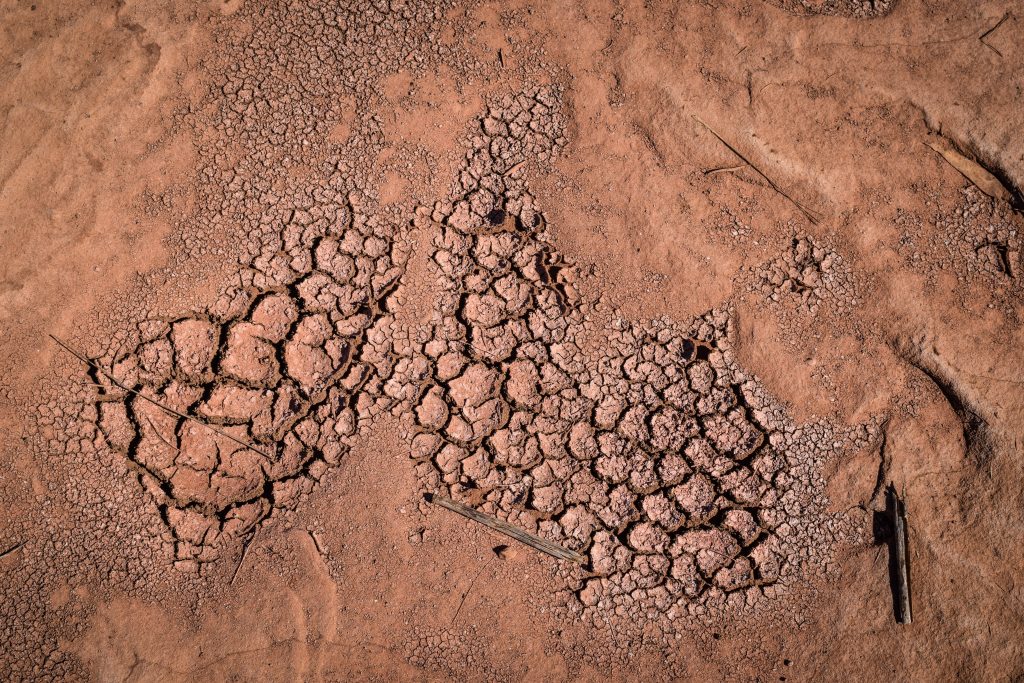
Thale Noi means the small sea and indeed, travelling by long-tail boat on this vast freshwater lagoon gives you the feeling that you are on an amazingly calm sea. The Lake is located in the Phatthalung province of southern Thailand, covers an area of 28 square kilometres, and forms the northernmost portion of the Great Songkhla Lake. The wetland area was declared a Ramsar site, which recognizes its international importance under the criteria of the Ramsar Convention on Wetlands for containing representative, rare or unique wetland types or for their importance in conserving biological diversity.
When to go?
The lotuses and water lilies are in full bloom from January to March/April and this time of the year corresponds with the largest number of migrating birds. I visited the place exactly on the first day of April and the scenery was amazing with a minimal number of tourists. In general, November is the wettest month of the year and July is the driest.
Morning activities on the lakeFisherman in the “office”Seems like floating on a carpet made from lotus flowers
How to get to Thale Noi?
The easiest way is to fly from Bangkok to Hat Yai, Nakhon Si Thammarat or Trang and arrange a further trip from one of these. The southern railway connects Phatthalung with Hat Yai and Nakhon Si Thammarat, but you can easily get mini-buses or buses too.
Where to stay?
As long as you are planning to take a sunrise boat trip, you should stay overnight somewhere around the lake. I recommend Chuanchom Resort. It’s basically just opposite the area where the boatmen hang out in the morning. The room is simple but perfectly fine for a short stay. I paid around 700 THB for one night.
How long to stay?
One day is enough to explore the area. After the sunrise trip, you may want to check out Thale Noi Viewpoint Tower and then make a stop in Phatthalung, before heading further.
Lotus flower
Sunrise boat trip
Boat trips can be arranged around the big parking, opposite the road next to Chuanchom Resort. Just go there in the morning and speak directly with the boatmen. I highly recommend starting around sunrise time, as it’s purely magical to see how the wetlands spring to life. The prices vary depending on the duration of the trip. The 1-hour trip will cost about 550 THB while the longer one, which is over 2 hours, will cost about 900 THB or more. I took the longer one and totally loved it. It was even more than 2 hours as the boatman didn’t have a watch and I didn’t control the time either. After a while, he just asked me what time it is and then we turned back. Perfect cooperation 🙂 Long-tail boats can carry up to 7 people.
It’s worth waking up early!Sunrise is the best time for a boat trip on the lake
Thale Noi is an important habitat for various wildlife, particularly waterfowl. January to April is the time of the year with the largest number of migrating birds and the sunrise hours are best for observation. Besides that, you will certainly spot water buffaloes. Local fishermen can be spotted too, checking their fish traps and nets but also unknowingly posing for photos. The long-tail boat glides across the water strewn with lotus flowers like a carpet. And when there are no plants on the surface, it acts as a mirror, reflecting incredible formations of clouds.
There are many photo spots when the boatman switches off the engine so you can take in all that view in silence.
Water buffaloes marching through the lakeWater buffaloesSeems like they really enjoy the water!Fisherman preparing fish traps
Other interesting places
Chaloem Phrakiat Bridge
Spanning 5.5 kilometres, it is the longest bridge in Thailand. There are some rest stops so you can pull over and take your photos if you are driving. When you enter the bridge from the Gulf of Thailand side, you may spot giant square-shaped nets which are mounted on a wooden frame named ‘yo‘ in Thai. The nets are dipped into the water and then raised to catch the fish which can then be sold at local markets. The very picturesque Twin House is located more or less about halfway along the bridge, on its left side.
Amazing cloud formations above the bridge5,5 km – the longest bridge in ThailandIt is possible to safely stop at the bridge and take photosBe careful with your drone as there are many birds aroundAerial view of Thale Noi Twin House is located more or less about halfway along the bridgeGiant nets used for fishing The nets are dipped into the water and then raised to catch the fishTop-down view of the fisherman housePanorama with fishermen spots
Thale Noi Viewpoint Tower
Walk up the stairs to admire the panorama of Thale Noi Lake.
Phatthalung
There are no must-see places in town, however, some are worth the visit if you have time to spare.
Phatthalung Museum is a former residence of the Governor of Phatthalung. Beautiful, Thai-style houses are now accessible to the public. When it comes to temples, I would recommend visiting Wat Khuha Sawan, with a cave full of Buddha statues and Wat Khao Chiak with 800+ steps uphill and beautiful panoramic views as a reward. To finish the day, Saen Suk Lampam Beach is a good spot for enjoying lakeside views, especially during sunset.
Many people say that Flores Island is the most beautiful of the Azores. For me, every island was completely different and worth seeing but it’s true that when I am writing this post, I feel a big excitement! Flores means “Flowers”, and when it comes to nature, the island really lives up to its name. Waterfalls, volcanic lakes, cliffs. It’s all present here in the grandest form.
Together with tiny Corvo, Flores forms a Western group of the Azores archipelago. Diogo de Teive and his son João de Teive discovered the island in the late summer of 1452. As a reward, they received the concession of the sugar monopoly on Madeira.
Interestingly, Flores Island is the westernmost point of not only the Azores Archipelago but the whole European continent, even though together with Corvo they are part of the North American tectonic plate and not European plate like the rest of the Azores islands.
I visited Flores on my long-term trip in pandemic times, when I took the advantage of remote work and lived “on the road”. I stayed in the archipelago for two months, between April – May, which isn’t a high season. Graciosa is the only island I haven’t visited yet, but isn’t it a good reason to be back one day?
How long to stay?
I would say that 3-4 full days should be enough to visit all the interesting places on the island and do a couple of hikes. Of course, it depends on the weather which is very unpredictable in this region. If you are unlucky, the interior of the island, especially the lakes may be covered by clouds for the entire duration of your stay. Check the weather frequently and always have a backup plan. It’s usually less cloudy closer to the coast.
The mobile app SpotAzores is a great tool for monitoring weather situations in the Azores archipelago. I used it every day when I was there and I seriously can’t imagine travelling without it!
Where to stay?
Due to my remote work, I always look for a private room with a fast internet connection. The best quality to price ratio offered lovely host Valentina on her Airbnb listing. The place is located in Fazenda das Lajes, therefore a car is needed to get around. There is access to a fridge, washing machine, a well-equipped kitchen as well as free parking. The room was simple but nice with a shared bathroom and toilet. Fully recommended!
Getting around Flores
As on all the other Azores islands, renting a car is essential to reach all places. I used the services of Autatlantis several times and I can fully recommend that company. The price was always around 16-20 EUR per day (without any extra insurance) and the cars I had were Toyota Yaris, Citroen C1, or Smart. Bigger ones are available too, of course at a higher price. Pick up and return were smooth and quite fast.
Another popular rental company in the Azores region is Ilha Verde, however, customers’ opinions are mixed and I have never used them.
If you don’t have a driving license, you can try hitchhiking but you need to be patient and quite lucky. Alternatively, get in touch with one of the taxi drivers and negotiate a daily price. I can recommend Silvio Medina (+351 918 804 210), knowledgeable and English speaking.
Poço Ribeira do Ferreiro
Tips
The weather is unpredictable and you have to be prepared for anything. Always have with you a waterproof jacket and umbrella. Install mobile app SpotAzores and don’t go to places that are totally covered in clouds. You will lose time and won’t see anything anyway.
Book your car in advance in the high season. I was travelling in the Azores between April – May so it wasn’t a problem to get a car from one day to another, however, I can imagine that in high season it could be a problem, especially on the smaller islands.
Drive carefully, especially in the fog. It’s pretty normal that cows, sheep or goats stand very close to the road or simply walk on it.
If you go hiking, download GPS files and maps from the official website Visit Azores and have them on your phone just in case. In general, trails are well marked but in a dense fog, it’s not that difficult to get lost.
Don’t be afraid of hitchhiking. Many trails are linear, which means that you need to get back to the starting point. You can walk the same way or try to save your legs. On some islands, the traffic is minimal but once the car comes, it is almost certain that the driver will stop and help you out.
Santa Cruz das Flores
Island’s main town is located on the east coast with an airstrip that runs basically just next to the main street. There are a few sights worth seeing, all within walking distance. Plan around 3-4 hours to discover the area.
Start at Flores Museum which has documented the most significant moments in the island’s history from its discovery to the present day. Then, check out Igreja de Nossa Senhora da Conceição, which is a beautiful church standing just in front of the museum.
A little bit further on, towards the coast, you will find natural pools (Piscinas naturais de Santa Cruz das Flores). Good place for a swim if the weather is nice. Whale Factory (Fábrica da Baleia do Boqueirão) at the northern end of the town presents a rather depressing story of whale hunting, which luckily nowadays changed into whale watching.
Two viewpoints worth mentioning and within walking distance are Miradouro da Costa Nordeste and Miradouro do Monte das Cruzes.
Other sights on Flores
Poço Ribeira do Ferreiro – Without a doubt, it is a must-see on Flores Island. The “wow effect” is guaranteed and I had it every time I saw it, even from the distance. The waters of the various waterfalls come down from the steep cliff surrounded by intense Azorean vegetation. It’s especially breathtaking after heavy rains. The walk from the parking lot is easy and takes around 10 minutes.
Fajã Grande – famous for many imposing waterfalls bringing water from the high plateau to the coastal plain. Cascata do Poço do Bacalhau, located in the northern part of the village, is the most spectacular one. Natural pools formed by rocks in the ocean are perfect for those willing to cool down. Additionally, it’s a good hub for hiking trails that either start or end there.
Rocha dos Bordões – Geological formation formed by large columns of basalt. There is an official viewpoint and other small parking places along the road where you can pull over. Don’t miss the beautiful waterfall Cascata da Ribeira do Fundão.
Reserva Florestal Natural do Morro Alto e Pico da Se – Morro Alto is the highest point of the island of Flores, Azores. The trail can be either walked or taken by car. Other than that, it’s all about crater lakes: Negra and Comprida (best seen from Miradouro Lagoa Negra e Lagoa Comprida) as well as Branca and Seca. Simply nature at its best!
Caldeira do Mosteiro – The name comes from the fact that the village was located inside a volcanic crater. Today, it’s totally abandoned (its last inhabitant left in 1992). Mainly due to the lack of electric power and running water. There are plans to revitalize that area and adopt for rural tourism but so far it is simply a cool photo spot.
Caldeira Rasa e Funda – Another two amazing crater lakes. There are also two viewpoints worth mentioning: Miradouro Caldeira Rasa e Funda, located on the road just between the lakes, and Miradouro Lagoas Rasa e Funda, a bit farther away.
View from Miradouro Lagoas Rasa e Funda Lagoa Funda
Fajã de Lopo Vaz – Let me remind you that fajã is a flat surface near the sea, created from collapsing cliffs or lava flows. In this particular case, it’s hard to have any doubts about the origin. High cliffs are just in front of your eyes when you are approaching this place following the PRC04 hiking trail. Most probably, it was the first place inhabited on this island. There are a few houses but on the day of my visit, I didn’t meet anyone.
Cliffs around Fajã de Lopo Vaz
Ponta Delgada & Farol de Albarnaz – Small community that is located on the northern coast of the island with great views on Corvo. There is nothing much to do in the town itself but it’s worth visiting Ponta do Albernaz, where the lighthouse stands. Miradouro da Baía de Além is closeby and provides great panorama of Maria Vaz Islet. On the way out, pull over next to Pico do Meio Dia, another viewpoint located along the main road ER1-2.
Ponta Delgada seen from Pico do Meio Dia
Lagoa da Lomba – another small lake of volcanic origin, situated a bit more further away from all the others, however, it’s still worth visiting.
Viewpoints (Miradouro) on Flores
As on every island in the Azores archipelago, there are plenty of viewpoints and usually, they are easily accessible by car. Just look for the sign ‘Miradouro’ which in the Portuguese language means viewpoint. Here is the list of the most popular ones but of course nice views are nearly everywhere and it’s easy to find a stunning ‘no-name’ spot.
I parked my rental car next to Igreja de Nossa Senhora Do Carmo. It was cloudy, but most importantly it didn’t rain and there was an optimistic forecast for the next couple of hours, including the sun! After about 1 – 1.5 km of moderate uphill walk, the ascent to Rocha do Risco started to be way steeper. The effort was rewarded though, as the views from the coastal path were simply great. Don’t forget to look back from time to time as Faja Grande looks magnificent from every perspective. On the other side, the view of small Corvo island will accompany you for the rest of the hike to Ponta Delgada. Depending on the time of the year, there could be some streams to cross and the path can get muddy, so be careful.
Once you reach asphalt road, turn left and continue down the road. It is worth taking a small detour to see both Miradouro da Baía de Além as well as Farol de Albarnaz, which is Europe’s westernmost lighthouse. From there, it’s an easy walk on the asphalt road to the final destination.
The track is linear and coming back to the starting point in Faja Grande might be complicated. If you don’t want to hike back, you can try your luck and hitchhike, which was my idea as well. However, I was waiting over an hour and the road was absolutely dead with no cars coming at all. In the end, I gave up and called a taxi.
I have to say that on the day of the hike, I had really bad rainy weather which definitely influenced my final judgement. In many parts, the track was overgrown, muddy and slippery. In the first phase, there are good views of Rocha dos Bordoes, which is the best-known rock formation on the island.
Cross the village of Mosteiro and continue to one of the most interesting places along the trail – the village of Caldeira do Mosteiro. It was finally abandoned in 1992 due to the lack of electricity and running water. Currently, it seems that there are plans to renovate it and turn it into a place for rural tourism.
The next stops should be Miradouro do Portal and Fajãzinha but soon you will reach a sign indicating the detour to Poço da Ribeira do Ferreiro. This is by no means, the most spectacular waterfall in the Azores, so don’t hesitate. Go there, but not only go. Sit down and spend some time. Admire.
The remaining distance is mainly through farmlands with plenty of small stone walls, very typical for the Azores. The grande finale is in Faja Grande, with also pretty grande waterfall – Poço do Bacalhau.
The logistics problems are similar to the ones at PR01. As it’s a linear track, I left the car in Faja Grande and took a taxi to Lajedo. If you have more time, try to hitchhike. Faja Grande is a very popular touristic place so it should be much easier to get a ride than in Ponta Delgada. My driver was Silvio Medina (+351 918 804 210). Nice and English speaking guy but the service itself is rather expensive.
Poço da Ribeira do Ferreiro Poço do Bacalhau Rocha dos Bordoes Views over the coast
PR03 FLO – Miradouro das Lagoas – Poço do Bacalhau
The track starts at one of the most popular lookouts on the island, between lakes Funda and Comprida. Continue along the right side of Comprida Lake towards Seca Lake and then turn left into a very muddy land road with views of Branca Lake on your right. Soon, you will reach a wide gravel road. Follow it until the turn to the left. Admire panoramic views of Fajã Grande as well as Fajãzinha and start your descent down the cliff until you reach the first one. Don’t forget to make a short detour to Poço do Bacalhau. Magnificent waterfall!
The official difficulty of the track is hard, mainly due to steep descent at the end, but I would still say it’s rather medium.
Again, it’s a linear track so if you leave your car at Miradouro das Lagoas, then you have the option of getting a taxi or hitchhiking back there.
Park your car at the picnic area and start the descent towards the fajã. The views are good from the very beginning. Once down there, take your time to explore the black sand beach and walk around small houses. Turn right behind the first of them and then continue on a stone path towards the stony beach with huge cliffs and a waterfall just in front. If you are lucky, you will have all Fajã de Lopo Vaz to yourself and then it’s truly magical. In the end, return to the car the same way you came.
Challenging but extremely rewarding track for anyone interested in long-distance hikes. It goes from Santa Cruz das Flores to Ponta Delgada (21 km) and then from Ponta Delgada to Lajedo (26 km, along PR01 and PR02). The distance could be split into at least 2 or even 3 days with overnight stays in Ponta Delgada and Fajã Grande.
Stage 16 is complicated both logistically and physically. Between Paczków and Głuchołazy there are hardly any options for an overnight stay, not to mention long kilometres of walking on the asphalt roads.
Route planning
Total distance from Złoty Ztok to Głuchołazy is 58,5 km, which is clearly out of range for regular hikers. You may want to split it as follows:
Option 1: Złoty Stok – Paczków (13 km) and then Paczków – Głuchołazy (45,5 km)
Option 2: Złoty Stok – Piotrowice Nyskie (30.5 km) and then Piotrowice Nyskie – Głuchołazy (28 km)
Option 2 sounds more reasonable, though it involves overnight stay at Piotrowice Nyskie Palace, which isn’t particularly cheap. As it’s nearly the end of the hike, you can simply tell yourself that you deserve a little bit of a luxury 🙂
First kilometres towards Paczków
I hit the road in Złoty Stok following the main road passing through the town. Soon, on the right side, I noticed old lime kilns. If you want to learn more about their history, plan your first break here and have a look at the information board.
Finally the red track turn left leaving the main road and continues towards Błotnica and further to Kozielno and Paczków. Kozielno reservoir on your left is another nice place for a short break.
Kozielno Reservoir
What to do in Paczków?
Paczków was founded in 1254 and shortly after defensive walls were erected. Remains of them can still be noticed today. Besides that, several other places are worth seeing: City Hall, Church of St. John the Evangelist, Gas Museum and city towers: Ząbkowicka, Wrocławska and Kłodzka.
City Hall
A beautiful building with the tower that retained its original renaissance character until today. It can be climbed and the panorama of the entire city fully rewards the effort.
City Hall in Paczków
Church of St. John the Evangelist
The temple is really huge and towers over the city so you can’t miss it. The construction began in 1350 and lasted about 30 years. The current shape of the building is the result of reconstructions in the Renaissance, Baroque and Neo-Gothic styles. An interesting fact is that in the 16th century, fearing the invasions of the Turks, the temple was rebuilt and fortified. A round stone well was set up in the southern aisle, the only one in Europe that was located inside the church.
Church of St. John the Evangelist in Paczków
Gas Museum
The gasworks in Paczków was built in the years 1898 – 1901 and shortly after started providing permanent gas supply. Over 90 years later, the place was turned into a museum, being the only facility in Poland where all the municipal gas production facilities have been preserved. You can see a huge collection of gas lamps, meters, cookers, heating stoves, irons but also more weird objects such as refrigerator or curling iron. Unfortunately, it was closed on the day of my visit in town due to COVID-19 pandemic, but it must be an interesting and unique place to visit.
City Gates: Ząbkowicka, Wrocławska, Nyska and Kłodzka
System of medieval town fortifications in Paczków is one of the best-preserved examples of its kind in Poland. Initially, three city gates led to the ring of defensive walls and in the 15th century, a fourth was built. Currently, Wrocławka Gate can be climbed for panoramic views and at the Nysa Gate, there is a wooden, roofed walking gallery with viewing platforms open to the public free of charge.
Kłodzka Gate in Paczków
The Main Sudetes Trail used to end in Paczków but a couple of years ago, it was extended to Prudnik. Therefore, I had to postpone celebration and continue my hiking adventure for a little bit longer. I turned left just after Nyska Gate and followed the main road all the way to the turn leading to Unikowice. Asphalt road passes through the village, goes further to Lisie Kąty and then to Ujeździec. It was only 8 kilometres from Paczków but the road seemed to be incredibly long and just boring with no mountains views at all.
Small chapel with the indication of red track
There was still 10 kilometres between me and my bed for tonight. The boring path continued for 4 kilometres to Trzeboszowice. After passing it, the track turned right and took me to Ratnowice. Both are just another small villages en route without anything particularly interesting. For remaining distance, the landscape was quite monotonous. The only highlight was a young deer roaming the fields. Finally, I arrived at Piotrowice Nyskie and had the whole afternoon for relaxation after that difficult day. The distance was just fine, but walking on asphalt roads is usually much more tiring for the feet. Together with the monotonous landscape, it can be tiring for the mind too.
The Main Sudetes Trail enters small village of Ratnowice
The following day started with 3 km to Kałków, unfortunately again on an asphalt road. I wondered if the trail would look like this until the end and if so, why was it extended. Luckily, after passing Łąka, it was finally the time to take a bit wilder path and cross the farmlands to reach Jarnołtów.
Crossing the farmlandsStorks are very common on a trail
Next targets were Sławniowice and Gierałcice, from where Polish-Czech border is a stone’s throw away. The track continues along on an asphalt road (yeah, again) until it finally separates and continues through the fields to Głuchołazy, passing Biała Głuchołaska river.
In Głuchołazy, I stayed in Guesthouse Iwona. Clean and spacious room with a nice yard in front of the house. There is not much to do in town but a short walk around the old market square and the Catholic Church of St. Lawrence is a good idea. And if you still have too much energy, wonderful Beech Forest Nature Reserve can be explored on foot.
City centre of GłuchołazyIn some places it seems like the time stopped
I was really happy to finally reach the town. Last two days were probably the worst ones during the entire hike. But I also had high hopes for the next day as I knew that mountains will be back for the last time. Biskupia Kopa (890m a.s.l.) is the highest peak in the Opawskie Mountains. So, the plan was easy. Climb it and then finish my adventure on the Main Sudetes Trail in Prudnik.
Numerous beaches, ocean, forest, mountains, waterfalls and rich history. It’s a perfect combination for every holiday. Add to it relaxed vibes as well as proximity to Auckland and you will get a very popular place for summer escapes from a big city.
The area was occupied by Maori long time before the arrival of Europeans. Unfortunately, the distance from Auckland, availability of kauri timber and discovery of gold resulted in intense colonisation and Maori lost most of their lands by the 1880s.
The Peninsula was named after HMS Coromandel, a ship of the British Royal Navy that stopped at Coromandel Harbour in 1820 to purchase kauri spars. The ship was named for India’s Coromandel Coast.
The following itinerary encircles the peninsula from east to west and assumes that you have your own transportation.
Day 1 – Waihi, Whangamata, Wentworth Falls, Tairua, Hot Water Beach, Cathedral Cove
The day is busy and packed with attractions so it’s essential to start early. Driving along the east coast of Coromandel Peninsula will reward you with scening summer towns, waterfall, gold and silver mine and hot water beach. All of that finished with the grand finale at famous Cathedral Cove. Let’s start!
Waihi
Gold was first discovered here in 1878 and soon after the Martha Mine became one of the most important gold and silver mines in the world and the reachest one in New Zealand. It closed in 1952 due to change in the gold price, outdated machinery and the world depression of the 1930s. In the 1970s, when the gold price went up again, interest in mining at Waihi returned. The site was reopened as an open pit in 1988.
The detailed story is presented in Gold Discovery Centre and additionally, you can join a guided tour to see modern-day gold mining up close. After putting on safety gear, you will board a van driven by a knowledgable guide that stops in many interesting spots along the way. It’s a different kind of experience comparing to historic mines all over North Island, where you walk through old tunnels and see the machinery.
Tickets are quite expensive though – Gold Discovery Centre 25 NZD, guided tour 39 NZD and combo ticket including both 59 NZD (prices for adults).
Remainings of old buildingsOpen pit in Martha MineOpen pit in Martha MineVan used for guided tours around the mine
Whangamata
Popular summer-holiday town with restaurants, parties, fine beaches such as Whangamata Beach or nearby Onemana Beach and a wide selection of water attractions.
Wentworth Falls
From Whangamata follow Wentworth Valley Road for around 8 kilometres inland. Park your car and head towards Wentworth campsite. From here, the return hike to the falls should take about 2 hours. The track is easy, mostly flat and crosses two bridges on its way. The falls are in two drops of about 20 metres each.
Tairua
Another popular getaway destination with one particularly nice spot to stop by which was once a volcanic island – Mount Paaku. It’s a short but very steep, half an hour return hike with reward panorama of Pauanui and Tairua. The area was also occupated for a long time by Maori tribes.
Panorama from Mount Paaku
Hot Water Beach
If you see crowds digging holes in the sand and then jumping into them then yes, you are in a good place. It looks quite ridiculous from the distance but in fact, it really is a unique place! Hot water flows from the depths of the earth to surface in the Pacific Ocean exactly here at Hot Water Beach. You can pay a few dollars to rent a spade or simply ask some friendly folks at the beach. Keep in mind that the best time to create your own natural spa is within two hours either side of low tide. Check the times here.
Very popular Hot Water BeachDig your own hole and enjoy natural spa!
Cathedral Cove
The place with the famous cathedral-like arch is indeed picturesque but somehow I missed that ‘wow effect’. There is too much hype about it and it’s all over Instagram creating false expectations. All those photos with increased colour saturation and extra effects look nice but when you arrive at the actual place… eyes don’t have extra settings 🙂 Best would be to get here in the late afternoon to avoid crowds. From the parking, it’s about 30-45 minutes hike one way. Alternatively, you can park your car in Hahei and walk from there (60-70 minutes one way), take a bus or water taxi.
Famous arch at Cathedral Cove from one side……from the inside……and from another sideRock formations in the coveBeach and rock with the arch at Cathedral Cove
Day 2 – Shakespeare Cliff Lookout, Otama Beach, Opito Bay, Waiau Falls, Kauri Grove, Coromandel Town
The second day is fully focused on nature. You will reach remote beaches but also waterfall as well as majestic kauri trees – a cornerstones of the original forests of the North Island.
Shakespeare Cliff Lookout
Scenic reserve located between Cooks Beach and Flaxmill Bay. A very short walk rewards with memorable views of Mercury Bay. You may also spot a cairn that records the arrival in 1769 of the HMS Endeavour under the command of James Cook.
Otama Beach and Opito Bay
Both spots are accessible via Black Jack Road. It’s mostly unsealed but in a good shape so no problems at all with driving a campervan. The long stretch of Otama Beach comes first. Walk around and enjoy remoteness while listening to the sounds of the ocean.
If you continue driving further along a winding road, you will finally arrive at Opito Bay. Here, I recommend you to do exactly the same as at Otama Beach.
Otama BeachOpito BayOpito Bay
Waiau Falls and Kauri Grove
Both attractions are located on Road 309 so you need to drive back from Opito Bay towards Kaimarama and then take a turn to Waiau. After half an hour, there will be parking next to Waiau Falls. It’s only 10 metres high but still a very nice place for a quick stop.
Waiau Falls
From there, is about 10 minutes hike to kauri grove which was probably the highlight of the day. I had never seen this kind of trees before and damn, I was impressed. Just imagine that back then, the whole Coromandel Peninsula was covered by such a forest! The oldest trees are 600 years old and have about 6m circumference.
Kauri trees are a cornerstone of the original forests of the North Island. They are one of the longest-living tree species in the world as well as the largest.
Tane Mahuta with a diameter of 4.6m and height of 52m is the largest kauri tree still standing. It is estimated to be between 1200 and 2000 years old. You certainly shouldn’t miss seeing it when travelling through Northland.
Kauri timber was used by Maori for a very long time, especially for builduing boats and houses or carving. The gum was used as a fire starter and for chewing.
The arrival of Europeans brought the decimation of these magnificent forests. The mature trees were felled to fulfil the high demand for sawn timber of unsurpassed quality for building. The gum was obtained through digging, fossicking in treetops, or more drastically, by bleeding live trees. Finally, more forest was cleared as demand for farmland.
My first time to admire kauri trees!Fantastic forest walk at Coromandel Peninsula
Coromandel Town
The discovery of gold in the 1860s resulted in an establishment of settlement that quickly grew to over 10.000 inhabitants. Have a walk around the town admiring the Victorian architecture and finish the day with fish & chips and sunset view at Mcgregors Bay.
Mining & Historic Museum located in the historic Coromandel School of Mines building presents the life of mining and its impact on a small town so you may want to visit it in the morning if you are interested.
Architecture in Coromandel Town
Alternative: night in Port Jackson / Fletcher Bay
A very scenic road goes from Coromandel Town to the very top of the peninsula. It’s about 60 km but you have to count at least 2 hours to get there. The road is gravel and very shaky, so I felt a bit insecure while pushing my campervan to its limits already in a first week. I arrived at Macdonald Recreation Reserve, which is more or less halfway and made a decision to turn back.
Nevertheless, if you decide to proceed further, coastal views will certainly take your breath away. It makes sense to drive in the afternoon, stay for the night in one of DOC’s campsites in Fletcher Bay or Port Jackson and come back to Coromandel Town the following day in the morning.
Hiking enthusiasts will be happy as Coromandel Coastal Walkway (3 hours one-way) links Fletcher Bay with Stony Bay and provides fantastic views.
Short rest in Macdonald Recreation ReserveCould easily have a nap here!
Day 3 – Thames, Pinnacles
The highlight of the last day at Coromandel Peninsula is without doubt a hike to the Pinnacles. But before you head towards Coromandel Forest Park, dive into the gold rush times at well maintened Goldmine Experience in Thames.
Thames
Currently, it’s the largest city on Coromandel Peninsula but back in time, it was even the second-largest city in New Zealand. As usual, all because of the gold rush. At that time it was discovered in the lower Kauaerange valley. Two smaller settlements (Shortland and Grahamstown) were founded to support mining in the early 1860s and later on merged into one forming Thames.
Visit in Goldmine Experience was worth the time and money as it was completely different than modern mine in Waihi. The staff is lovely too and they will certainly tell you more about the story of that place. Wear a helmet to walk through the tunnel and have a look at still working stamper battery in action. It’s really noisy but no worries, you will get ear protection.
School of Mines & Mineralogical Museum is another historical spot on the map of the city. I decided to skip it though as minerals aren’t that interesting for me and the main plan for the day was a hike to Pinnacles.
School of Mines & Mineralogical Museum
The Pinnacles Track
After a quick stop in Pak’n’Save to stock with food, I moved on towards Coromandel Forest Park and Kauaeranga Valley. From visitor centre (you may want to ask for maps or weather conditions) it’s another couple of minutes on unsealed road to the parking and start of the hike.
Official timing says it’s 3 hours one way to the hut and another 30-40 minutes to the summit. If you are in a good shape, it’s perfectly doable to reach the hut in about 2 hours. But as always, better assume more and take it easy.
The Pinnacles Track follows the route used by packhorses when carrying supplies for loggers, gum diggers and gold miners who worked in the area during the early 1900s.
First kilometres are rather moderate but the track goes continuously up at some point you may get tired. After reaching the trails junction, you can either continue on the Webb Creek Track or the Billygoat Track. The best and the most popular scenario is to take Webb Creek Track for ascent and then descent following Billygoat Track. That’s exactly what I did as well.
The views are getting better and better the higher you go and the last section will take you to The Pinnacles Hut. It’s a popular overnight place and indeed it must be nice to admire night sky in such a place. I didn’t have a reservation so had a quick lunch instead and then made a final push to the summit.
Very clear message from the staff working in The Pinnacles Hut
The summit seems to be very close but it is a tough ascent, first on the wooden stairs and later on a metal ladder attached to the rocks. Stay focused but don’t forget to look around – that views are the main reason of coming here after all 🙂 Once on the summit, you should feel great satisfaction.
The weather was perfect – warm but with some clouds providing shadowPanorama of the PinnaclesThe hike there and back should take between 6-8 hours
I descended back towards the Pinnacles Hut and then continued all the way to the same trail junction as before, but that time I chose Billygoat Track, finally arriving at the parking where I left my van.
That’s all about the trip to the Coromandel Peninsula. It was a wonderful time packed with beautiful places, history and scenic hikes. I hope you will enjoy it too. And if you have a question, don’t hesitate to leave a comment.
Probably I wouldn’t come to Tauranga if it wasn’t the place where I had to pick up my campervan. I was super excited because it was supposed to be my vehicle and home for the next several weeks. The plan was simple. Finish all formalities quickly and spend the rest of the day exploring the town!
How did I find a car in Tauranga? Well, it was before I even departed to New Zealand. At my boring job, I had enough time for browsing websites of rental companies, reading blogs and articles from other travellers. This is how I came across Kiwi Road Trips and checked their offer of self-contained vans.
After another week of thinking about all pros and cons, I made my mind that it’s the most convenient and affordable way to have my own 4 wheels for a longer period of time. It comes with guaranteed buy-back so I didn’t have to worry about looking for buying in April, which is already after peak season. Karen and Pete explained to me all formalities and we set the date for pick up.
Don’t you worry – there will be a separate article describing all the options that travellers have for renting or buying a car in New Zealand. Stay tuned. Meanwhile, let’s focus on Tauranga.
Intercityhas a bus network all over the country and they have good deals too. You can buy hours-based travel passes and that should be fine to visit the most popular travel destinations. Needless to say, places that are off-the-beaten-track will be difficult to reach and very often it’s possible only with your own vehicle.
Nearby airport isn’t too busy but there are daily flights to and from Auckland, Wellington or Christchurch.
I will describe the bus trip a bit more because I must say, it was quite entertaining. I boarded the bus in Auckland and everything was fine until on one of the turns it hit the wall of rocks with its left side. Not very hard, but everyone could feel a bump and small pieces of glass were all over the floor. A window was broken. The driver stopped, checked the damage and called the company. The window was still there, just a bit broken. Unfortunately, it could fell apart anytime creating the risk for passengers and other drivers. The solution to the problem was very practical and kiwi style. The driver took a broom, smashed remaining parts of the window, told everyone to move to the front of the vehicle and that was it. We continued the journey to Tauranga, just without 2 windows on the side of the bus. At least we couldn’t complain there wasn’t enough fresh air. Such situations certainly don’t happen too often to stay chilled!
Broken windows in unlucky Intercity connection from Auckland to Tauranga
I was picked by Karen from Kiwi Road Trips at the bus station and after signing documents, it was time to drive out on kiwi roads.
1-day itinerary
Tauranga is the largest city in the Bay of Plenty and one the biggest in the country. Location is very convenient for further exploration of North Island, with Rotorua, Taupo and Tongariro National Park being a short drive away. The city centre isn’t as popular as beachside suburbs – Mount Maunganui or Papamoa. But you know me guys, I always want to see everything so here is where I started.
The Elms – Anglican mission was established here in 1838 by priest Alfred Nesbit Brown and the first buildings in the Bay of Plenty were constructed, initiating regular contact between Maori and Pakeha (white people). Brown worked hard, preaching even in the most remote settlements. Unfortunately, after the war, soldiers settled on the land previously occupied by Māori and the mission declined.
The guide was an absolute highlight of the place. So passionate and dedicated! Even though the entrance ticket isn’t cheap (15 NZD for international guests), it’s a solid part of New Zealand history and shouldn’t be missed.
Mission Cemetery – Visiting the memorials commemorating battles between Maori and British government forces is a great continuation to the visit at the Elms mission house.
Mission house in TaurangaInside the mission house – guided tour is great!
Monmouth Redoubt – Another memorial place. Maori fortified village (called pa) Taumatakahawai, used to stand here until it was taken over by British forces during the wars to stop the flow of warriors and support for Maori chiefs.
Tauranga Art Gallery – exhibitions of contemporary works. I’m not a fan of such, so gave it a miss but it does have good reviews so you may want to consider it in your itinerary.
After seeing the most interesting sights in Tauranga, I got into my car and drove to the nearby beachside suburb of Mount Maunganui. It’s hard to miss an extinct volcanic cone at the end of peninsula seen from the distance and that was exactly where I was heading. Maunganui means big mountain but let’s say that with the elevation of 232 m a.s.l. the name is rather overexaggerated.
Mauao Reserve – There has been evidence of three fortified villages (pa) on top of and around Mauao making it an important and sacred site for Maori. Several walking paths run in the area, the most popular being the summit walk. You would need about 35-50 minutes to get to the top and it can be done following Oruahine Track, Waikorire Track or 4WD Track. Check the map here. It’s quite steep and more tiring than it looks like but the views are nice, especially in the direction of the ocean. The base track around the mountain is popular as well and it’s 3.4 km long, taking about 45 minutes to complete.
Views nearby the summit of Mount MaunganuiPath to the summit in Mauao Reserve
Main Beach and Pilot Bay Beach – The first one is on the side of the ocean, which makes it very popular among those looking for bigger waves. There is also Moturiki Island easily accessible from the beach. The second one is located on the side of the bay and is usually much calmer and better for kids.
Pilot Bay BeachPilot Bay Beach
Mount Hot Pools (optional) – Located just at the feet of Maunganui. The bath in hot saltwater doesn’t sound bad and certainly will help you to recover energy after a full day of sightseeing.
Minden Lookout – Being located about 13 kilometres from the city centre, it was my last stop for that day. The easiest is to follow State Highway 2 and then turn left into Minden Road in Te Puna. Wide panorama of the Bay of Plenty is certainly worth extra kilometres.
View to Mount Maunganui from Minden Lookout
From there, it was time to stock up with groceries so I made my way to Pack’n’Save. It has the opinion of being the cheapest supermarket in New Zealand and they also have discounts for fuel which is another benefit for road trips.
Karen and Pete recommended me to stay the first night in the campervan at McLaren Falls, 190 hectares of parkland set alongside Lake McLaren. Parking for campervans costs 10 NZD and it was indeed a very nice place in nature with clean toilets, sink and electric grills.
Waiheke was my second island escape from big city life in Auckland. Fantastic beaches, watersports, hiking, fishing, wineries. It seems that Waiheke has it all and it would be really difficult to be bored there. How lucky Aucklanders are to be surrounded by such places!
How to get to Waiheke?
The island can be easily accessed with the same operator that took me to Rangitoto and Motutapu Islands before – Fullers 360. The ferry ride from the Auckland City Centre takes around 40 minutes and costs 42 NZD for the return trip.
Approaching ferry terminal in Matatia Bay
How to get around?
After arriving at the ferry terminal at Matatia Bay, I purchased one day ticket for public bus service. It costs around 10 NZD and takes people to various locations on the island with plenty of stops on the way.
There is also a more expensive alternative of HOP-ON HOP-OFF bus served by Fullers 360. It’s more like a tour bus that has set stops limited to the attractions and wineries. Combined ticket including return ferry ride plus the bus costs 68 NZD. Unless you want to reach a place that is beyond public bus service and on the other hand is included on the route of HOP-ON HOP-OFF, I don’t see the benefit of choosing that option.
Another means of transport include bicycles, scooters, rental cars or taxis.
One day itinerary
The first ferry from Auckland to Waiheke was scheduled at 8 AM and to have as much time as possible on the island, I was obviously on board. The morning seemed to be very cloudy but shortly after arrival at Matatia Bay, the sun was already burning my neck. I didn’t repeat the mistake from Rangitoto and that time I immediately put a sun cream all over my exposed skin.
I purchased a daily ticket for public bus service and boarded line 502 heading towards Rocky Bay. The driver seemed to be surprised that I’m going there and for a short moment it made me hesitate. Luckily, I didn’t change my mind. The less popular the place the better!
The reason why I wanted to go there was Whakanewha Regional Park. The place was absolutely awesome and probably I could spend the whole day just here, hiking all the tracks. It was still some time before high tide and the ocean looked like a bigger pool a few hundred meters from me.
Low tide at Rocky BayWhakanewha Regional Park has a lot of hiking tracks
I followed Dotties Lane Track first, then completed two small loops: Rua Loop Track and Pa Look Track. In the end, I couldn’t resist going all the way to Cascades Stream with waterfalls, following Nikau Track that later joins Tarata Track. All of them were excellent hikes in a completely new type of forest for me. At least back then, because the next 3 months in New Zealand brought even more natural surprises. People don’t even call it a forest here. It’s a bush. Bush full of ferns, palms and birds singing all over the place.
Nature at its best!Feels like walking under huge umbrellasFern leaf in a symbol of New Zealand
The visit to Whakanewha Regional Park took me around 2-3 hours. You can check out the detailed map of the place published on the Auckland Council website.
My next destination was Onetangi Bay and due to peak hour, all buses seemed to be full of tourists. Google maps shown it was just around an hour walk to get there, with the chance to visit Waiheke Museum on the way, more or less following Waiheke Cross-Island Walkway. Why not? 🙂
There is a reconstructed woolshed with exhibits, old cottage, three bach-style houses, telephone exchange and building of the jail. It’s a really nice place to understand the history of the island. Entry by donation.
Old cottage in Weiheke MuseumWeiheke Museum is a good short stop along the way
Onetangi Beach had nice sand and there were much fewer people than I expected. A pleasant place for quick swim and lunch.
Calm Onetangi BeachView on the yachts and hills Short swim is the best way to get new energy
I caught the bus 502 again, that time going towards Blackpool Beach. Calm and quiet place only with a single kitesurfer and moored yachts. When I proceed along the Esplanade, unexpectedly I saw a picturesque wreck visible in full size due to low tide. It’s the hulk of the trading scow Rahir.
Kitesurfer making use of strong windUnexpected discovery on Blackpool BeachRahir shipwreck at low tide
As mentioned before, Waiheke is famous for two reasons: beaches and vineyards. Beaches checked. Time to have a break and do a wine tasting. At that moment the closest place was Mudbrick Vineyard and Restaurant and that was where I headed. For 10 NZD I had the chance to sample 3 different kind of liquid pleasure. It tasted even better on their lovely shaded terrace.
Hills full of vineyards
The last stop was Oneroa Beach, approximately half an hour walk but after some wine, I was fast as the wind. Oneroa was my least favourite beach on the island. Being so close to the ferry terminal, it’s very accessible and popular, somehow lacking the atmosphere.
One day on the island was just fine and fulfilled my expectations. On the other hand, I wouldn’t say that that 2 or 3 days would be too long either. With so many things to do, time can fly very fast and if you are tired enough, nothing is better than a glass of wine or chilling at the beach.
The Tour du Mont Blanc commonly knows as TMB is one of the most popular long-distance walks in Europe. Even though the track doesn’t go anywhere close to the summit, everyone knows Mont Blanc – the highest mountain of Western Europe (4.808 m a.s.l.) and its name attracts thousands of hikers every year. The first successful ascent by Jacques Balmat and Michael Paccard took place on August 8th 1786, causing a significant boom in mountaineering.
TMB goes around the massif, covering a distance of roughly 165 kilometres passing through parts of Switzerland, Italy and France. Depending on the path you take, it’s wise to prepare your legs for a little bit more. In my case it was over 180 kilometres, having completed several variants.
Following the classic route, the highest point is 2.537 m a.s.l. at the Grand Col Ferret which is also a border between Italy and Switzerland. However, some variants can get you higher than that. For example, Col des Fours or Fenetre d’Arpette rewards hikers with the panoramic views from 2.665 m a.s.l.
Fenetre d’Arpette, Switzerland
TMB was in my mind since I completed a few overnight hikes in New Zealand. Long-distance hiking totally got me and the plans for 2020 were modified several times. First, it was supposed to be Camino de Santiago (French Way), but in the end, it was the Main Sudetes Trail in Poland (440 km). After that, it was supposed to be Camino again but the number of COVID-19 infections increased in Spain once more (third time lucky?). Then, my eyes turned to theAlps.
Tour Monte Rosa, Tour Matterhorn and the Haute Route were all on the list of possible hikes to do. Having no previous experience in the region, I chose Tour du Mont Blanc as the most popular one and probably the easiest of those.
The Alps seen from the plane
It was time to book a one-way flight to Geneve. I didn’t know what to do after TMB, therefore it was better not to stick to a specific return date. I was sure there would enough time to think about the next steps while hiking or resting in a tent!
When to go
The best period (and the busiest) to hike TMB is definitely summer, more precisely July – August. June and September as shoulder months could be an option too, but the weather will definitely be more unpredictable and snow can be experienced at higher elevations.
Clockwise or Anti-clockwise
I chose to follow anti-clockwise direction, starting and finishing in Les Houches. It seems to be a way more popular option. However, after completing the track, I don’t think that going clockwise would make any significant difference.
First day on TMB
By going with the flow, it’s easier to make friends on the way as you see the same faces every day. On the other hand, if walking anti-clockwise, the track will be mostly empty in the morning hours, until you meet groups of hikers going from the opposite direction. It gives you the chance to enjoy a more secluded atmosphere. I don’t mind having other hikes around me but everyone has their own vision of encounter with nature.
If hiking clockwise, it is advised to start elsewhere than Les Houches to avoid 1500m killer ascent to Le Brevent on the first day when your body may still not be used to heavy backpack and increased physical effort. From that stage I clearly remember never ending descent and how sorry I felt for all the people going up. Consider starting in Argentiere, Champex or Courmayeur instead.
Where to stay
There is plenty of options to choose from if you have deep pockets. Private accommodations, hotels, refuges. I took my tent and camped every single night. Obviously it was the most cost efficient way, but to be honest I can’t imagine going for such a hike without a tent. This makes the whole experience complete.
On the last day, I set my tent next to Refuge la Flegere and decided to treat myself with a proper dinner there. The food was nice, the chat with other hikers was nice but somehow I felt happy when I went back to my tent immediately after the meal. To find my own peace and rhythm.
Moreover, I didn’t have to bother at all about any bookings. I simply arrived at the campsite and had no issue with finding a spot. All the other options, especially refuges, require bookings well in advance, especially in COVID-19 times when the number of spots is even more limited.
Camping next to Refuge la Flegere
The website www.montourdumontblanc.com makes planning very handy. You can choose your departure point at the specific date and it shows you the list of accommodations on the way, including walking distance. Really cool!
There are plenty of alternatives and I will mention some of them in the separate articles dedicated to specific sections.
Wild camping is discouraged or forbidden, depending on the country. I didn’t do it so I have nothing to say in this topic. In Italy, wild camping is allowed above 2,500 m a.s.l. In Switzerland, it’s forbidden when in France no one really knows what the rules are and it’s usually tolerated. Some people set the tent at sunset and leave at dawn. Do it at your own responsibility and needless to say, leave no trace.
What to pack
As I was camping all the way, most of my backpack was filled with equipment that made the experience comfortable and hassle-free:
Sandals (I have the ones from KEEN and they were great to get around the camps)
Flip flops
Other:
Ultralight towel
Hiking poles (extremely useful!)
Painkillers
Toiletries
Wet tissues
Plasters for blisters (Compeed brand is great)
Sunglasses
Suncream
Optional:
Thermal underwear – it wasn’t really that cold to use it, but if your sleeping bag is not too thick, it could be a good option to wear for sleeping.
Buff – if it gets windy, you may put it on your head or neck. I used it also to wipe sweat from my forehead 🙂
Water filter – never used on TMB but good to have just in case.
I did laundry almost every day and on the next day my backpack looked like a Christmas tree with socks and undies as decorations. It was the only way to dry them though.
When it comes to food, you will be able to refill your stocks along the way so no need to add more weight into your backpack. I usually had food for 2 days, in case of an emergency stop due to bad weather or sickness.
Here are some examples of what I usually eat on the track:
Breakfast:
Bread with jam, honey or peanut butter
Instant cereal with fruits or porridge
Biscuits with jam
Powdered milk
Banana
Tea or coffee
Lunch:
Bread
Cheese
Salami
Humous
Ready to eat sausages
Instant soup
Tea or coffee
Dinner:
Instant rice or pasta
Tinned tuna or chicken
Instant soup
Freeze-dried meal
Tea or coffee
Snacks:
Chocolate
Muesli bars
Biscuits
Nuts
How to get there
Most hikers fly to Geneve and take a bus to Chamonix, so did I. Flying directly from the holidays in Spain, I didn’t have sufficient time to look for the most affordable option and I booked a shuttle bus from Mountain Drop-Offs. It cost me 40 EUR and I was the only passenger on board. It’s very easy to find their box at the airport and over an hour later I was already at the campsite in Chamonix.
On the way back, I used the service of BlaBlaBus which took a bit longer but was significantly cheaper (around 22-25 EUR).
Travel by train is possible as well but it’s more complicated and usually requires catching at least two connections.
Track markings
Budget
In total I spent 300 EUR, starting from day 0 after arrival to Chamonix when I bought a gas bottle, lighter, shoelaces and some food. Flight ticket and transportation from Geneve airport need to be added on top of that.
Campings were the most expensive in Switzerland: ~17-22 EUR per night. The exception was La Peuty for only 6 EUR, but the facilities were very basic. In France setting up a tent costs usually between 10-12 EUR and in Italy 12-15 EUR per night.
Everything else was mostly food. Spaghetti bolognese, pizza, panini, burger and even McDonald’s once back to Chamonix 🙂 Even though I mostly stocked in supermarkets and cook by myself, all of these meals are tempting and if you are tired, it isn’t easy to resist.
My itinerary:
Finishing the track took me 9 days, tackling a lot of variants which made the route a bit more difficult than the standard one. Some people do it faster, some people do it slower. It doesn’t really matter. Take your time, don’t rush and enjoy the views. I planned to take a day off in case of pouring rain, but it never came so every day I slept in different location 🙂 Being so lucky, there was no point in wasting such perfect weather conditions!
Day 1: Les Houches – Les Contamines (via Refuge de Miage) Day 2: Les Contamines – Les Chapieux Day 3: Les Chapieux – Courmayeur (via Refugio Maison Vieille) Day 4: Courmayeur – Arp Nouva (via Col Sapin) Day 5: Arp Nouva – La Fouly Day 6: La Fouly – Champex Day 7: Champex – Trient (via Fenettre d’Arpette) Day 8: Trient – La Flegere (via Lac Blanc) Day 9: La Flegere – Les Houches
Col de la Seigne – border between France and Italy
Final thoughts
Tour du Mont Blanc is absolutely amazing. In fact, it’s the first hike that I could imagine doing one more time straight away. Planning the stages, taking in all the sights and arriving at the campsite being filled with satisfaction. Setting up the tent, preparing dinner on a gas stove, far away from daily routine. Knowing that the next day will bring more good vibes.
It’s hard to describe the feeling on the last day. Being very tired, I was walking the final kilometres to Les Houches with a wide smile on my face, thinking of all the preparation, flight to Geneve, bus to Chamonix and completing all the stages. Adventure came to the end, but what an adventure it was!
If you are a hiking enthusiast and were thinking of doing a long-distance hike in the Alps, just do it. Do it now, not later. To be honest, I am always against postponing personal plans for later, as later can never come. The memories will enrich and stay with you forever.
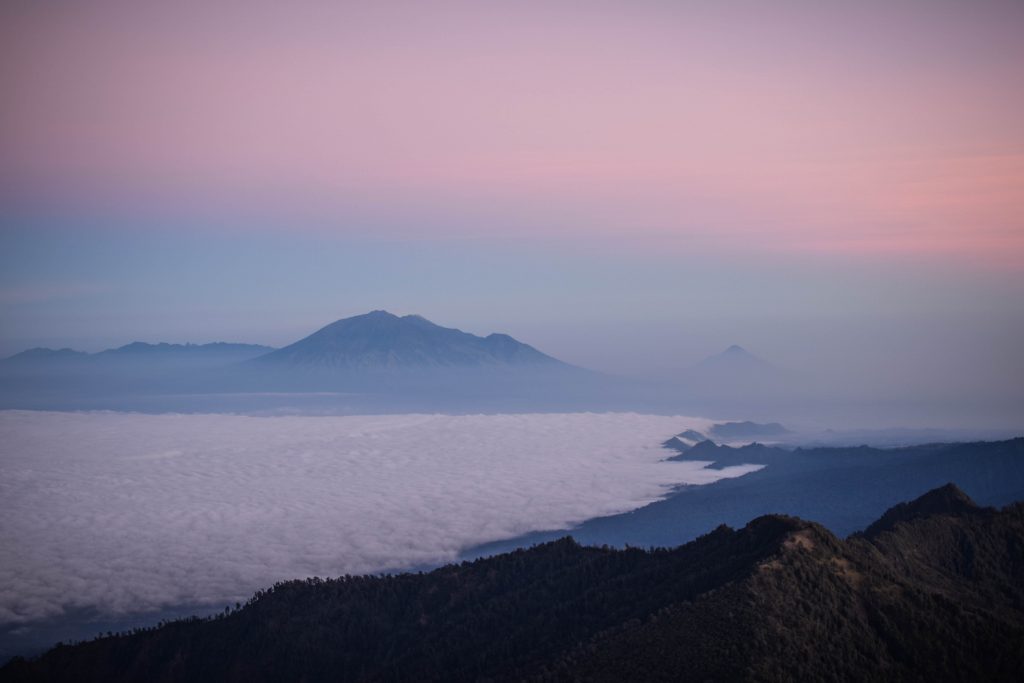
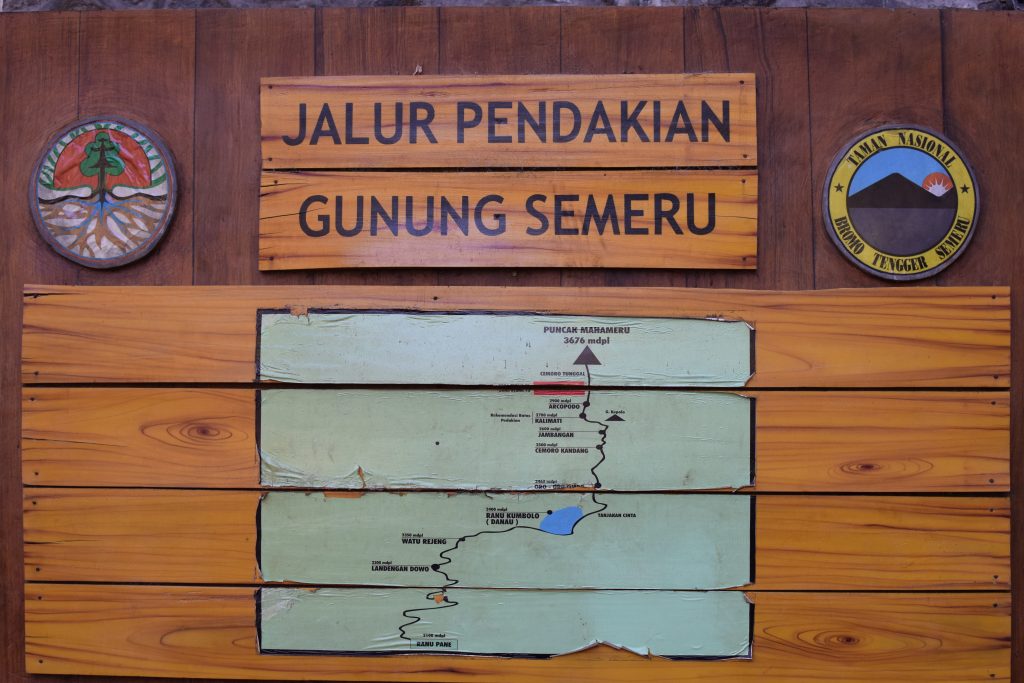
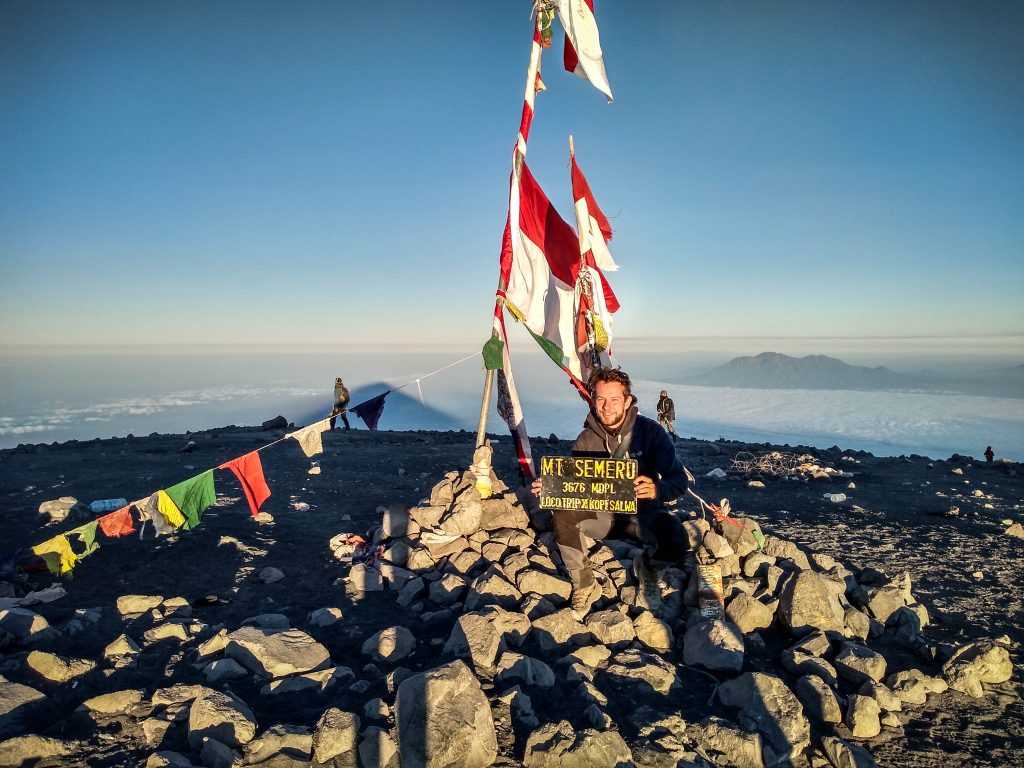
Semeru is a stratovolcano, which with its 3.676 meters above sea level, can be called the roof of Java. The mountain is also known as Mahameru, meaning ‘The Great Mountain’. The name originates from the Hindu cosmology’s mountain of Meru or Sumeru, the place where gods reside.
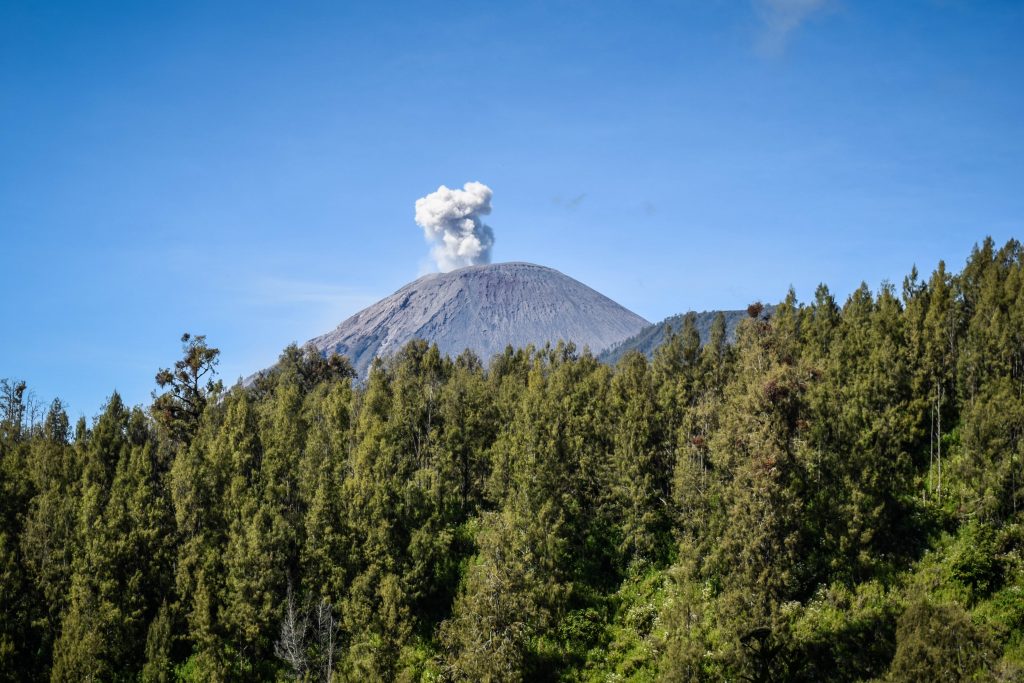
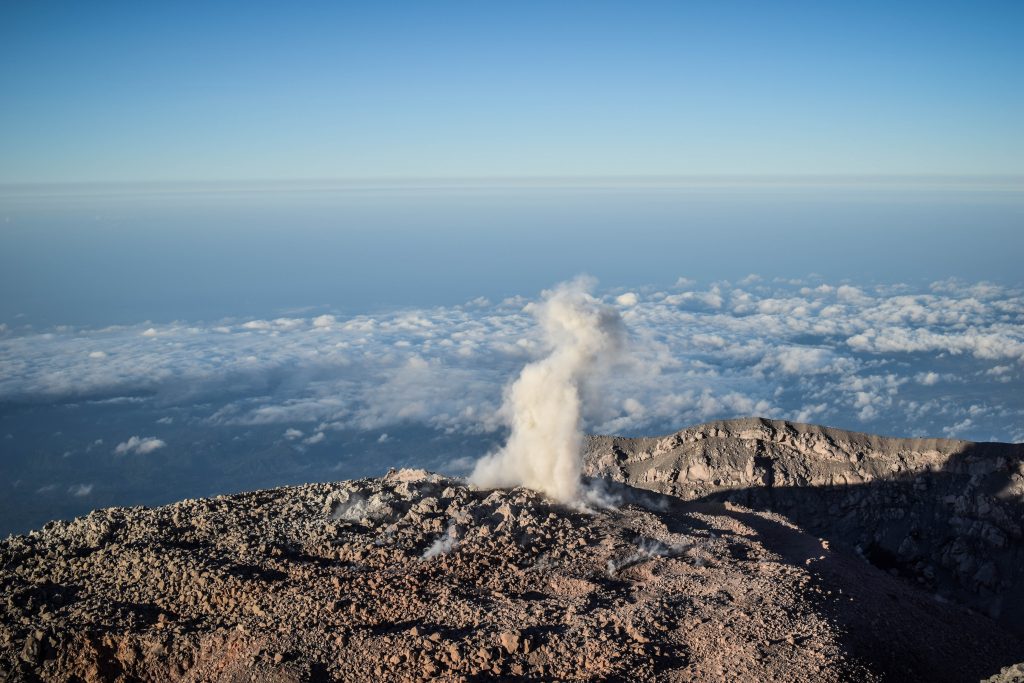
It’s a popular hiking destination that provides you with a feeling of real adventure. In the end, you are walking on an active volcano! The activity can be noticed many times, especially when you see volcanic ash coming out of the crater at the summit. On the way up the mountain, you start thinking about how it will look up there. Is it even safe?
Semeru has a long history of eruptions and can be periodically closed for hikers. I was there in August 2019 and felt perfectly safe. Needless to say, care has to be taken on the last kilometers when walking on the steep and exposed slope and later when wandering around the summit. Most probably you will witness small eruption when volcanic ash goes into the air just a few meters from you but that’s the part of the game and the factor that attracts so many tourists. Just don’t come too close to avoid breathing it in. Everyone wants to have a selfie with a small eruption in the background and it happens every 20-30min!
Everything you need to know before you go
Technical details
Summit: 3,676 meters above sea level
Altitude gain: 1,576 meters
Distance: 42 km return
Ranu Kumbolo Lake campsite: 2,400 meters above sea level (10.5 km from the starting point)
Kalimati campsite: 2,700 above sea level (7.5 km from Ranu Kumbolo Lake)
Final ascent: 3 km one way from Kalimati campsite
My difficulty rating: medium / hard
Best time to go
The dry season, which is the best time for the hike, starts from late April and lasts until November. During the rainy season from January to late April the trail to the summit may be closed but most importantly going there can be dangerous. It’s also the time to restore the ecosystem of the area.
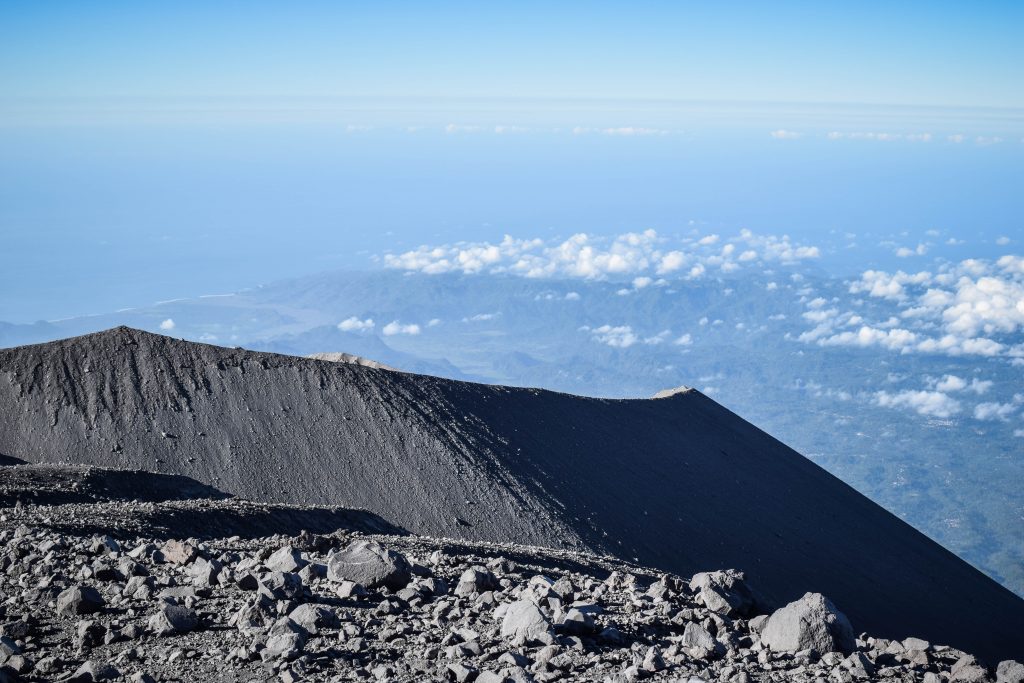
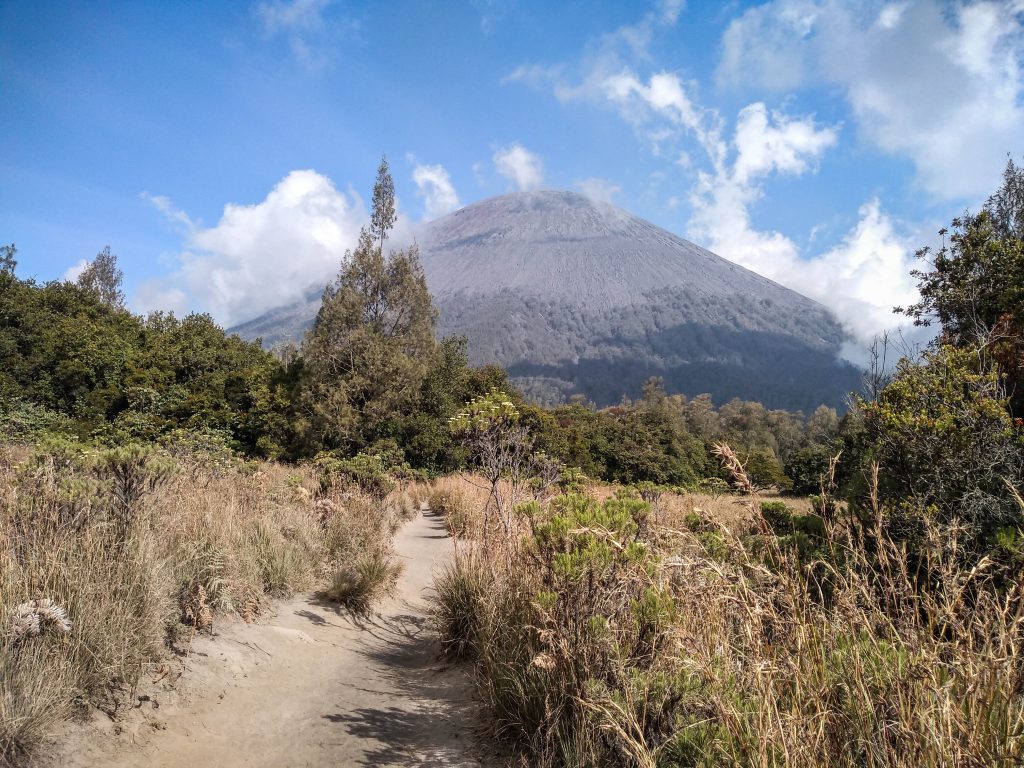
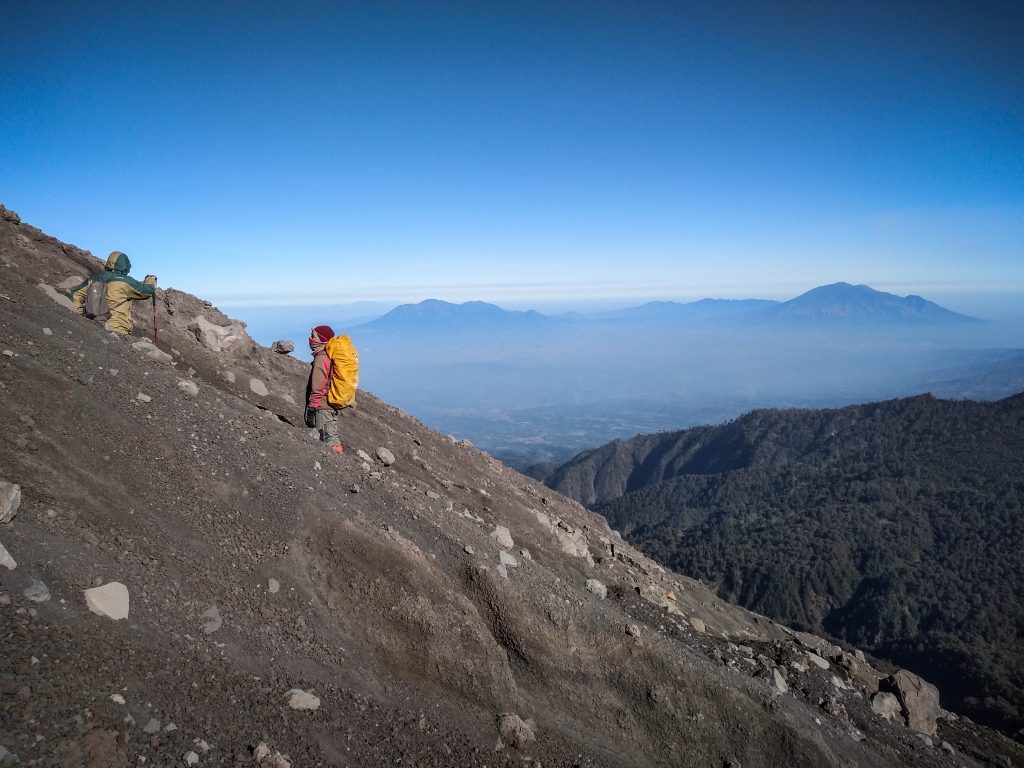
Panoramic views on the way to the summit
How to get there?
We did the route Malang – Tumpang – Ranu Pane. The first leg was really straightforward as we ordered a taxi via the Grab mobile app. Just tell the driver to take you to the jeep’s departure point. Both Grab and Gojek are great ways to get around Indonesia. They work in the same way as Uber but very often have more options available. You can literally order delivery of anything you can imagine!
Being the only hikers there, we waited well over an hour for other people to join in order to lower the costs of jeep ride. Unfortunately, no one came. After bargaining, it cost us 150.000 IDR per person. The rule is simple – the bigger the group, the lower the cost per person is. They charge per vehicle and as it was only two of us, we had to pay a bit more.
Required documents
Medical check – must be obtained from the local hospitals or public health facilities 1 day before the hike. It’s an easy procedure – they just check your weight, high, blood pressure and ask about your general condition. I don’t remember the exact cost, but it was around 20.000-40.000 IDR. We did it in Malang 1 day prior to the hike but you may also do it in Tumpang or even Ranu Pane village.
Passport / ID copy – Photocopy of official identity document that is still valid. For hikers who are less than 17 years old, parents’ approval has to be signed and stamped (6.000 IDR fee) together with a photocopy of parents’ passport / ID.
Registration form – confirmation of online registration or the document filled in the office in Ranu Pane.
Views like that are worth the paperwork
Bookings and prices
Registration for the permit can be done through the websiteof Bromo Tengger Semeru National Park. Just follow the online booking registration flow, make a payment and wait for the confirmation email. The national park puts a limit of 600 people entering the trail every day, that’s why in high season it’s better to make the booking and secure a spot. Don’t forget to do it at least 3 days before the start of the hike.
There was a problem with processing the payment with my credit card, so if you have the same issue, just take enough cash and pay in the office in Ranu Pane. Apparently, if you don’t make a payment as soon as 5 hours after registration, it will be canceled. Even though, we didn’t have any problems explaining to the ranger that the payment couldn’t be processed and he accepted cash.
Ticket prices for Indonesians:
Working Day 19.000IDR per person per day
Holidays 24.000IDR per person per day
Ticket prices for Foreigners:
Working Day 210.000IDR per person per day
Holidays 310.000IDR per person per day
Views from the top of Mount Semeru
Briefing
After picking up the permit in the rangers’ office, you will be invited to the briefing. They explain the route, location of the campsites and some safety tips to keep in mind. One rule is especially worth remembering: whatever you bring in, bring it out with you. There are no rubbish bins and unfortunately, trash can be found around campsites. Indonesia has a big problem with rubbish and makes sure not to leave anything behind. Simply throw it away in Ranu Pane village.
Itineraries
2 DAYS 1 NIGHT
You will walk 42 km in two days and the second one will be especially tiring. Do it only if you are an experienced hiker in decent shape. We did it this way and it was fine, though one extra day to enjoy nature wouldn’t hurt. The campsite at Ranu Kumbalo Lake is only 3 hours walk away from Ranu Pane, that’s why it seemed unreasonable to stay there for the night and we pushed to the end instead.
Day 1: Ranu Pane – Ranu Kumbalo Lake – Kalimati campsite Day 2: Kalimati campsite – Semeru summit – Kalimati campsite – Ranu Kumbalo Lake – Ranu Pane
3 DAYS 2 NIGHTS
The most popular and optimal version of the hike, giving you more time on the side of nature, taking all the sights at a slower pace. Good idea if you have more time to spend in the national park.
Day 1: Ranu Pane – Ranu Kumbalo Lake – Kalimati campsite Day 2: Kalimati campsite – Semeru summit – Kalimati campsite – Ranu Kumbalo Lake Day 3: Ranu Kumbalo Lake – Ranu Pane
4 DAYS 3 NIGHTS
The very long and chilling version of the hike, for me it would be a bit too long though. But if you are with a group of friends, why not 🙂
Day 1: Ranu Pane – Ranu Kumbalo Lake – Kalimati campsite Day 2: Kalimati campsite – Semeru summit – Kalimati campsite Day 3: Kalimati campsite – Ranu Kumbalo Lake Day 3: Ranu Kumbalo Lake – Ranu Pane
On the top of Mount Semeru
With or without a guide?
Taking a guide is not necessary at all. The trail to Kalimati campsite is very easy to follow, there is a lot of people, small stalls selling food and drinks so it’s impossible to get lost. For the final summit push just follow the lights of other hikers and you will be fine as well.
Equipment
Here is my basic packing list for the hike:
Camping: tent, sleeping bag, sleeping mat, gas cooker, cooking pot, lighter. If you don’t have your own equipment, you can easily rent it everywhere in Ranu Pane.
Clothes: thermals, t-shirts, shorts, long pants, warm sweater/hoodie, gloves, hat, socks, underwear, hiking shoes, jacket. Don’t underestimate the weather. Even if it’s warm and nice in Tumpang or even Ranu Pane, the nights at the campsites will be cold as well as final ascent on exposed terrain.
Headlamp and spare batteries, hiking poles, sunglasses. Good light is essential as you will be walking hours in the night. Hiking poles are extremely useful on the last kilometers of the steep summit push so it’s good to have at least one.
First aid kit, basic medications, suncream.
Food Don’t take too much. Indonesia won’t leave you with an empty stomach. There are small stalls on the way where you can buy fruits, drinks, snacks. You will support the local community and keep your backpack lighter.
Camera
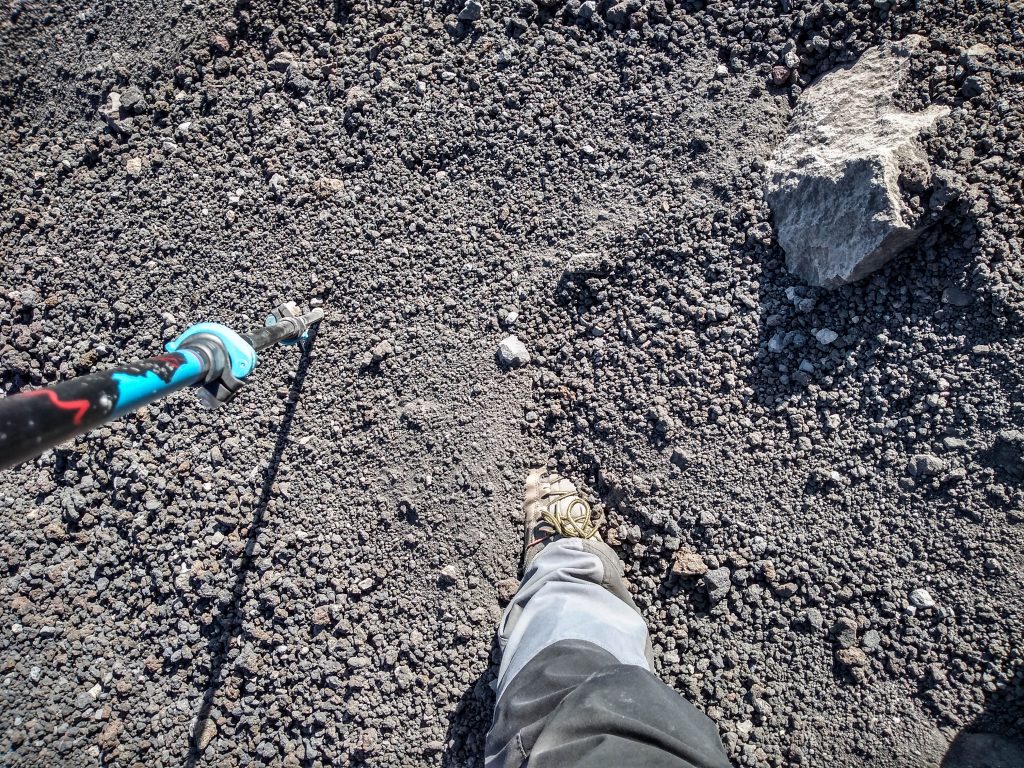
Hiking poles are very useful when walking in volcanic ash
Accommodation in Ranu Pane
There are many accommodation options in the village and the best is to text them through Whatsapp or just come to the village and look around. We chose Thomas Sanjaya Homestay which was simple but perfectly sufficient. There was even a hot water shower which is not always the case in Indonesia. They also run a small shop for those willing to buy some extra noodles, cookies or rent a sleeping bag and gas cooker. The nights can get really cold in the region, giving us a feeling that next night in the tent for sure won’t be too warm!
On the trail – 2 days 1 night
Day 1: Ranu Pane village – Ranu Kumbolo Lake – Kalimati campsite (15km, 5-6h)
Stage 1: Ranu Pane village to Ranu Kumbolo Lake (3-3.5h)
Around 7 am the guesthouse started to be busy with climbers getting breakfast and preparing for departure. The breakfast didn’t surprise – it was a simple nasi goreng (fried rice) with egg. I could say a lot about nasi goreng but let’s just underline that it is absolutely the most popular meal for budget travelers and I had it nearly every day 🙂
Information board at the entrance gate
At around 8 am we were already on the way. First, following asphalt road to the gate of the national park where our permits were checked and then passing through cabbage fields into the forest. Surprisingly, I realized that taking so much food with us was absolutely not necessary. Why? There are warungs (little stalls) on the way! They sell fruits, cakes, drinks and of course fried rice or fried noodles. You can make a stop there and refill your energy, supporting local people running a rather challenging business. They have to descent back to the village every day and then go up again in the early morning, very often simply carrying products on their backs.
Mt Semeru still looked very far away and we admired its graceful shape from the distance when suddenly the cloud of volcanic ash appeared growing just at the summit! It looked totally amazing and it was the first time for me to actually see a small volcanic eruption. It has a long history of eruptions and since 1967 it is in a state of near-constant activity. Small eruptions can happen even every 20 minutes! While it’s an additional advantage that boosts your adrenaline, for your own safety you should never go off the hiking trail.
Small eruption seen from the distance
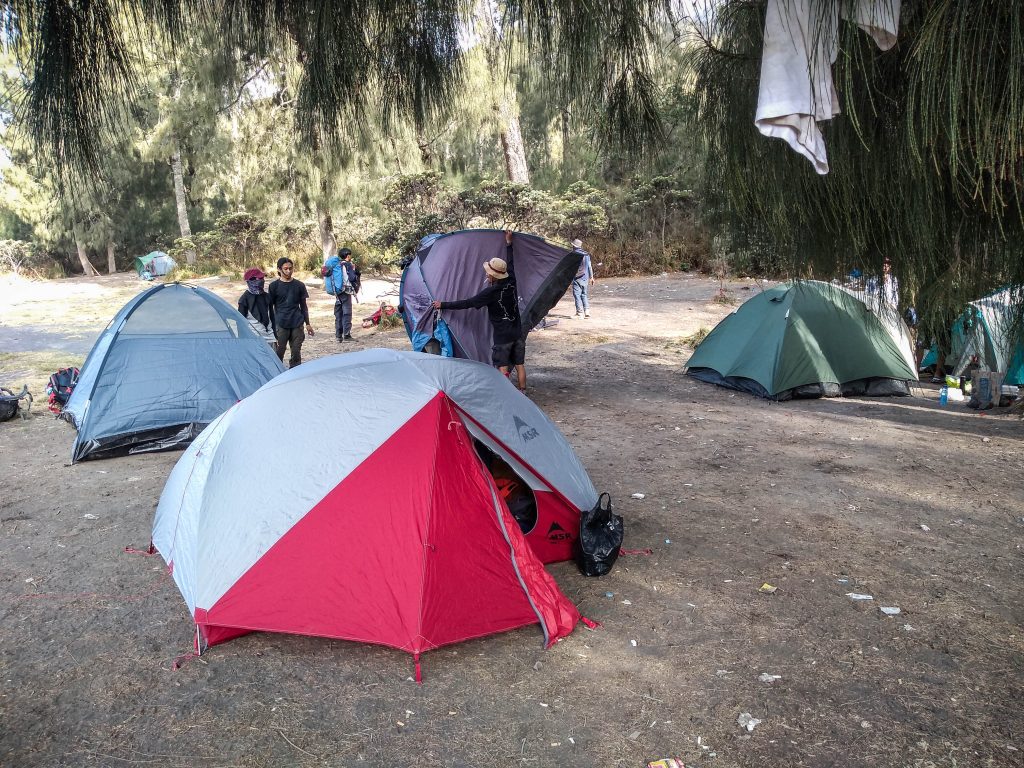
After 3 – 3.5 hours since departure from Ranu Pane, we arrived at Ranu Kumbolo Lake. There is a beautiful campsite there at the lakeside and obviously some warungs as well. Swimming in the lake isn’t allowed as the water is used for drinking and cooking. I regret a little bit that we didn’t stay there for an extra night. Next time!
Ranu Kumbolo Lake and campsite
Stage 2: Ranu Kumbolo Lake to Kalimati campsite (2-2.5h)
After a lunch break for cooking instant noodles and relaxation at the lake, we continued along much more steep part of the trail leading through forest and grasslands to Kalimati campsite. Here the backpack started to be really heavy and I was glad to have my trekking poles for extra support. Before, we could see Mount Semeru only occasionally, but now it’s getting closer and closer.
View on the way to Kalimati campsite
Around 2 – 2.5 hours later I was already setting the tent. The campsite was full of friendly hikers, everyone busy with cooking. If you are short on water, there is a source around 15 min walk from the campsite. Just ask locals for directions.
Having in mind that the night will be short, we tried to get some unstable sleep before the alarm woke us up at midnight.
Kalimati campsite
Day 2: Kalimati campsite – Semeru summit – Kalimati campsite – Ranu Kumbolo lake – Ranu Pane
Stage 1: Kalimati campsite to Semeru summit (4-5h)
The nights at Kalimati campsite can get really cold and the best is to have your own sleeping bag as the rented ones are rather thin. Good idea is to have a thermal layer as well.
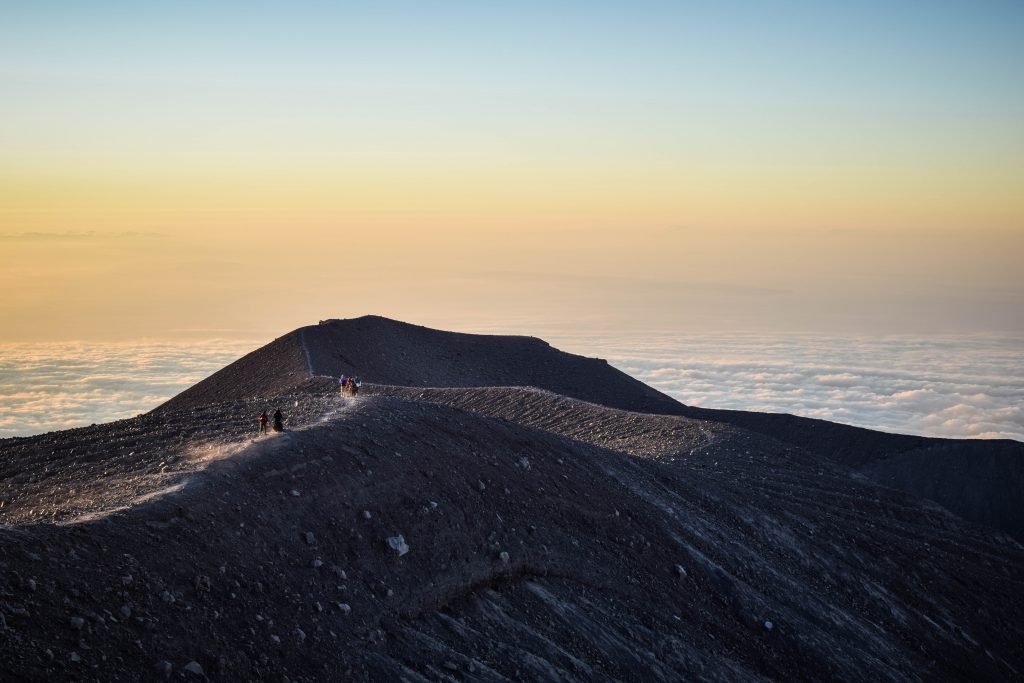
We started preparing our breakfast to warm up and feel some energy boost. Most of our things stayed inside the tent and we departed carrying a small backpack with water, snacks, a camera and an extra layer of clothes. Most of the people hit the trail between 00:00 – 01:00 am, so did we. There was a group saying that they want to depart as early as 10:00 pm but I think it’s way too early. Reaching the summit too early leaves you with nothing else to do than wait and get cold. Leave at midnight if you are slower and want to see the sunrise from the summit. If you are faster or it’s enough for you to see the sunrise on the way (which is awesome anyway), then 01:00 – 01:30 am would be enough.
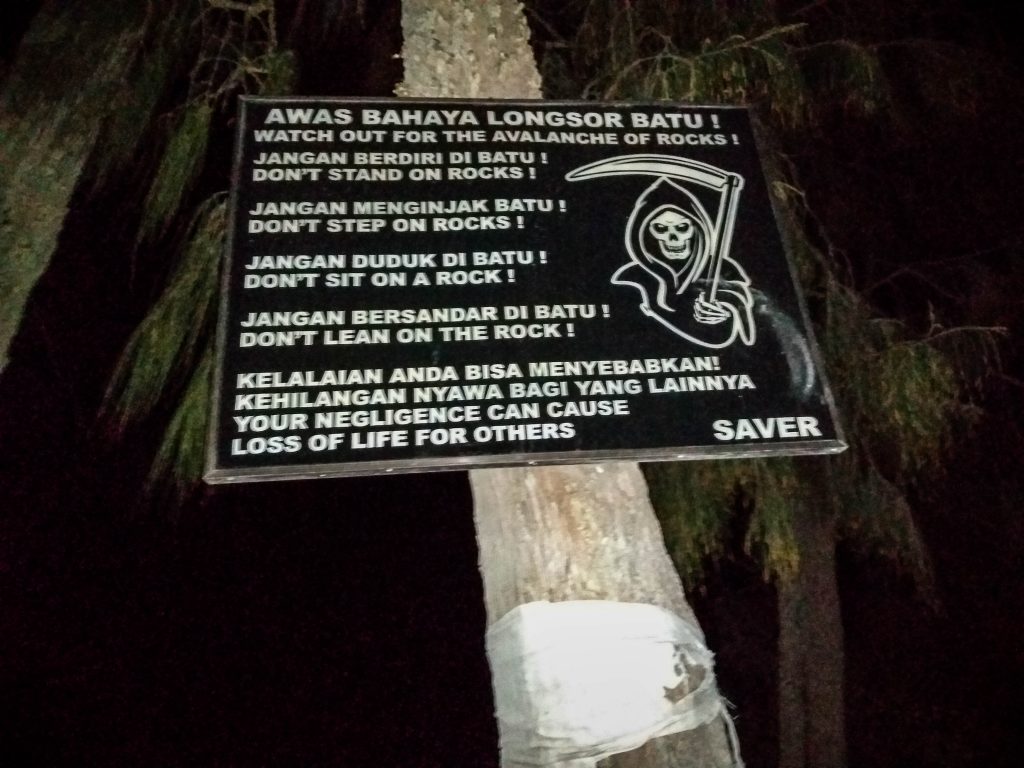
Rocks are your enemies!
I could imagine that the trail is difficult to follow if you go solo, but there were plenty of other hikers getting ready at the same time so we simply followed them. With everyone equipped with head-light, it looked like a moving dotted line in the middle of dark night.
From the campsite, we went into the forest but it didn’t take long to reach infamous volcanic ash and start of the crazy long and slow ascent. So glad that I had my hiking poles! With every 2 steps up, you pretty much slide 1 step down. It’s steep, it’s tiring, it’s cold and it may be very windy due to exposed terrain. You also have to be careful of loose stones rolling down the slope as people walk in front of you. Maybe it’s better that we walked in the darkness? At least we pushed forward not knowing how far we are from the summit.
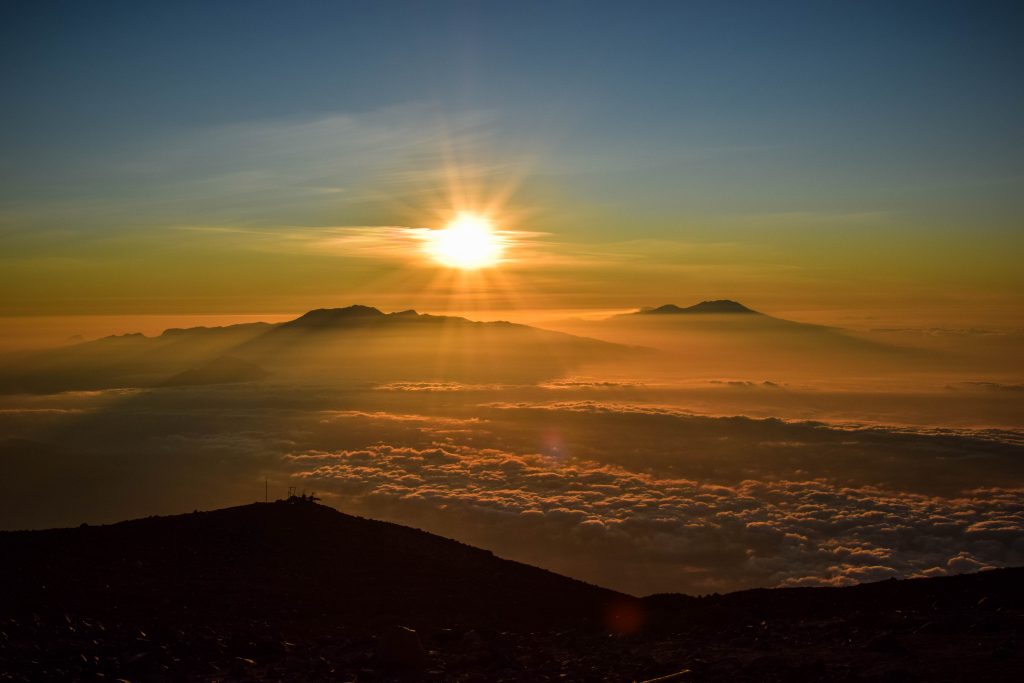
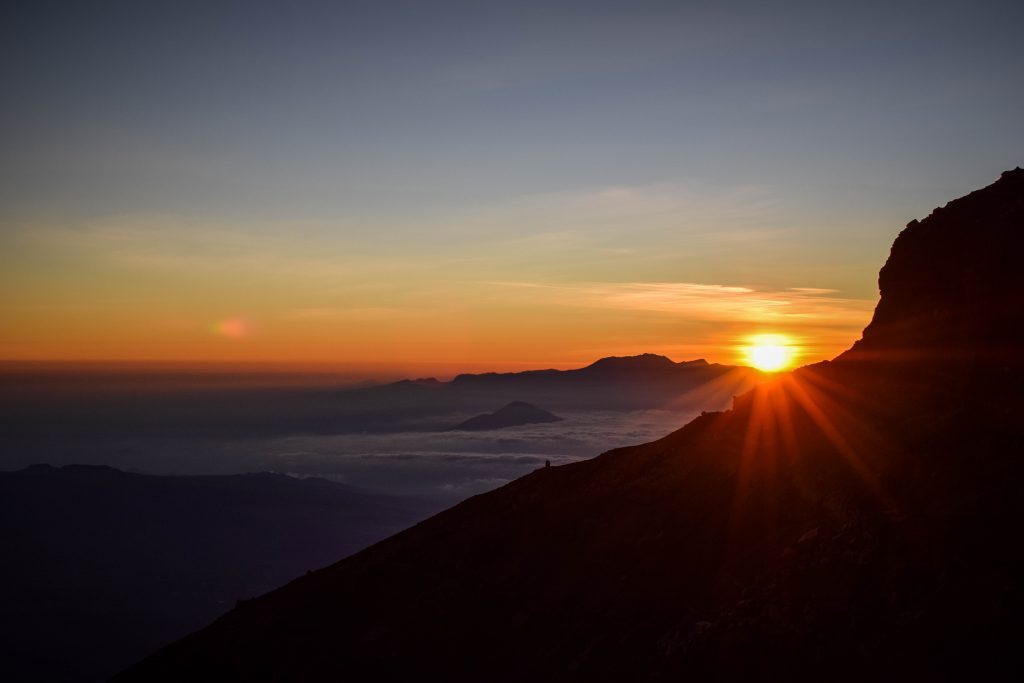
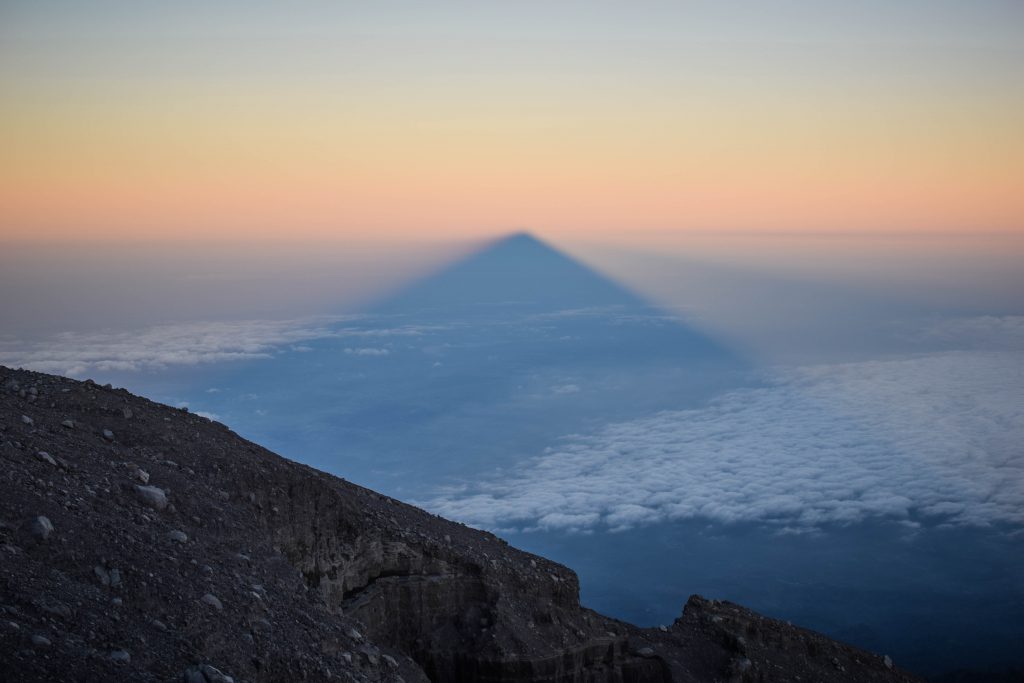
Sunrise on the way to Mount SemeruSunrise on the way to Mount SemeruThe shadow of the mountain at sunrise
Ok, I don’t want to scare you out! It’s definitely not easy but it’s doable. Just pace yourself properly and take breaks if you are running out of breath.
The summit is flat and there is a lot of space to take nice pictures and absorb the views. It’s worth following the trail along the ridge closer to the crater. Being the highest mountain on Java, panorama from Semeru’s top is simply spectacular. We also had a nice chat with a group of Indonesians that treated us with warm ginger drink and a soup! Having something warm in hands when resting on the summit after long and tiring ascent was exactly what we needed.
On the summit of Mount Semeru
But the best point was witnessing 2 small eruptions that happened just in front of us. Exactly the same style as we saw the day before but this time we were only a few meters away. The cloud was growing and taking its shape, hanging in the air and slowly drifting away. The whole spectacle reminds of frequent volcanic activity and the power of nature in Indonesia. In the case of Semeru, eruptions like that usually happen every 20-30 minutes so just hang around and wait for it. Be ready for one of a kind pictures opportunity!
Small eruptions can happen even every 20-30 minIt’s one of a kind spectacle!
Stage 2: Semeru summit to Ranu Pane village (6-8h)
After conquering the summit in 5 hours, the way down to the camp took us… less than 1.5 hours. Using heels and sliding all the way down is the most effective and fastest way to descent. When turning around, it was hard to imagine that we really went up this steep trail in the middle of the night.
The steep slope of Mount Semeru
We did an hour break to cook breakfast, pack all the things and then continued way back to Ranu Pane. After reaching Ranu Kumbolo Lake I started to feel really tired and made breaks more often to take off the backpack and let my shoulders rest for a while. We arrived at the village totally exhausted but extremely satisfied.
The last step was to organize jeep transportation back to Tumpang and from there taxi to the hotel in Malang. As always in Indonesia, negotiate your price and try to join a group of other hikers to split the costs. We couldn’t find anyone and after tough haggling, the driver took us for 200 IDR / person.
There are endless hiking possibilities in New Zealand and if you nature enthusiast, that’s the perfect country for you. I prefer camping, however, with the network of more than 950 backcountry huts operated by the Department of Conservation (DOC), carrying your own tent all the way is not always needed.
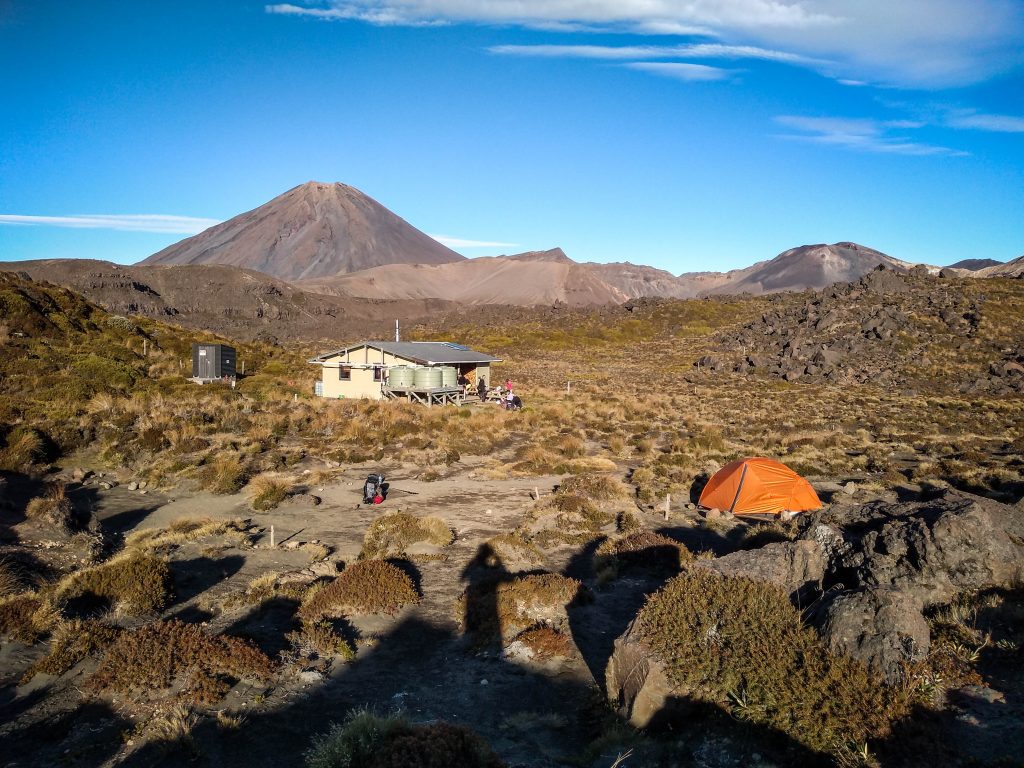
10 tracks with the status of the Great Walk are multiday adventures located in the most scenic landscapes in the country and providing hikers with good facilities. My story with them is rather simple. I went for one (Tongariro Northern Circuit) and I knew that I want to complete all of them.
North Island
Tongariro Northern Circuit
Distance: 41 km
Time: 2-4 days
Definitely my favorite walk on the North Island. It was also my first Great Walk after arrival to New Zealand so I’m still sentimental about it. Being a loop, there is no hassle with extra transportation so it’s also budget-friendly.
I was extremely lucky with the weather and even though I initially planned the hike for 3 days, I finished it in 2 days which is perfectly doable but tiring. Do it in 3 days or 4 days if you like a more relaxed pace.
The track meanders through the rugged volcanic landscape with cones of Mt Tongariro, Mt Ruapehu and Mt Ngauruhoe around you. It includes most of Tongariro Crossing which is a day hike done by most of the tourists coming to Tongariro National Park and this section can get crowded.
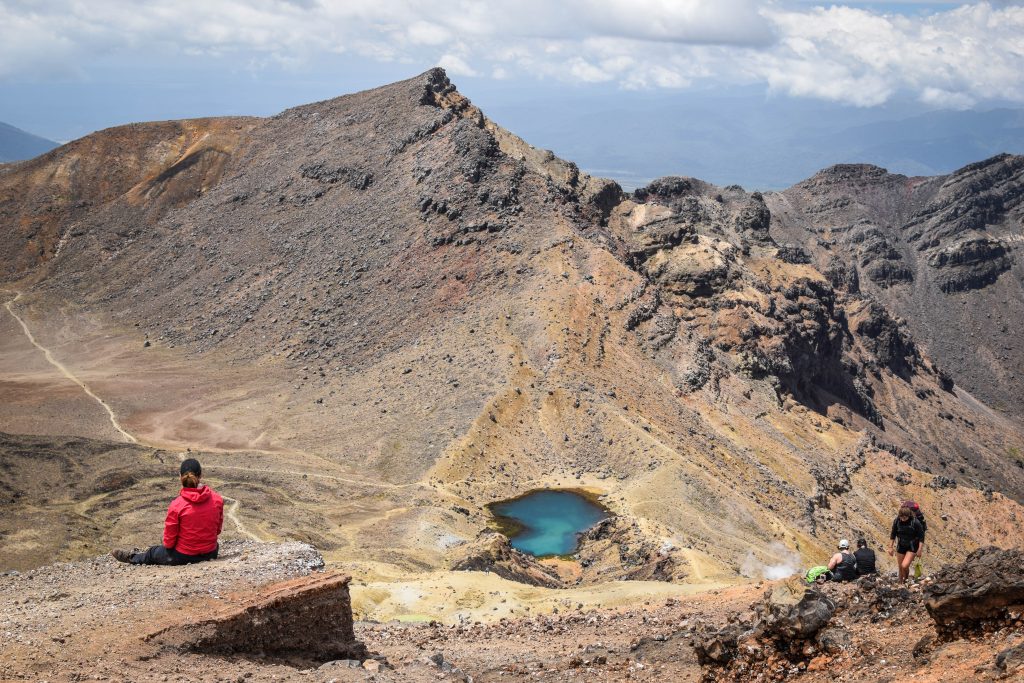
Don’t miss Blue Lake, Tama Lakes and Taranaki Falls as side trips. They are all worth it!
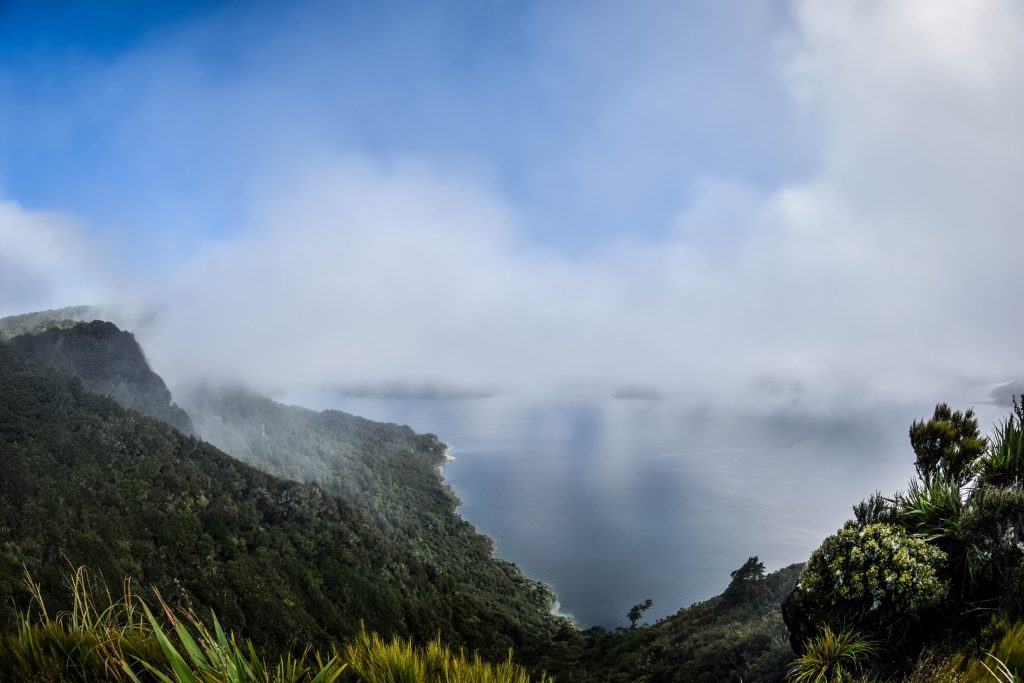
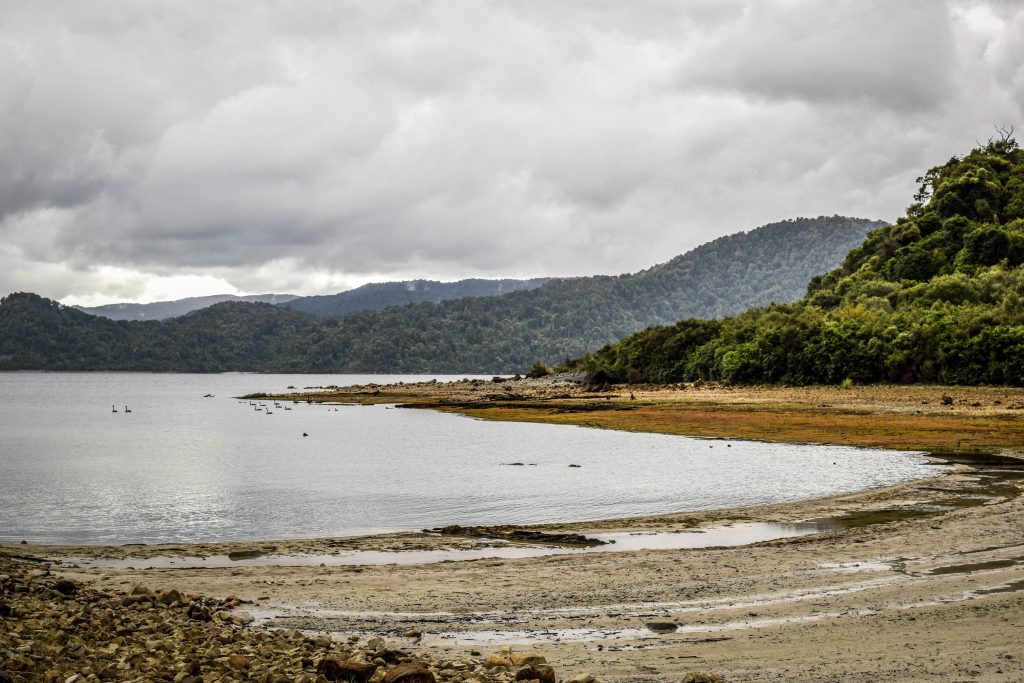
The track follows the shoreline of Lake Waikaremoana and if fairly easy except quite a steep uphill section between Onepoto and Panekire Hut (if walking from Onepoto) or Waiopaoa Hut and Panekire Hut (if walking from Hopuruahine Landing). Rainforest, waterfalls, beaches – you have it all here. Just don’t forget your swimwear!
I started the track at Onepoto and in this way covered the more difficult uphill section on the first day.
Whanganui Journey
Distance: 87 or 145 km
Time: 3-5 days
First of all, it’s not a walk. Unless you can walk on the water. If not, then grab a kayak or canoe, pack your things into waterproof containers and paddle your way down the Whanganui River.
The full version is 145 km long, starts at Taumarunui and finished in Pipiriki (5 days). If you are not such a big enthusiast of paddling, start at Whakahoro instead and cut the distance to 87 km (3 days).
It’s worth stopping at the Bridge to Nowhere, that was built in the times when soldiers coming back from World War I were granted land in the area. The land proved too difficult to cultivate and after building the bridge in the middle of the bush, the plans to continue with the road were abandoned. Therefore, today it’s quite a unique tourist attraction in the beautiful scenery.
Whanganui National ParkWhanganui National Park
South Island
Abel Tasman Coastal Track
Distance: 60 km
Time: 3-5 days
The trail goes along the coast and many hikers rate it as one of the easiest of Great Walks. There are several great campsites on the way where you can pitch your tent on the sand and even enjoy the shower. Jumping in the kayak and doing the whole route or only some fragments from the water perspective is a nice and popular alternative. It’s not a loop so at the end of the track, take a water taxi back to the starting point or if you have a couple of more days to spare, walk back via alternative inland track.
I did it over 3 days starting at Marahau and it seems to be an absolute minimum if you want to cover the whole distance. I camped at Onetahuti Bay and Totaranui. For more relaxed experience and longer breaks at the spectacular bays and beaches, plan 4 or 5 days.
There is one really critical tidal crossing at Aweroa that is passable 1.5 hours before and 2 hours after low tide under normal conditional. Therefore, plan your day accordingly and check tides hours online as there is no alternative way. For me, it was one of the most unique and breathtaking spots on the trail. Oystercatchers wandering around looking for food, a huge area with sand shaped by the water, hilly background and adventurous crossing on its own, sometimes with water above my knees.
Heaphy Track
Distance: 78.4 km
Time: 3-6 days
The longest and one of the most diverse of Great Walks. Being located in Kahurangi National Park, it takes not only good shape to tackle it, but you need extra cash to organize logistics. To come back from one trailhead to another, it’s a long bus trip that takes around 5 hours and costs over 100 NZD.
I hiked the track in 3 days. The first one was a mostly uphill walk in the mountainous area and forest. The second day was way flatter and the forest gave place to wide grasslands at the end arriving at the West Coast. On the last day, walking along the beach I got the chance to admire one of the most remote coasts that I have ever seen.
I spent the nights at Saxon and Heaphy campsites and both had superb location.
Outside of the Great Walks season (1 May – 30 November), it’s allowed to go on the track with a mountain bike.
Paparoa Track
Distance: 55 km
Time: 2-3 days
The only Great Walk that I didn’t experience but that’s because it’s a brand new one due to open in the second half of 2020. When I see its location on the West Coast, I have no doubts it’s on my bucket list for the second visit in New Zealand.
The track crosses the rainforest and the Paparoa Range. According to the Department of Conversation (DOC), mountain bikers are allowed as well.
Routeburn Track
Distance: 32 km
Time: 2-3 days
My favorite of 3 Great Walks in Fiordland National Park. It’s short but breathtaking and there are no boring sections. The weather on my first day was simply horrible with pouring rain and strong winds all the way. But if everything is booked…. gotta go 🙂 Luckily, it had a positive side too, as the passing dark clouds were extremely photogenic.
I spent the night at Lake MacKenzie campsite trying to dry my completely wet clothes at least a little bit. Of course, I failed.
The second day was much better and the sun welcomed me as soon as I opened the tent. After a full day of rain, the Earland Falls were so huge that I had to take a detour built for such situations.
It’s a great track for mountain enthusiasts. I recommend making a side trip to Key Summit which takes around 1.5-hour return. Leave your heavy backpack at the crossroad, there is no need to carry the things all the way up.
[update from DOC website as of 15.03.2020 – check regularly for further news]
The Routeburn Track partially reopens from 12 March 2020 as a new walking experience, named Routeburn Return. It’s a 4-day, 3-night hike beginning and ending at the Routeburn Shelter. This return journey starts and finishes near Glenorchy.
Routeburn Return replaces the Routeburn Great Walk, which is closed for the rest of the season due to storm damage.
The Routeburn Return route may be more challenging than the usual route because of changes in elevation and one of the days is longer than a usual Great Walks experience.
Kepler Track
Distance: 60 km
Time: 2-4 days
Being a circuit makes it easily accessible and budget-friendly. I did it over 2 days in a clockwise direction with overnight at Iris Burn but I must say it was pretty challenging and I finished completely exhausted.
The weather conditions in Fiordland National Park are pretty unpredictable which I experienced on the second day. The thin layer of snow was covering the ground and people coming from the other direction said that yesterday they were walking in a snowstorm. I was really lucky that DOC advised me to follow the clockwise direction!
There are limestone caves near the Luxmore Hut that make for a nice side trip. Take a torch!
Milford Track
Distance: 53.5 km
Time: 4 days
Only 40 independent hikers can start the track each day which makes it extremely difficult to book. I did it 4 months in advance, refreshing the page several days hoping for someone to cancel. I got lucky, but it’s also easier for solo travelers.
This time I left the tent in the car as camping on Milford Track is not allowed. Even though it’s only 53.5 km long, you need to stay in all 3 huts on the way. It has pros and cons. I could easily walk such a distance in 3 or even in 2 days. On the other hand, I was ‘forced’ to take it slowly having more time to appreciate nature. Which was just fine. However, the popularity of the track, lack of campsites and additional transport from one end to another, demand quite a big budget as for the hike in the mountains.
And even though it’s my least favorite of Great Walks in Fiordland National Park, there is still a lot to appreciate. Spectacular views from MacKinnon Pass, the highest waterfall in New Zealand – Sutherland Falls (580m) and of course plenty of wildlife.
Rakiura / Stewart Island
Rakiura Track
Rakiura National Park covers around 80% of the island and is home to the least crowded of Great Walks. I booked my camping tickets only 2 days before departure which would rather not be possible on other tracks in the middle of the season.
You will hike along sandy beaches and through the forest but the most interesting part is the chance to see the kiwi. It’s the best place in the whole of New Zealand to see its symbolic bird. Apparently it’s possible even in the daylight! I suggest waking up around midnight, taking headlight (best with the red light mode that doesn’t scare kiwi off) and walking quietly around the camp.
This Aboriginal community is on the way to Palm Valley, therefore its historic precinct is very often visited by organized groups on day tours. It was established in the 1880s as a Lutheran mission by German pastors, hence its name. They constructed characteristical buildings including a church, school and several houses. Today, you can enjoy your time in a tea shop, museum and the Namatjira Gallery.
Albert Namatjira is a world-famous Aboriginal watercolor artist born in Hermannsburg. Due to his art, he gained an appreciation and became the first Aboriginal person to get restricted Australian citizenship allowing him to vote, buy alcohol and claim land rights. In 1953 Namatjira was awarded the Queen’s Coronation Medal and in 1968 he was honored on an Australian postage stamp.
You can admire his works in many museums all around Australia and don’t forget to check the ones in the museum in Hermannsburg Historic Precinct.
Lutheran mission buildingsOld cars from Lutheran mission timesSchool building in Historic Precinct
Palm Valley
Palm Valley lies within Finke Gorge National Park that covers an area of around 46.000 hectares in Central Australia. Why is it so special? Because it’s like an oasis filled with around 12.000 Red Cabbage Palms after which the valley is named. There is no other place like that in the region and the nearest specimens are 850 km away in Queensland.
Why are there palms on the desert?
One of the very first versions claimed that palms are survivors from prehistoric times when the climate in this region was far more tropical. However, recent studies proved that the same species of palms grow around 1000 north around Mataranka and Katherine. It is believed that the seeds were transported from one place to another by migrating people 15.000 – 30.000 years ago. Why did they move? That remains uncertain and we can only speculate: the rise of sea levels, bushfires, etc.
The theory would, in fact, go in line with Aboriginal legend telling about palm seed brought by the ‘gods form the north’. Is it really possible that the legend survives more than 15.000 years? I don’t know but I like to believe it is. It only adds magical feeling to this already extraordinary place.
The landscape around Palm Valley
While Red Cabbage Palms are the main actors in this theatre, there are about 684 species of plants living in Finke Gorge National Park, 30 of them being rare and 16 that can be found only here.
The Amphitheatre
How to get
there?
You would need 4WD and I mean it. In many parts of Australia, I managed to access remote attractions with 2WD, just taking it easy and driving on corrugated dirt with care. But here, it certainly wouldn’t be possible. You will drive on a sandy bad of Finke River after all!
Therefore, without high clearance 4WD, I would suggest going for an organized tour as I did. It was a totally hassle-free experience in a 4WD truck and commentary provided by our guide Bluey from Emu Run Experience was probably the biggest advantage! Daily tours depart from Alice Springs and from there it takes around 2 hours to get to the national park. Besides Finke River National Park, they usually stop at Hermannsburg as well.
The truck from Emu Run Experience tour operator
On the way back we saw 4WD Toyota Hilux in trouble when the driver went too fast and broke suspension which in the result made a puncture in the fuel tank. The fuel leaked out completely in just a few seconds and that was the end of the trip for unlucky ones. Other tourists gave them a lift to Alice Springs where they had to find a mechanic and spare parts and then come back to Palm Valley to fix the car onsite. Difficult Aussie life!
Well prepared 4WD vehicles are essential to access Palm Valley
Overnight
If you travel independently you may want to set your camp at the dedicated spot and spend a night in this remote area. It must be an amazing experience and I would certainly do so next time. There are showers, toilets and barbecues provided. Don’t forget to take some cash to pay onsite.
Walks in the area
Arankaia Walk (2 km, 1-hour return) – located in Palm Valley itself it gives you the best opportunity to admire these spectacular plants.
Mpulungkinya Walk (5km, 2-hours return) – the longer version of Arankaia Walk.
Kalarranga Lookout (1.5 km, 45 min return) – easy ascent to the top where I was rewarded by the panoramic view of the national park and surrounding amphitheater of rocks. It’s a breathtaking spot for sunset, so if you camp overnight, get here on time!
Mpaara Walk (5 km, 2 hours return) – it’s a nice walk but also cultural experience describing the mythology of Western Aranda Aboriginal people. The start is at Kalarranga parking.
Trailhead of Arankaia and Mpulungkinya tracksThe arid ground in Palm Valley
A few things to remember
Please don’t ignore the guidance provided by Finke River National Park:
Camping is only permitted in the designated camping areas at Palm Valley and along the Finke River at Boggy Hole.
Collect firewood before entering the park.
At Palm Valley, fires are only permitted in designated fire pits.
Pets are not permitted in the National Park.
Rubbish bins are not provided, so take your rubbish with you.
If traveling the Finke River 4WD route, stay on the marked track.
Be careful where you walk and stay on the marked tracks. Young palms can be destroyed by visitors not realizing what they are walking on. The regeneration of the palms is needed for the survival of this population.


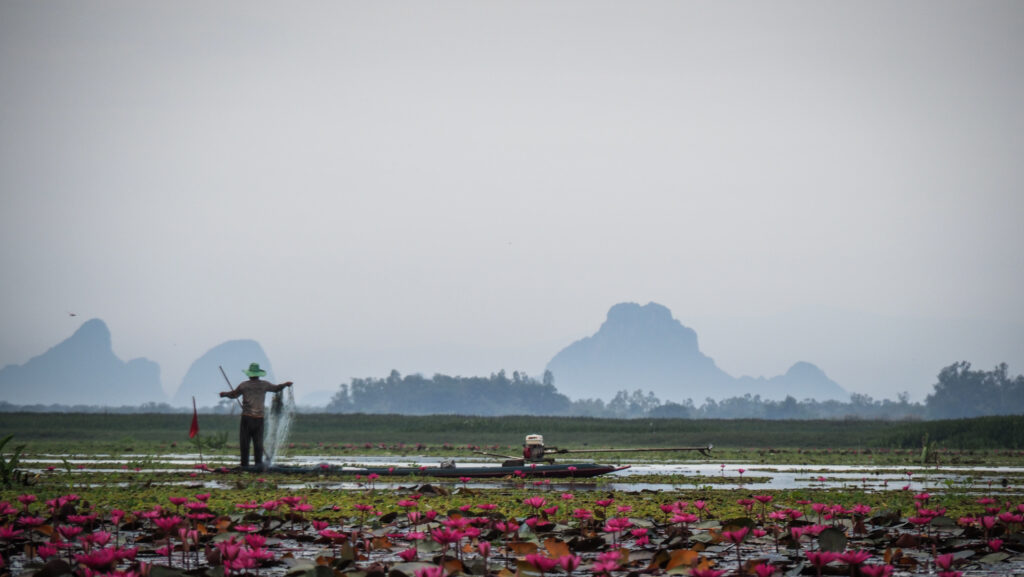
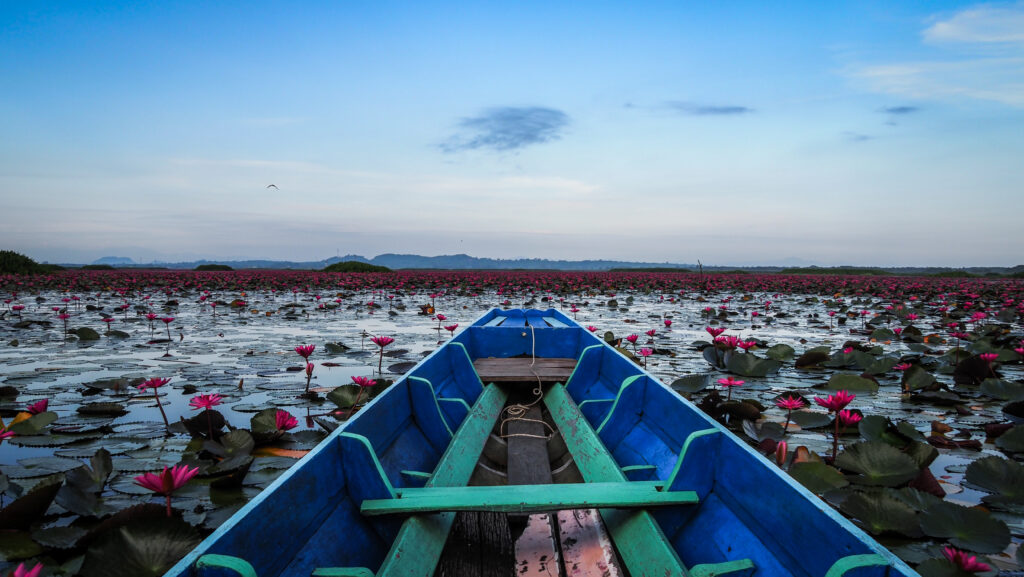
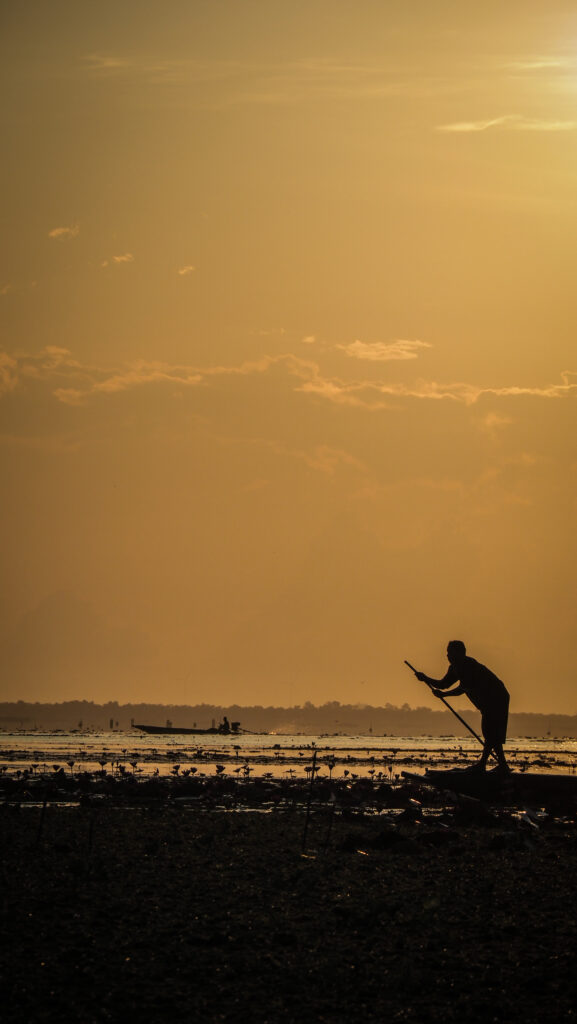
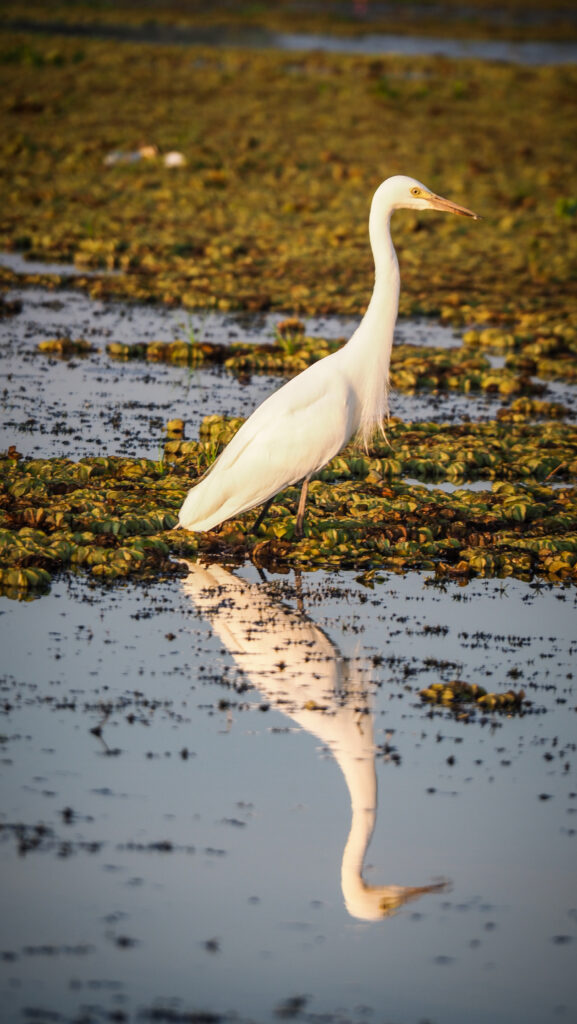


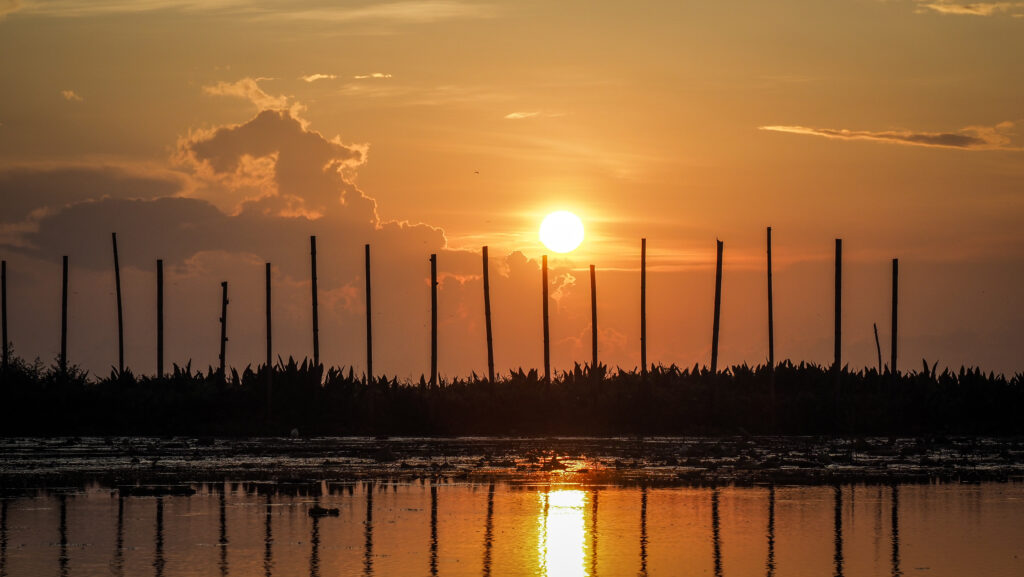
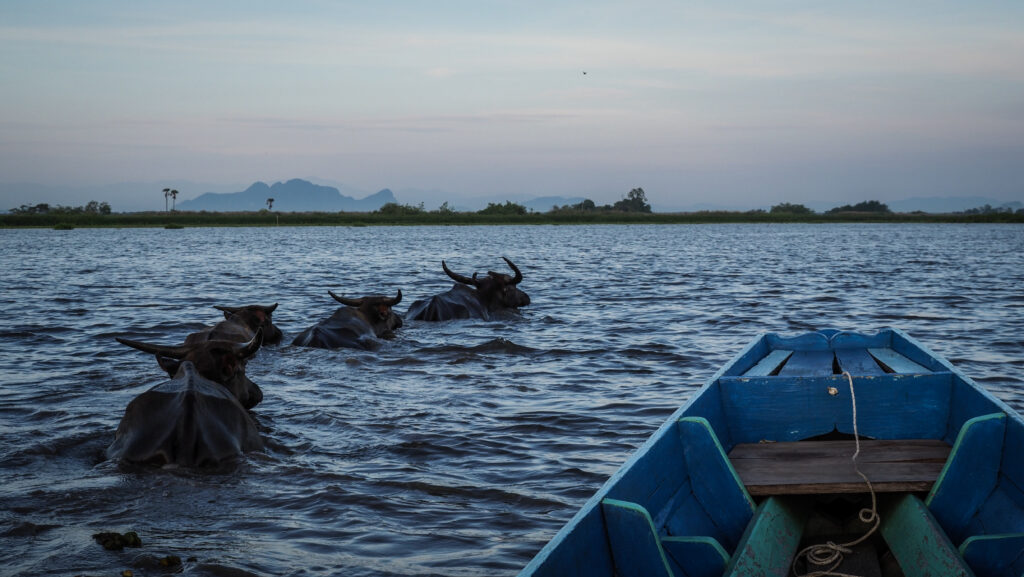

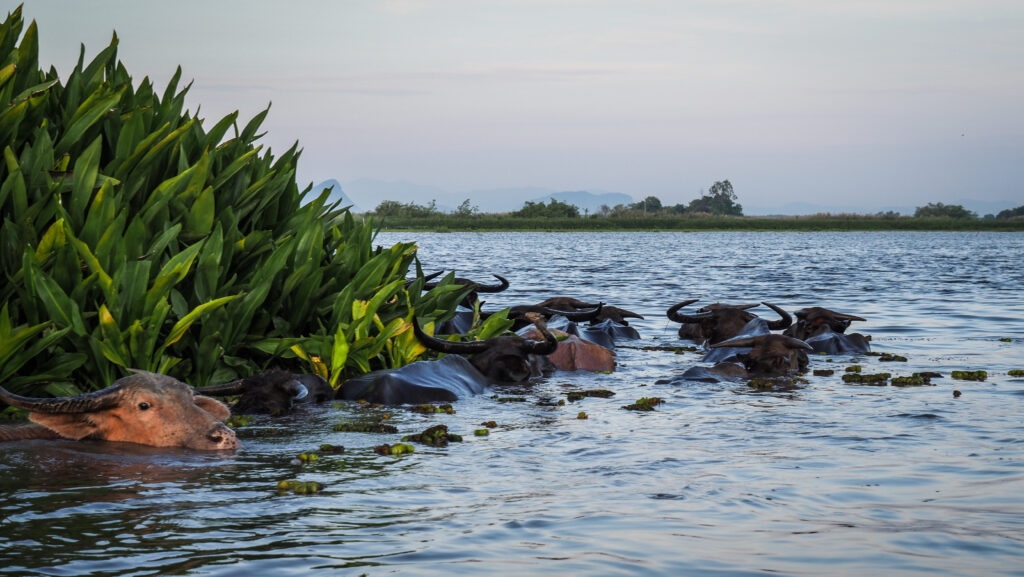
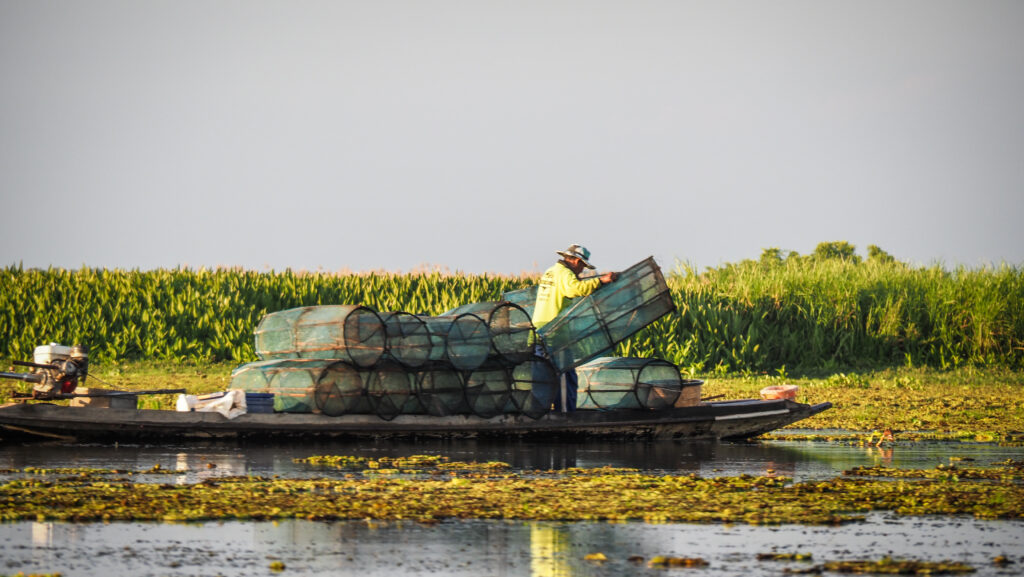
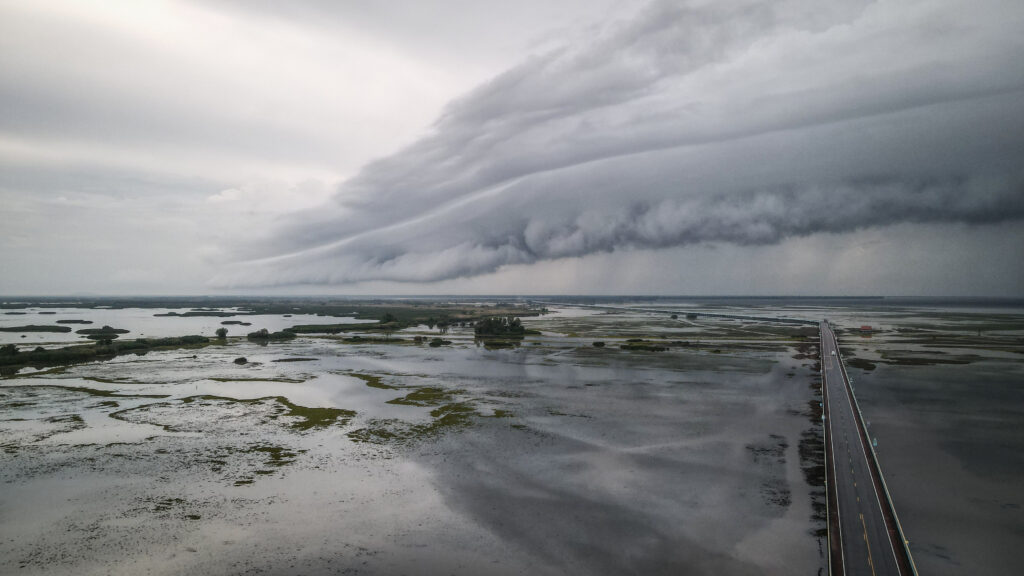
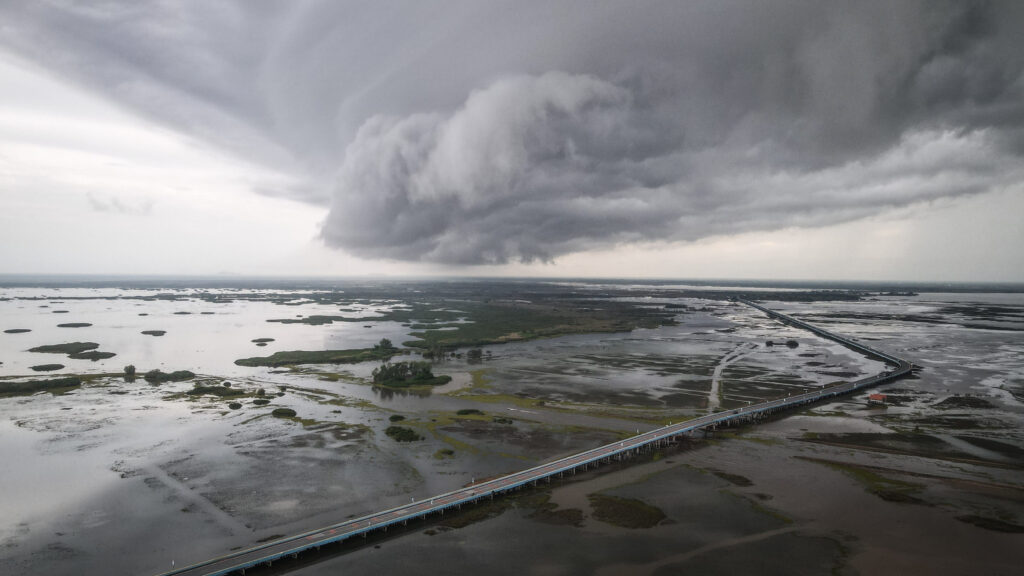
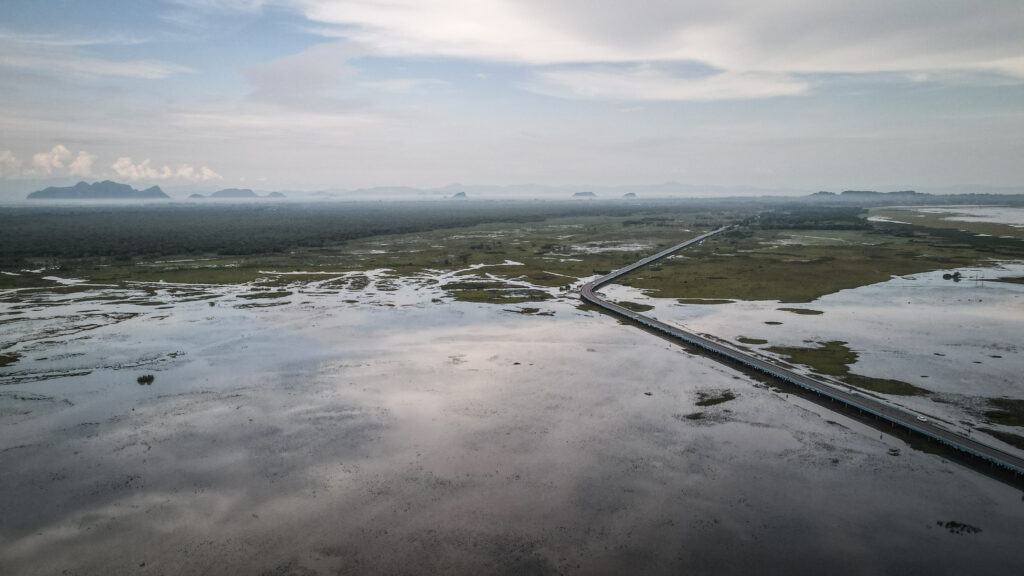
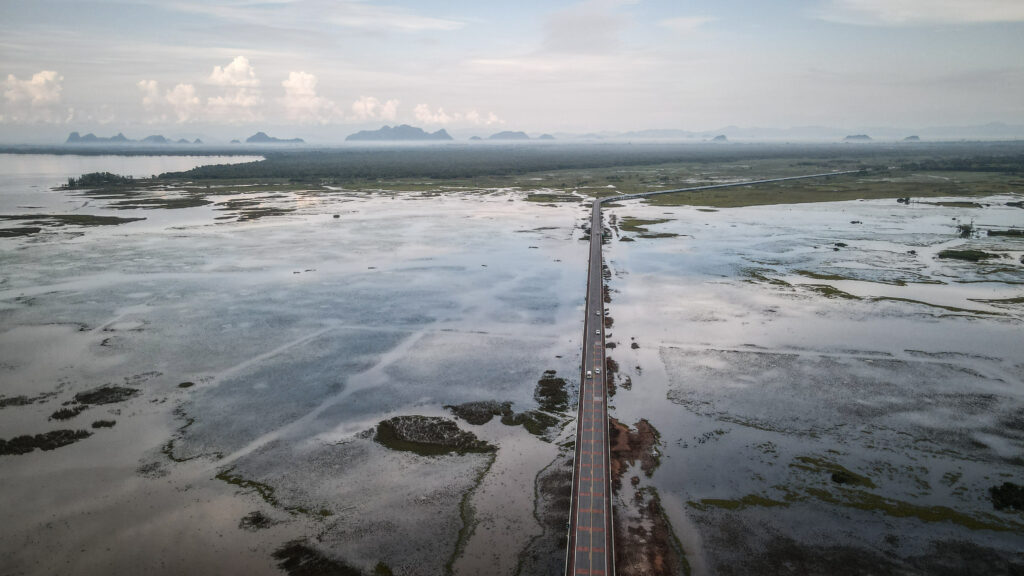

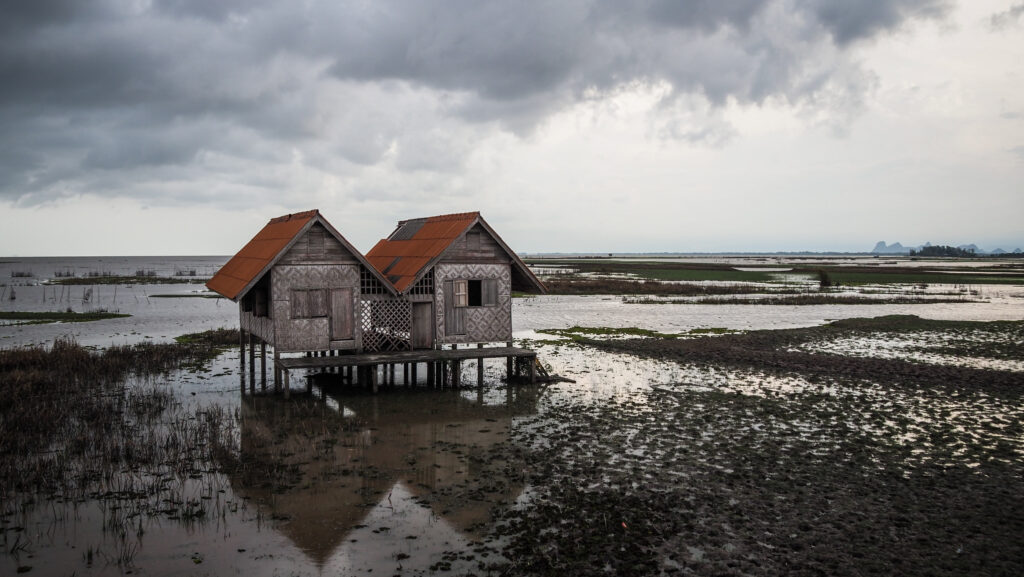
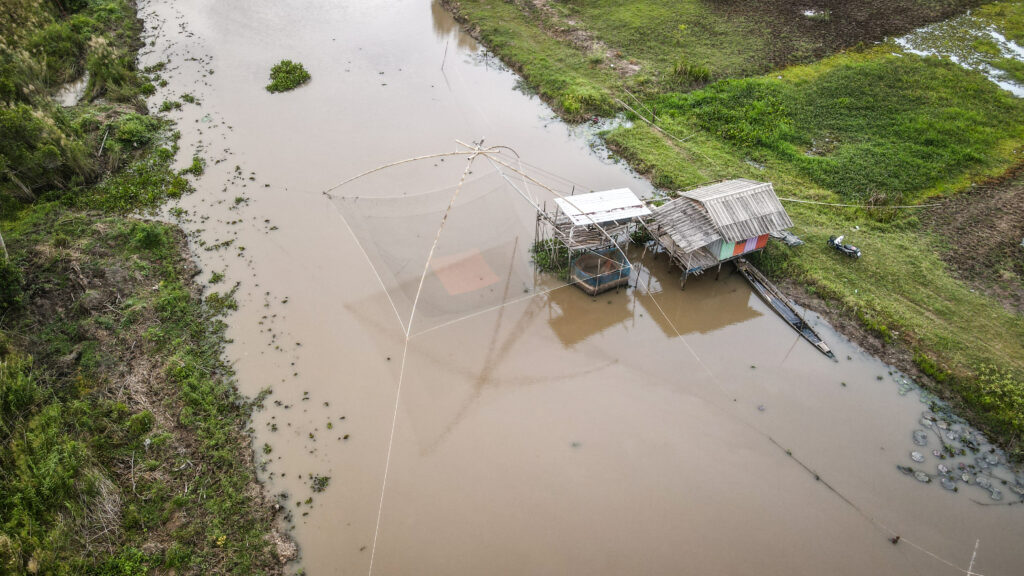
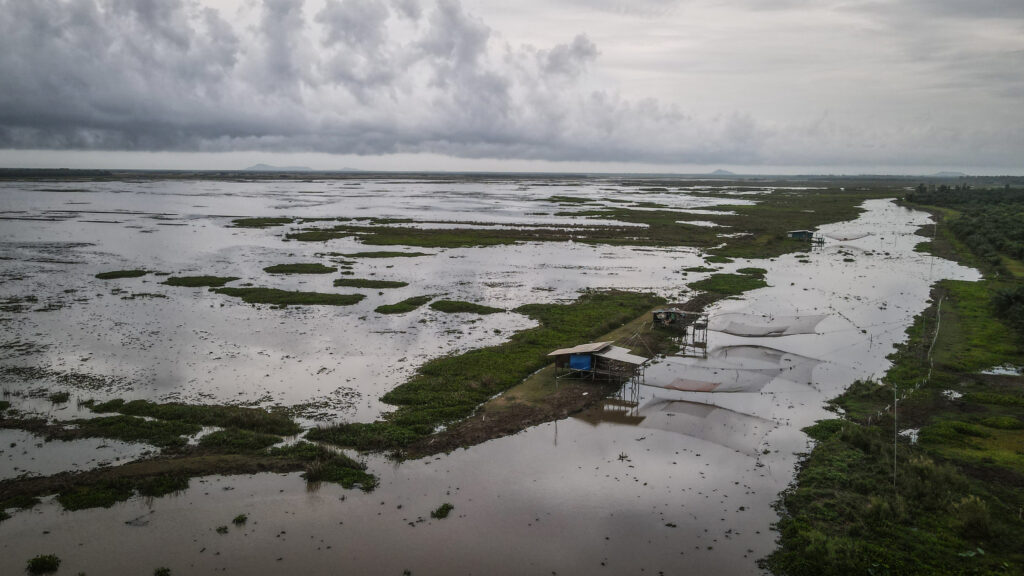
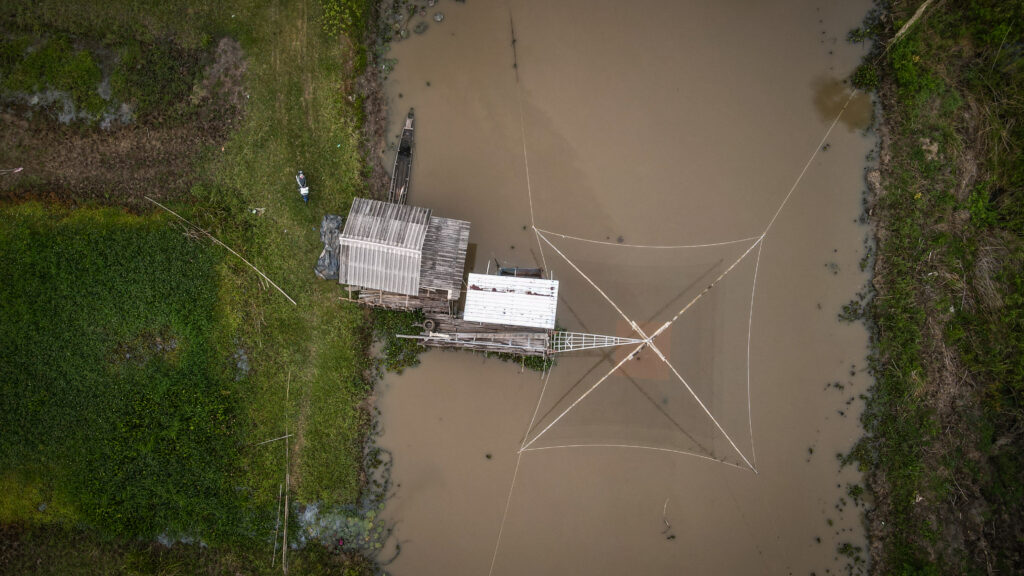
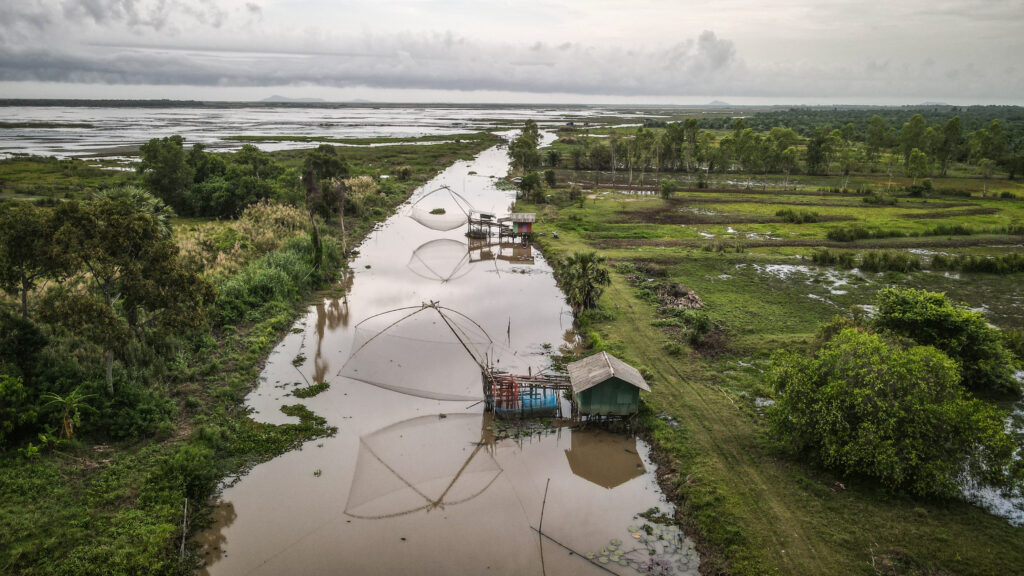

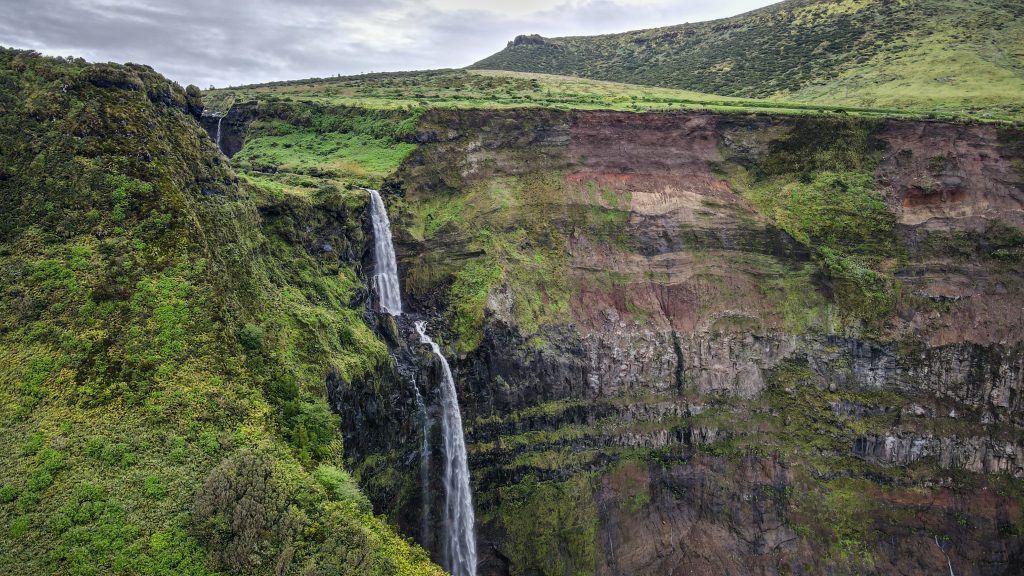
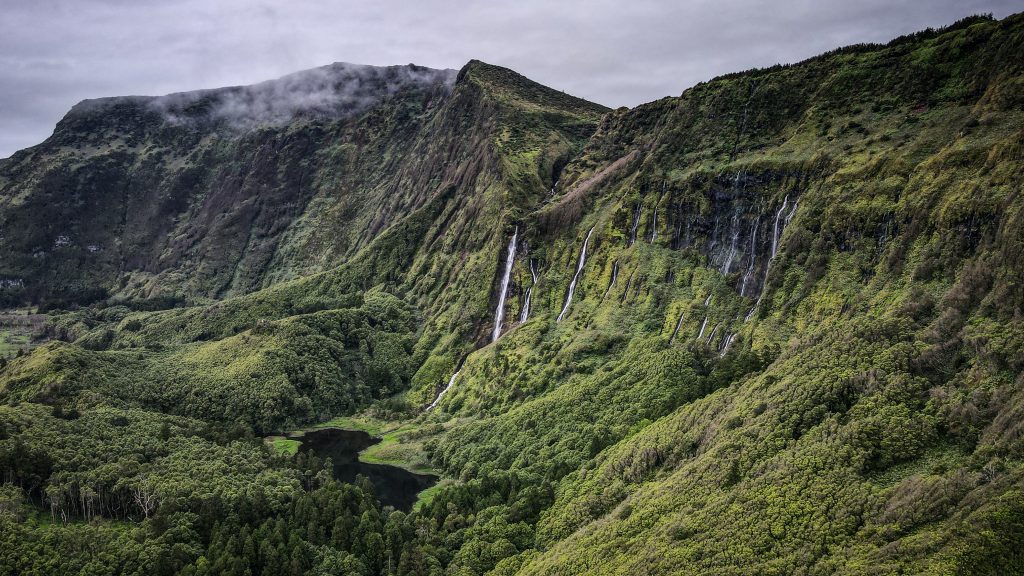


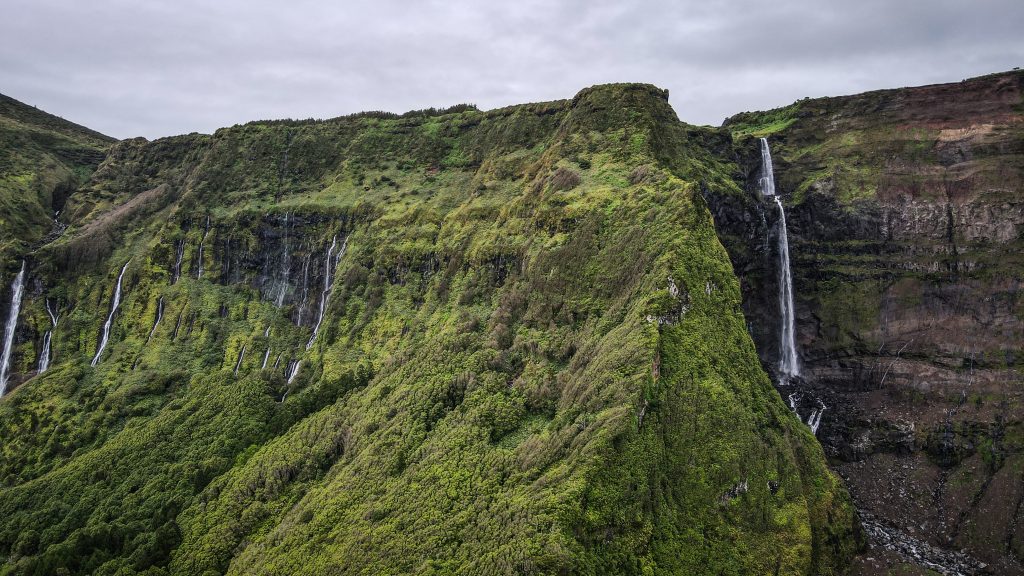
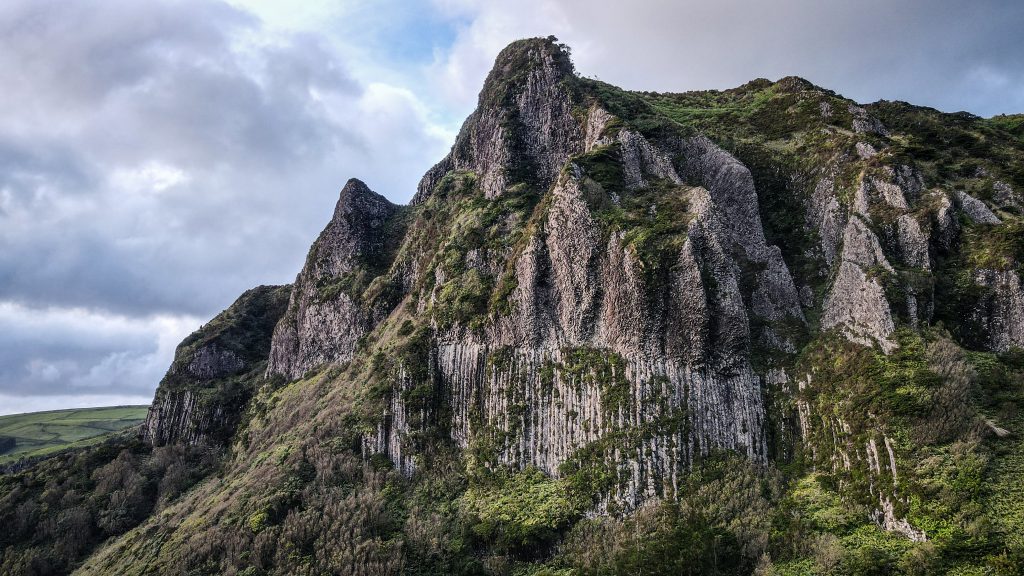


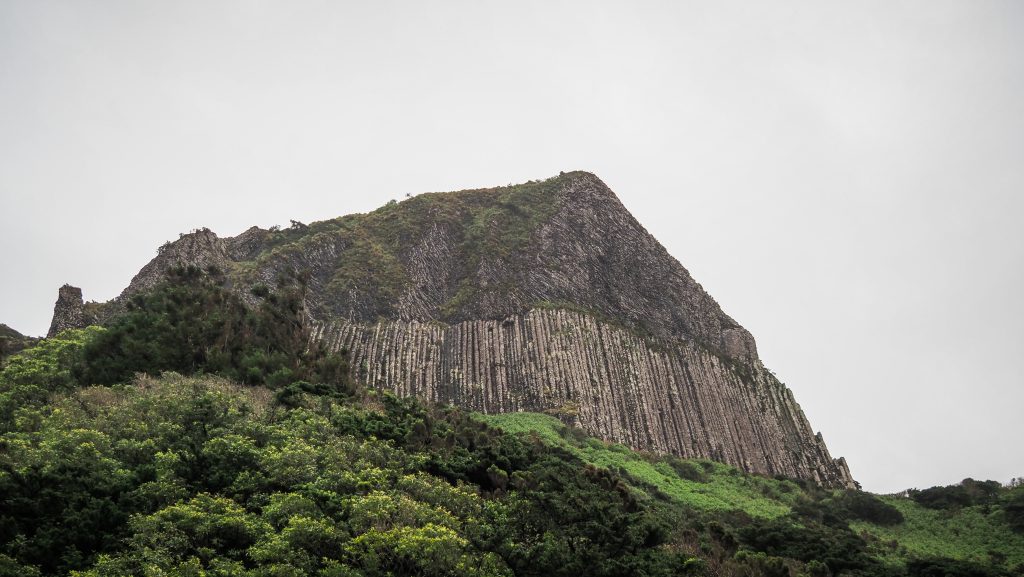
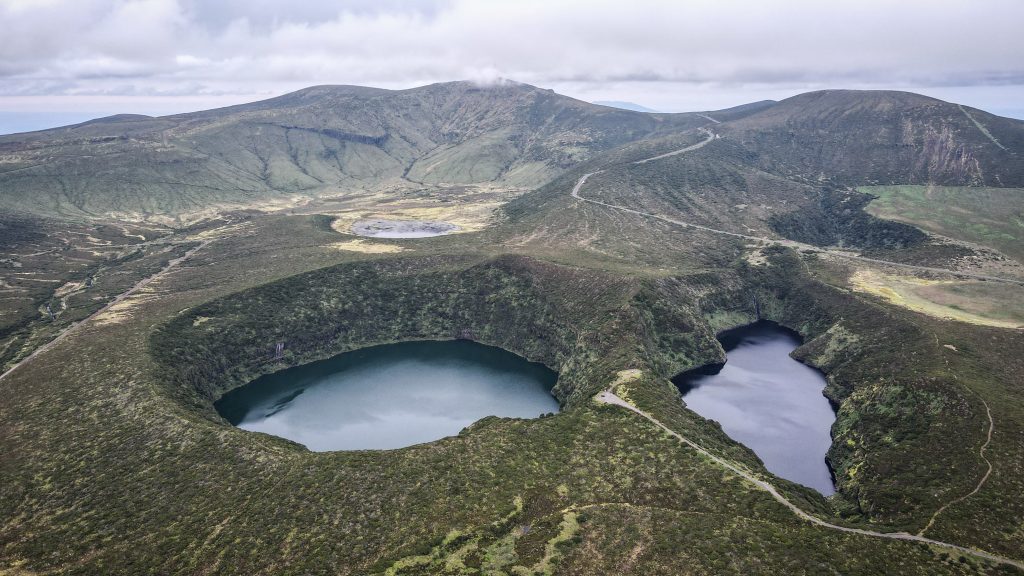
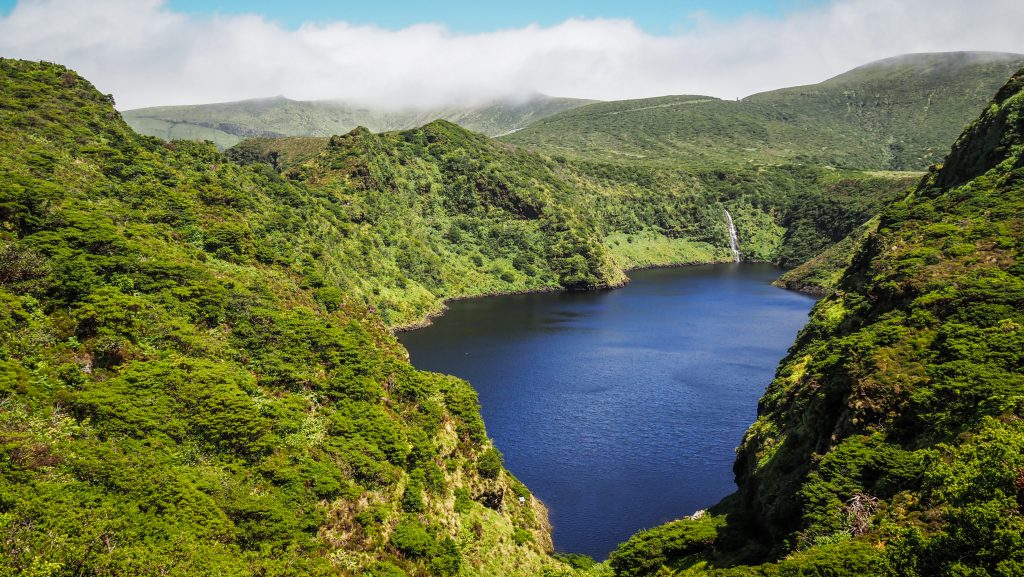

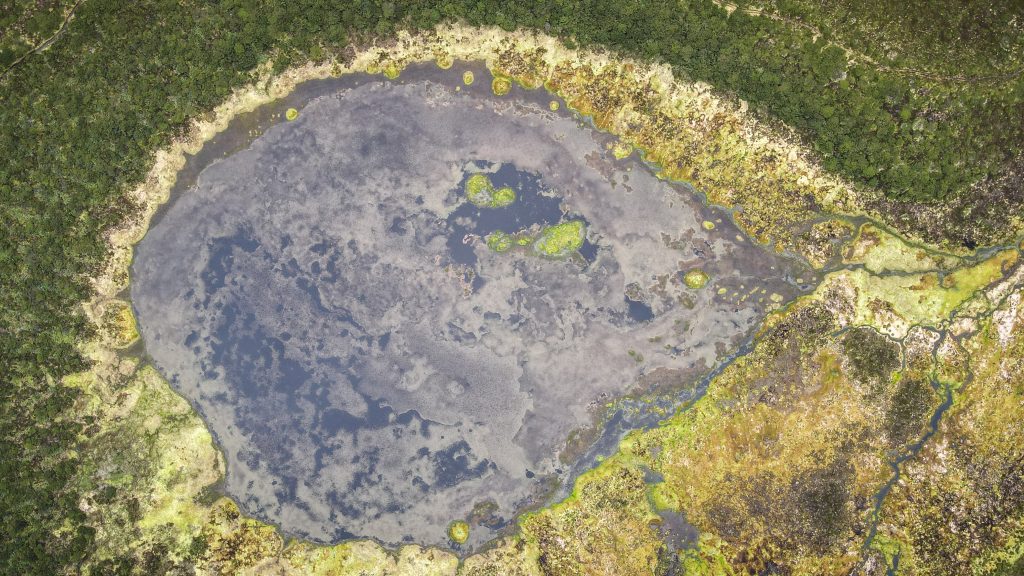
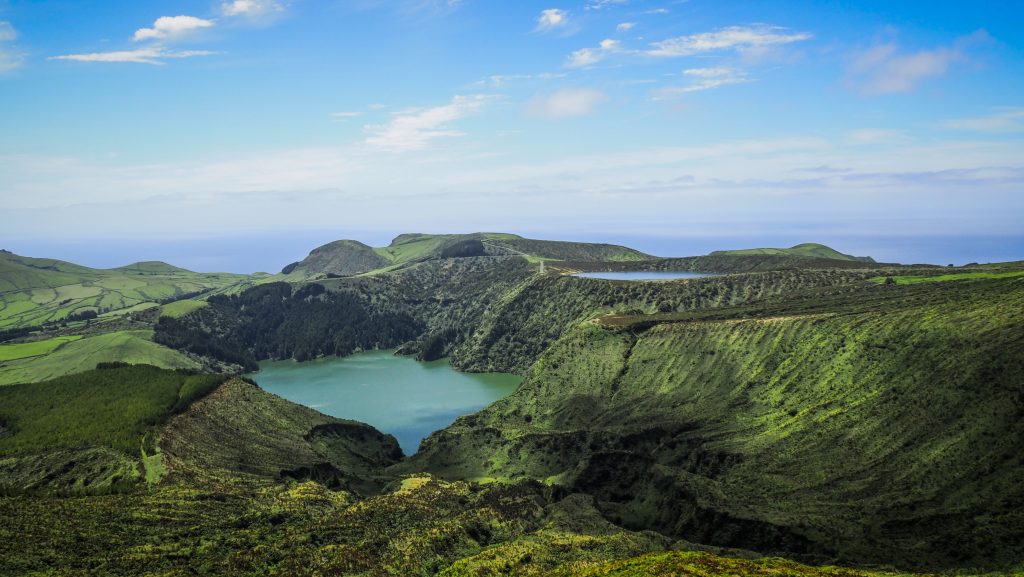
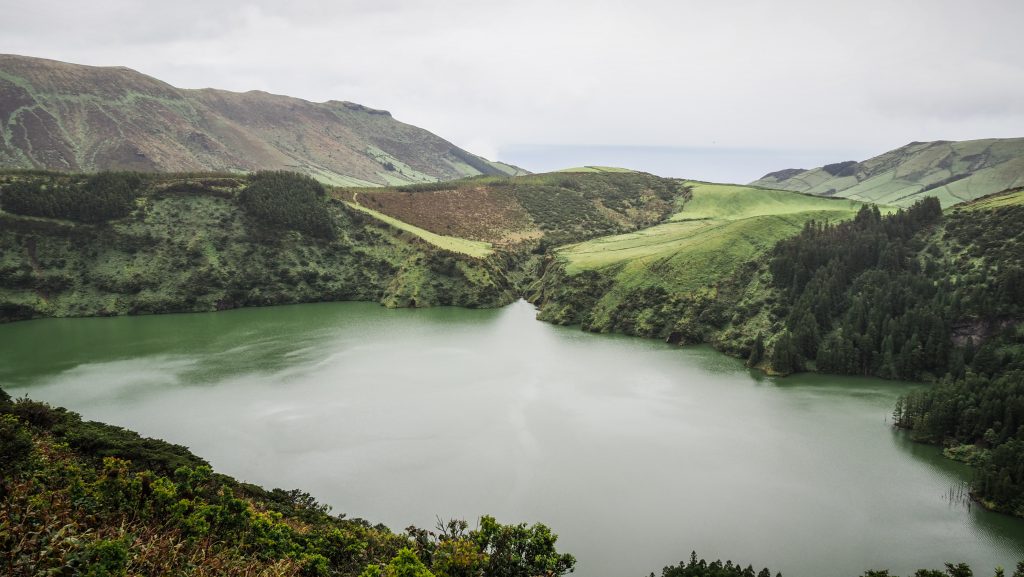
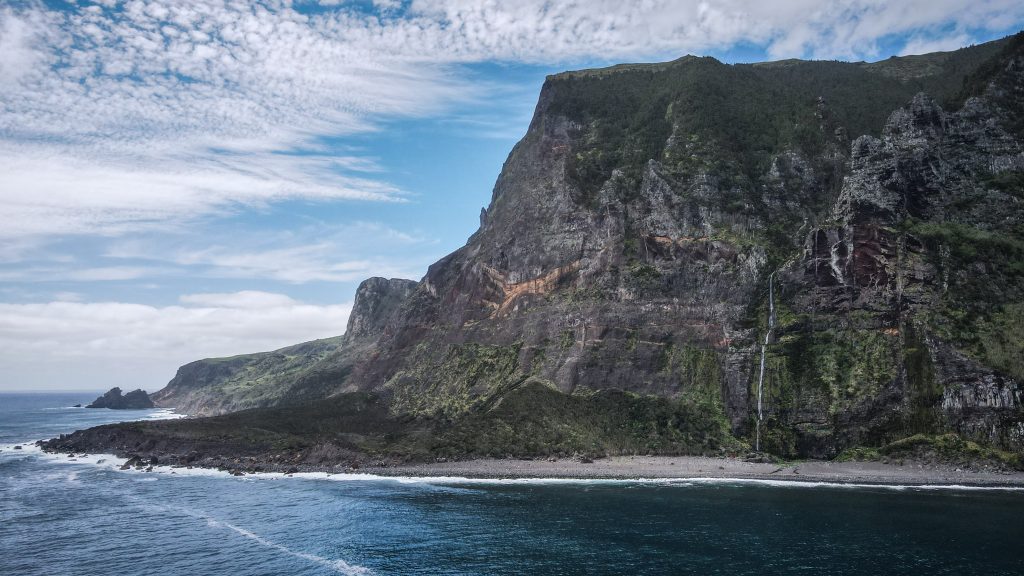

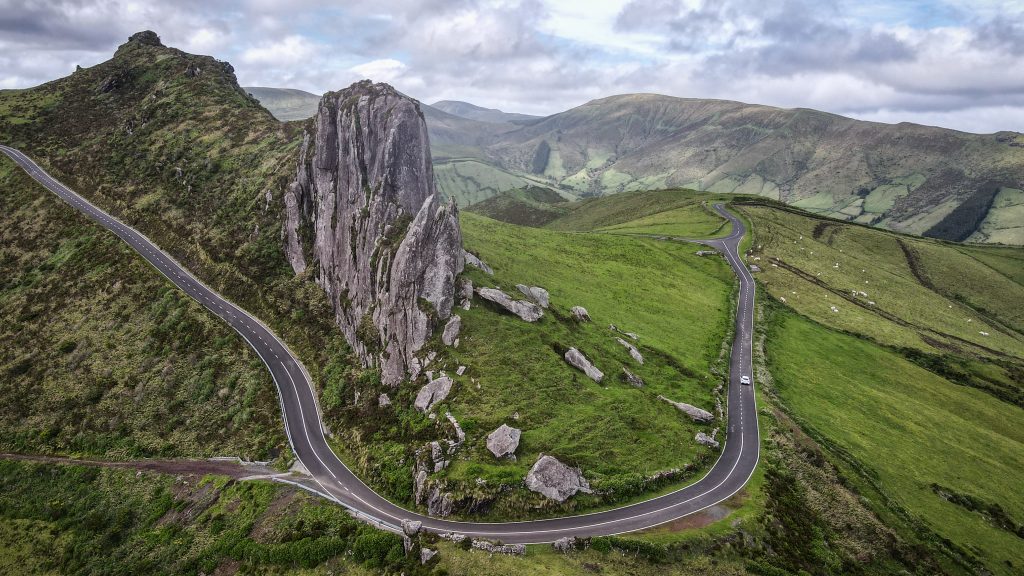
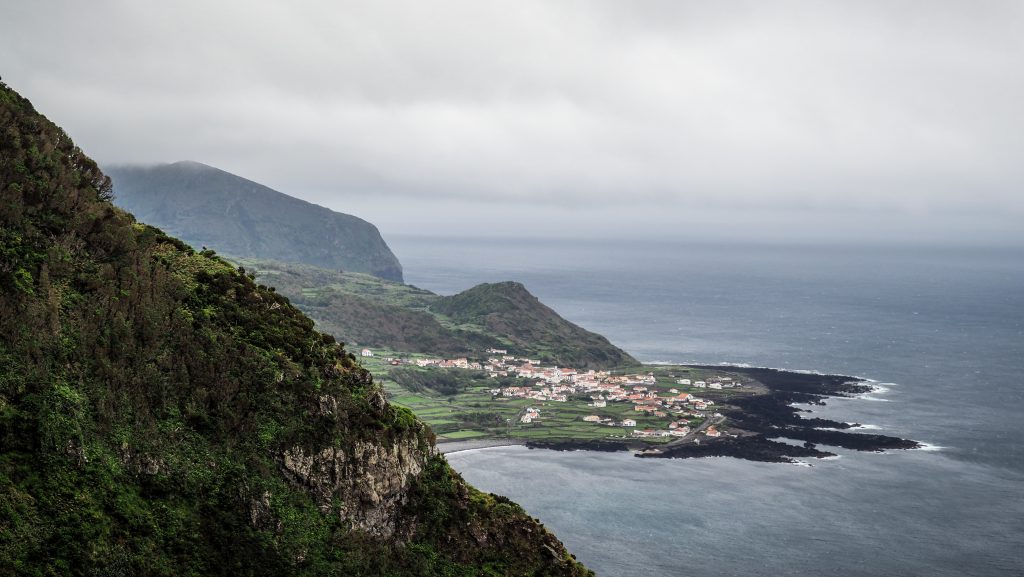
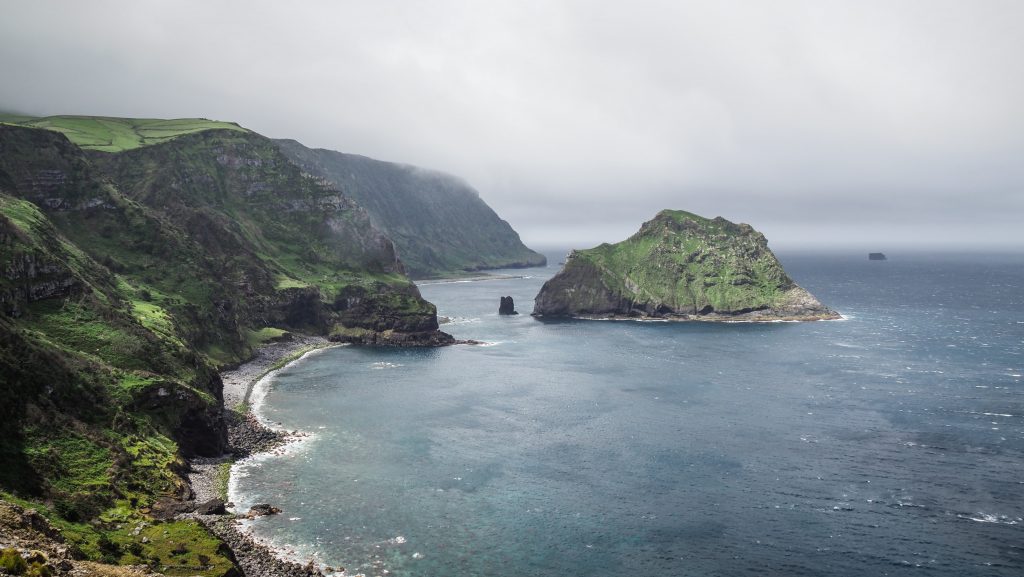
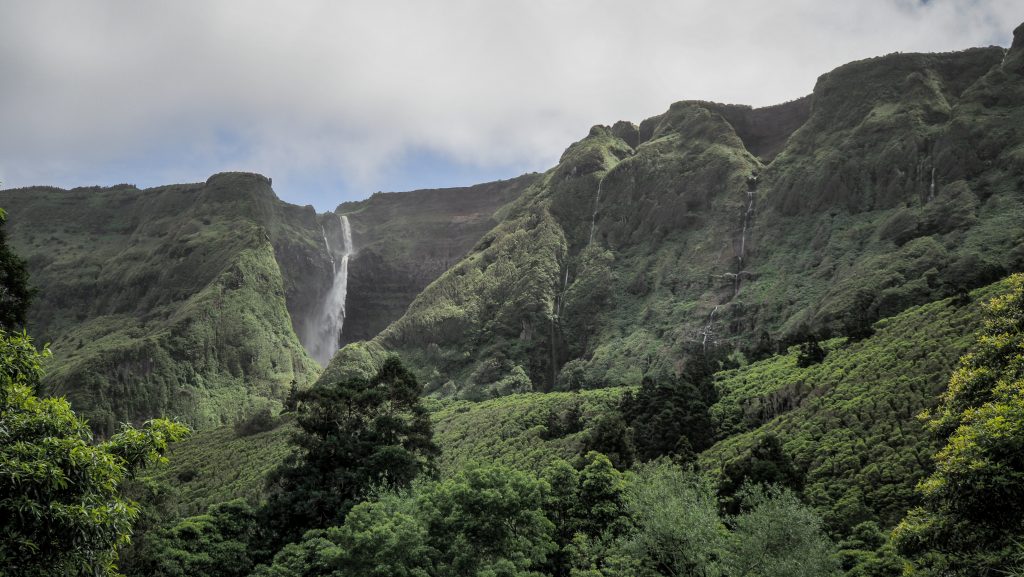
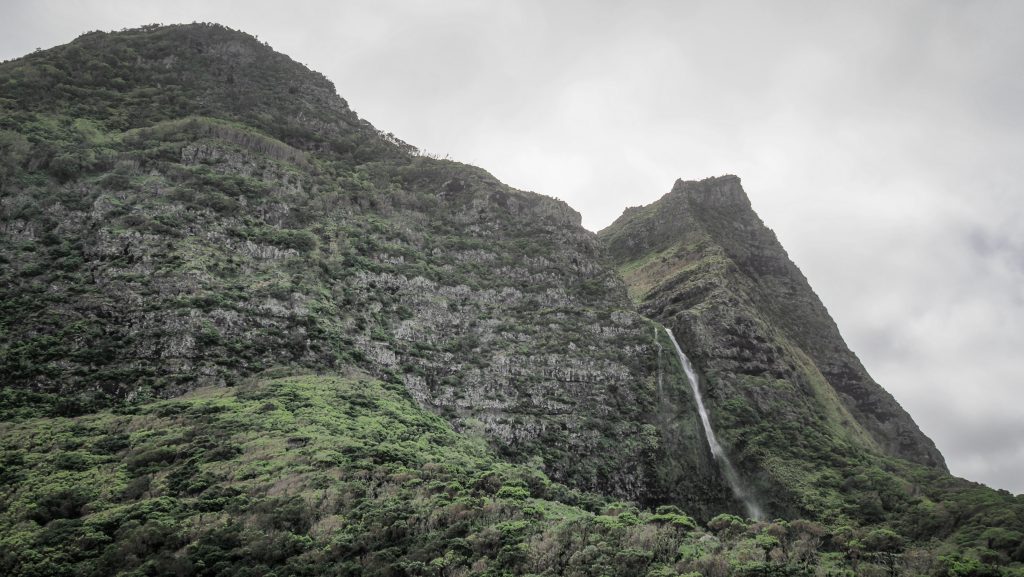
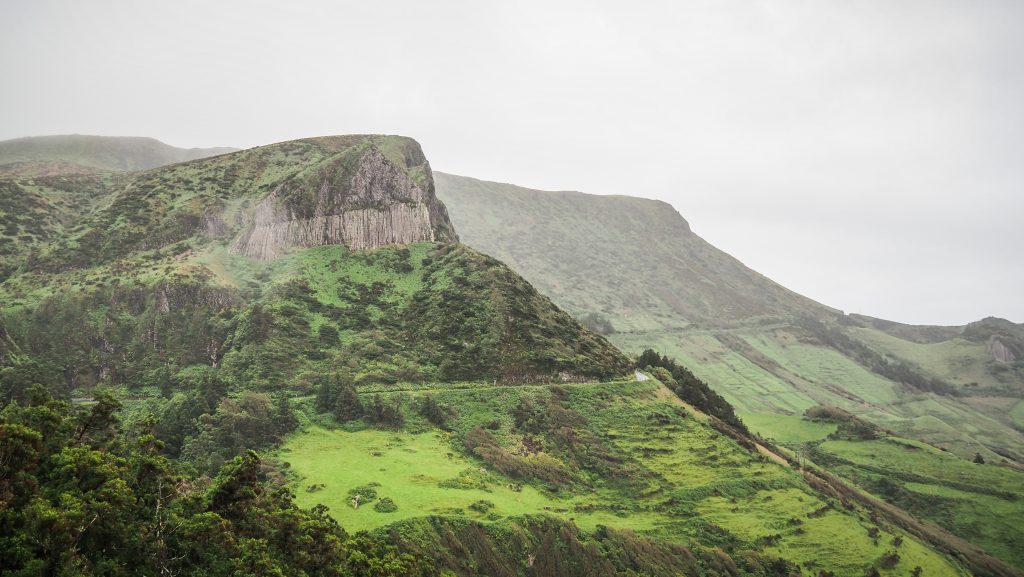
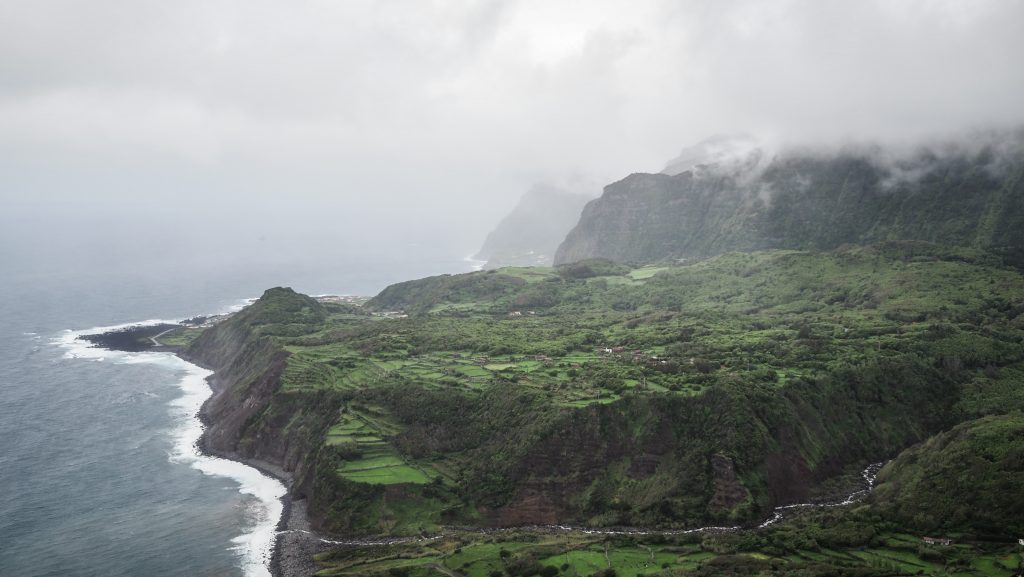
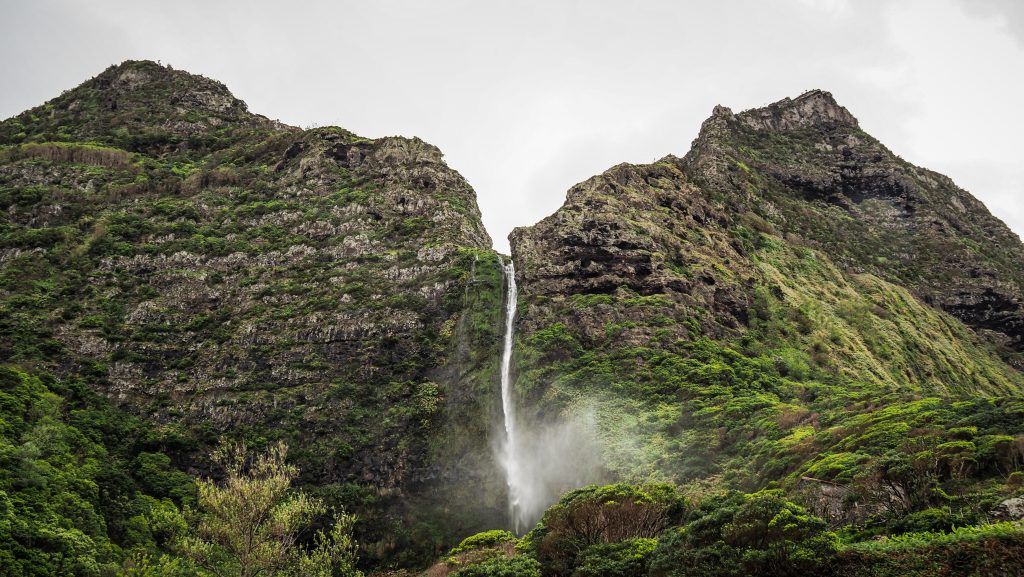
: Złoty Stok – Głuchołazy")
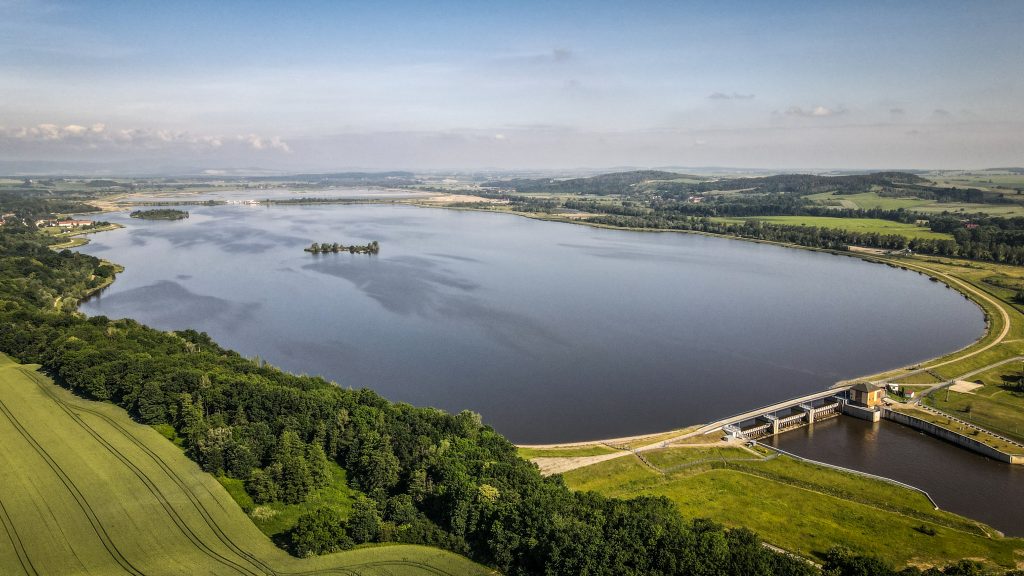
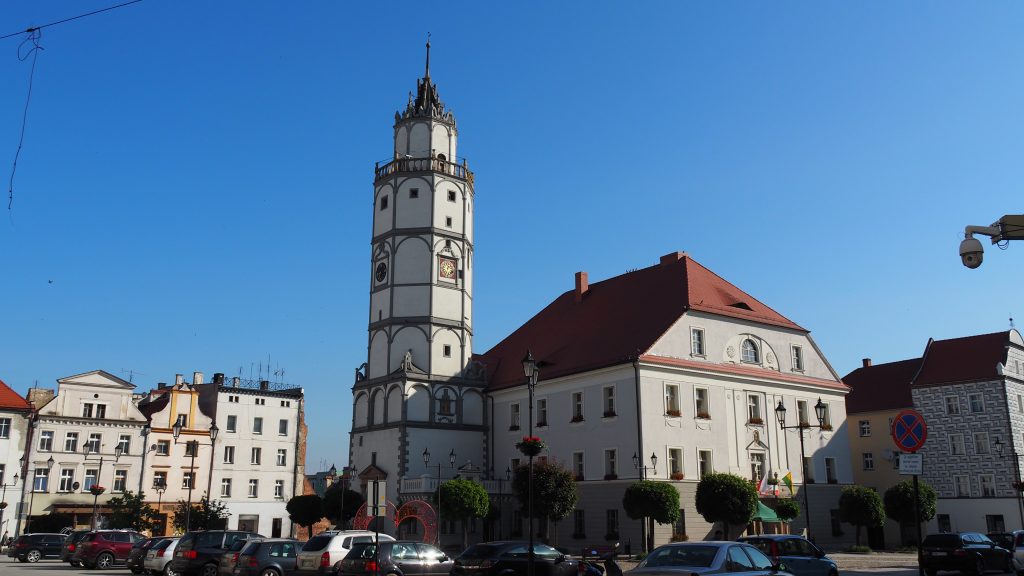

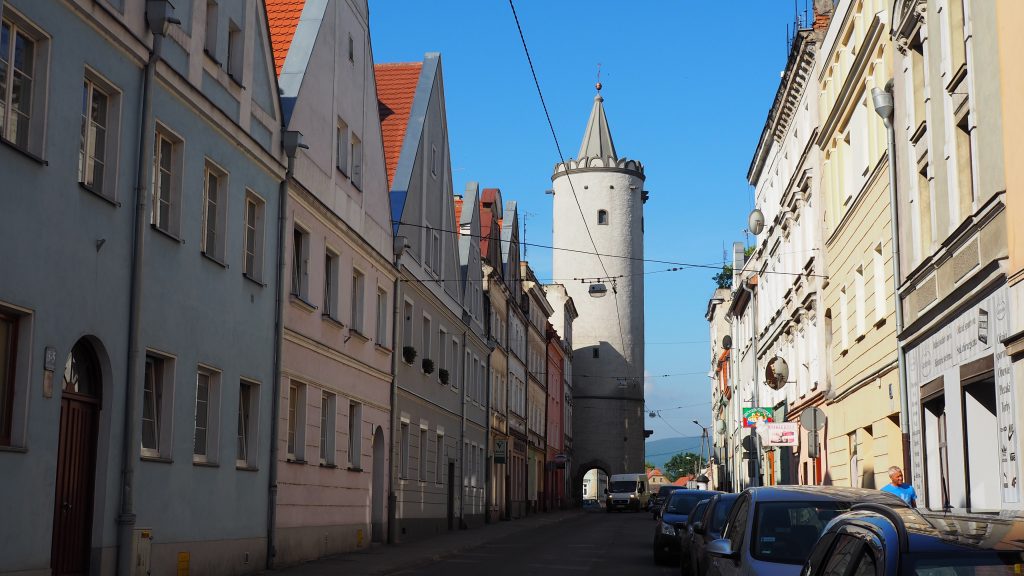
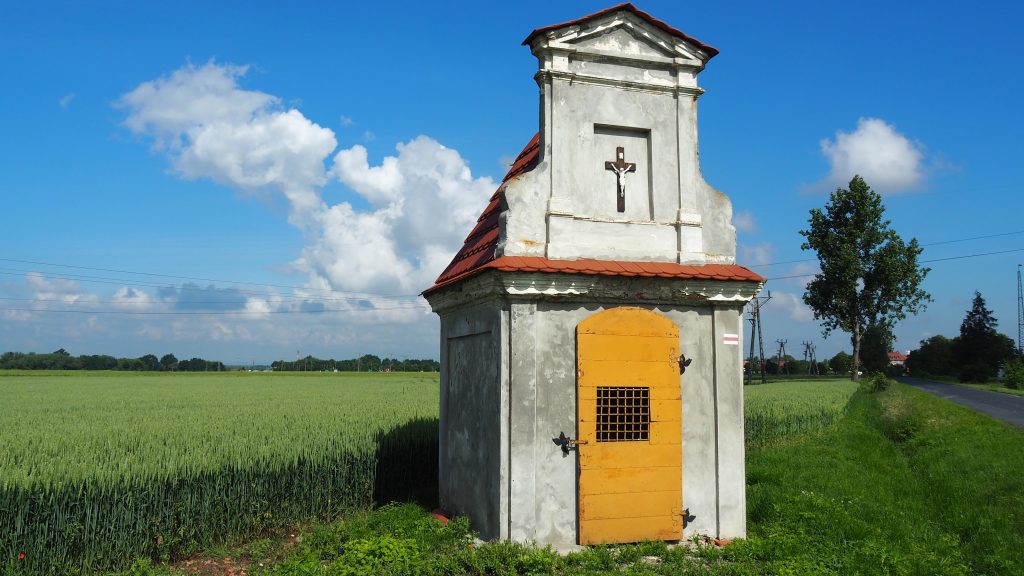
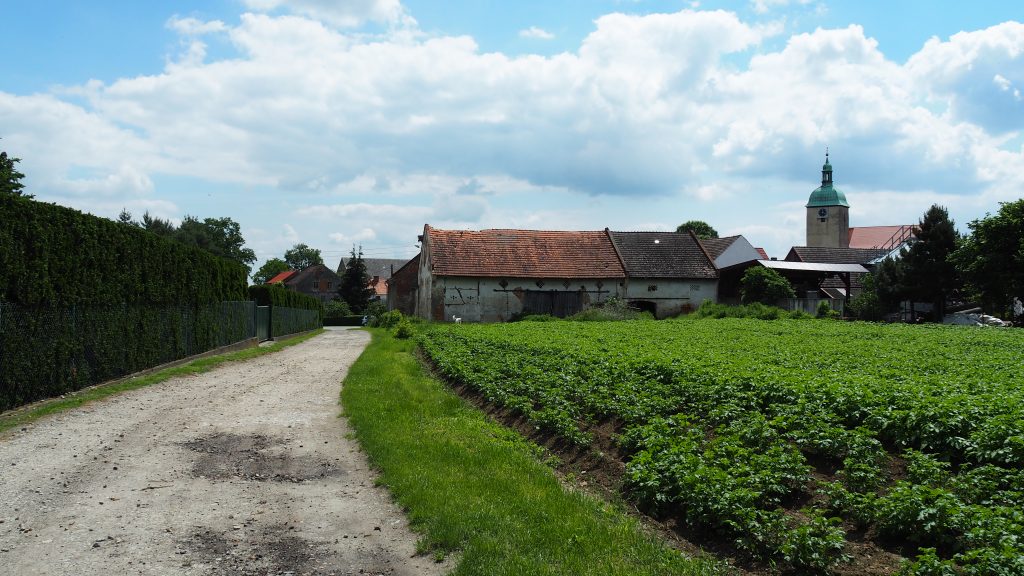
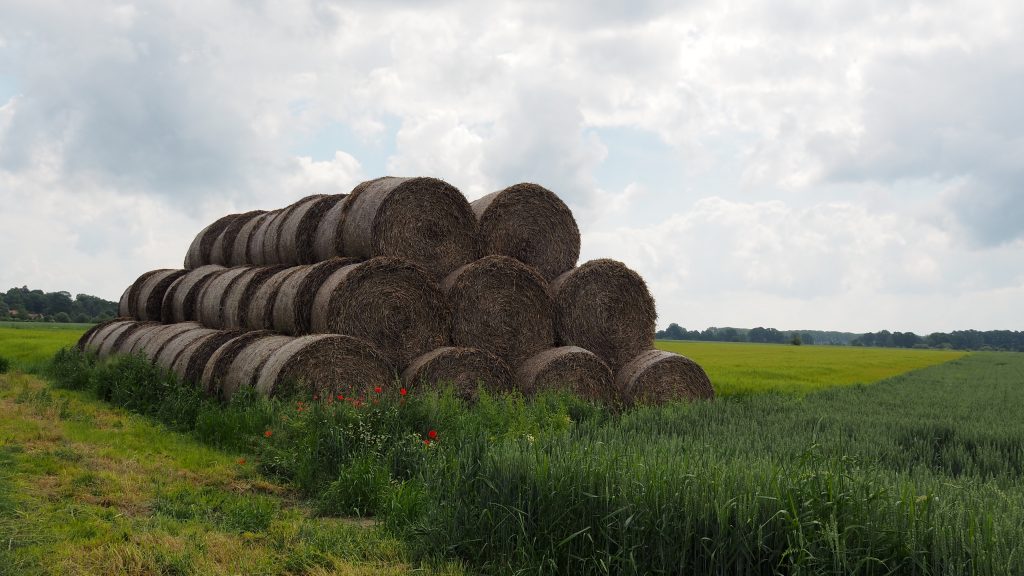
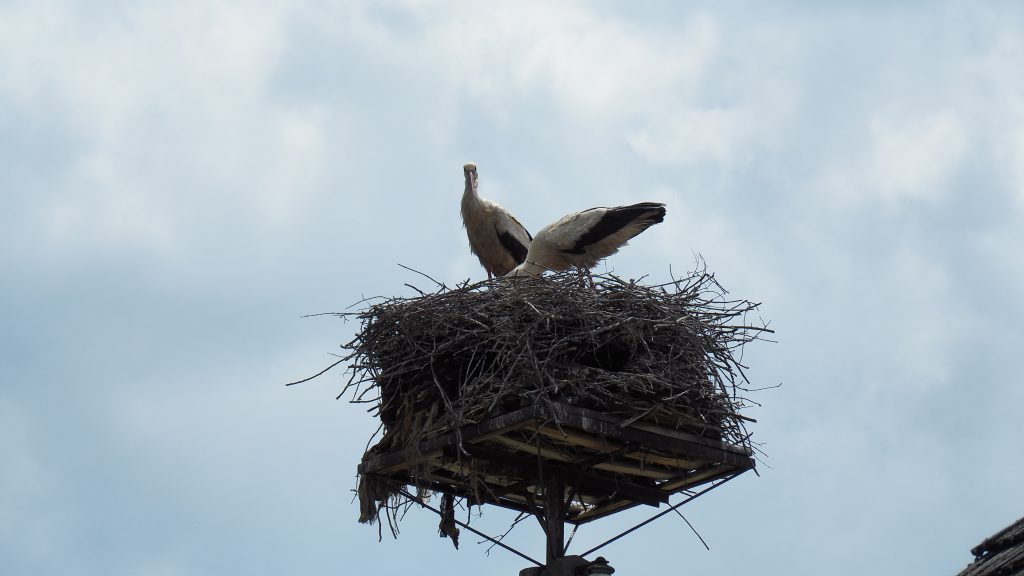
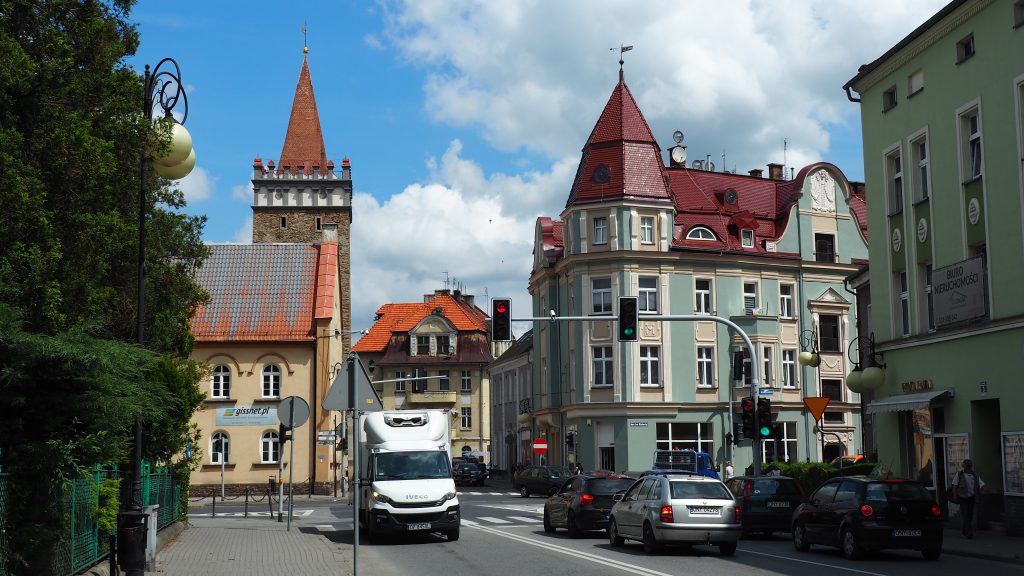
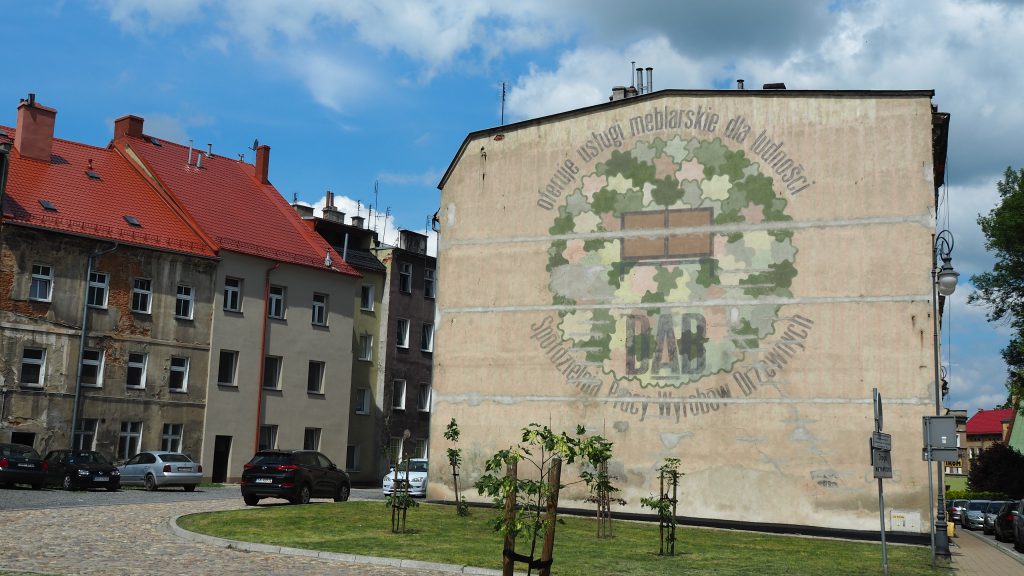

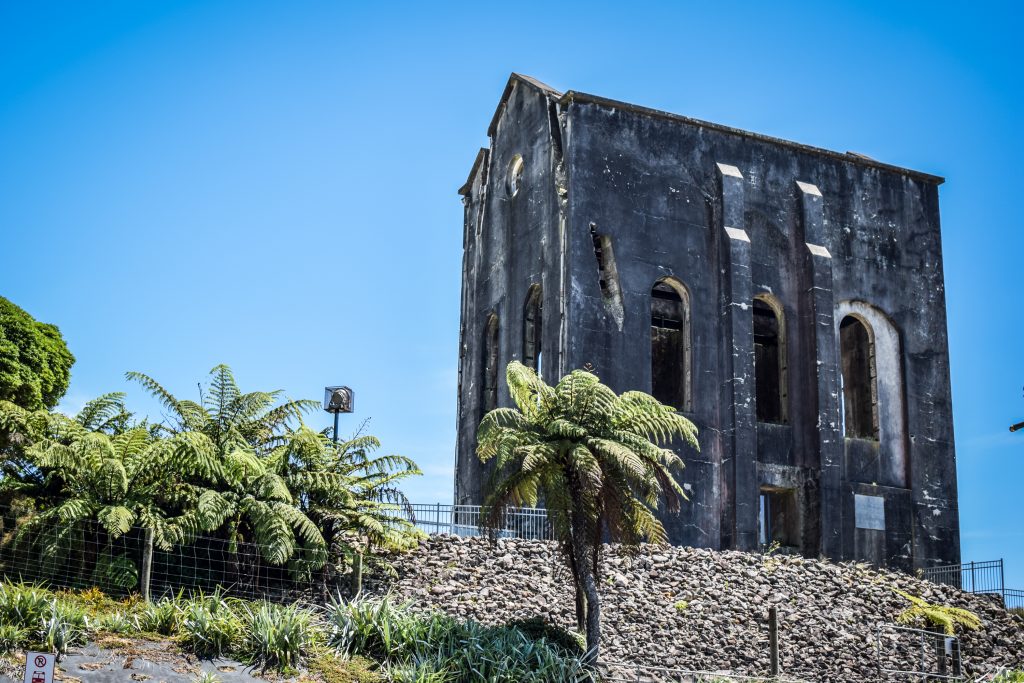
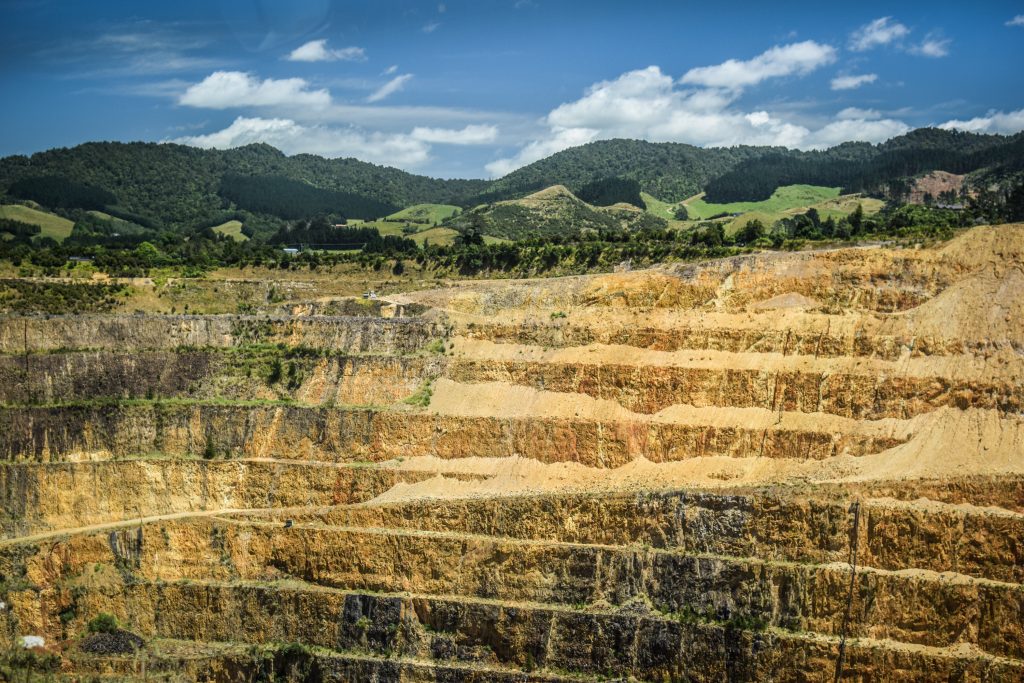
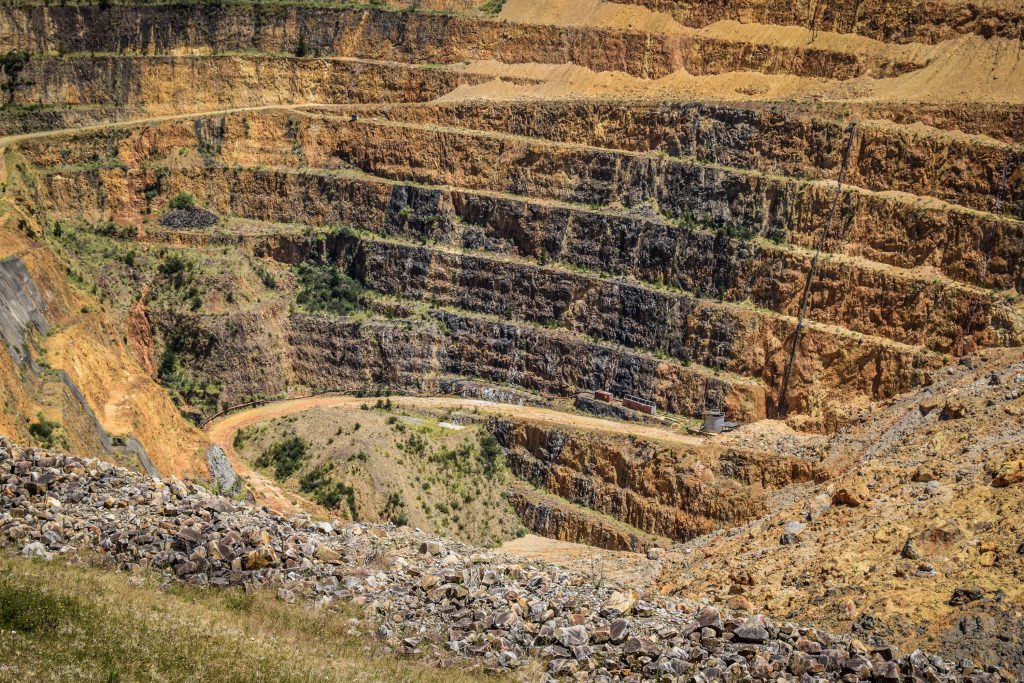
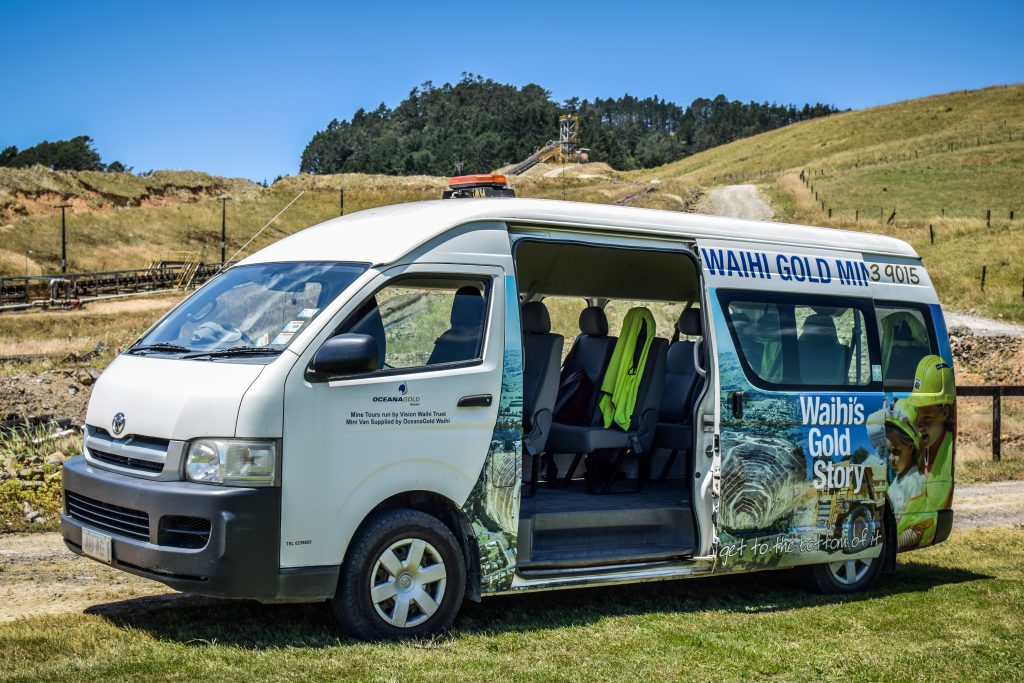
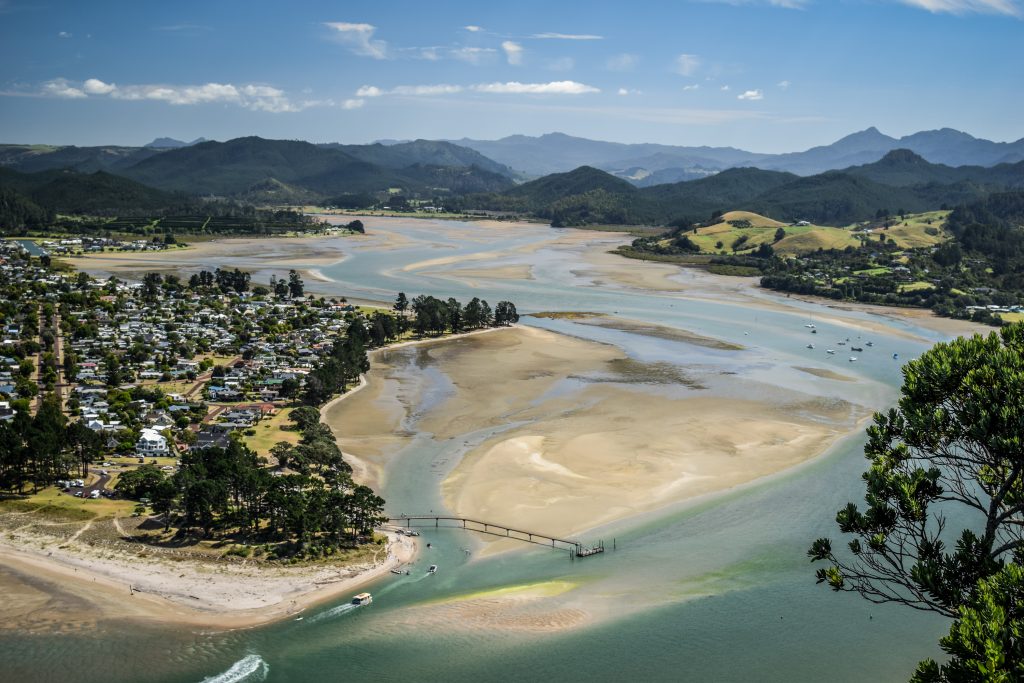
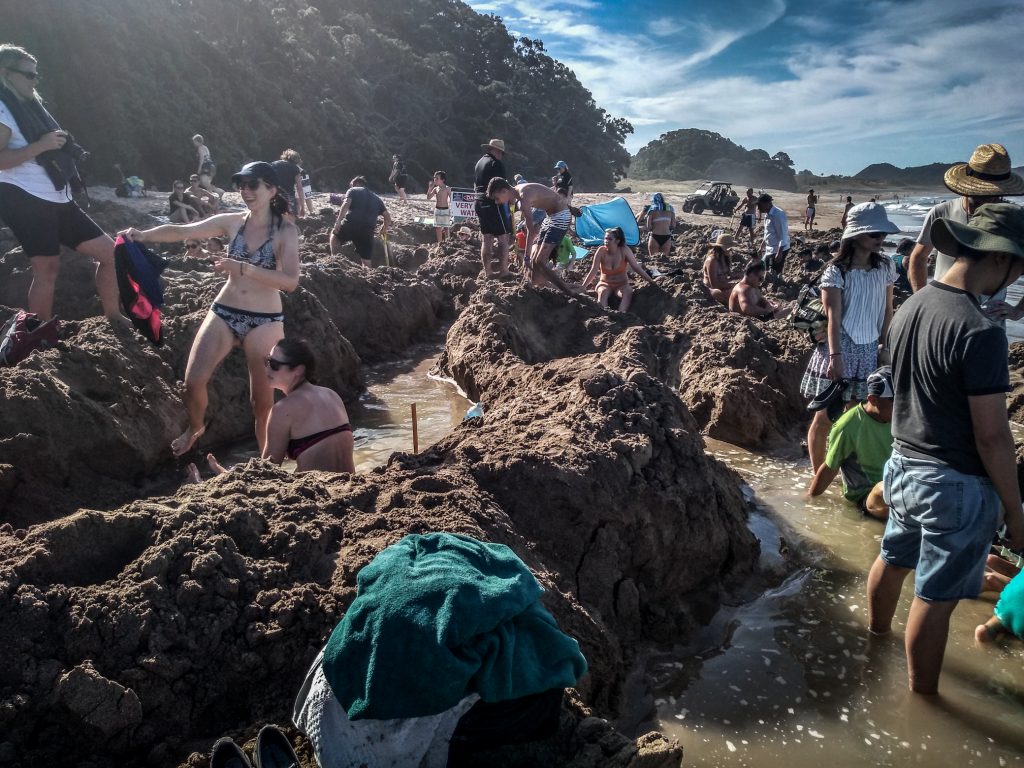
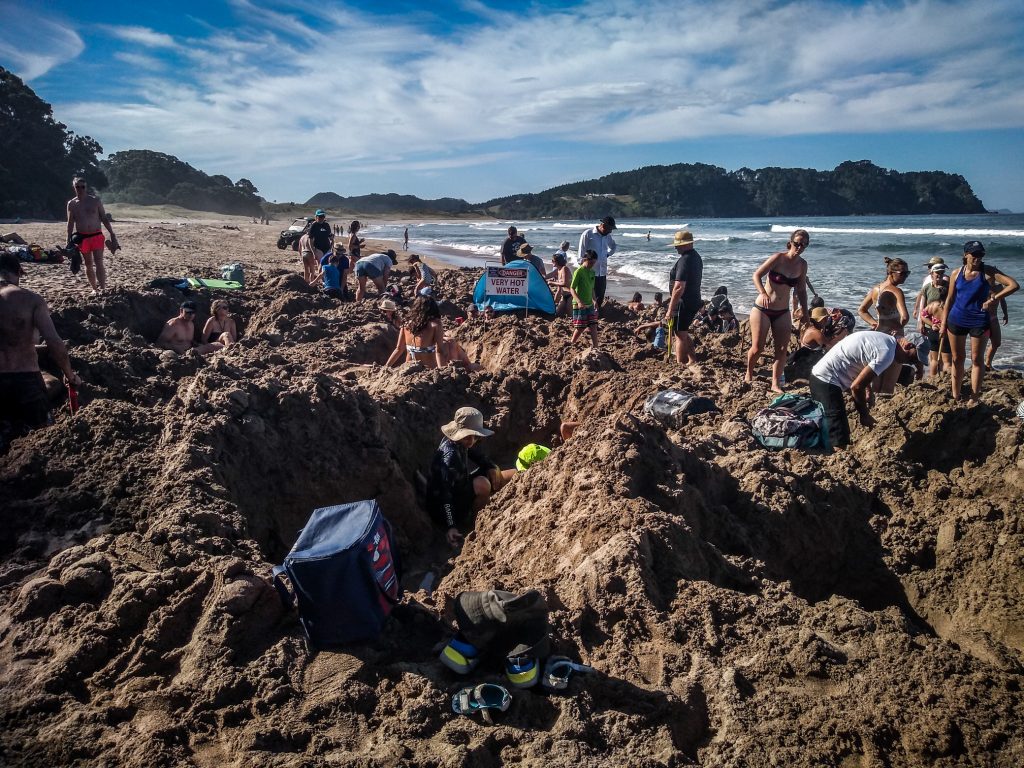

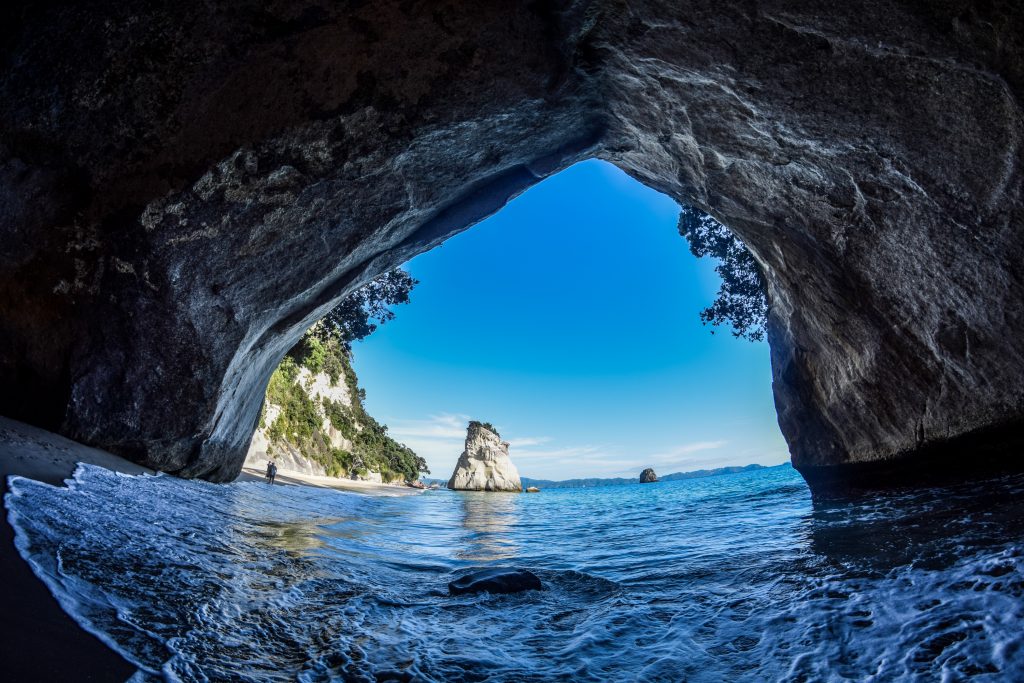
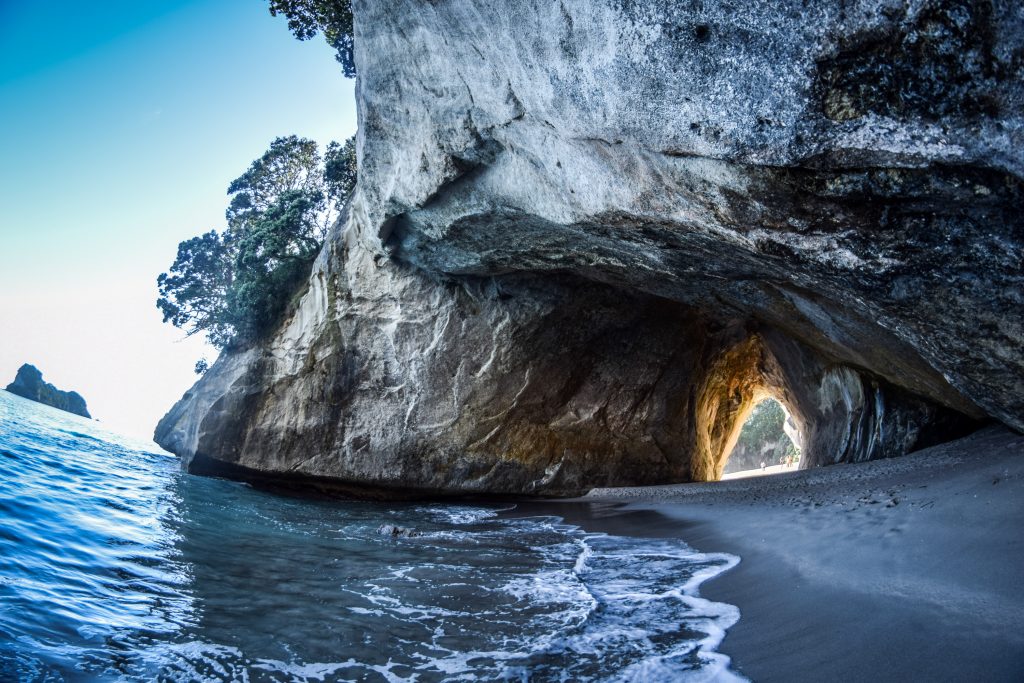
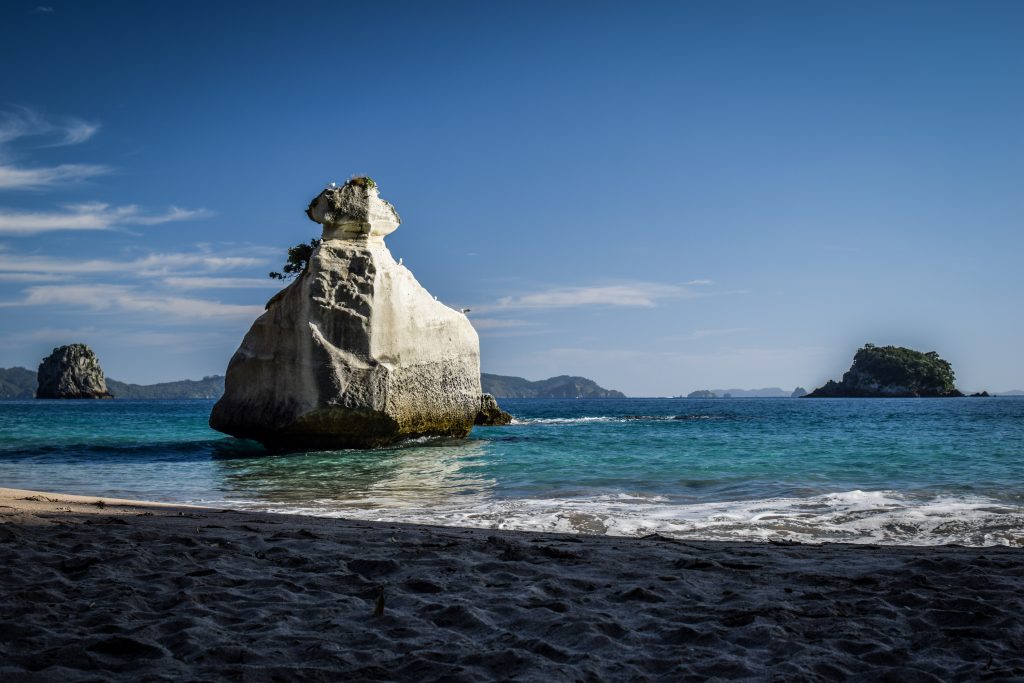
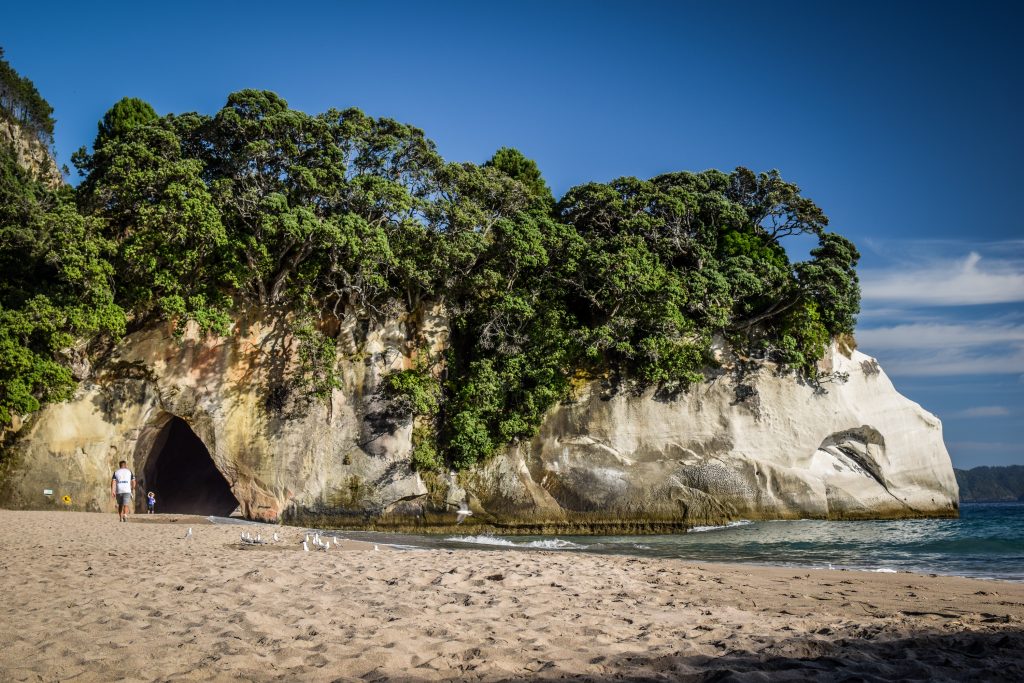
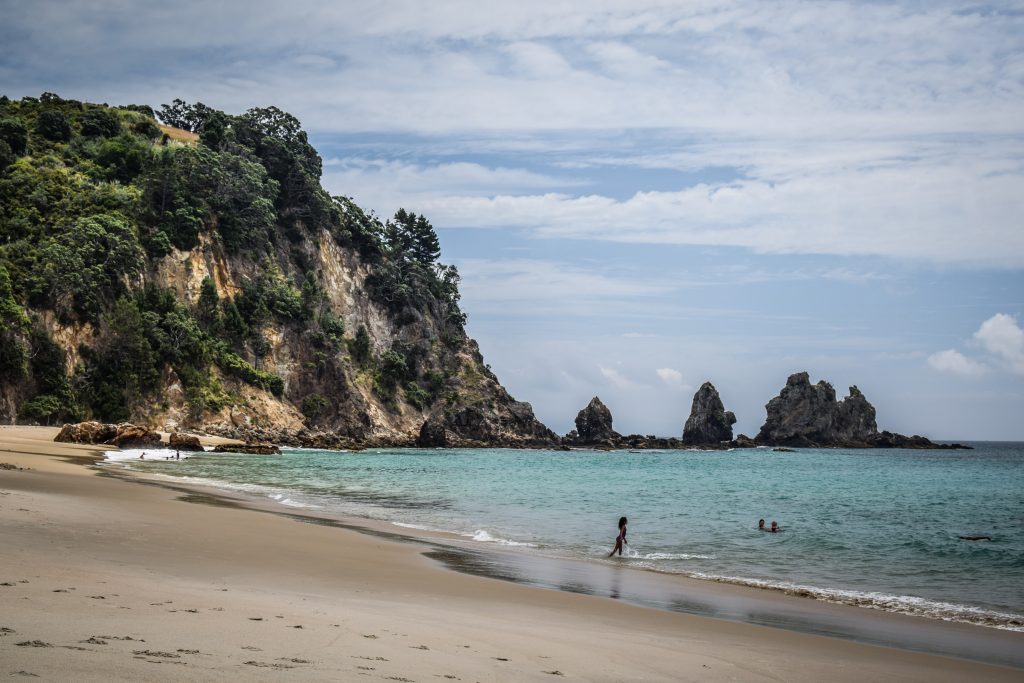
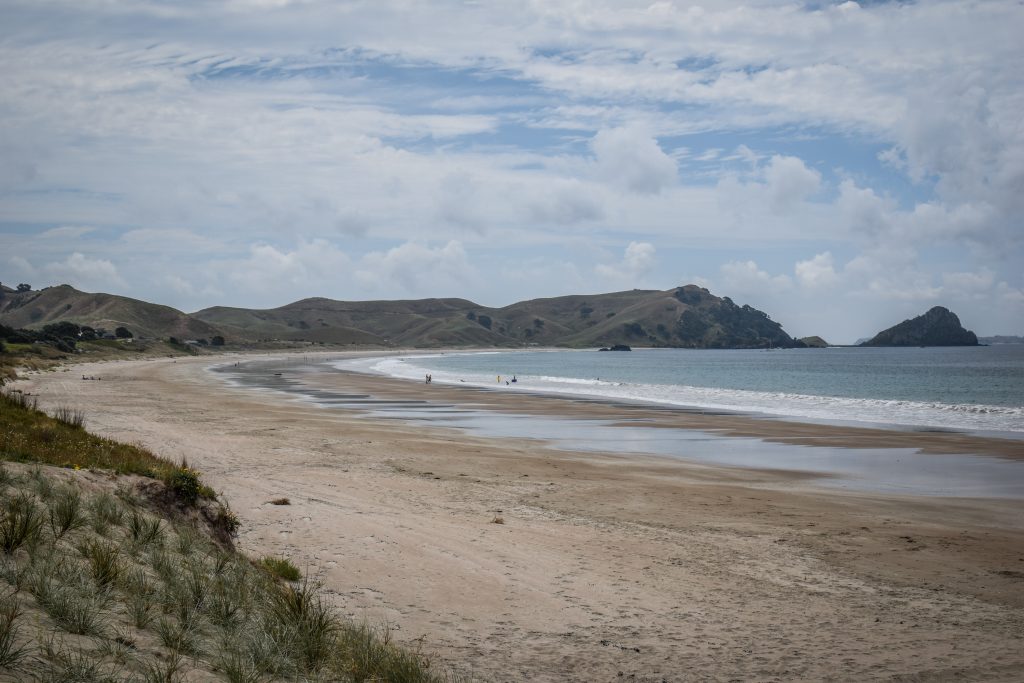
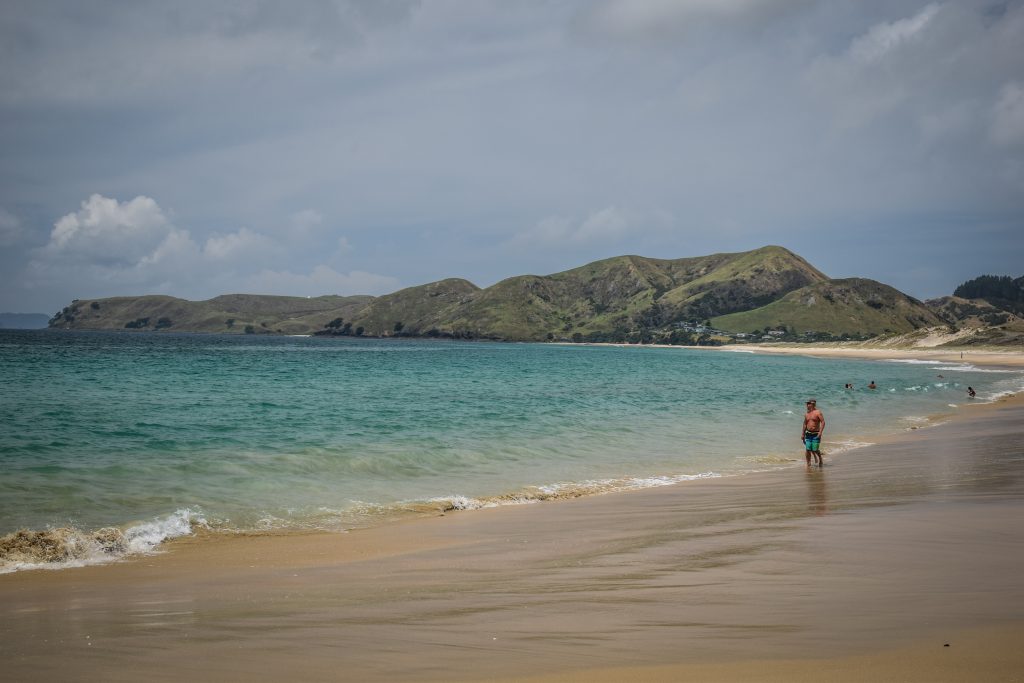
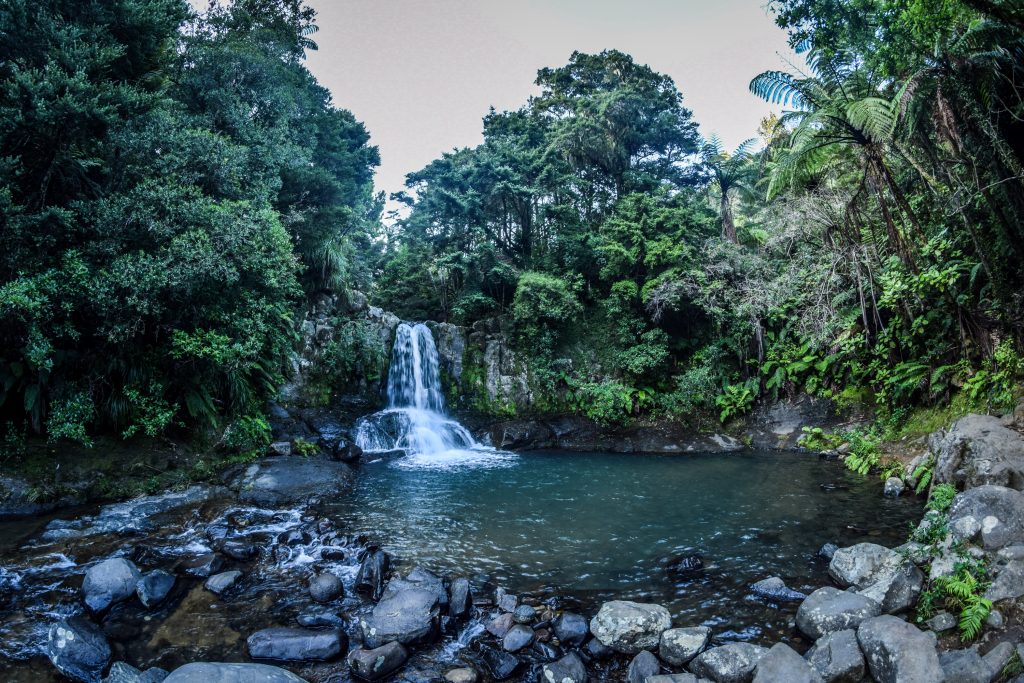
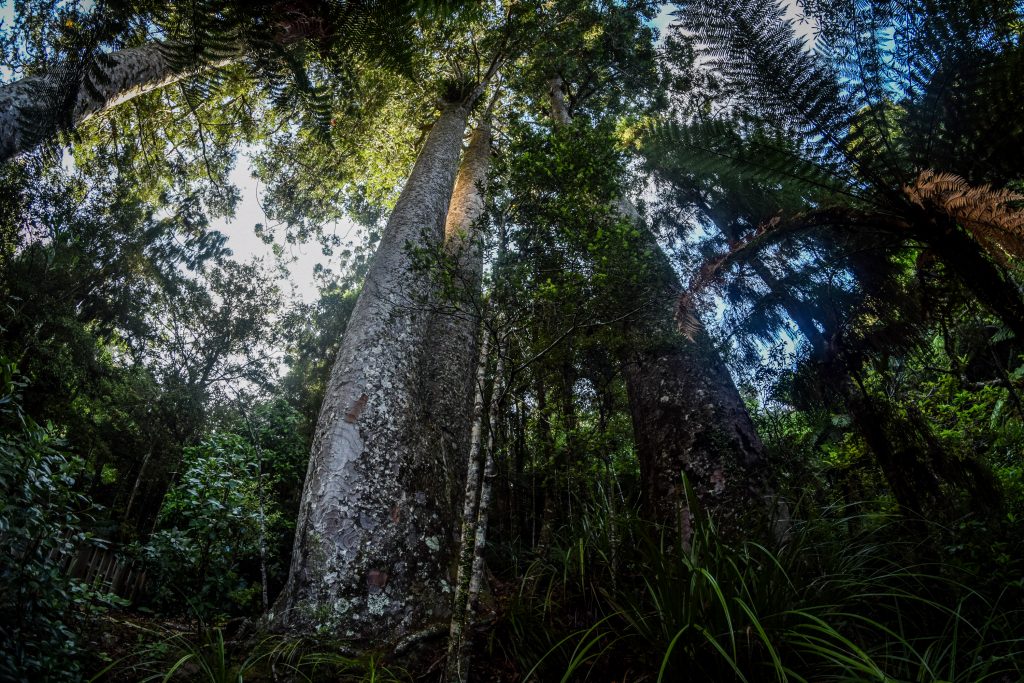
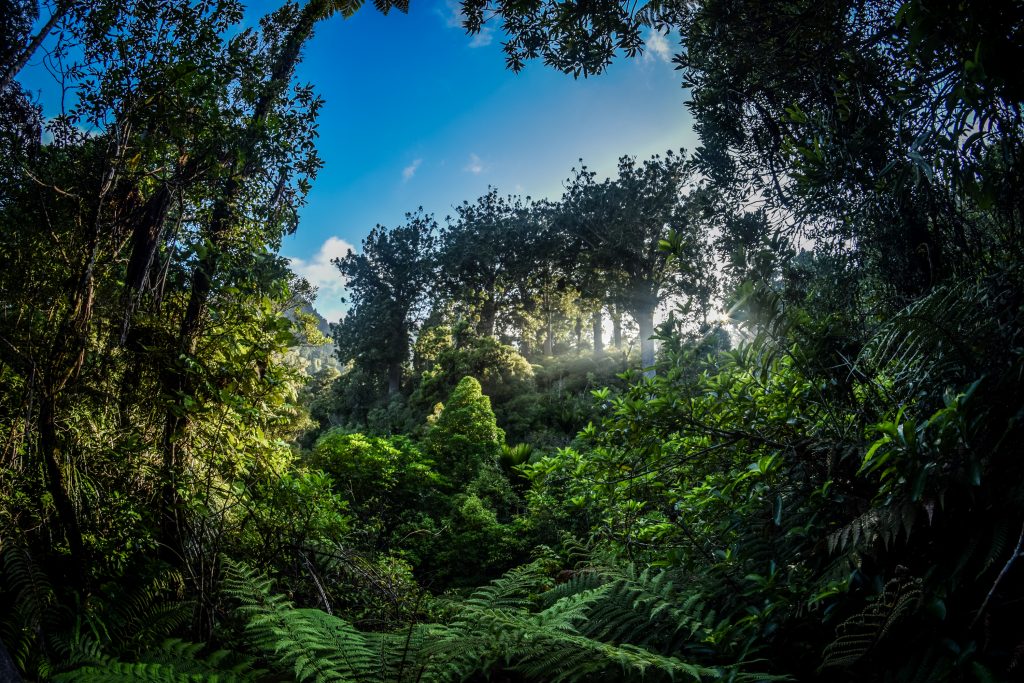


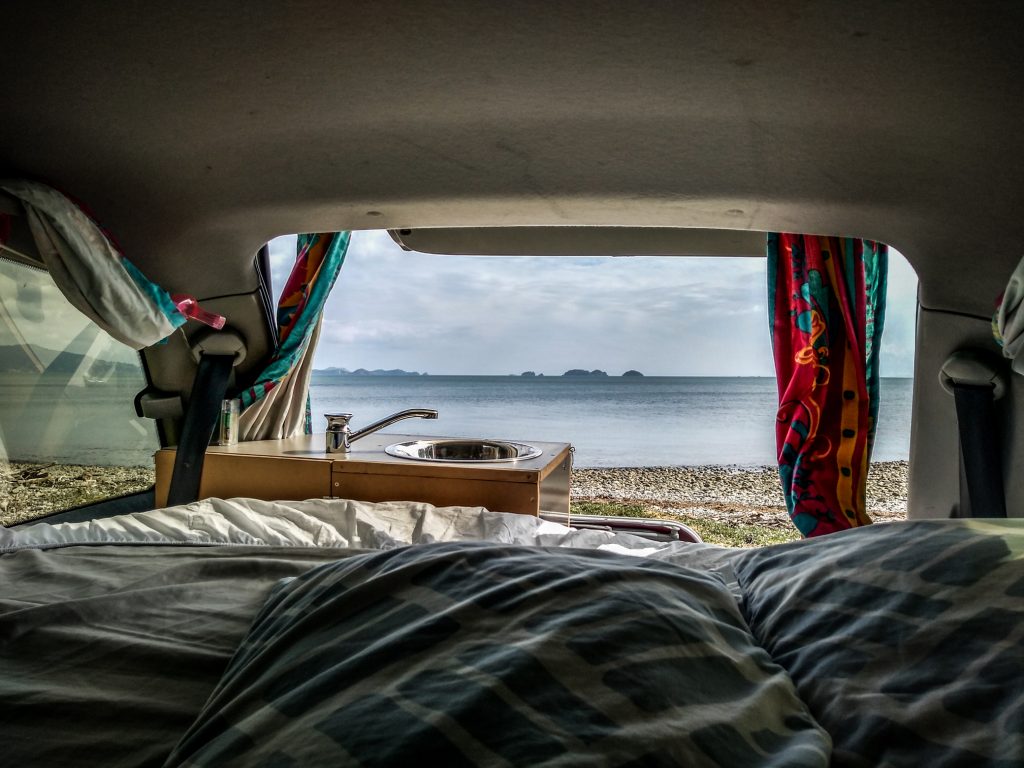

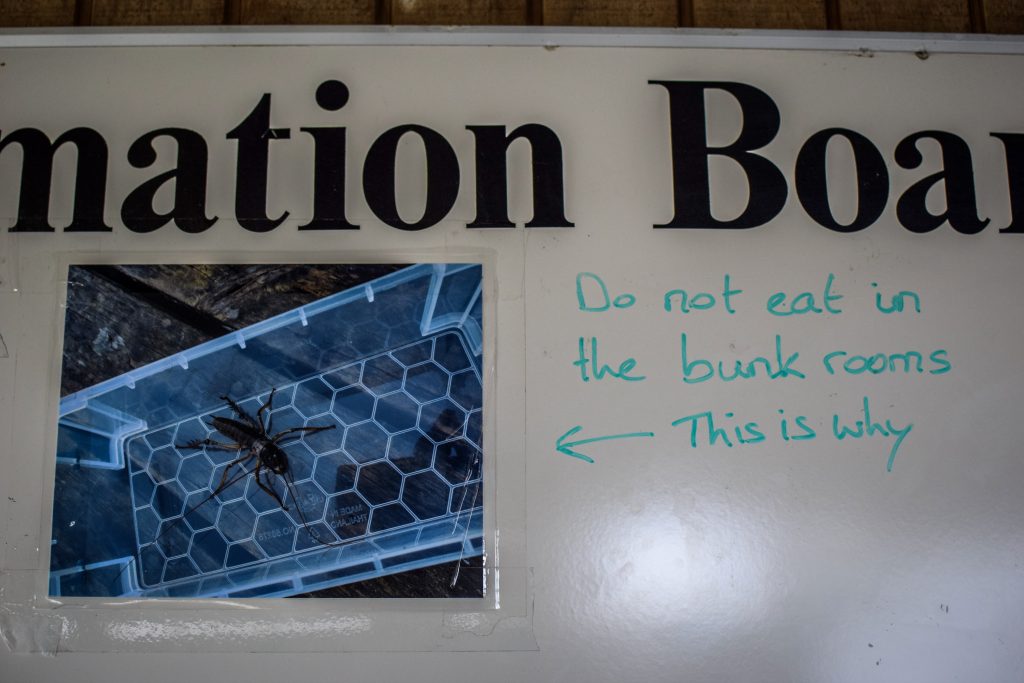

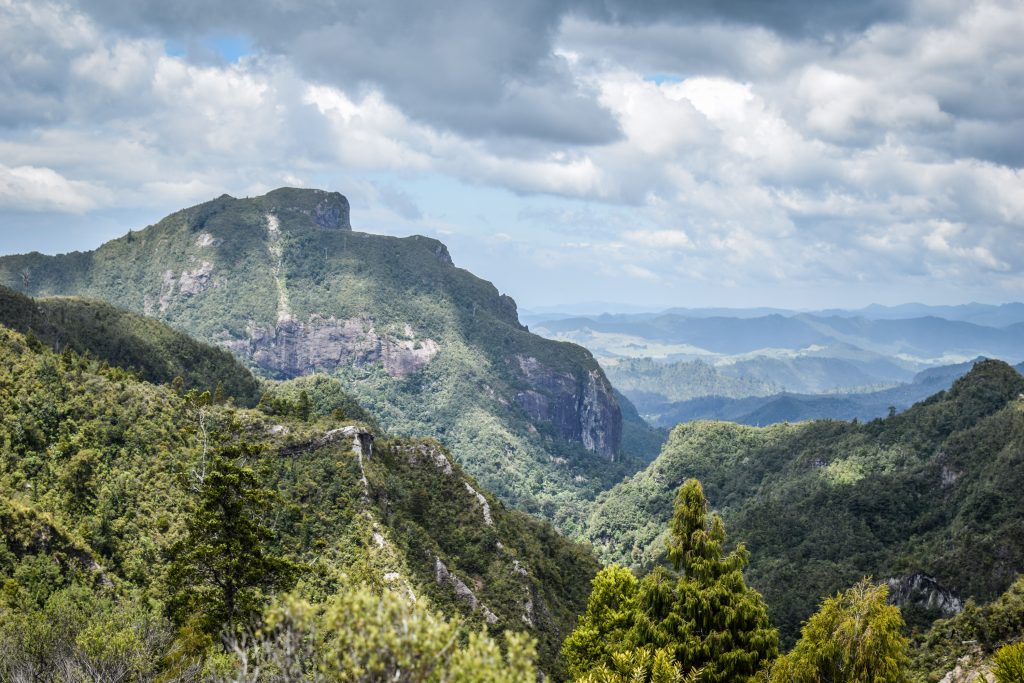
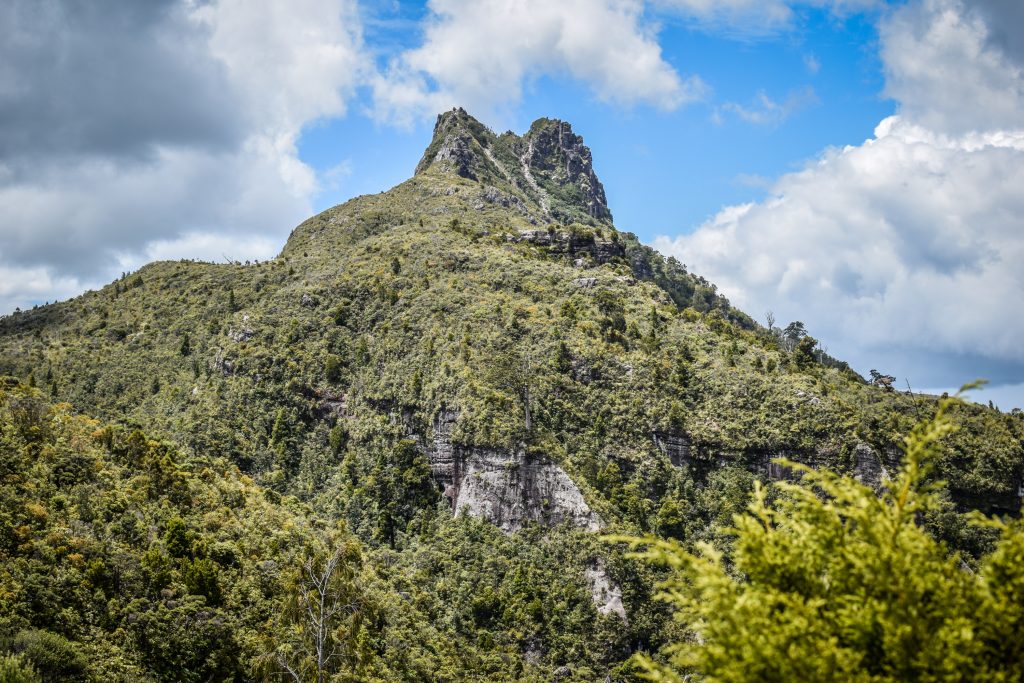

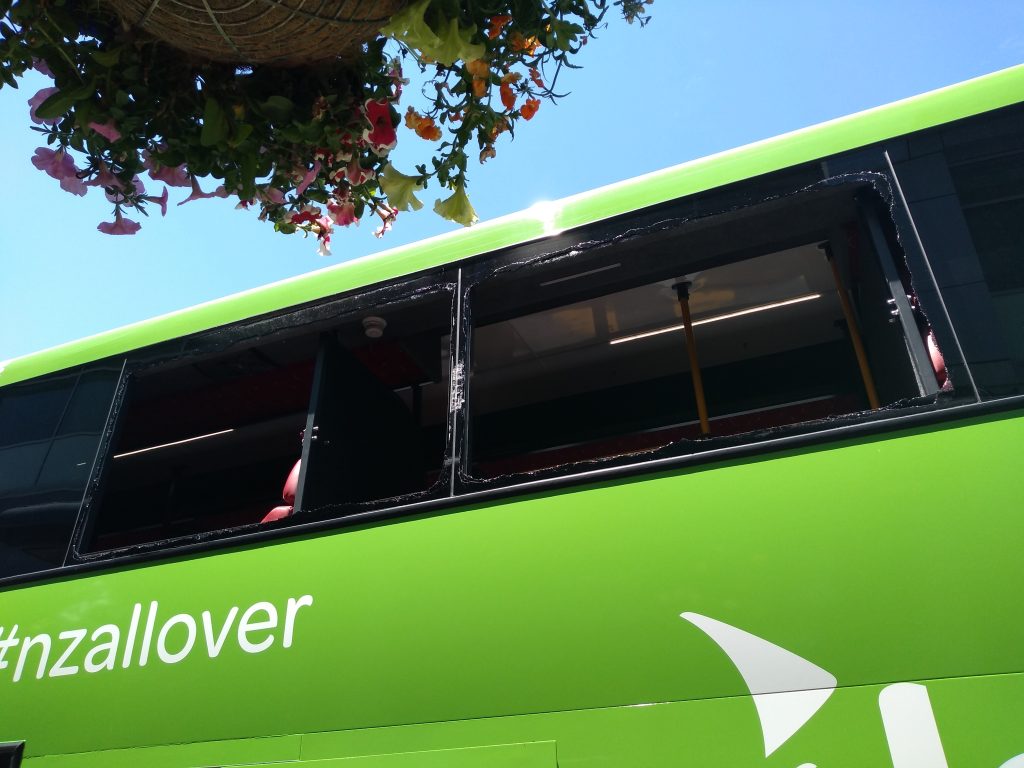

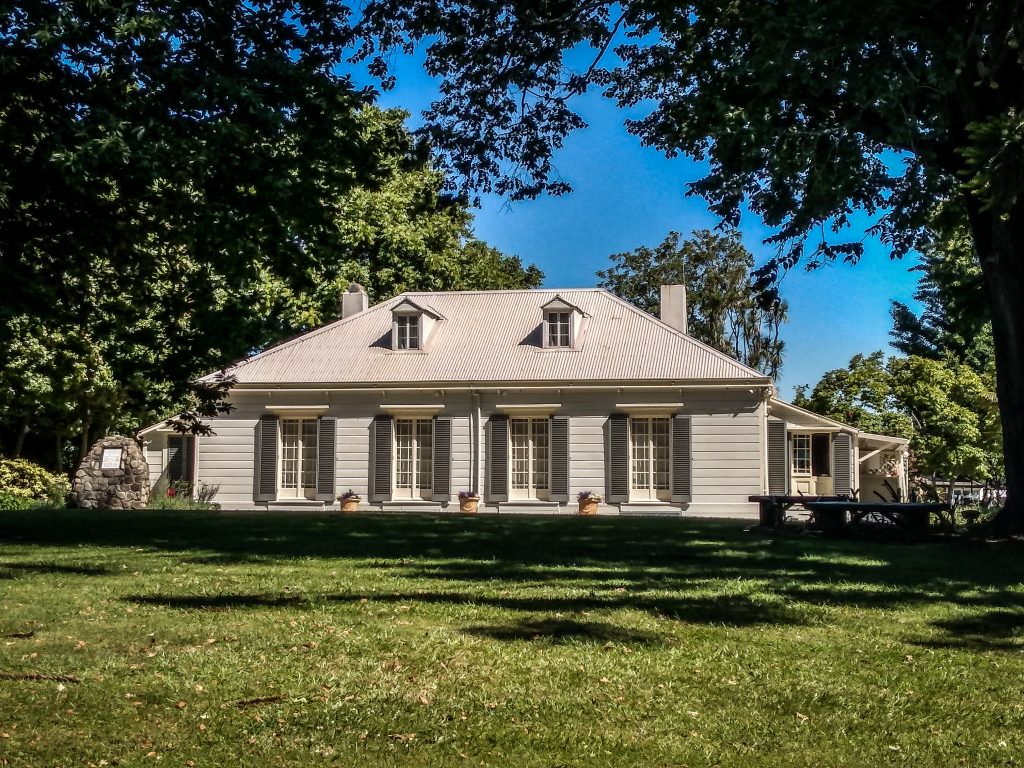
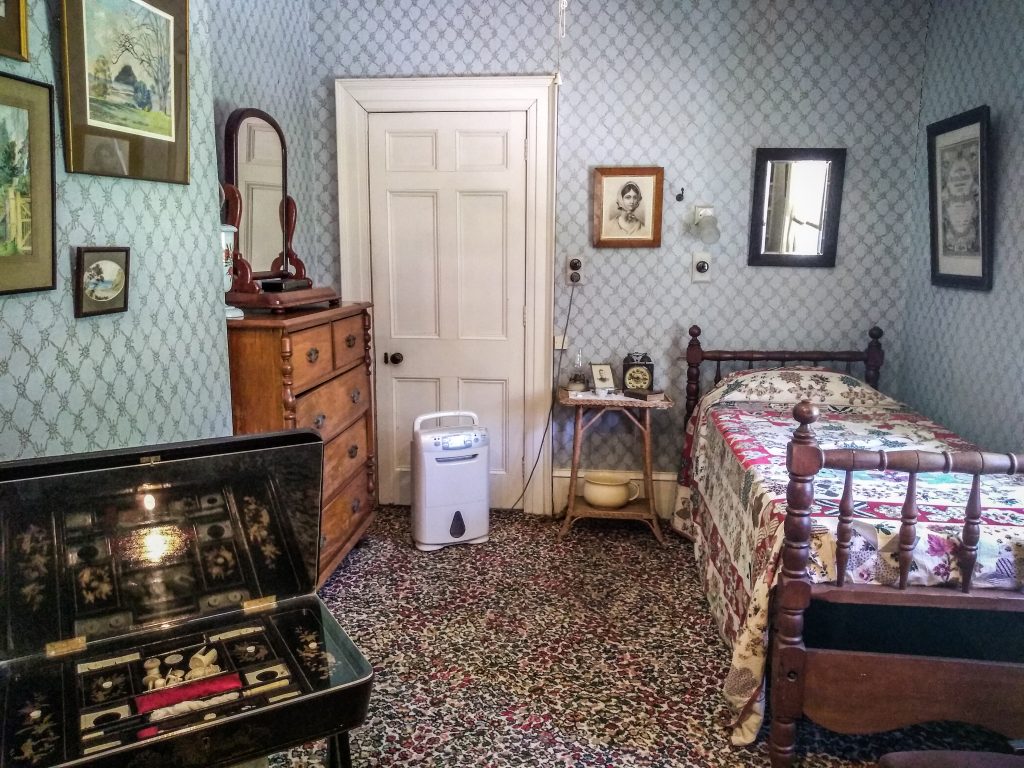
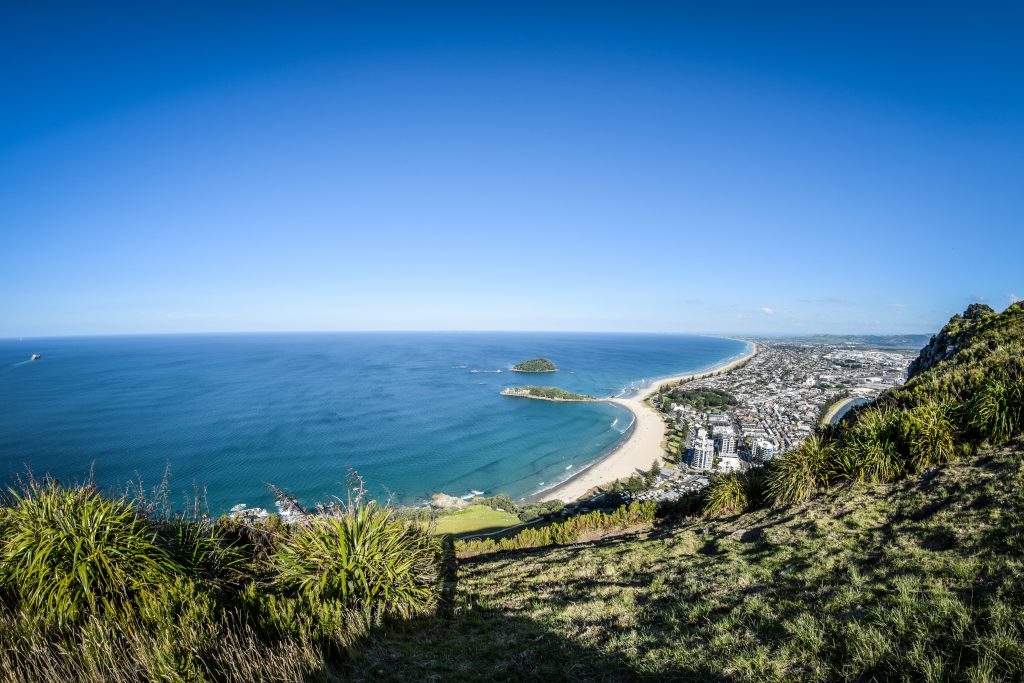
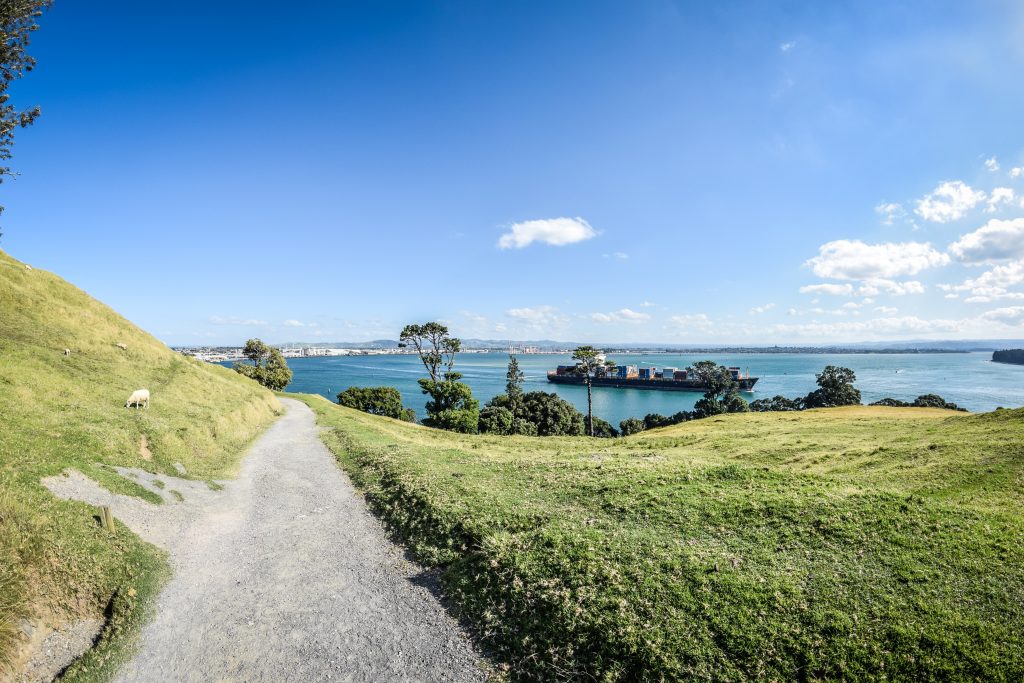
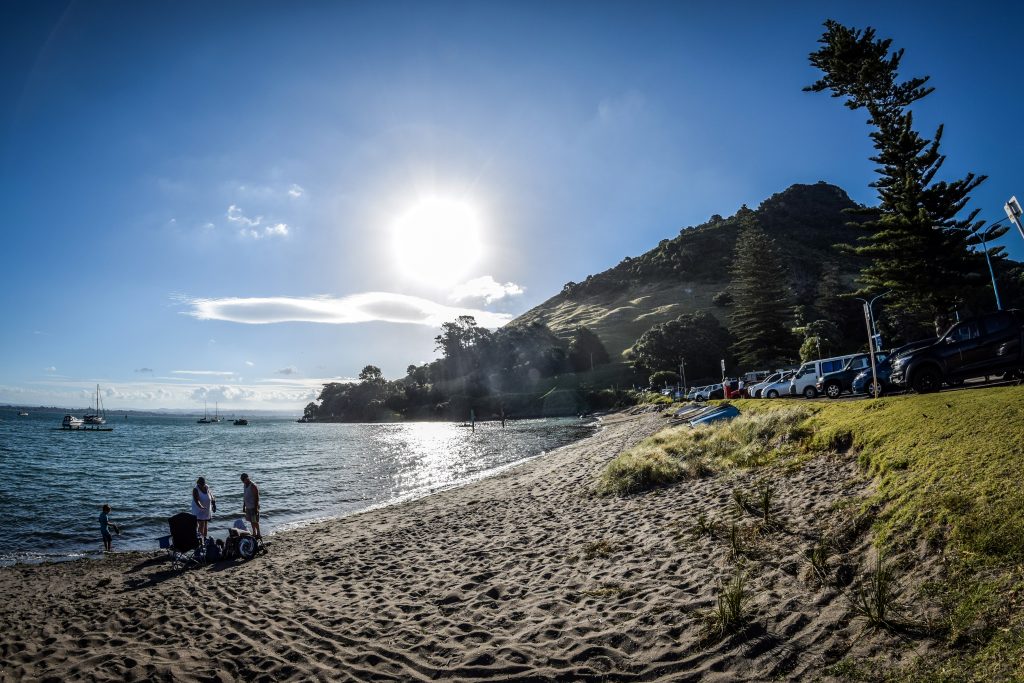

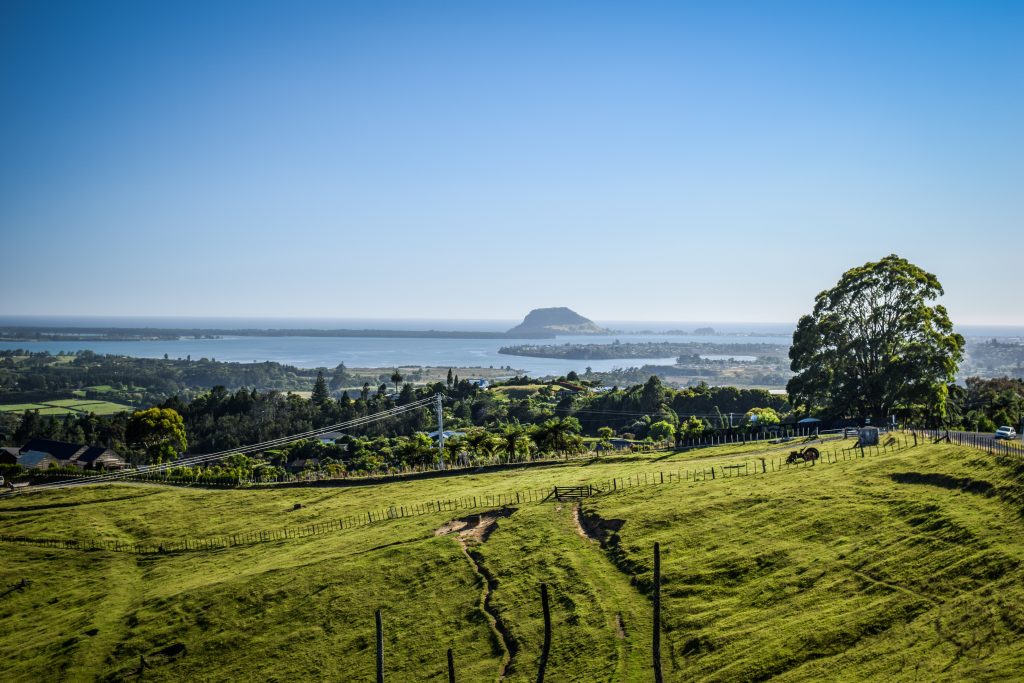

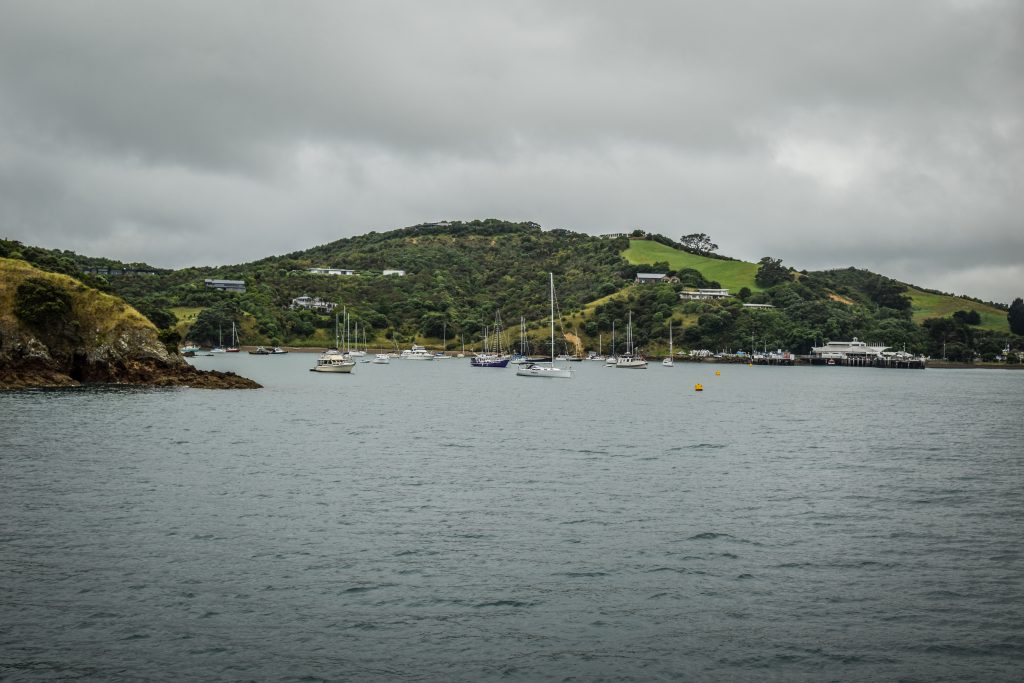
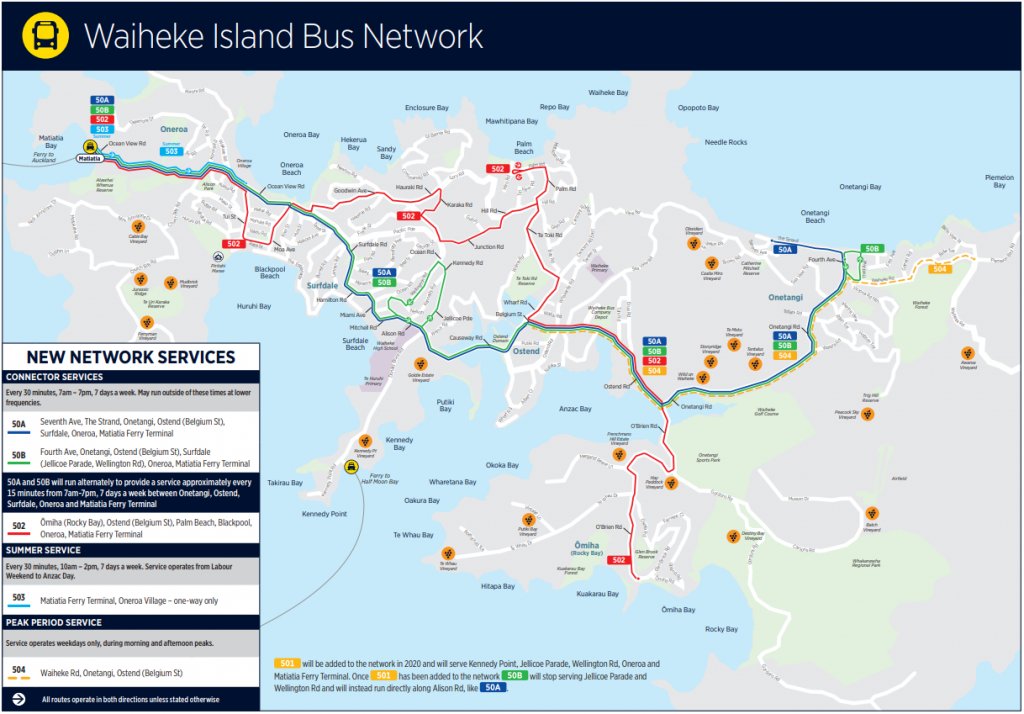
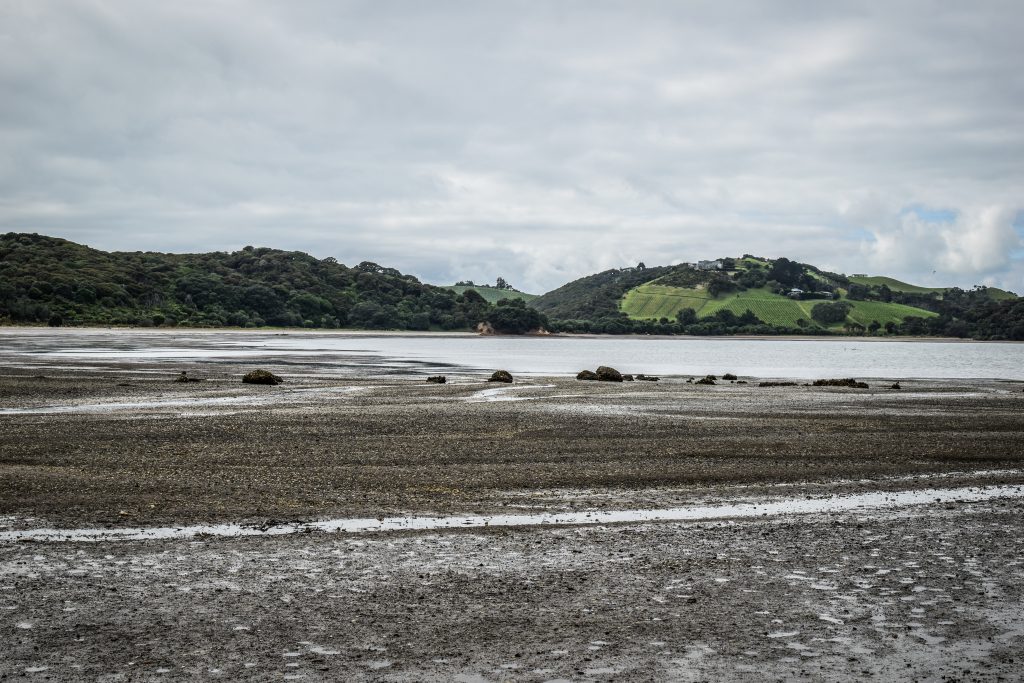
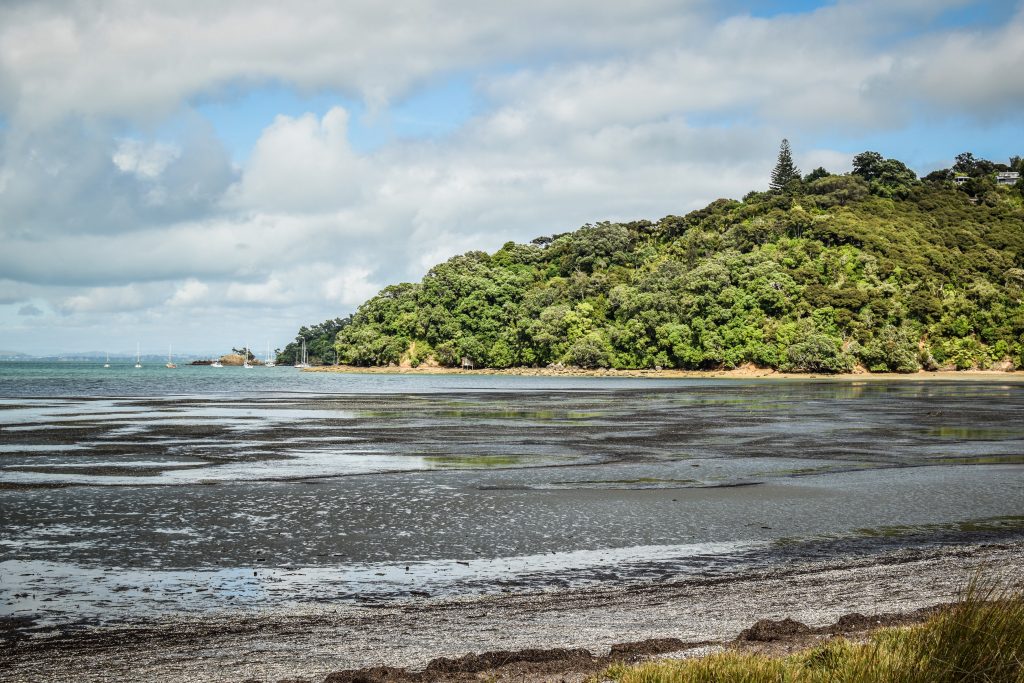
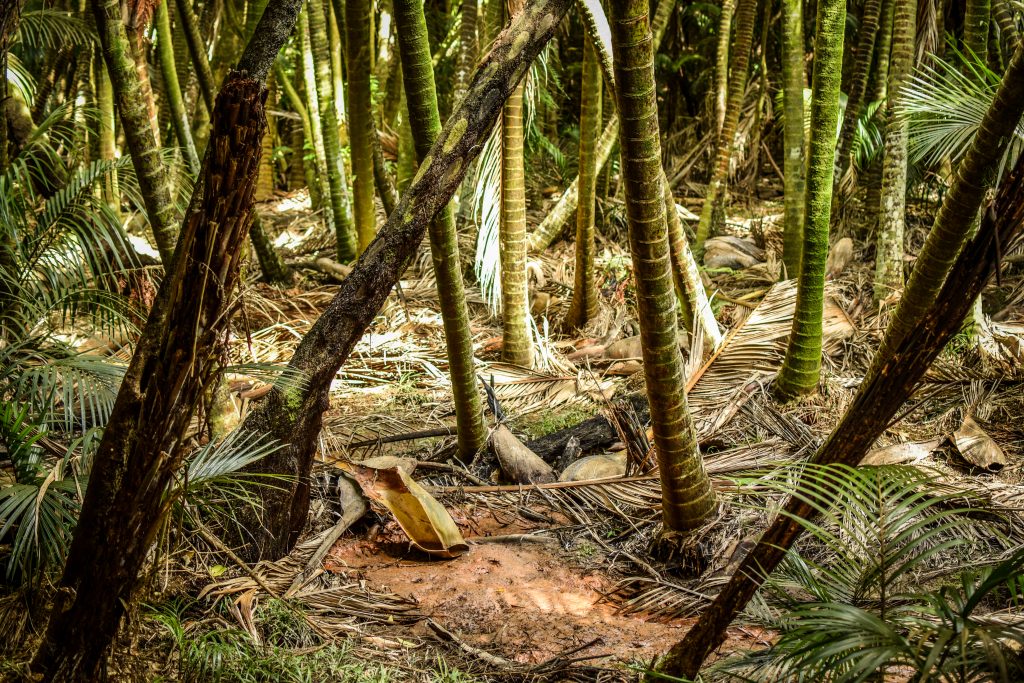
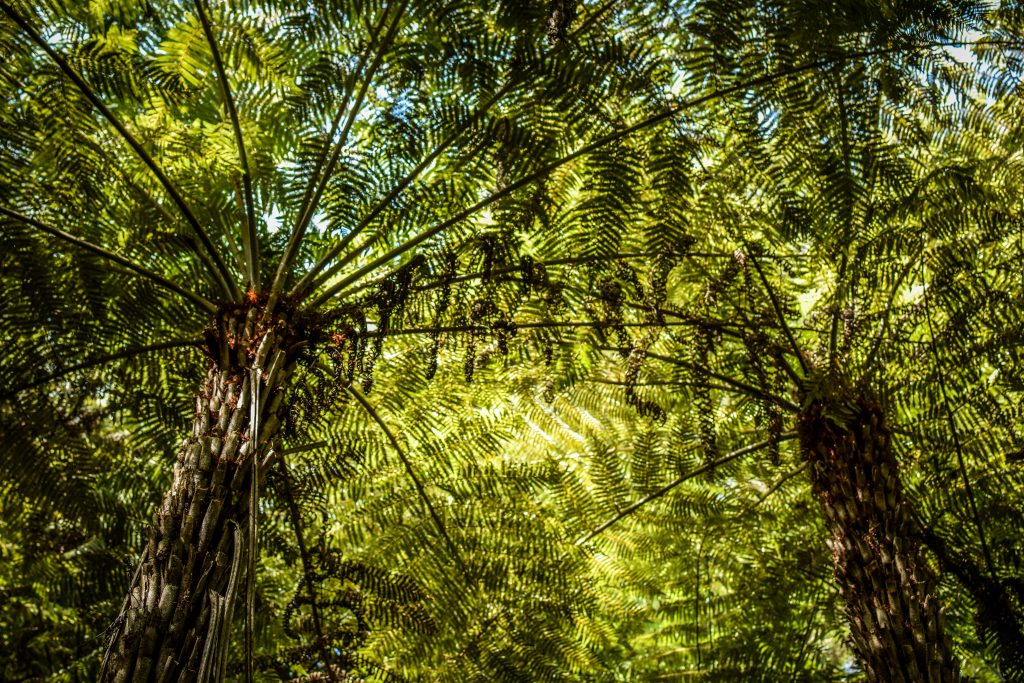
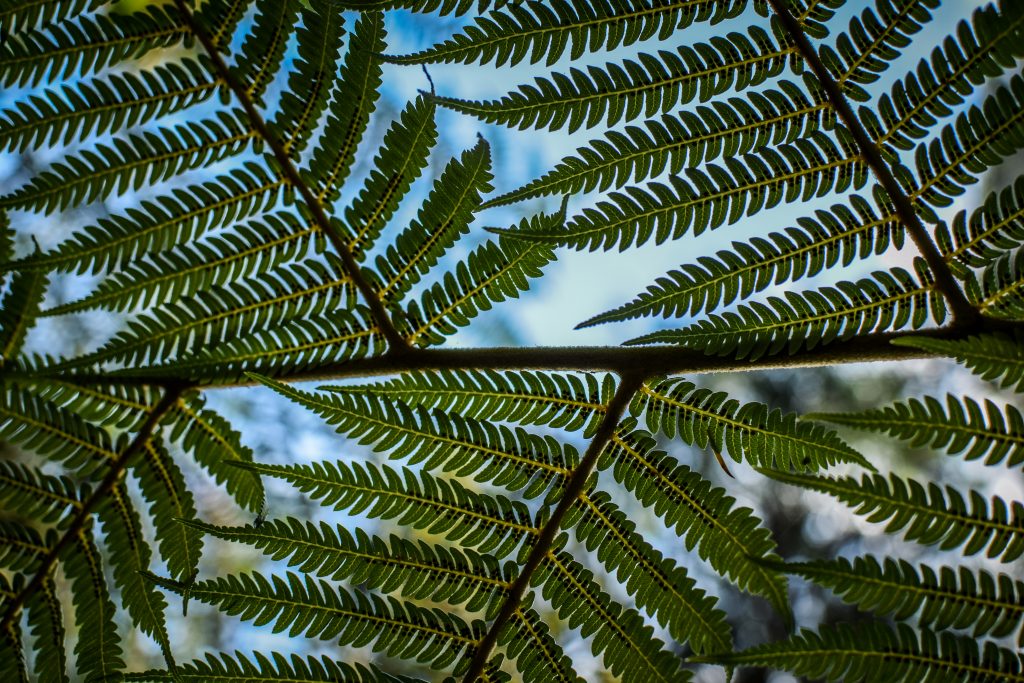
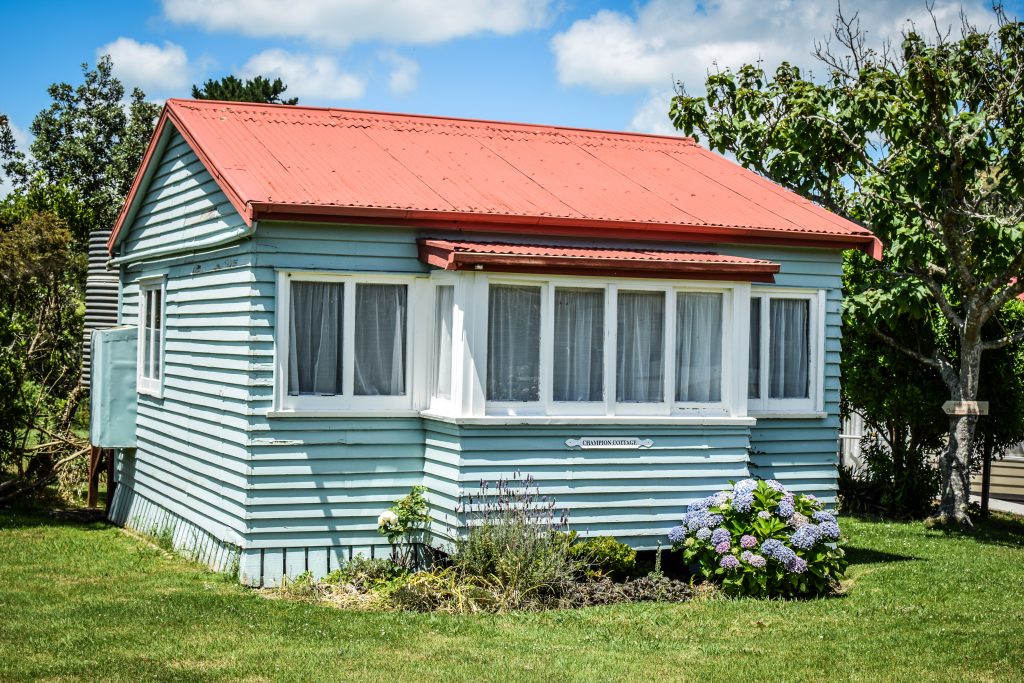
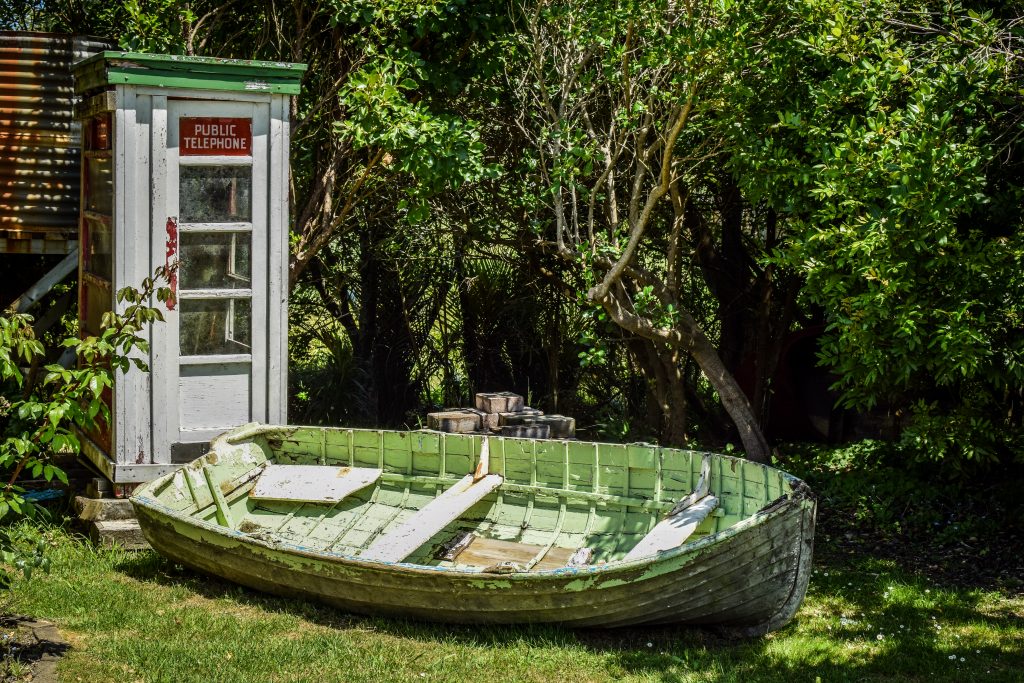

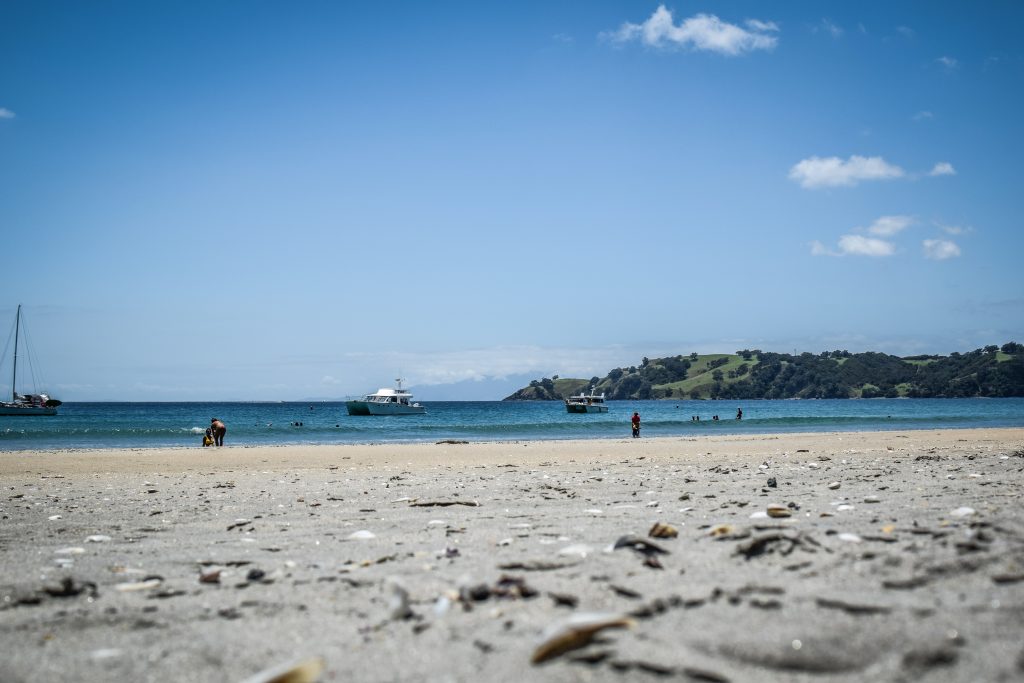
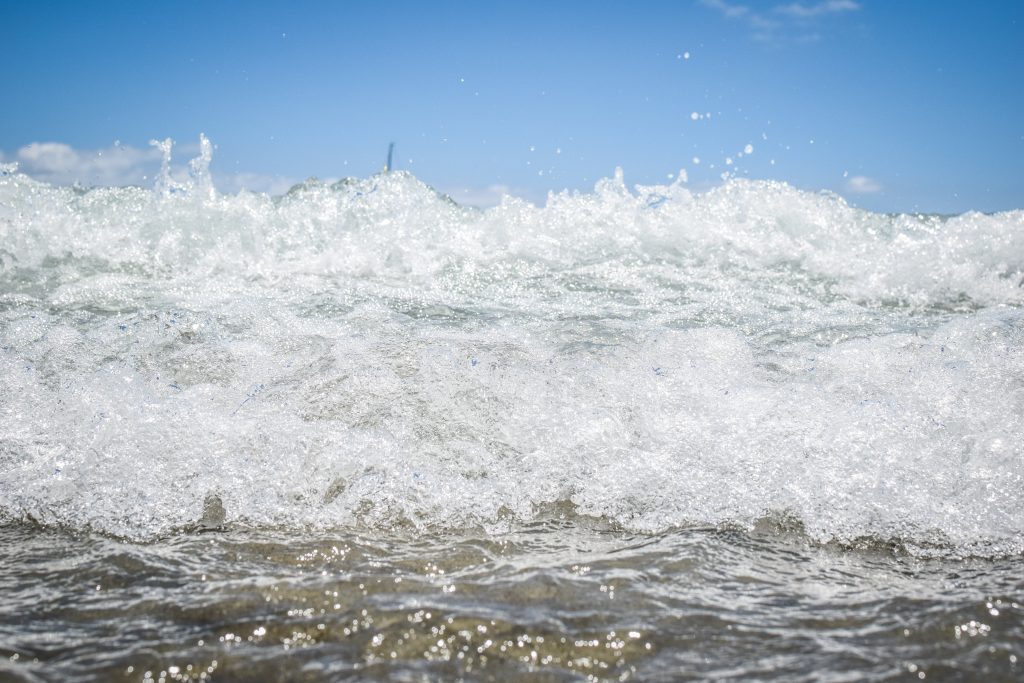
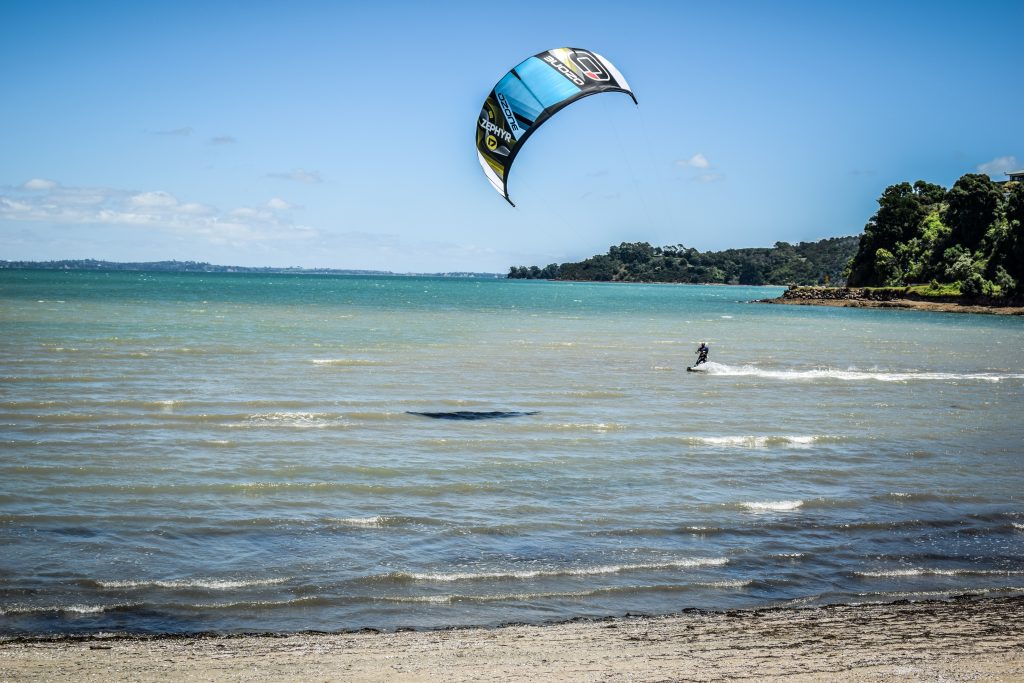
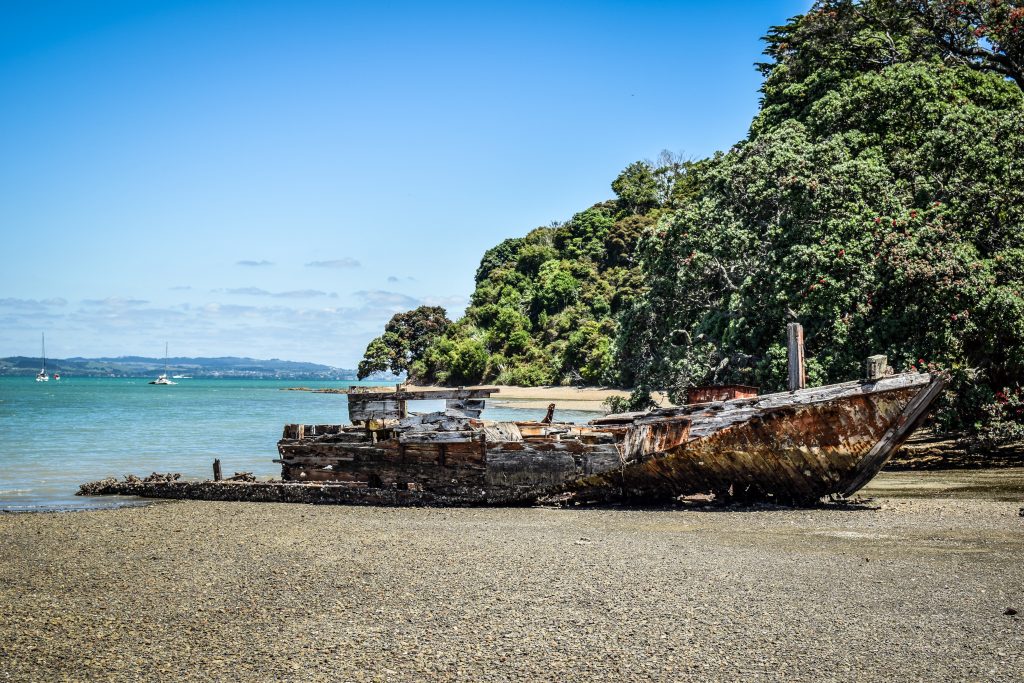


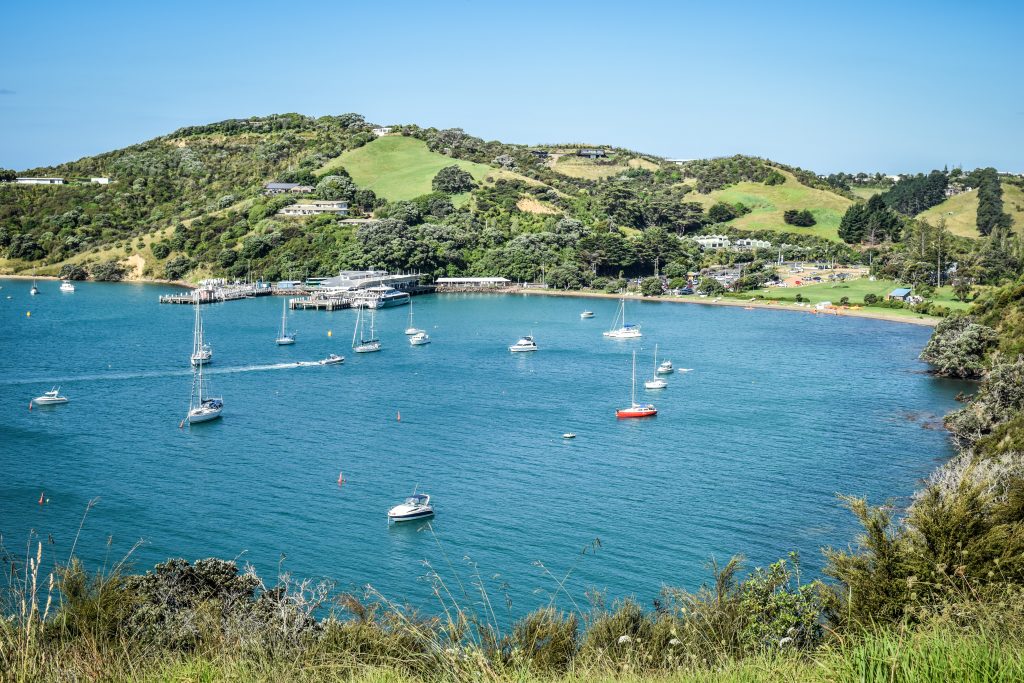


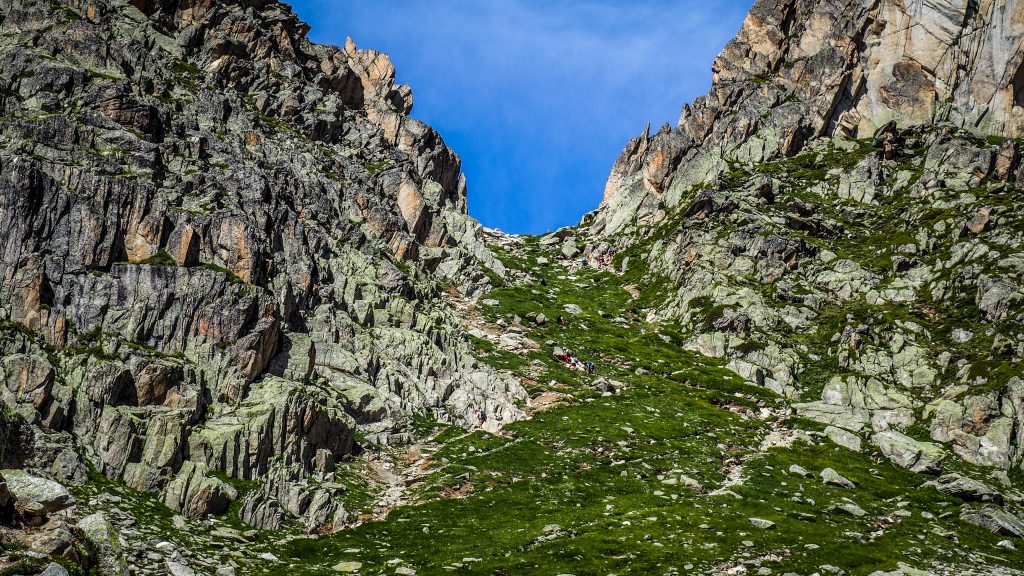
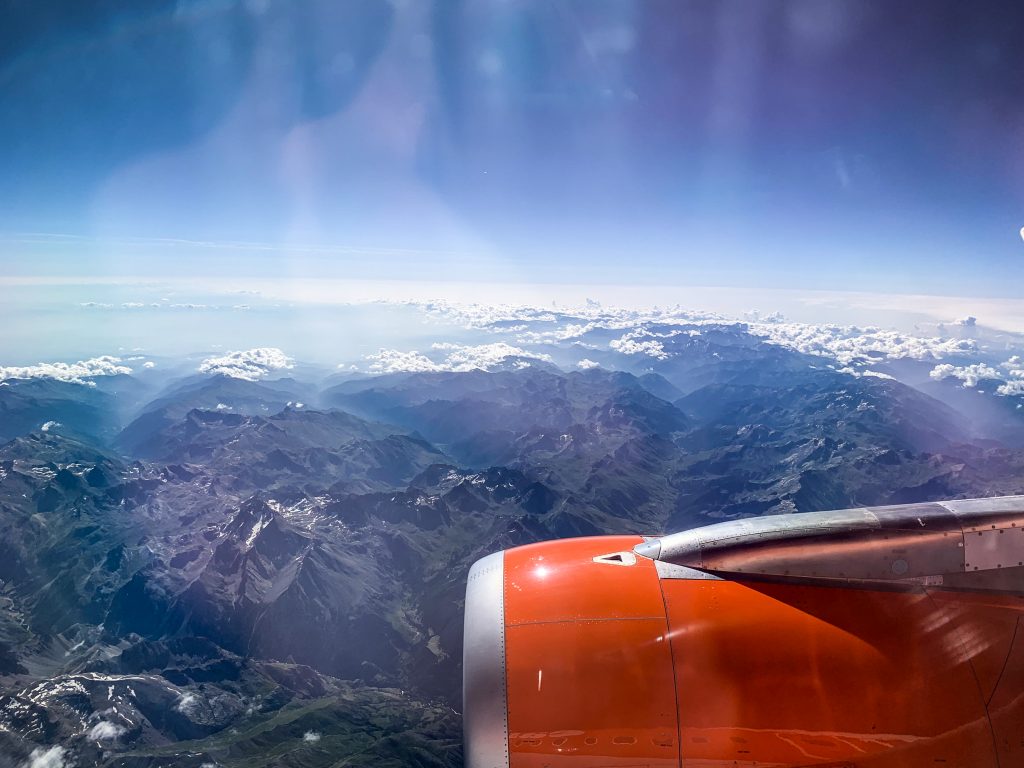
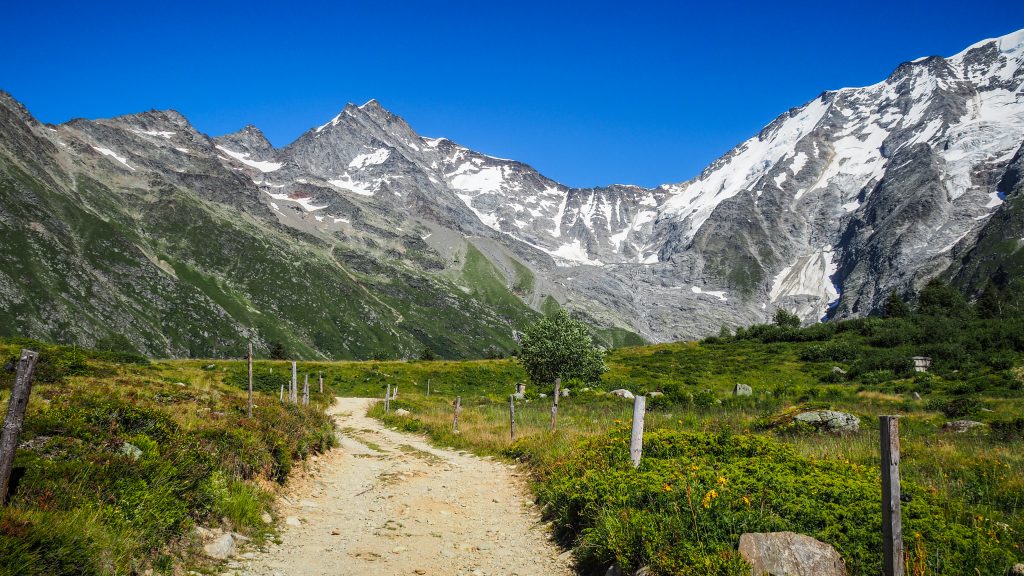

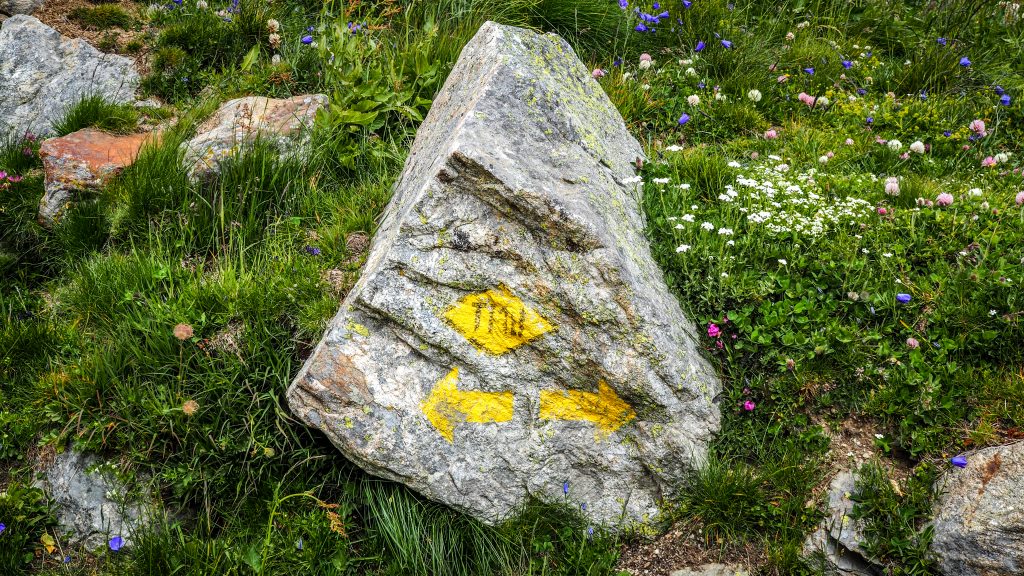

: the highest volcano on Java")