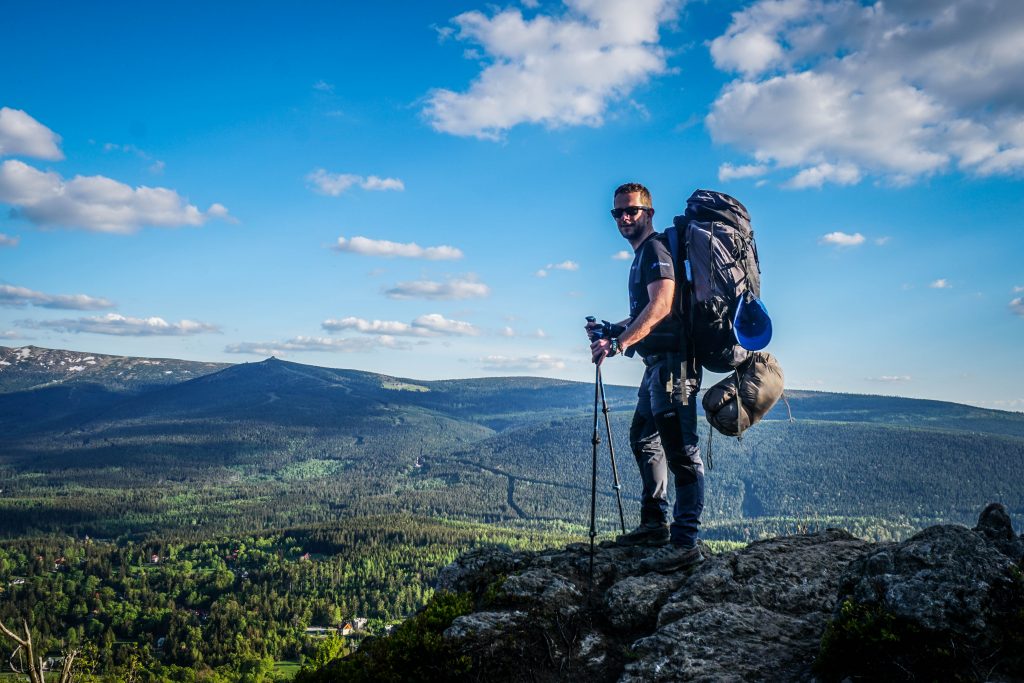
Today is a relaxing day. It doesn’t mean that I’m gonna be in bed the whole day watching Netflix though. Instead, I have 10 kilometres to walk through Raven Mountains (Góry Krucze) from Lubawka to Krzeszów.
In the morning I said goodbye to my travel buddy who according to the initial plan, after joining me for the first couple of days, came back to Gdansk to enjoy 9 AM – 5 PM life.
Above all, it was my back that needed a lighter day without carrying heavy load for such a long time.
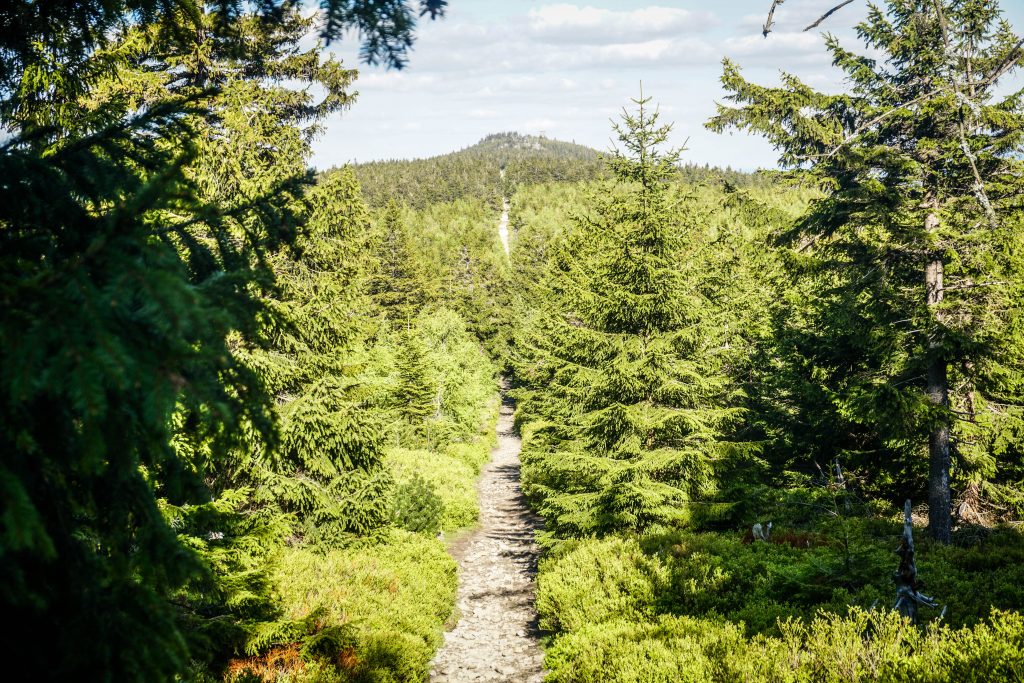
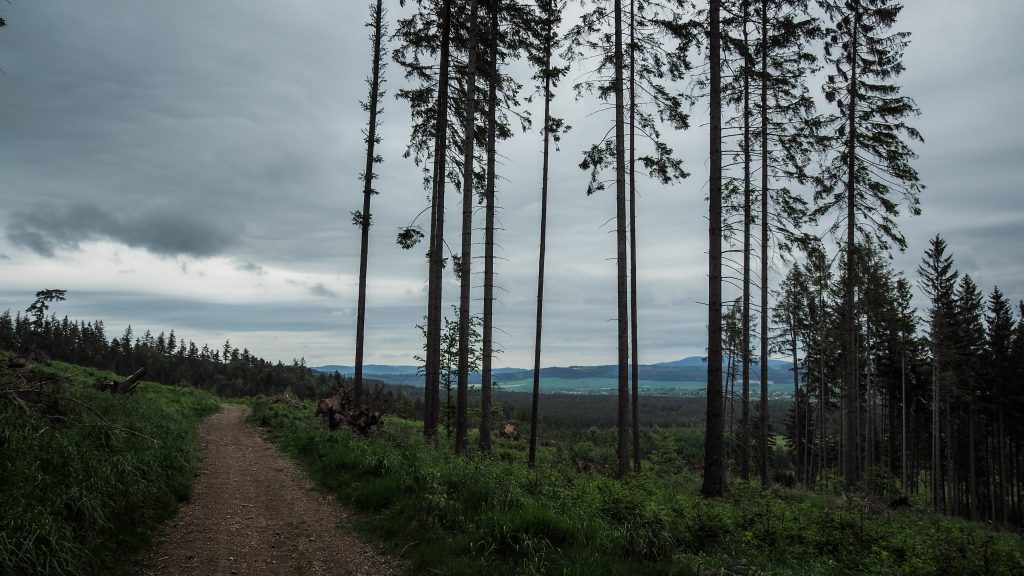
I departed from the main square in Lubawka and as always, followed red signs of the track leading me out of town into the Hazel Tree Ravine (Leszczynowy Wąwóz). Here the path goes gently up all the way to the Linden Tree Saddle (Lipowe Siodło). It’s around 3 kilometres from the starting point.
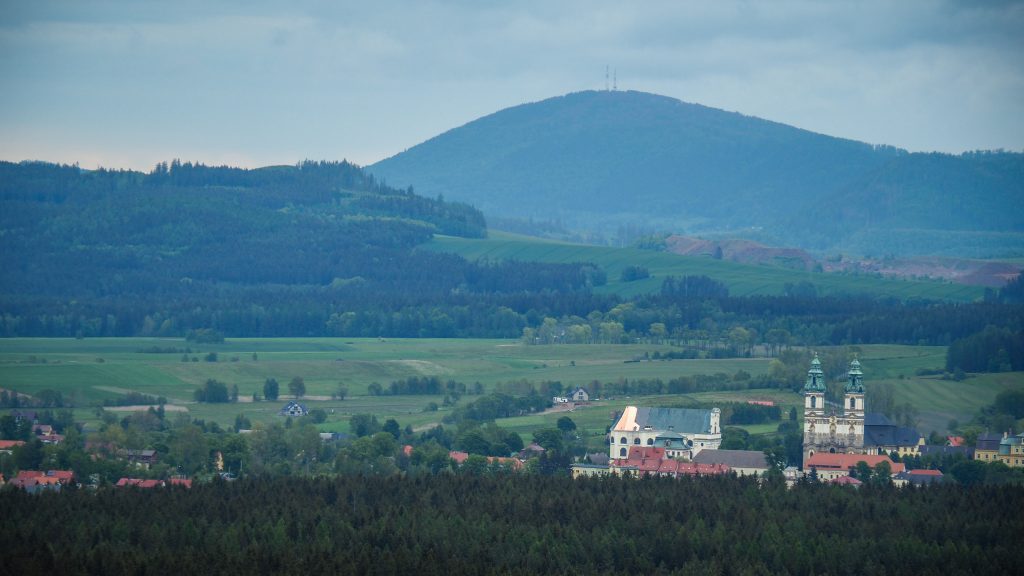
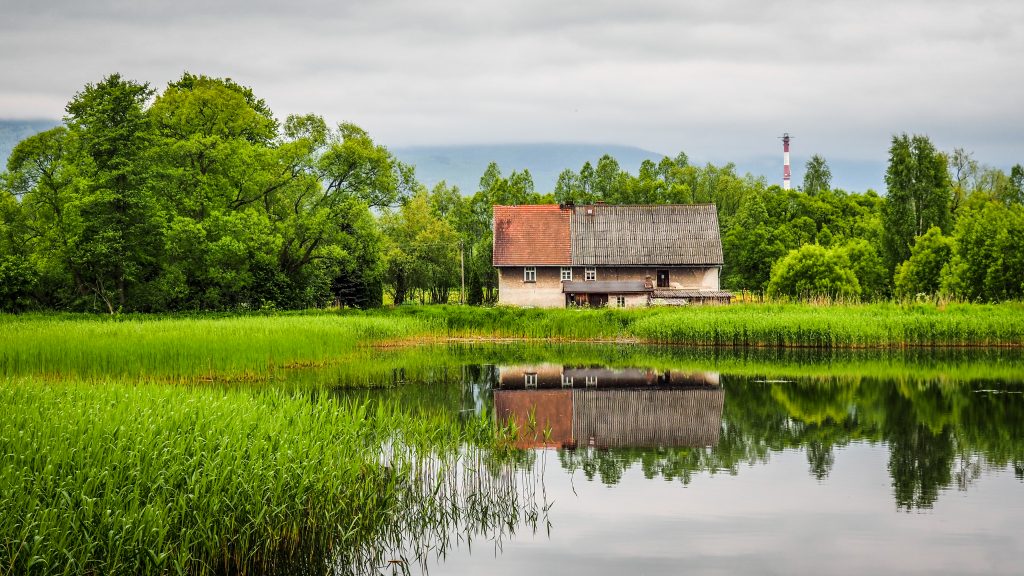
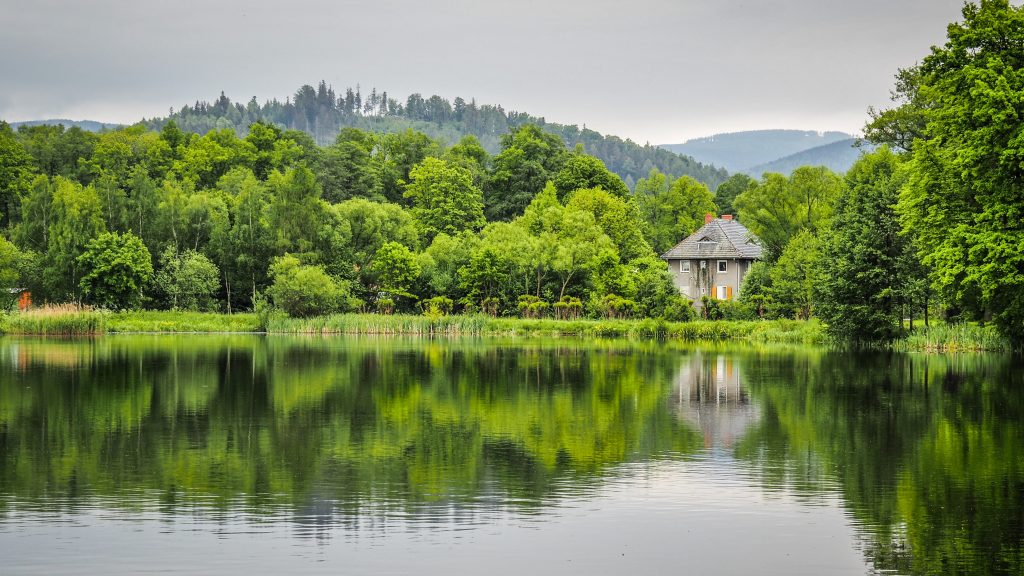
Next 5 kilometres are still in the woods, without a single soul around me. I push forward going sometimes up and sometimes down but no steep climbs today. After all – it’s a rest day! At some point, just behind the trees, I see a little town with a huge church. It must be my today’s destination – Krzeszów.
But first, I pass by Bethlehem (Betlejem). Yeah, you read it right. Welcome to the Polish countryside. During the whole Main Sudetes Trail, I passed countless villages with sights named after the bible. I don’t even know how many Calvary mountains (Góra Kalwaria) there are but it seems like every village has it’s own.
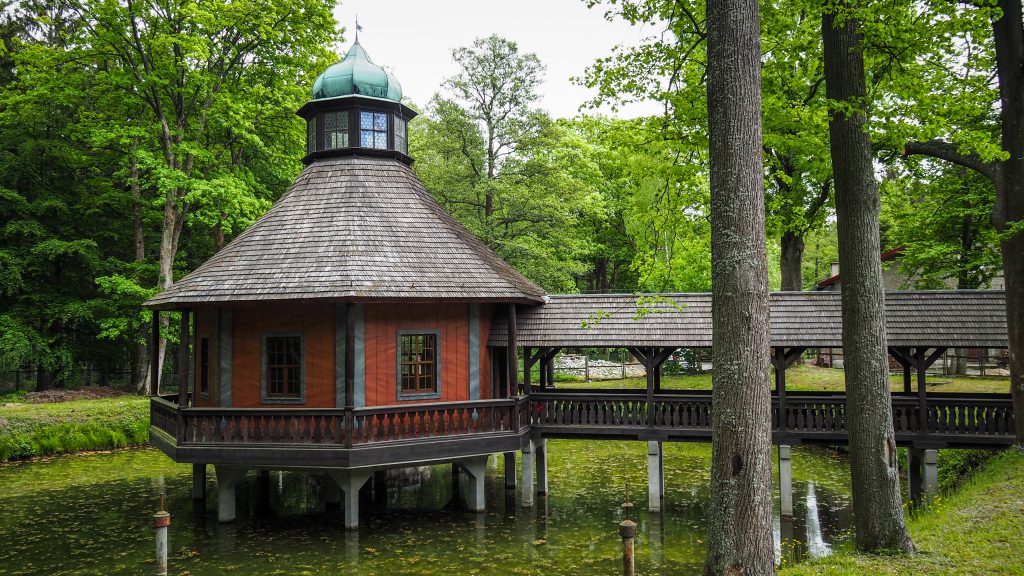
Wooden pavilion on the water in Bethlehem
Besides restaurant and guesthouse, it’s worth to have a look at the wooden pavilion that was built in the middle on the pond in the years 1674-1680 by the Cistercians. Apparently, inside there are paintings referring to the Old Testament, depicting scenes with the water theme. It was closed when I was there, however, if you wish to have a look inside, ask at the guesthouse.
Last kilometres are on a wide road leading to the centre of Krzeszów, but keep your eyes open as occasionally you can spot small chapels in the woods. These are the Stations of the Cross.
First buildings appear and my feet and back are very happy that soon backpack will rest on the floor and I will jump in sandals instead of heavy boots.
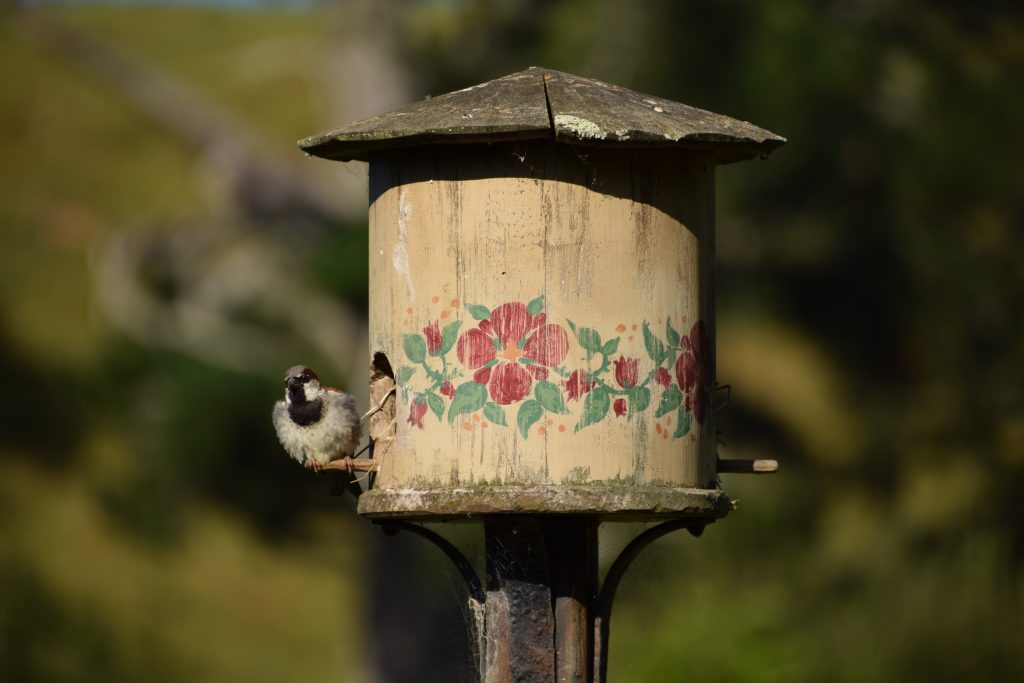
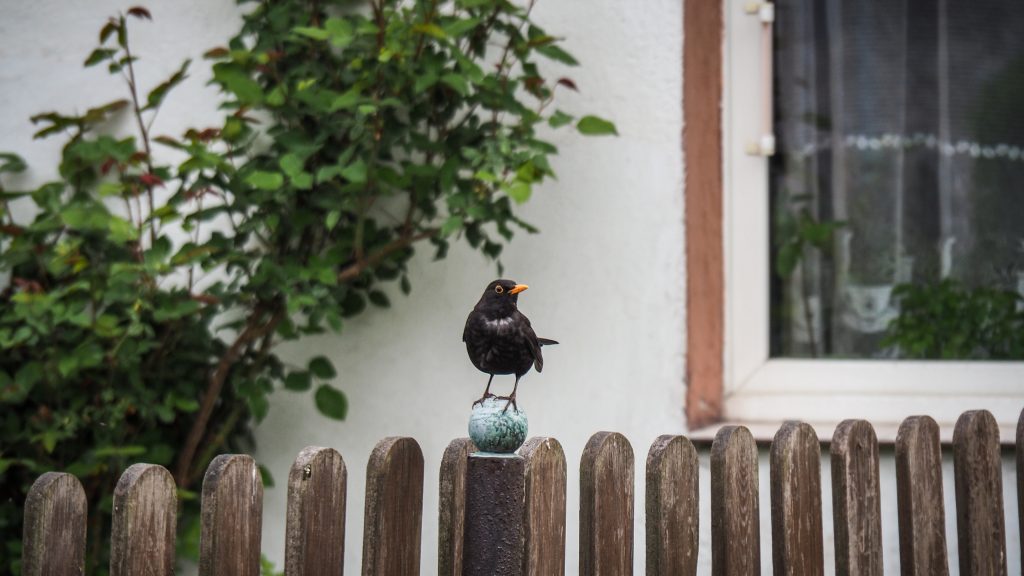
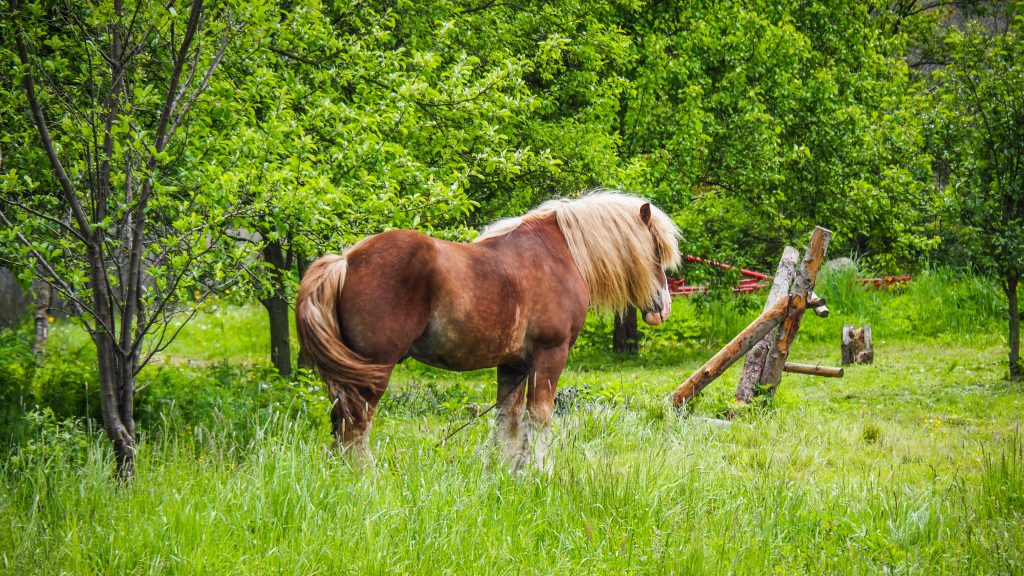
Bird seemed to be very interested in seeing hiker……but horse not too much.
For the night, I recommend the agrotourism place “Mała Chatka“. It was only 50 PLN per night and I had the whole place to myself. It was probably the best price to the quality ratio when it comes to accommodation on the whole track.
What to do in Krzeszów?
It was still quite early and I wouldn’t be myself to just sit at home and do nothing.
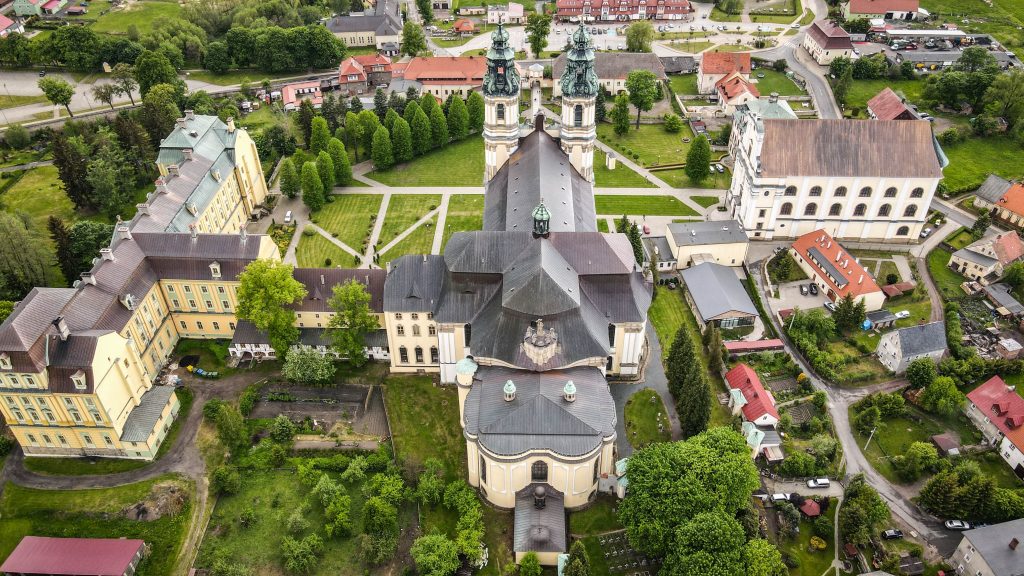
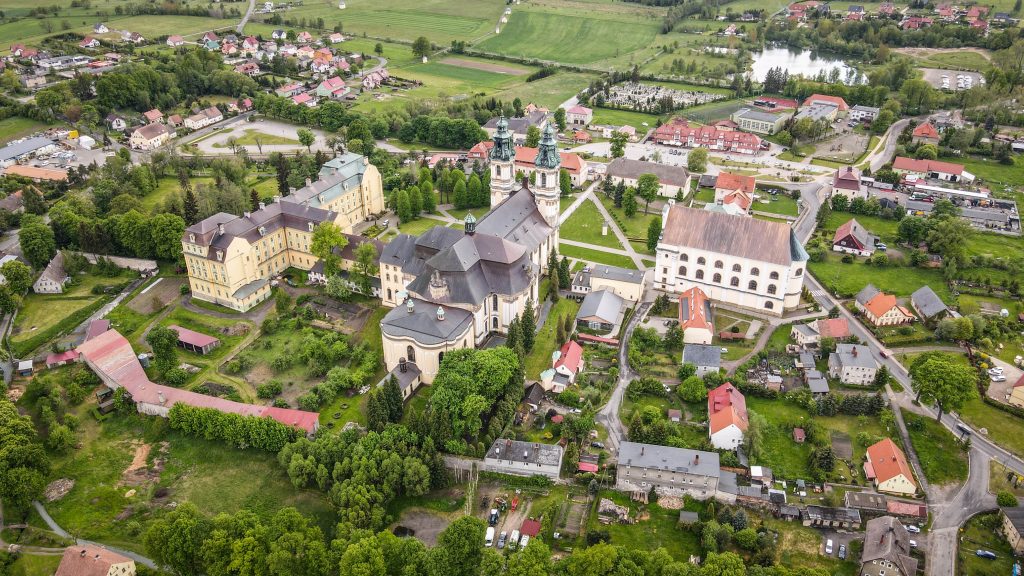
Basilica of the Assumption of the Blessed Virgin Mary
First monks in the region were the Benedictines that established an abbey in 1242, as a filial of the Opatovice monastery. 50 years later, the buildings were acquired by the Silesian duke Bolko I the Strict, who invited Cistercians. They managed what they got quite well and did not spare time, money and resources to build an impressive baroque church.
The standard ticket includes entry to 4 sights plus an audioguide:
Monastery Church (Basilica)
Bracki Church
Mausoleum of the Silesian Piasts
Maria Magdalena Chapel with the area of the historic cemetery
If this is not enough, get an extended ticket adding 3 more attractions:
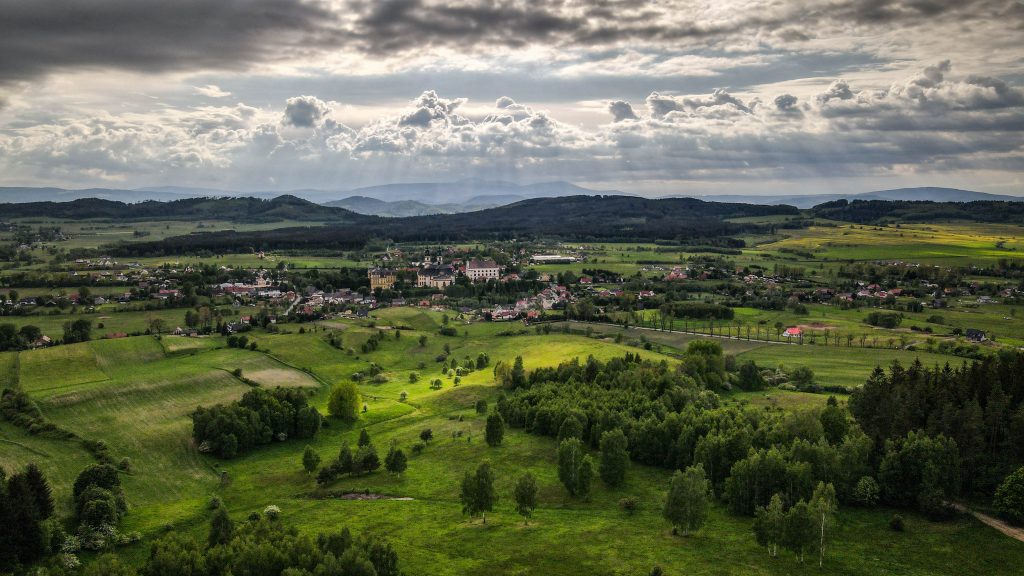
In the evening, it’s pleasant to stretch your legs walking the shorter path with the Stations of the Cross. For me it was also a great departing point for drone flight 🙂
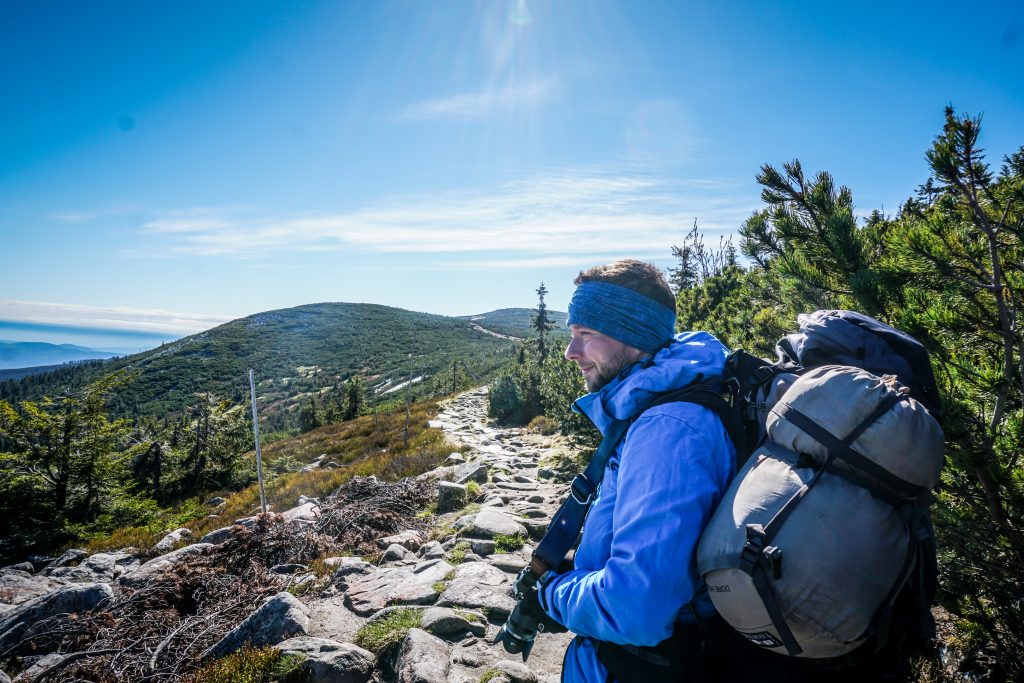
The plan for day 5 was to cover the distance of approximately 23 km, which gave us plenty of time to enjoy the hike without the need of being in a hurry.
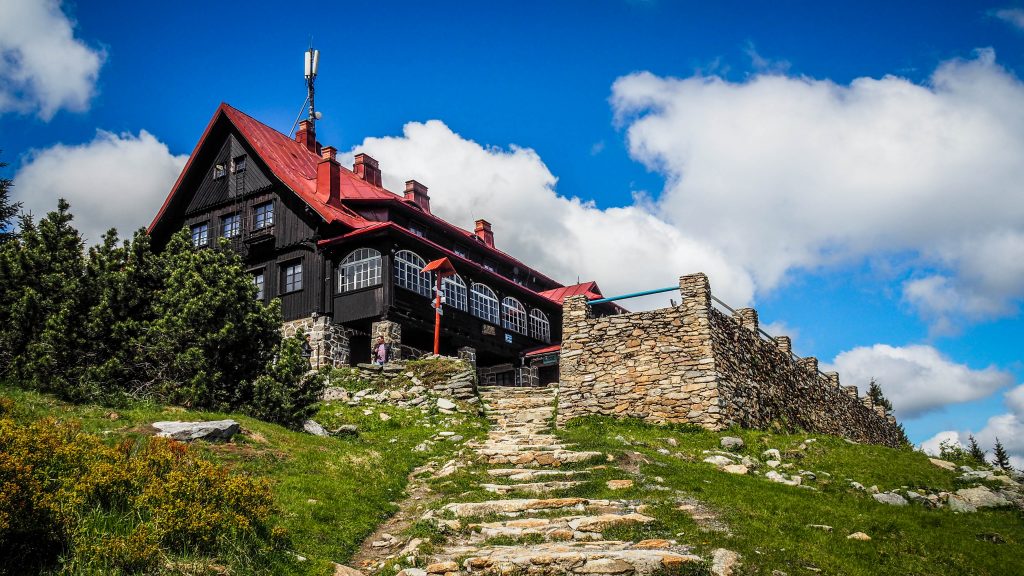
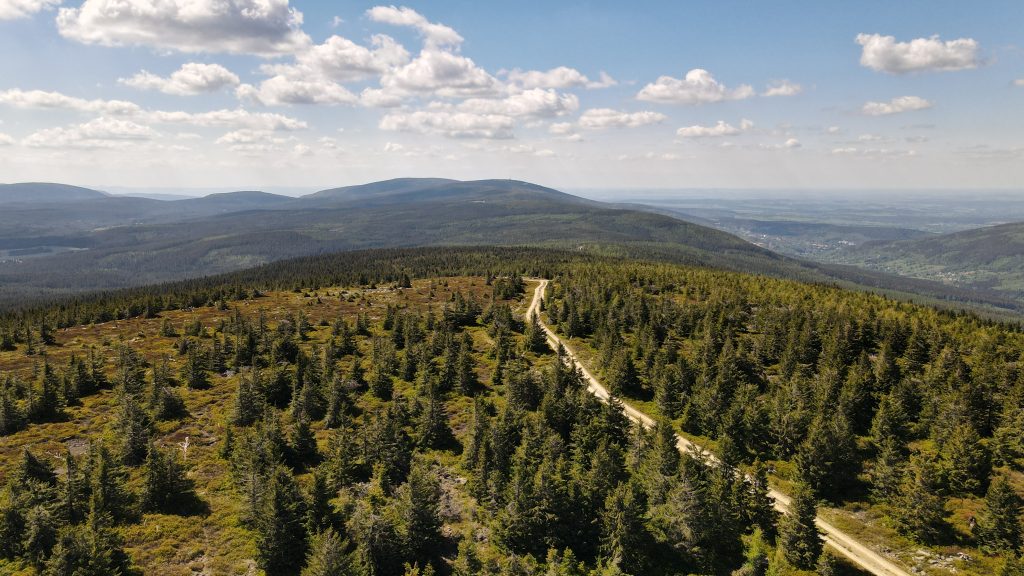
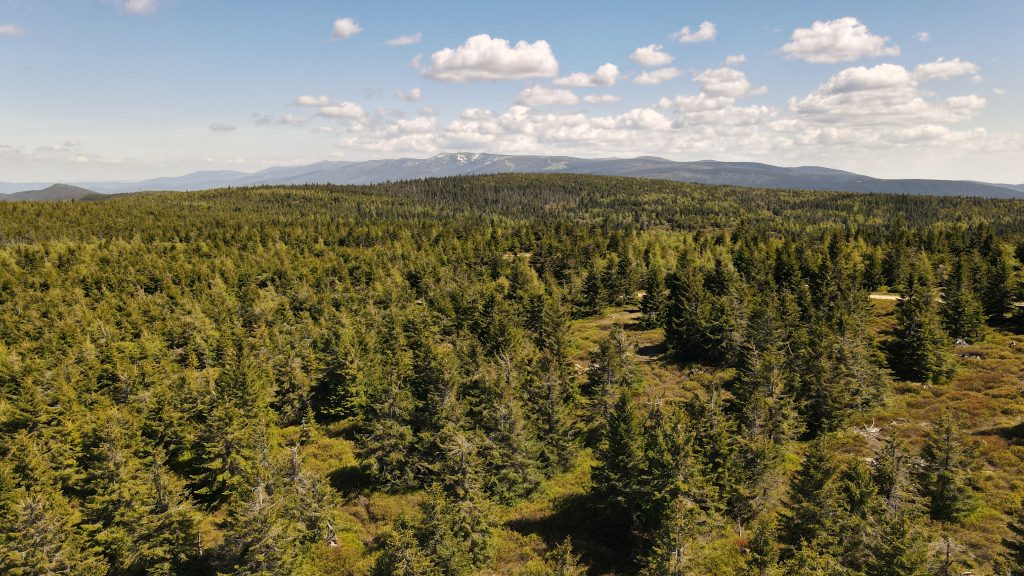
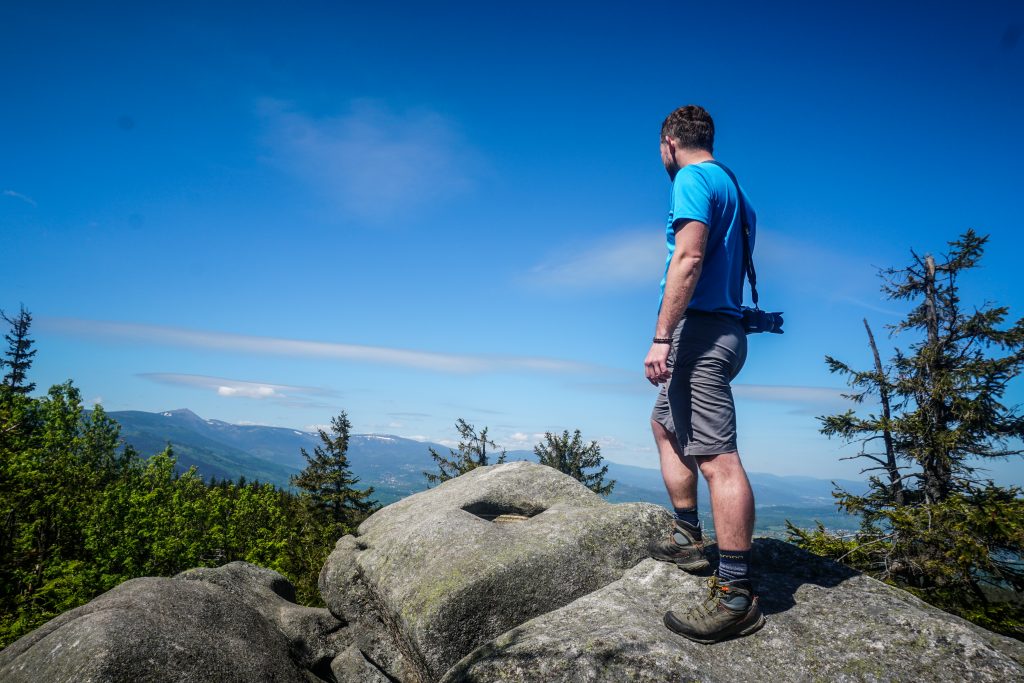
From Średnica Pass, the trail ascents for 3 km to Mała Ostra, where we found amazing rock formation to climb, from top of which we were rewarded with the breathtaking view to the places that we passed in the last days, e.g. Śnieżka and Karkonosze Mountains.
From there, you may want to take a short detour (~ 700m) along the blue track to Skalnik (945 m a.s.l.), though the views won’t get any better. The summit belongs to the Crown of Polish Mountains, so it’s tempting to tick it off from the list.
Next, the track gradually descends towards Bobrzak Crossroads and Czarnów, which is known for its Hare Krishna farm. Apparently it’s a good place to learn about the culture and try vegetarian food if you find it interesting. We decided to skip it at that time.
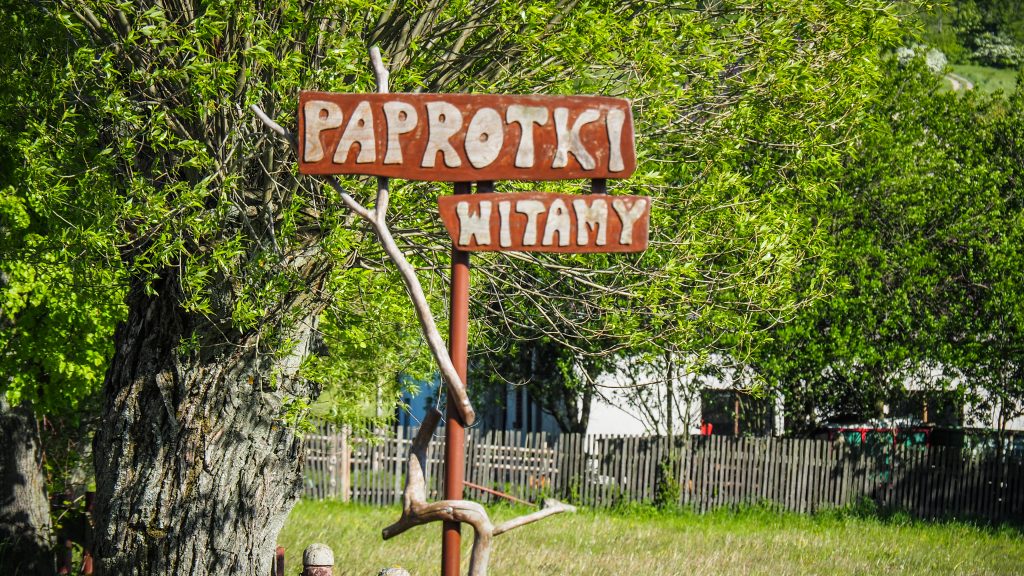
Passing through the peaks of Wilkowyja (776 m a.s.l.) and Liściasta (755 m a.s.l.), we finally arrived in Szarocin. Leaving it behind, we tackled the peak of Świerczyna (720 m a.s.l.). After the descent, there is a longer fragment of the track leading on an asphalt road, until we reached Paprotki.
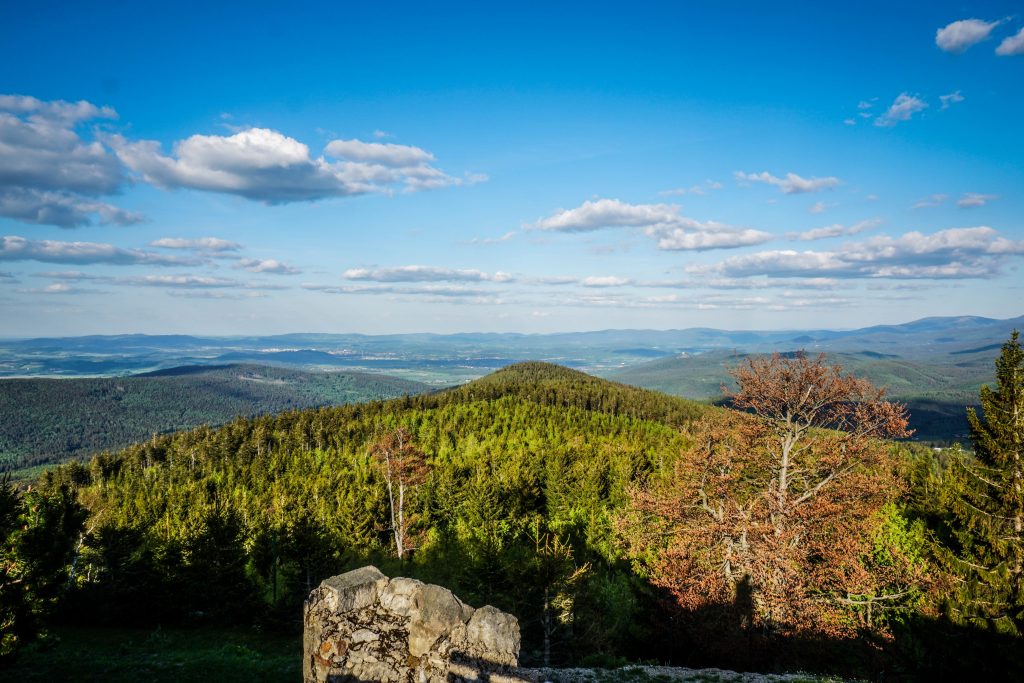
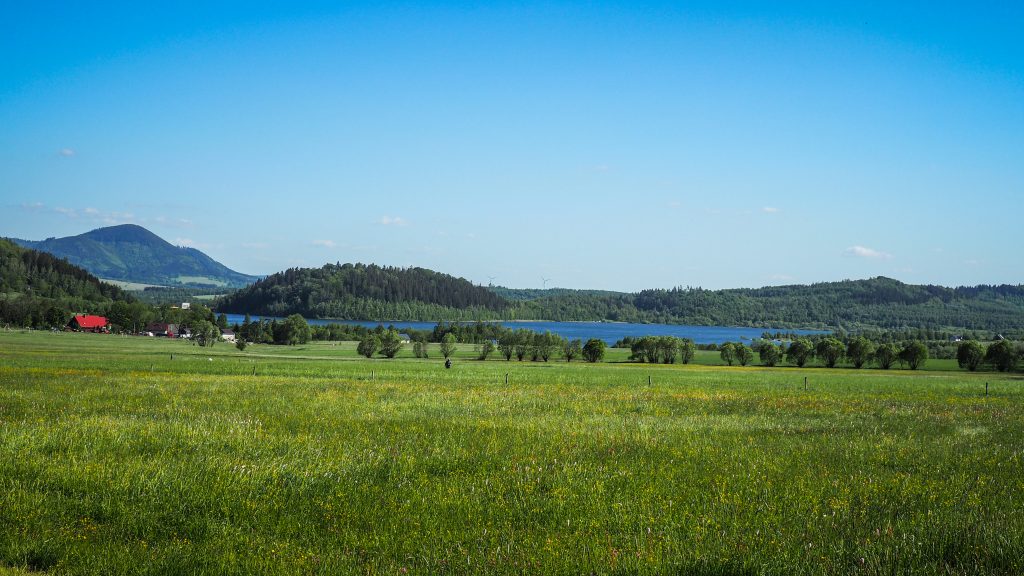
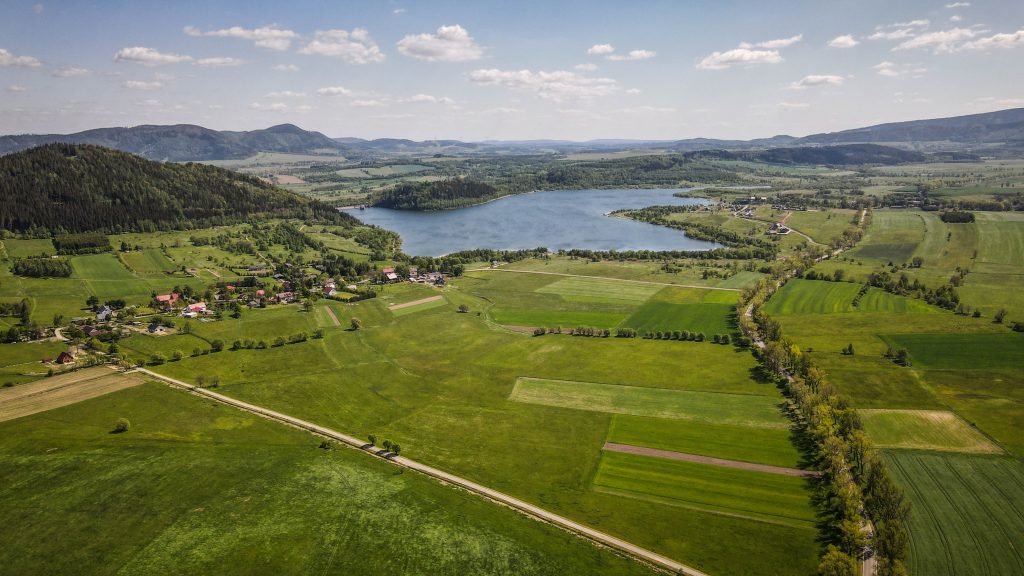
Paprotki is known for nearby Bukówka Lagoon. However, the track doesn’t follow near the banks but instead climbs to Zadzierna Rocks (724 m a.s.l.). It is a wonderful viewpoint but having already some kilometres in our legs, we started to feel first symptoms of fatigue 🙂
Passing by Bukówka Lagoon on a nearby asphalt roadBukówka Lagoon from the drone
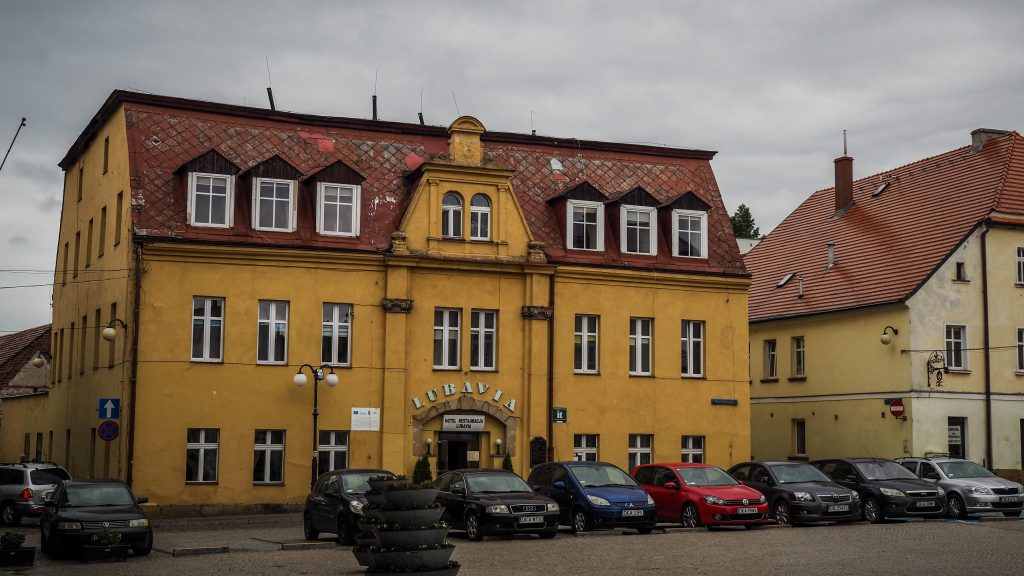
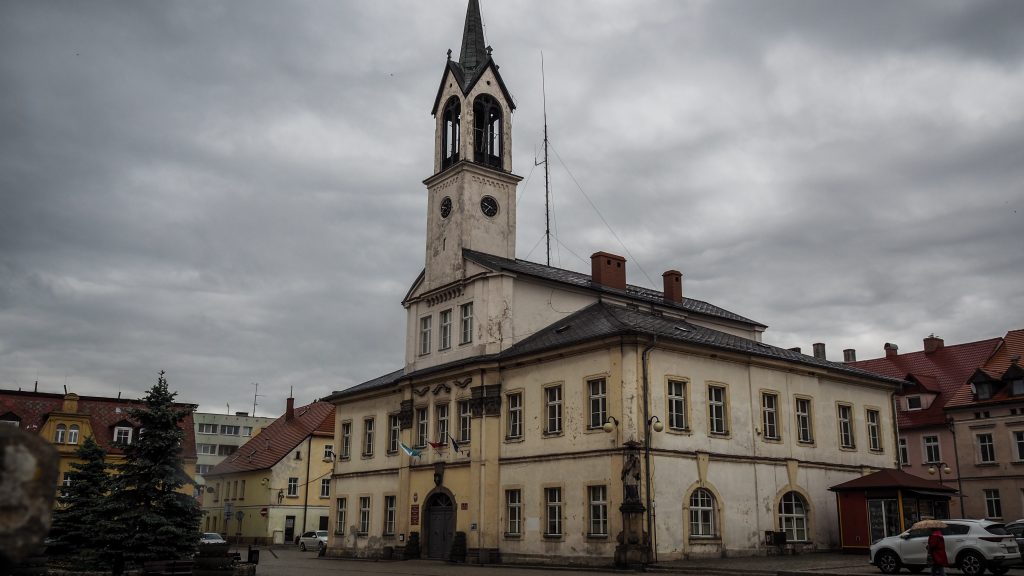
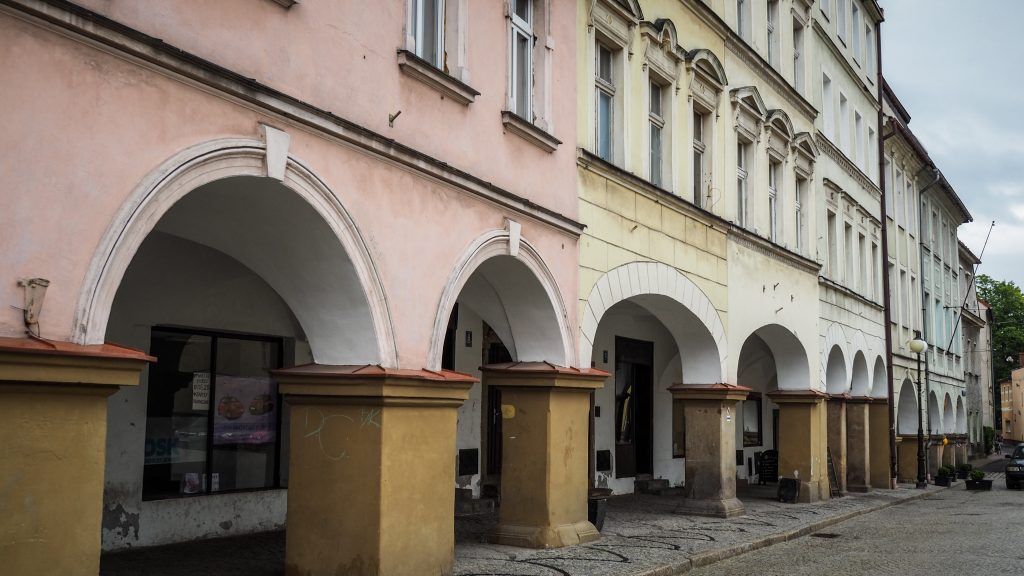
The last section leads downhill to Bukówka village from where we were forced to follow rather an unpleasant asphalt road with car traffic on it, which is never nice for hikers. Luckily, it’s only 3 kilometres to reach Lubawka. The city has a nice main square with city hall and tenement houses from XVIII century. We stayed for the night in Hotel Lubavia which was quite minimalistic. They have a restaurant too, where we refilled with energy in the form of schnitzel, listening to a rather horrible disco polo concert on local TV.
Lubavia Hotel where we stayed for the nightCity Hall in LubawkaTenement houses on the main squareTenement houses on the main square
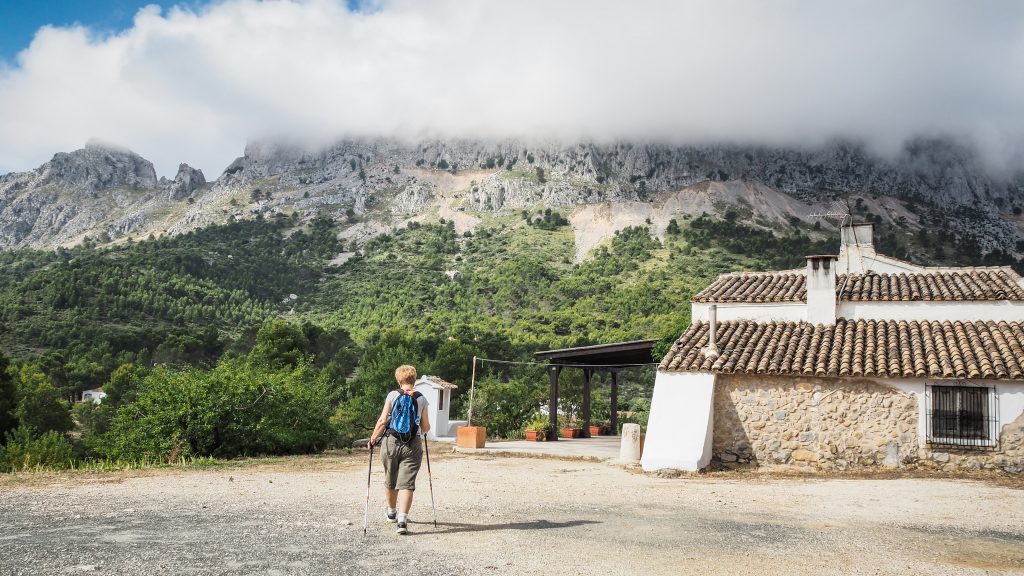
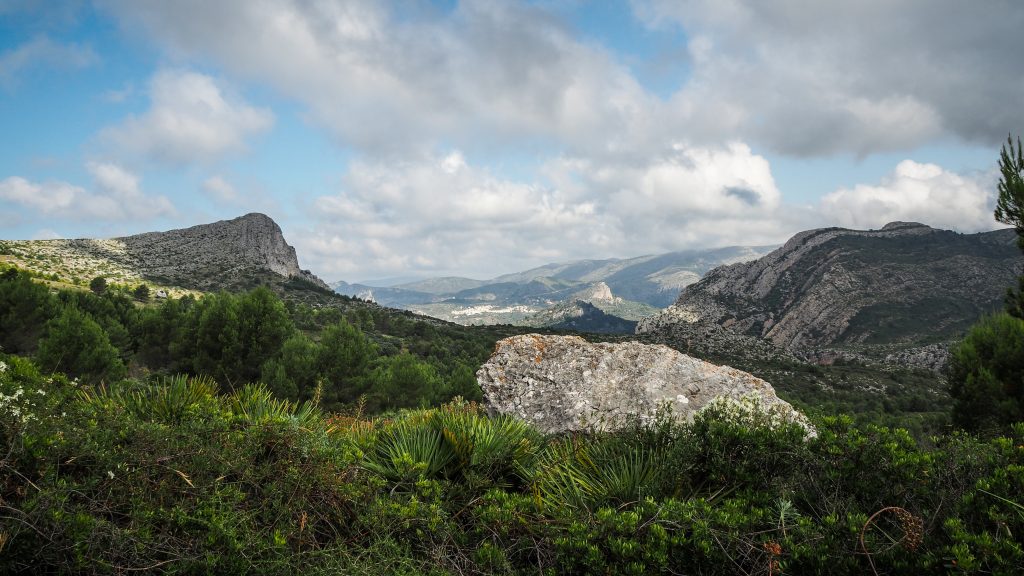
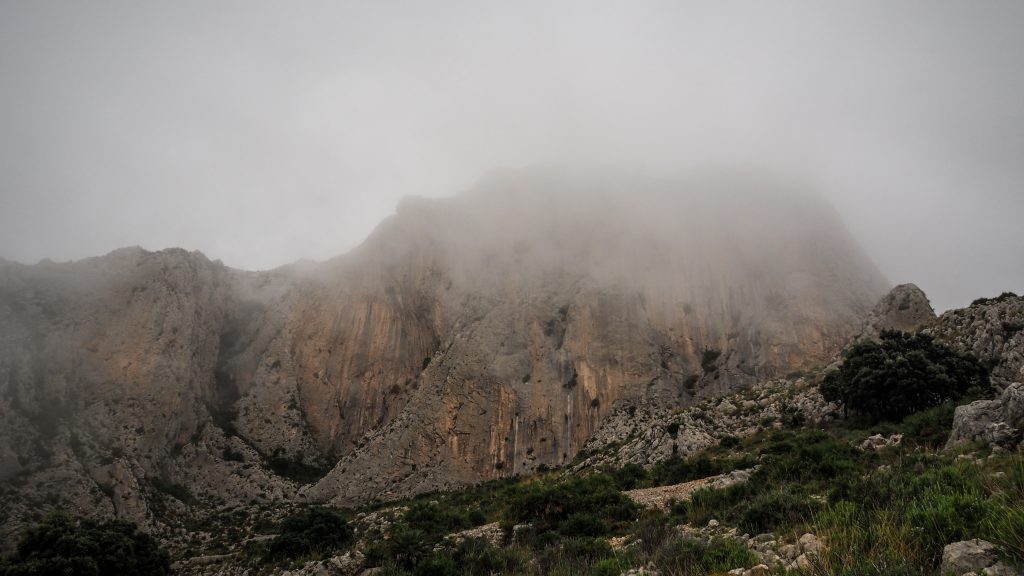
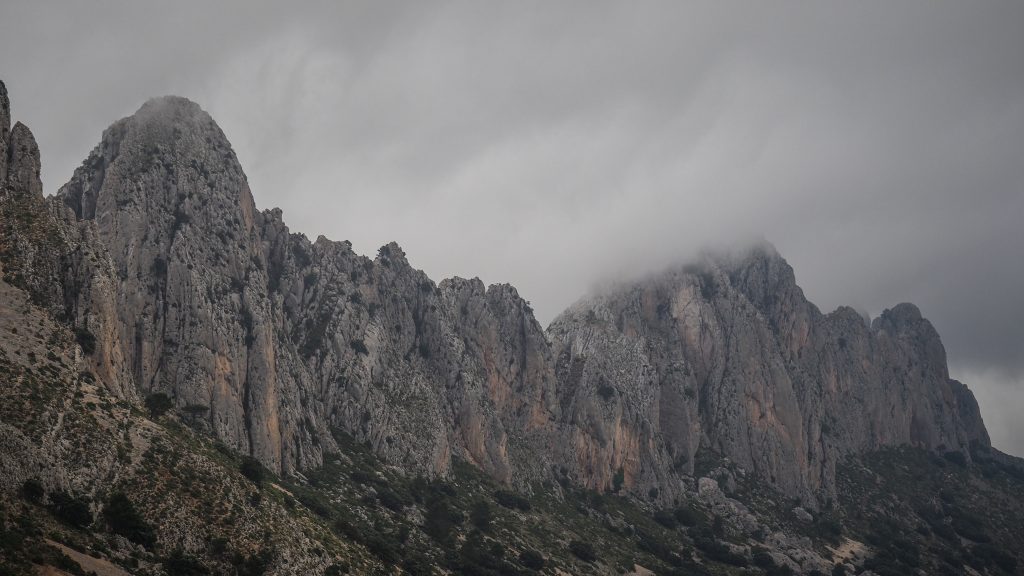
Sierra Bernia mountain range is located around 140 km south of Valencia and 65 km north of Alicante, covering an area of 1,900 hectares. It divides the Costa Blanca from North to South creating the Marina Alta and Marina Baja. The highest peak is at 1.128 m a.s.l.
Sierra de Bernia Circuit is the most popular hike in the area, including breathtaking views as well as adventurous crawl through the tunnel in the rock to the other side of the mountain. The whole route is between 9 – 10 km and should take approximately 4 hours to complete.
We got to the starting point with a rental car and once we turned off the highway and passed through Benissa, the road turned into an experience in itself. It is in a very good condition but quite narrow and winding so be careful, especially when you see the cyclists or cars coming from the other direction.
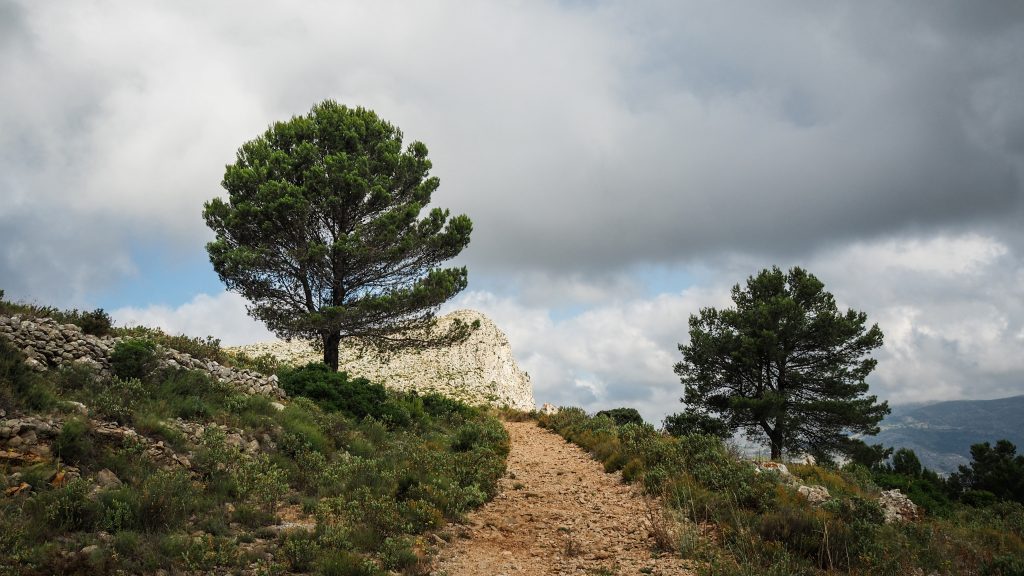
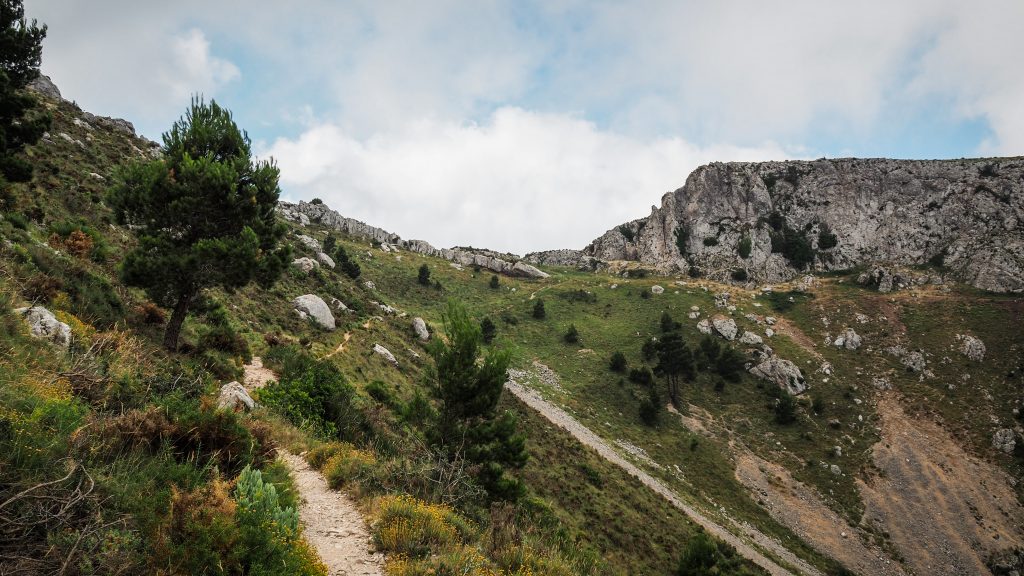
Leave the car next to Restaurant Serra Bernia and proceed beyond the building to the crossroad with trail directions. Does it matter if you follow the track in clockwise or anticlockwise direction? Honestly, I don’t think so. We decided to turn right and follow the trail in counter-clockwise directions.
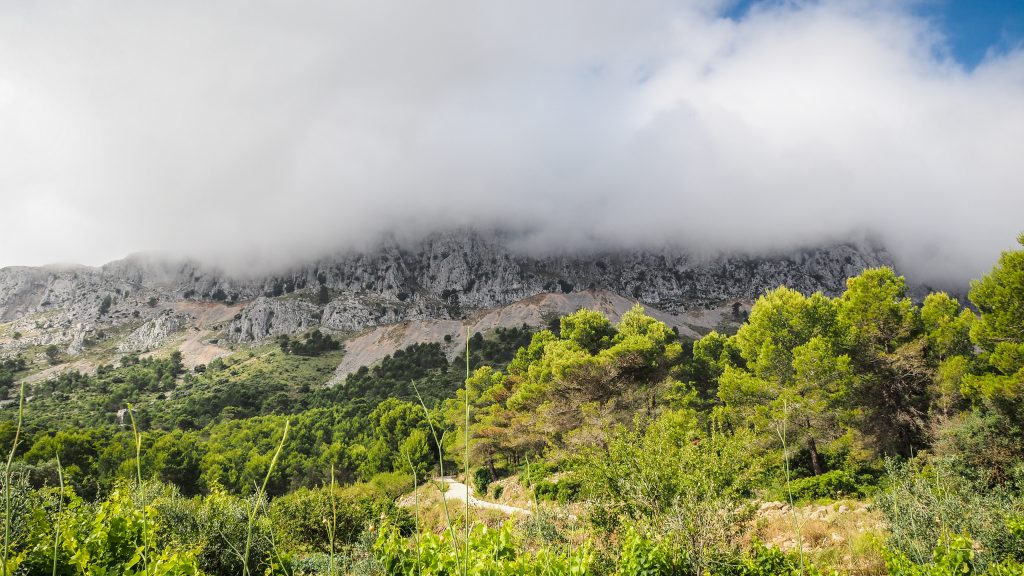
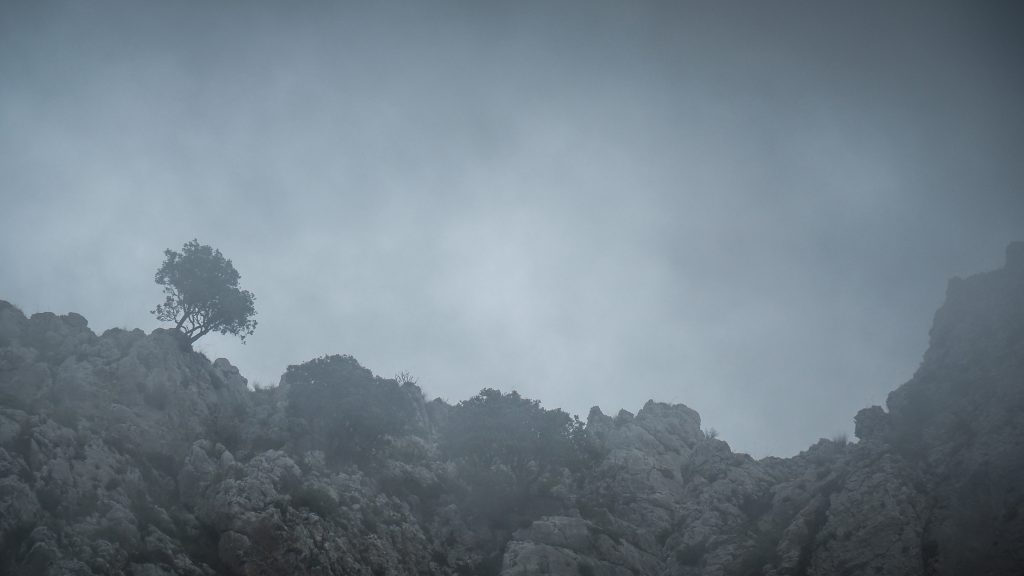
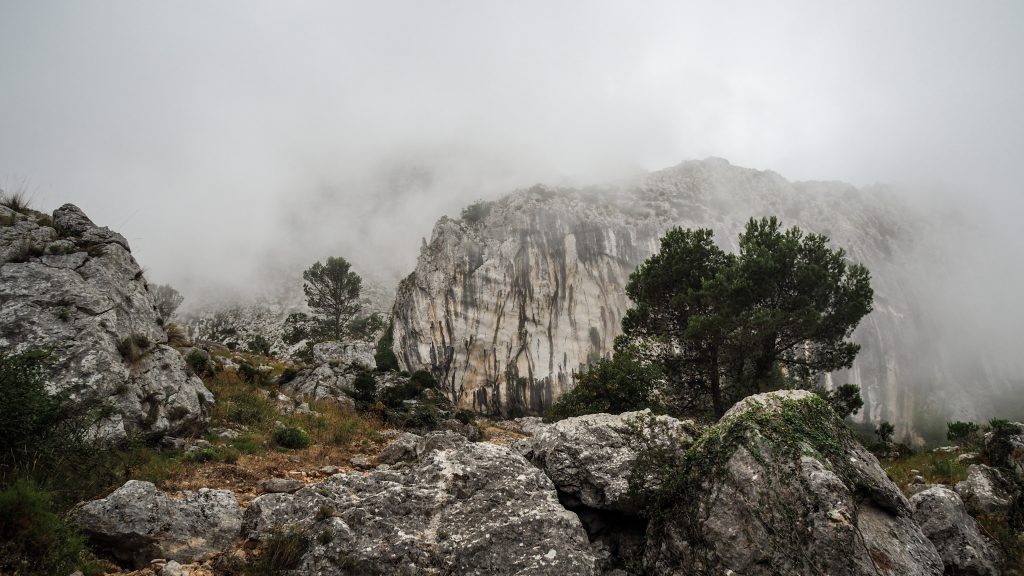
It was the beginning of July and it scared us at first but seems we were lucky enough to bring some clouds with us. After a sunny and hot beginning, it was around halfway to the Fort when first clouds rolled in bringing a pleasant shadow. In general, aim for the start in the early morning and late afternoon, especially during summer months.
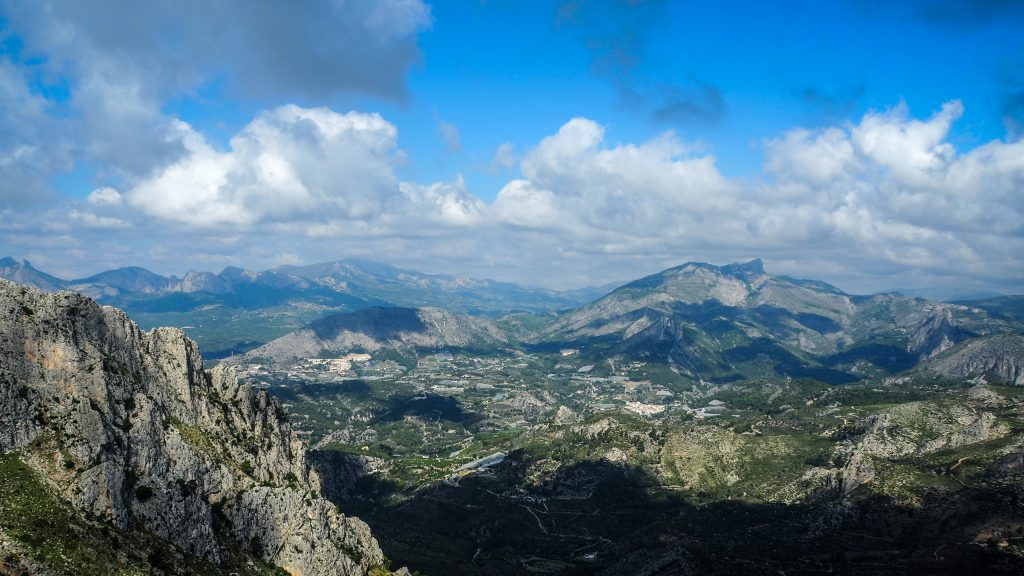
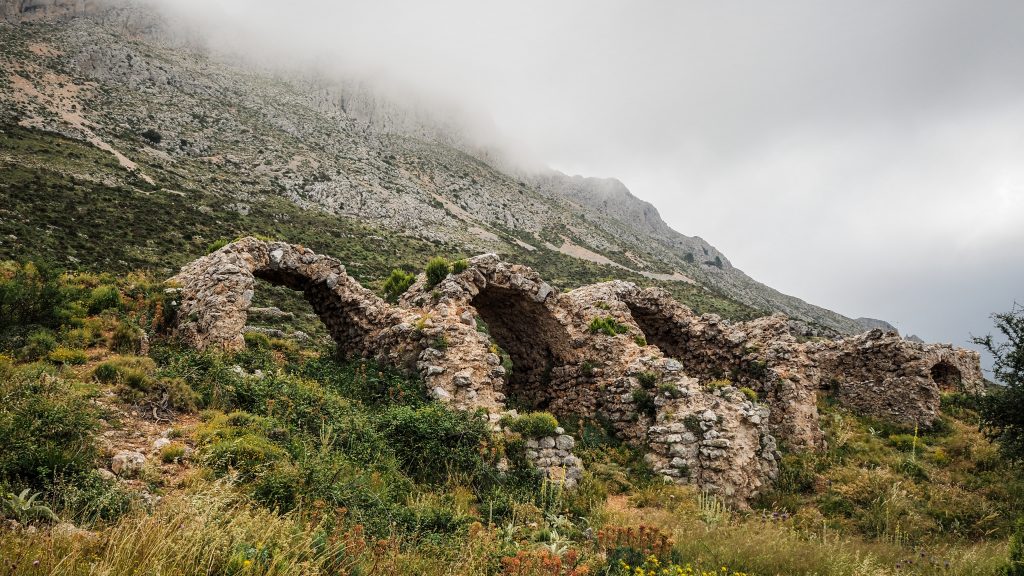
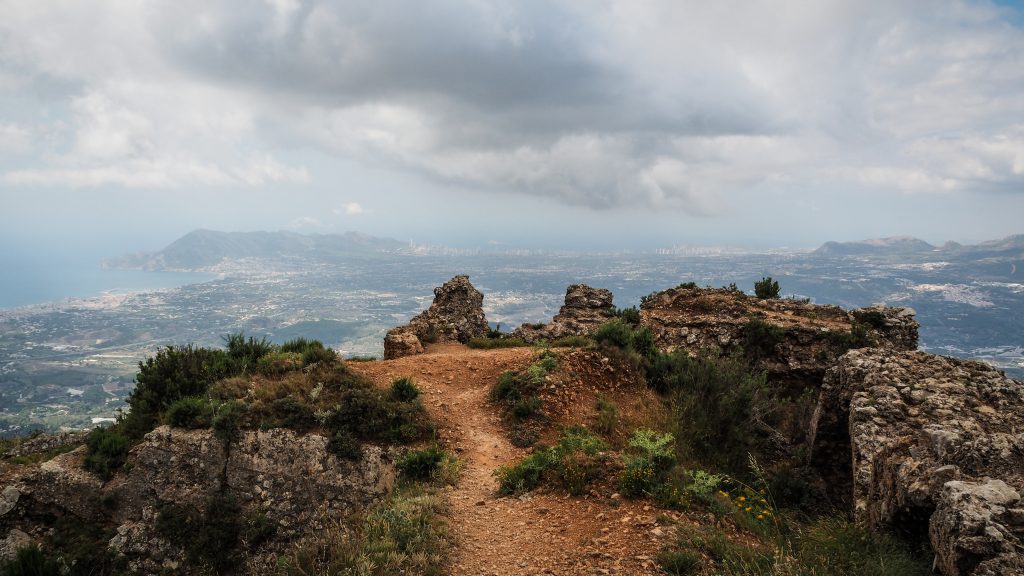
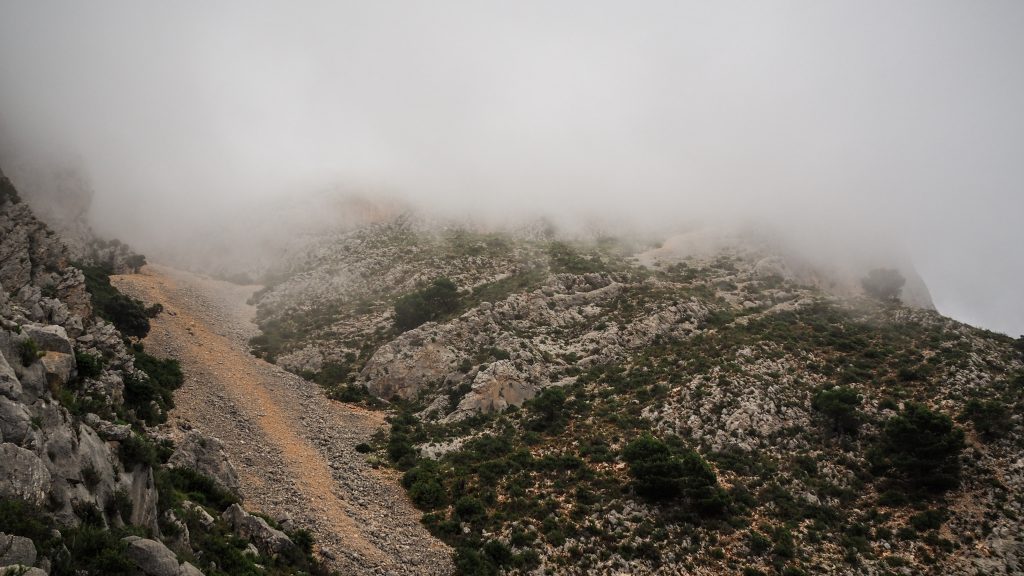
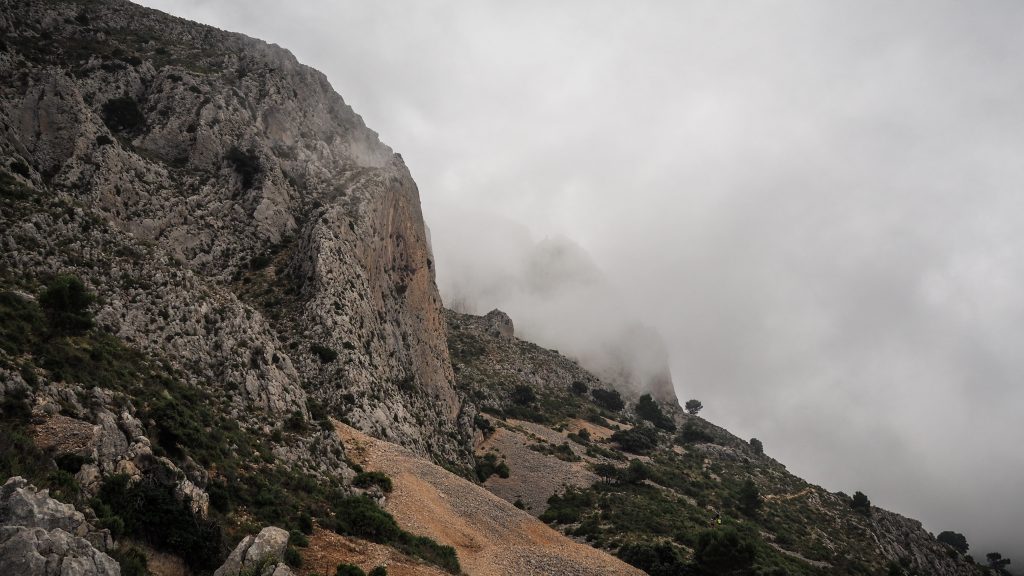
The fort was our first stop and the path from the parking lot was gradually ascending until we saw first ruins in front of us. The views were simply awesome all the way up with Sierra de Bernia mountain range on the left side and wide-open panorama on the right. Better keep your camera close. The fort was designed by Juan Bautista Antonelli in 1562 and commissioned by Prince Philip II to combat the Moorish uprisings. Being located 803 m a.s.l. certainly helped to do the job very well. Today you can see the skyline of Benidorm and apparently if the weather permits, even the islands of Ibiza and Mallorca.
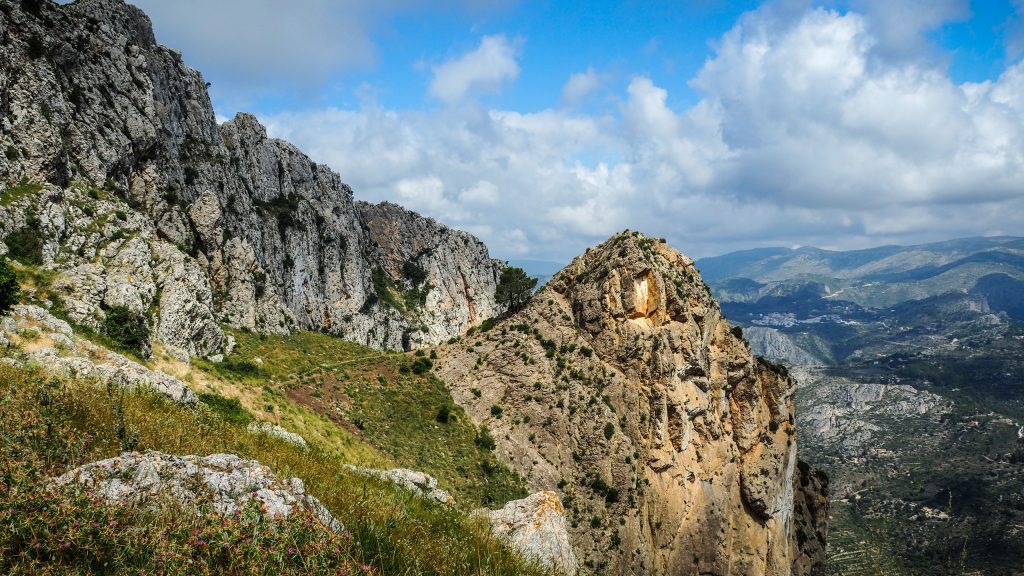
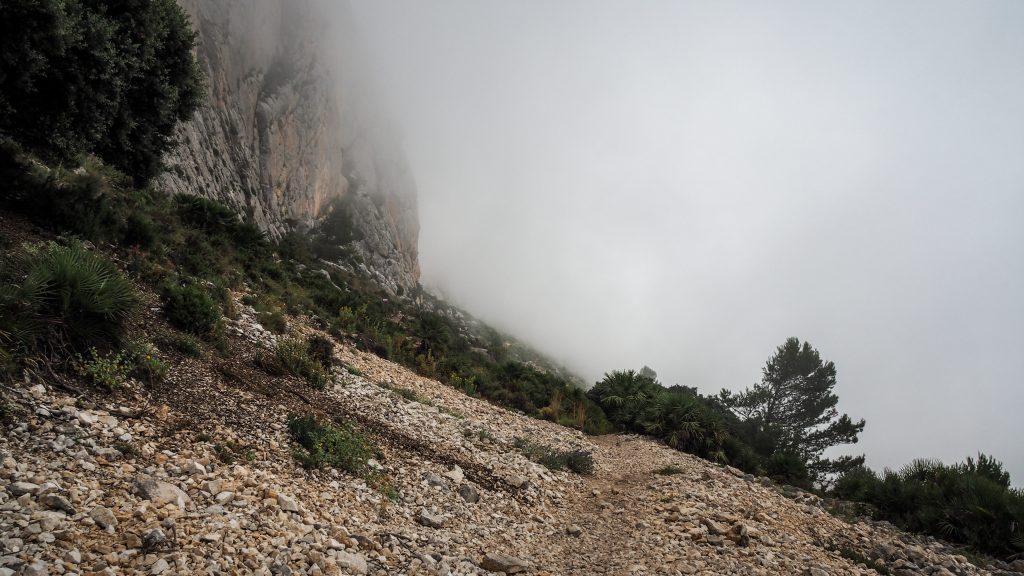
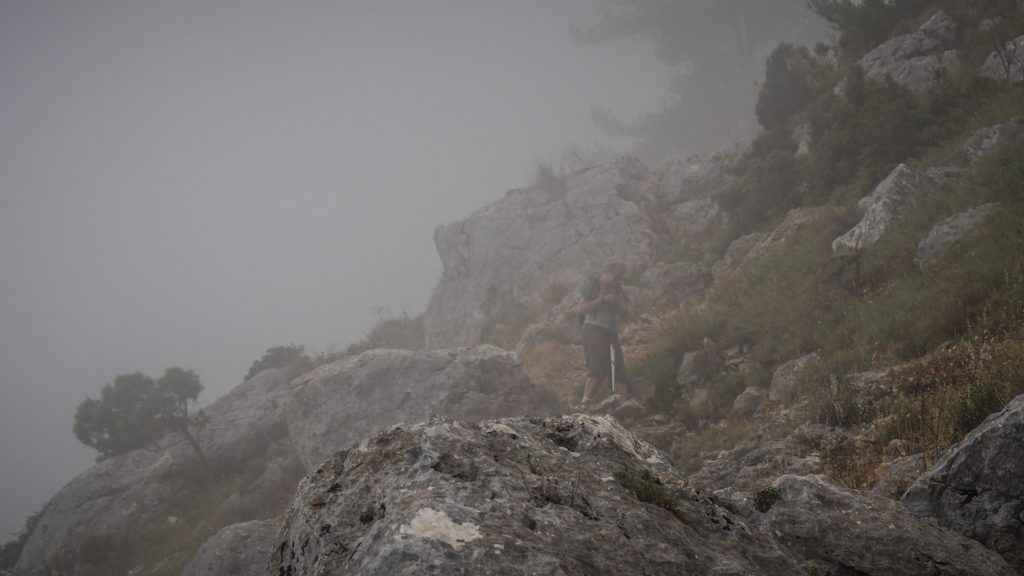
From the fort, the track continues towards the Forat, which is a man-made tunnel through the rock to the other side. It’s not too long, just around 20 meters, but if you are tall, you would need to go down on your knees and crawl. In my case, it wasn’t so drastic 🙂
The last leg of the track descents all the way down to the Font which is a nice place to refresh before the final section back to the parking. The path here becomes much wider and within a couple of minutes, we were back at the parking. Just in time, as it started to rain 10 minutes later! For the second half of the day, we made our way to Calpe, which has a nice beach and awesome Nature Park Penyal d’Ifac to relax (or tackle another rock if your energy level permits).
To sum up, the hike was definitely worth the time and I took tons of nice pics and videos. From the physical point of view, it was more serious than I expected and I was glad to have proper hiking shoes, enough water and snacks. If you prepare well and take your time, it’s certainly doable even for spontaneous hikers.
Our fourth day of the hike began in Karpacz and the target was about 22 km further around Średnica Pass. Not a very demanding day from the physical point of view, but sometimes it’s just nice to take it slowly. The red track was only a few hundred meters away from our accommodation so we joined it without wasting the time for passing through the city.
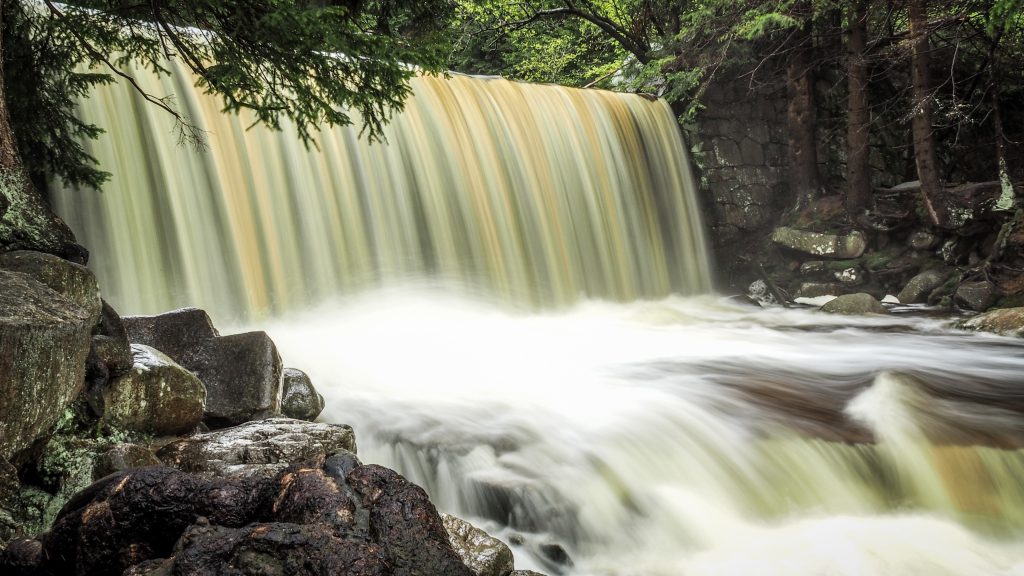
Don’t get me wrong, Karpacz is a nice town and very pleasant to walk around but we already did that the day before. Take your time to check out Wang Church, Wild Waterfall, Dam on Lomnica or the view from Karpatka. Sooner or later I will make a dedicated post about that popular town in Karkonosze Mountains so stay tuned!
Wild Waterfall in KarpaczWang Church in Karpacz
Meanwhile, let’s come back to Main Sudetes Trail. The weather wasn’t good. Light rain accompanied us for the first two hours but the forecast was right and it improved around noon. We passed Płóczki – the oldest area of Karpacz and pushed towards Przełączka pod Grabowcem (~ 2.5 km).
From there it was downhill all the way to Radzicz (~ 3km) and at some point, we saw quite cool ruins of old preventorium on the left side. From Radzicz the track continued to Mysłakowice (~ 6km) on a flat and mostly asphalt surface.
Ruins of preventorium around Radzicz
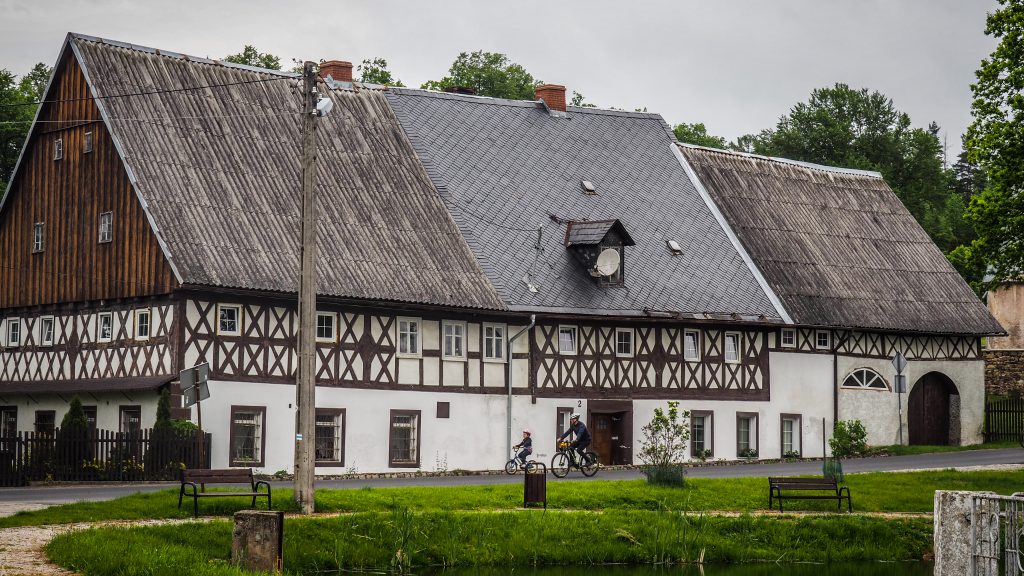
What you may find interesting in Mysłakowice are the houses in Tyrolean style. In 1837, the Austrian emperor issued an order according to which infidels had to decide whether they would convert to Catholicism and stay in the country or they would remain with their faith and leave Austria. Over 400 Evangelicals decided to move to Jeleniogórska Valley, thanks to the Prussian king Frederick William III, who let them settle there. The largest group stayed in Mysłakowice building houses and making the city their home.
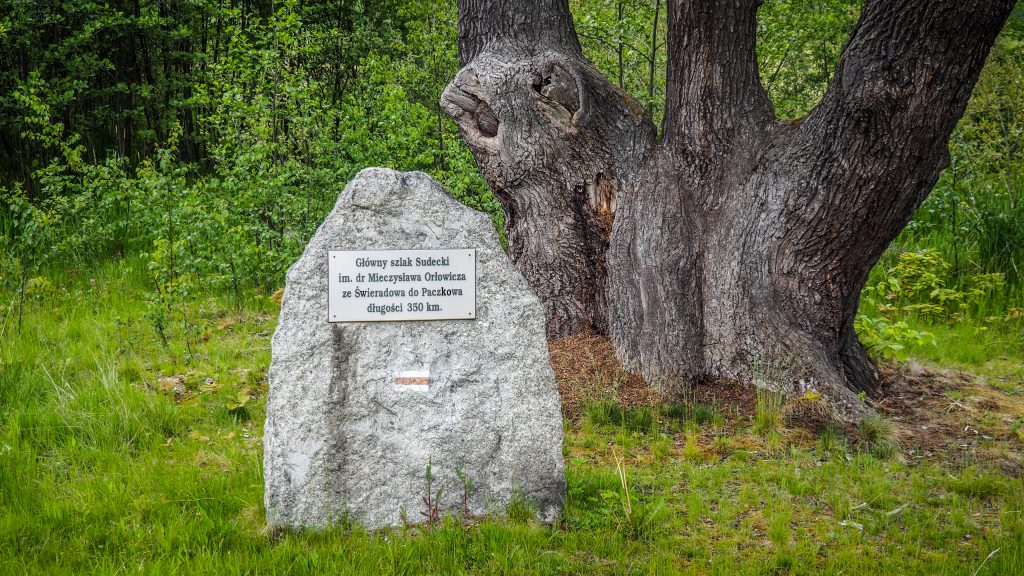
Stone showing old distance of Main Sudetes Trail when the track used to finish in Paczków – 350 kmLazy atmosphere in Mysłakowice
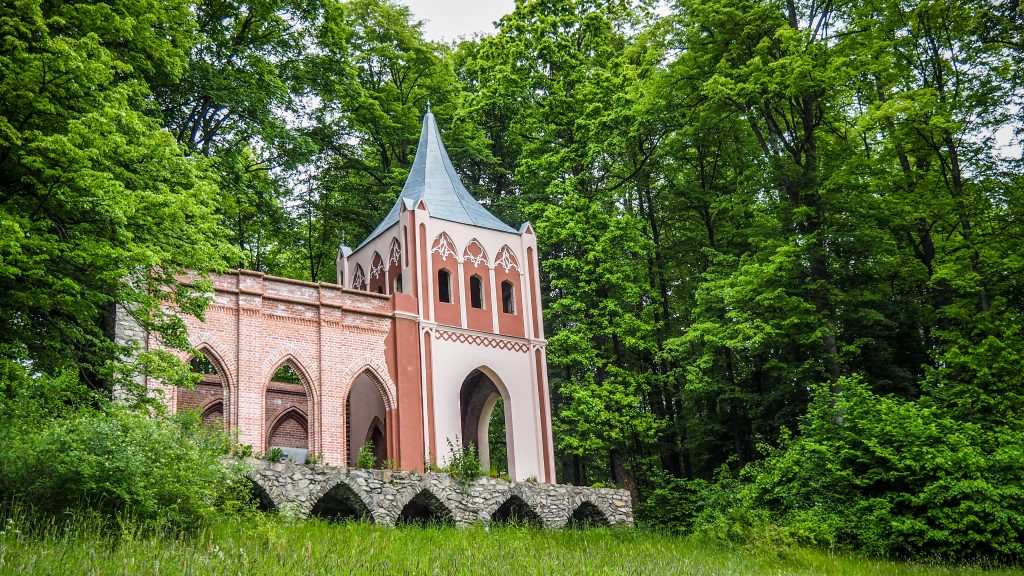
4-5 km further we reached Bukowiec which was the highlight of the day. We got out of the forest to the meadows and saw the picturesque ruins of the abbey on our right side. Then, surrounded by several ponds we passed through the village checking out the palace and the tea house pavilion in Athena Temple in the gardens.
Bukowiec was once owned Friedrich Wilhelm von Reden, who was a German pioneer in mining industry. He and his wife turned the town into a significant cultural centre of Prussia, with the status of a summer resort.
Mysterious Forest Museum is located in a former brewery building and presents in an interactive way flora and fauna of the region. We didn’t visit it but if you have more time, it looks like a nice stopover and has good reviews.
Ruins of the abbey in BukowiecPonds around BukowiecPonds around BukowiecPonds around BukowiecAthena Temple in Bukowiec
From Bukowiec, the track ascents gently through the forest for about 5 km to Średnica Pass. Here, we left the red track and walked to Wojków where our accommodation for tonight was.
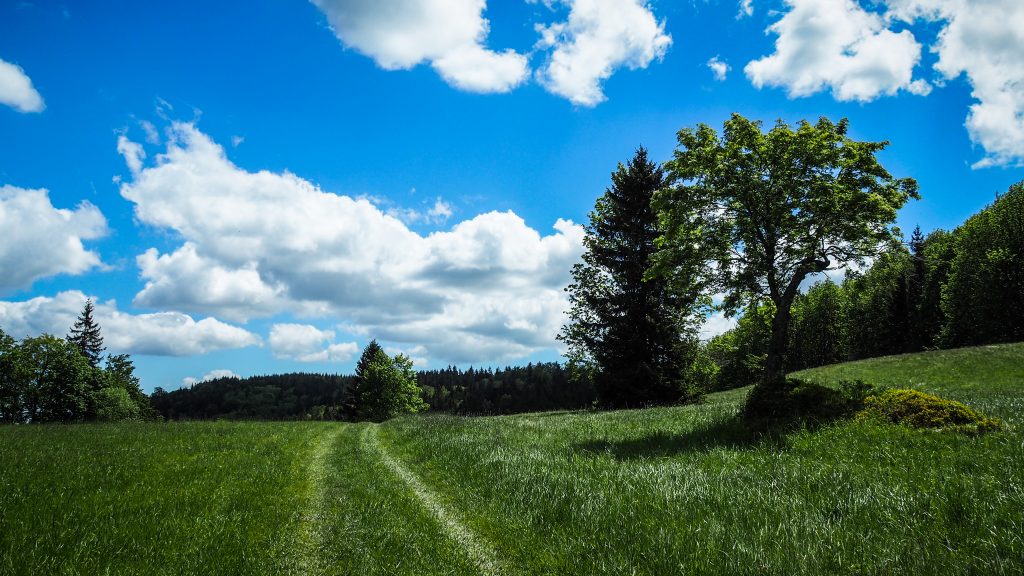
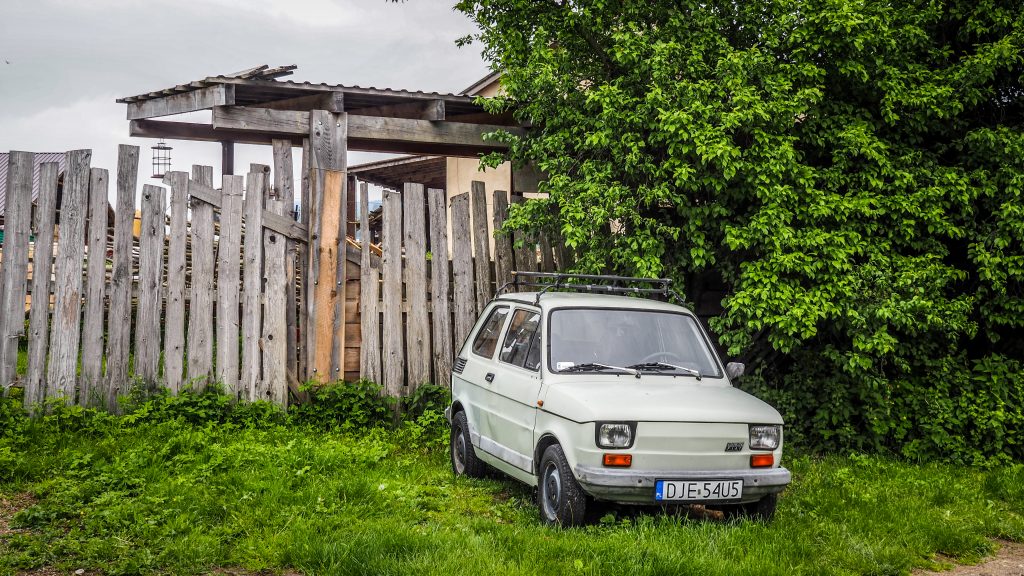
To sum up, it was a very different stage compared to the previous ones. It leads mostly through the forest and typical Polish countryside, which provided an extra variety to the experience.
Fiat 126p – the icon of Polish automotive industryHouses on Polish countryside
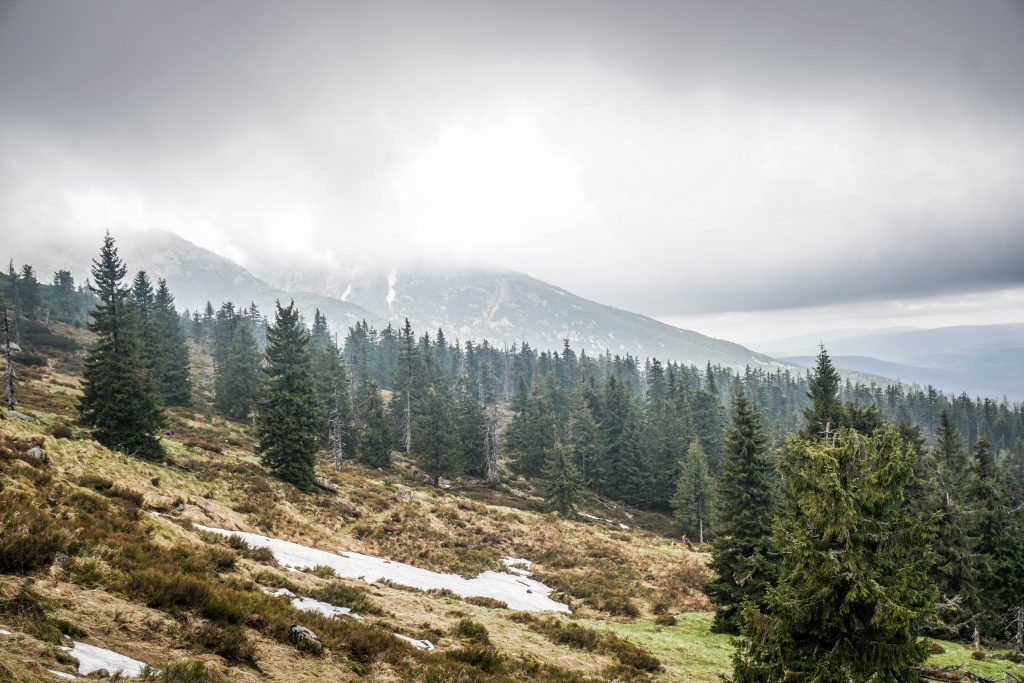
And again. Opened my eyes in the morning, saw the backpack and I knew it is going to be another day on the track. Fog from the previous day was gone and in the morning there were only different versions of blue and green. Perfect day.
We left shortly after breakfast which was as delicious as yesterday’s dinner. Pancakes with blueberries and some extra scrambled eggs.
Route: Odrodzenie Hut to Karpacz Distance: ~ 21 km
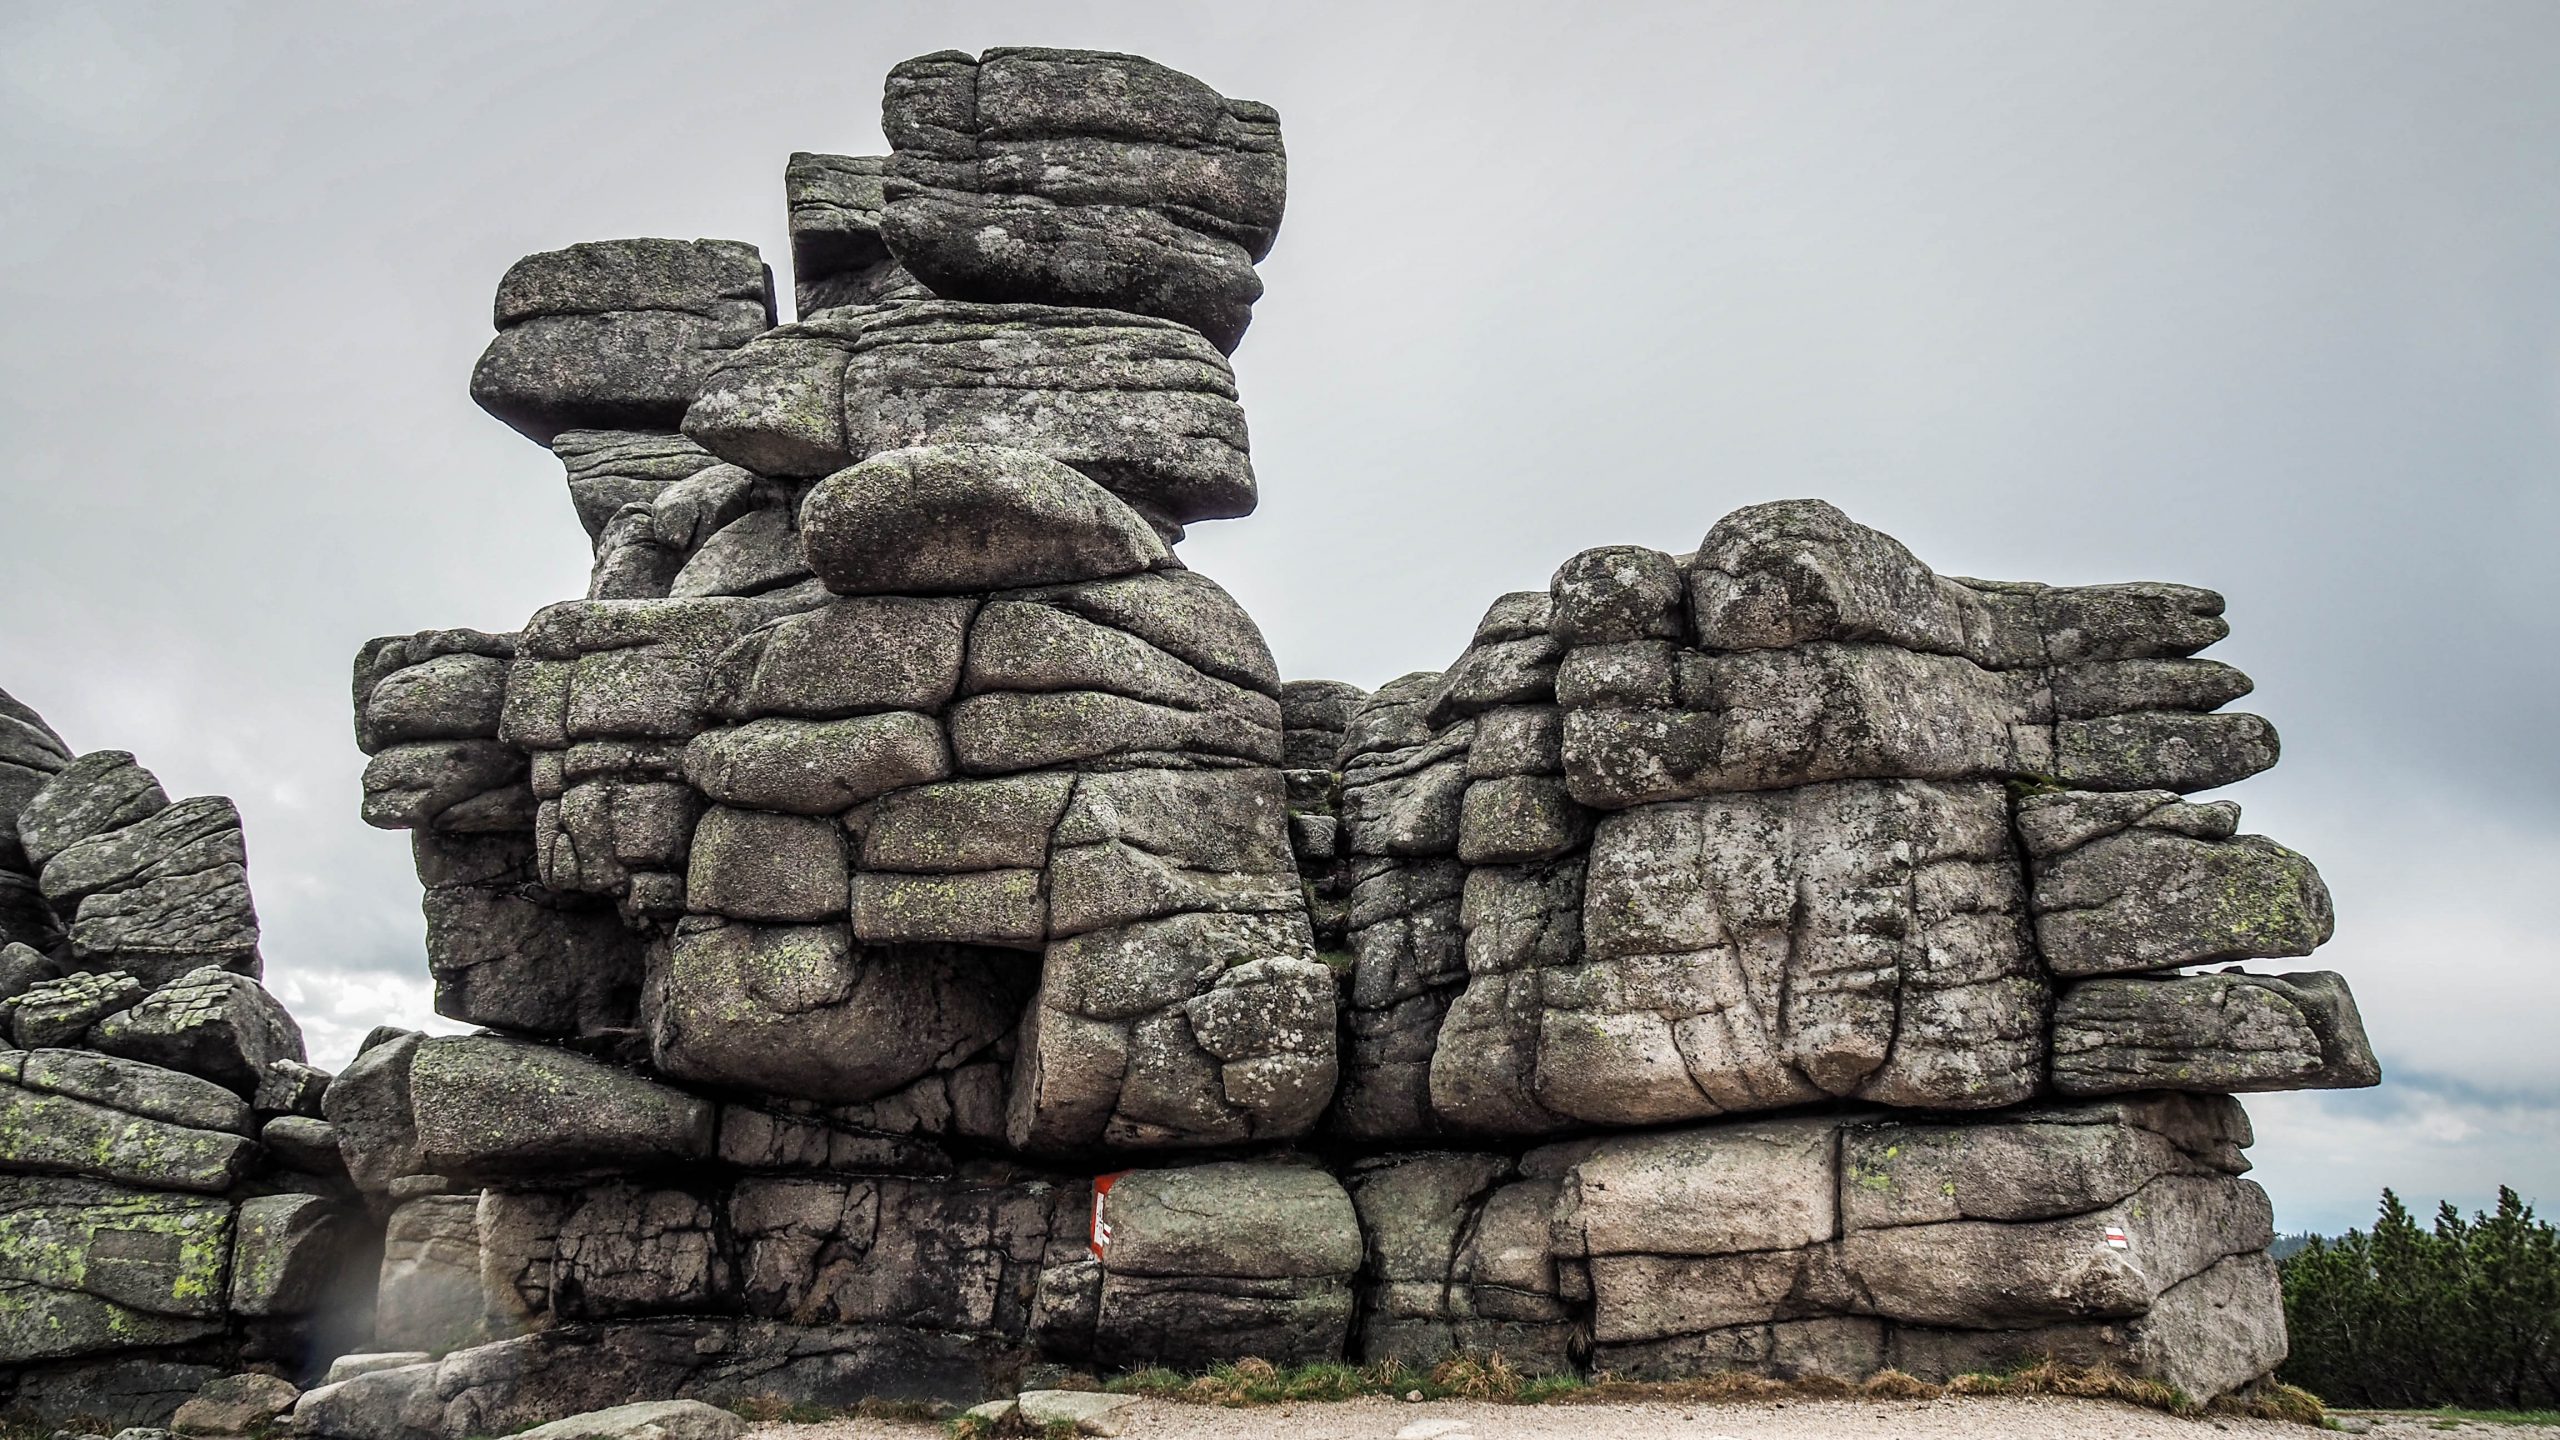
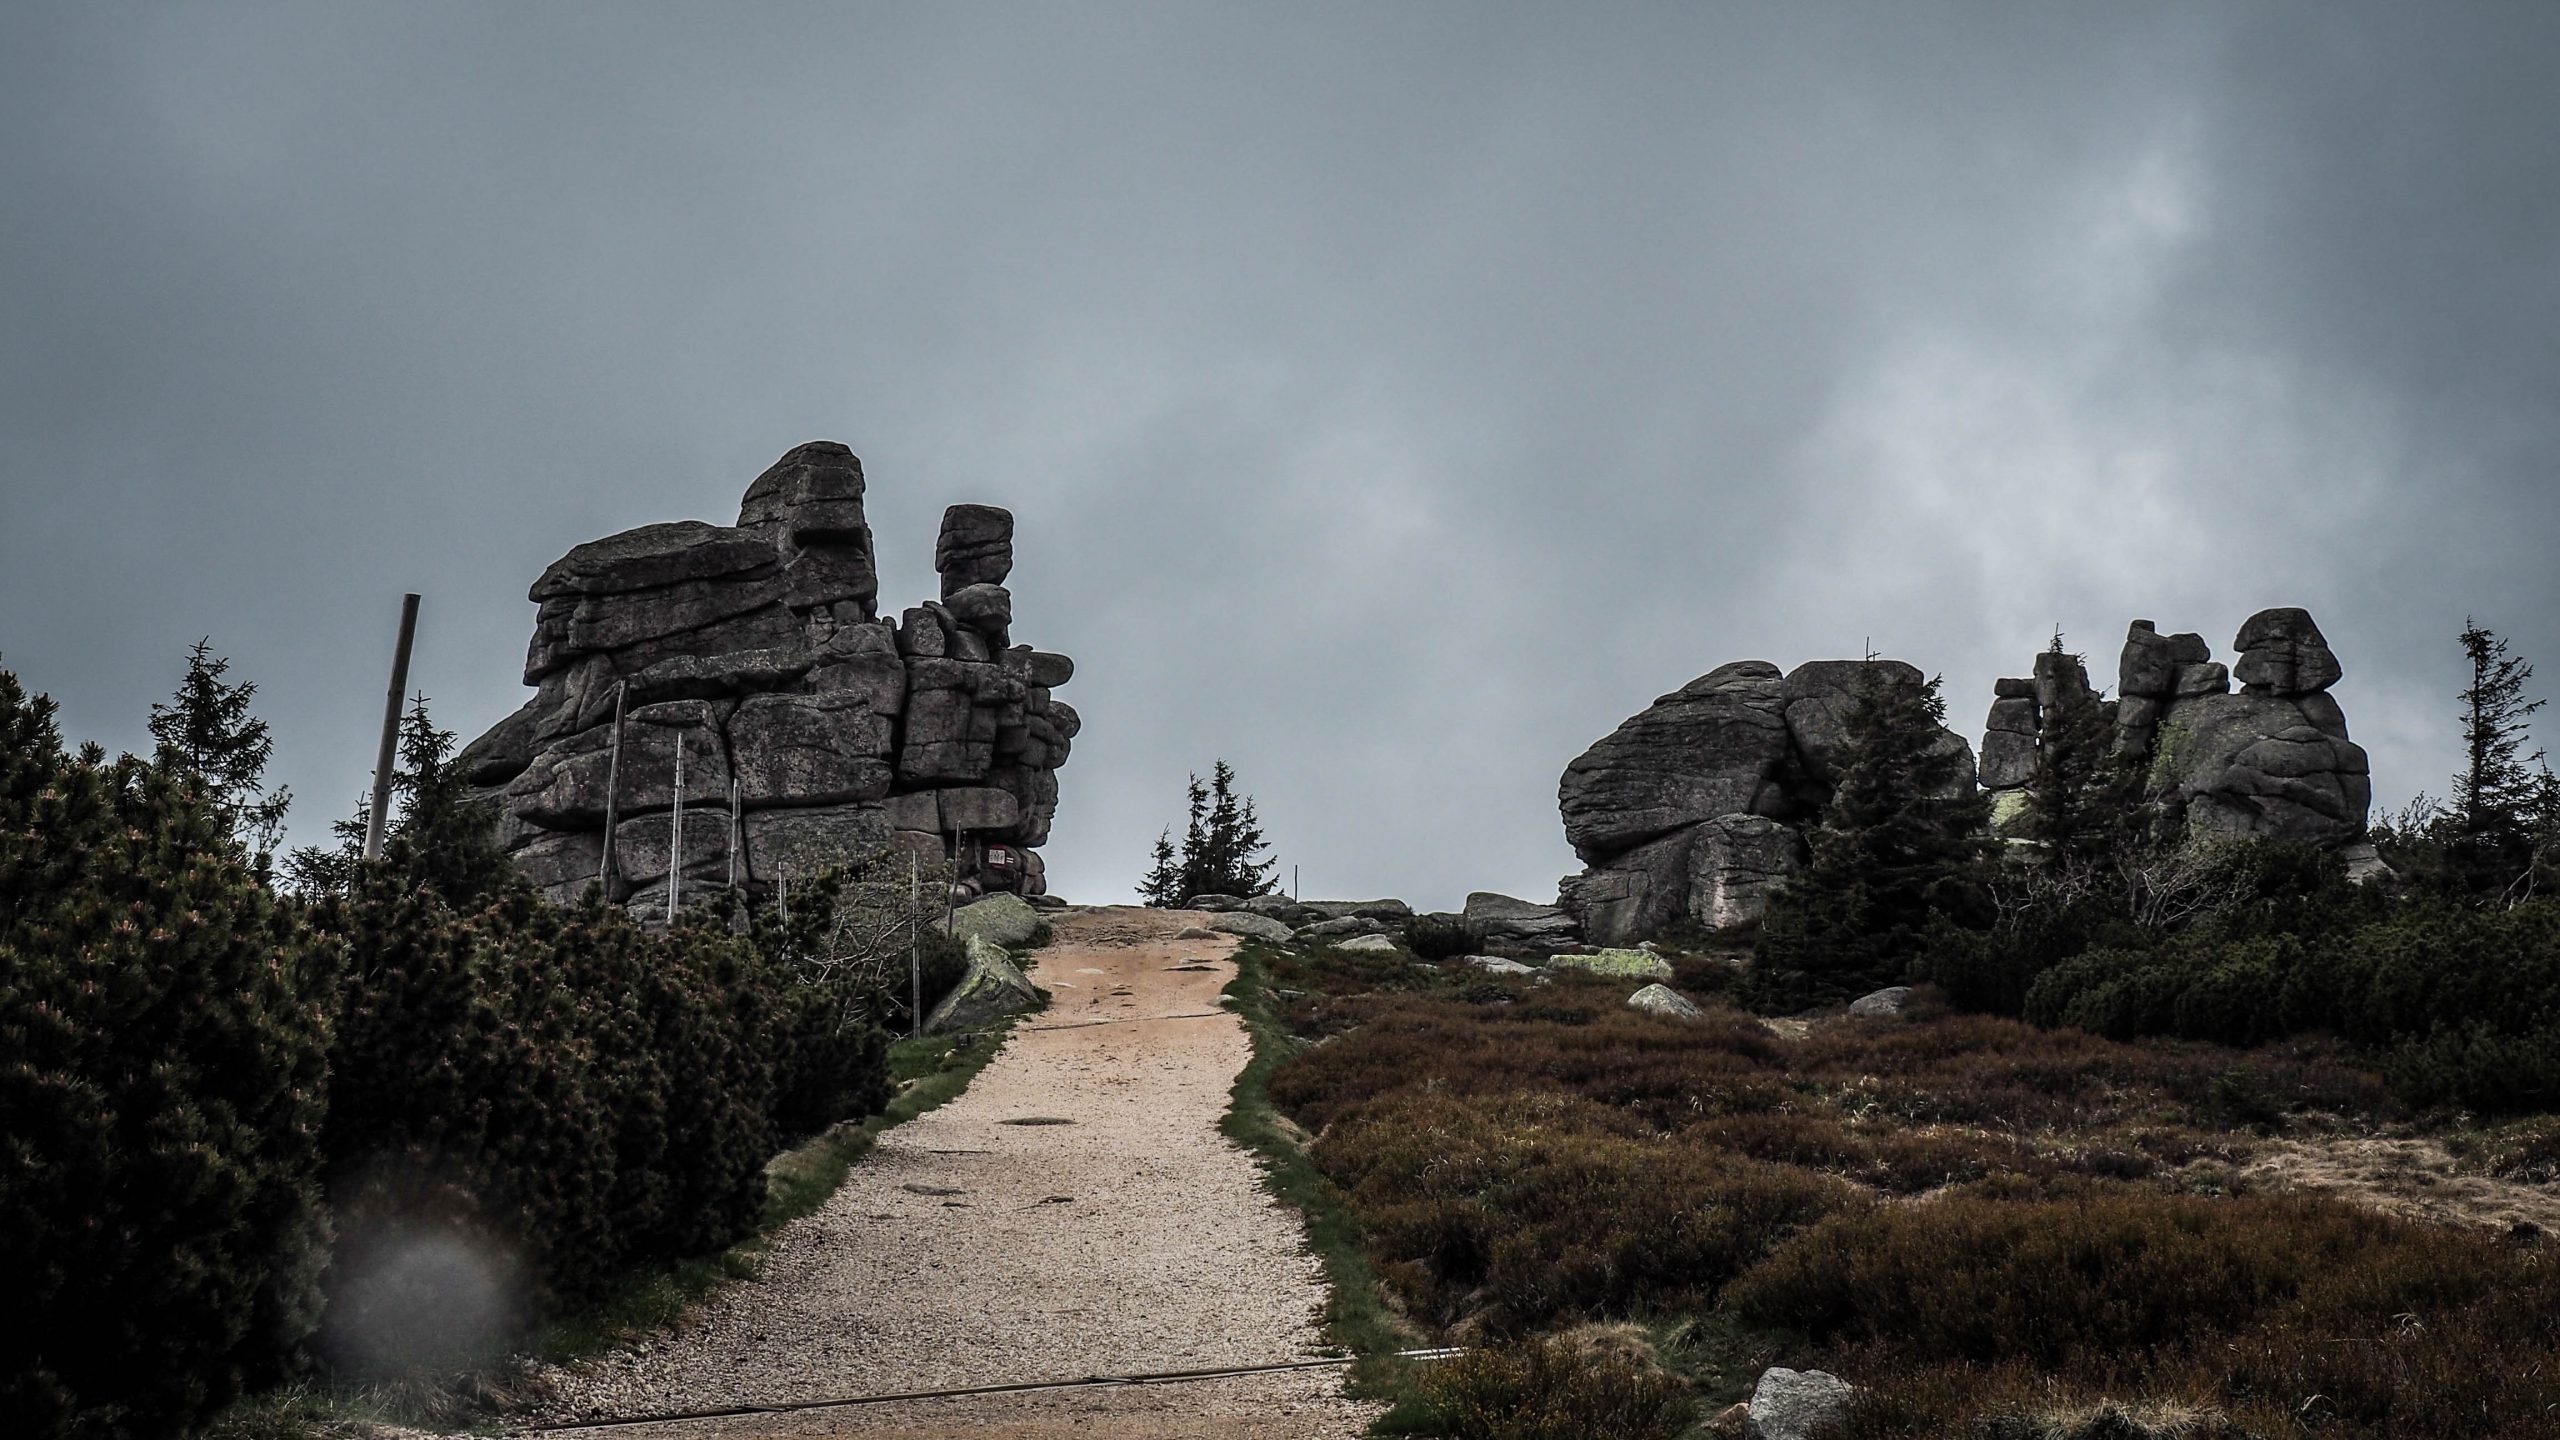
The first stage (~3.5 km) lead us from Odrodzenie Hut to Sunflower (Słonecznik). It was a very gentle ascent, perfect for the easy start just after breakfast.
There is a legend explaining how the rocks appeared in that place. It was the devil himself who tried to flood the nearby villages and figured it out that throwing big rocks to the Great Pond (Wielki Staw) would do the job. Easier said than done though. The rocks were too heavy and before he reached the edge of the pond, he heard church bells ringing in the morning and he lost all his powers, dropping and rocks where they stand today. The devil turned into the rock as well (the one that looks like a man looking over the horizon). Nevertheless, the legend still doesn’t explain the name Sunflower. The answer is much easier to digest than the devil’s legend. The neighbouring villages used it as a natural clock. With the sun above the rock, they knew it’s noon.
Between Odrodzenie Hut and SunflowerThe SunflowerThe Sunflower
Sunflower is a major crossroad with green and yellow tracks. Here we had to make a detour again as the red track was closed. At first, we decided to make a coffee and wait to see if someone is going to go anyway. There were quite a lot of people hesitating and we could feel the tension in the air. Finally, two women passed under the rope but it wasn’t longer than 10 minutes until they came back being returned by the ranger who was waiting just around the corner.
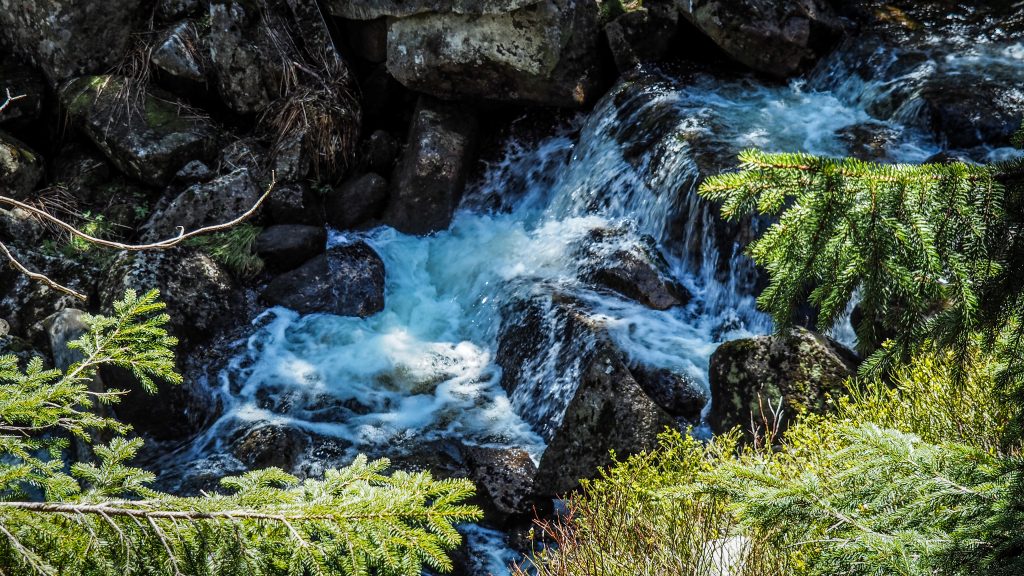
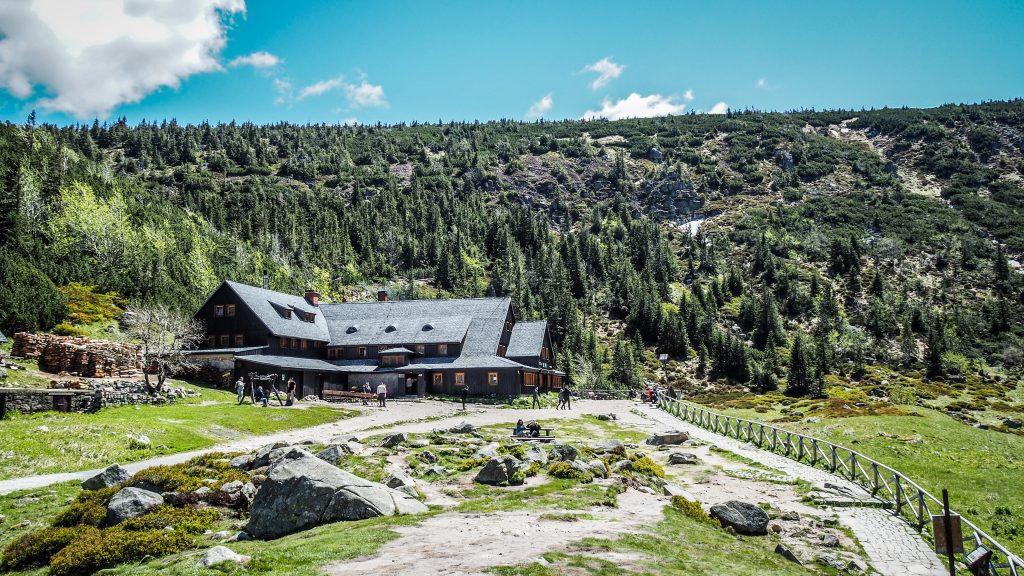
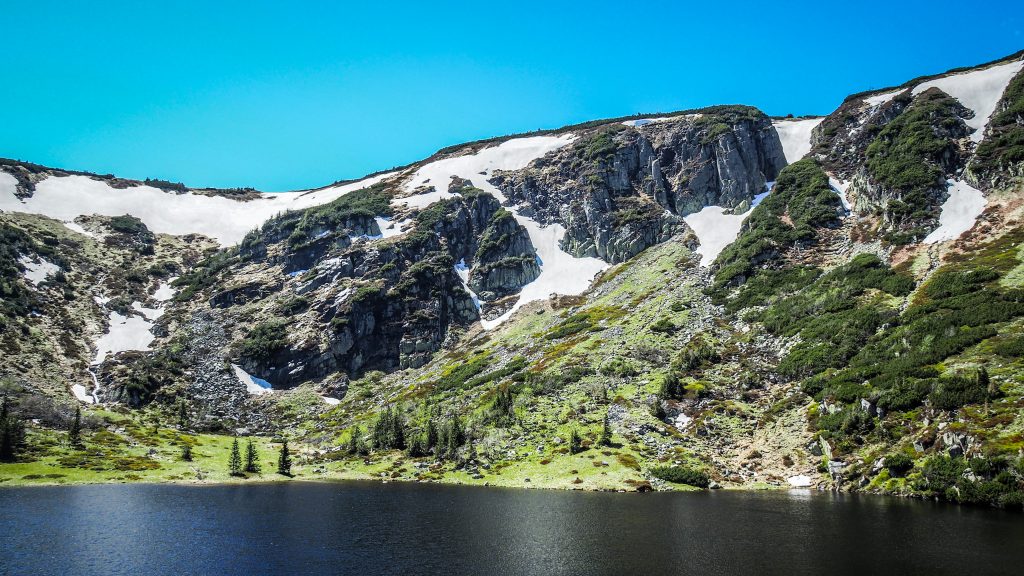
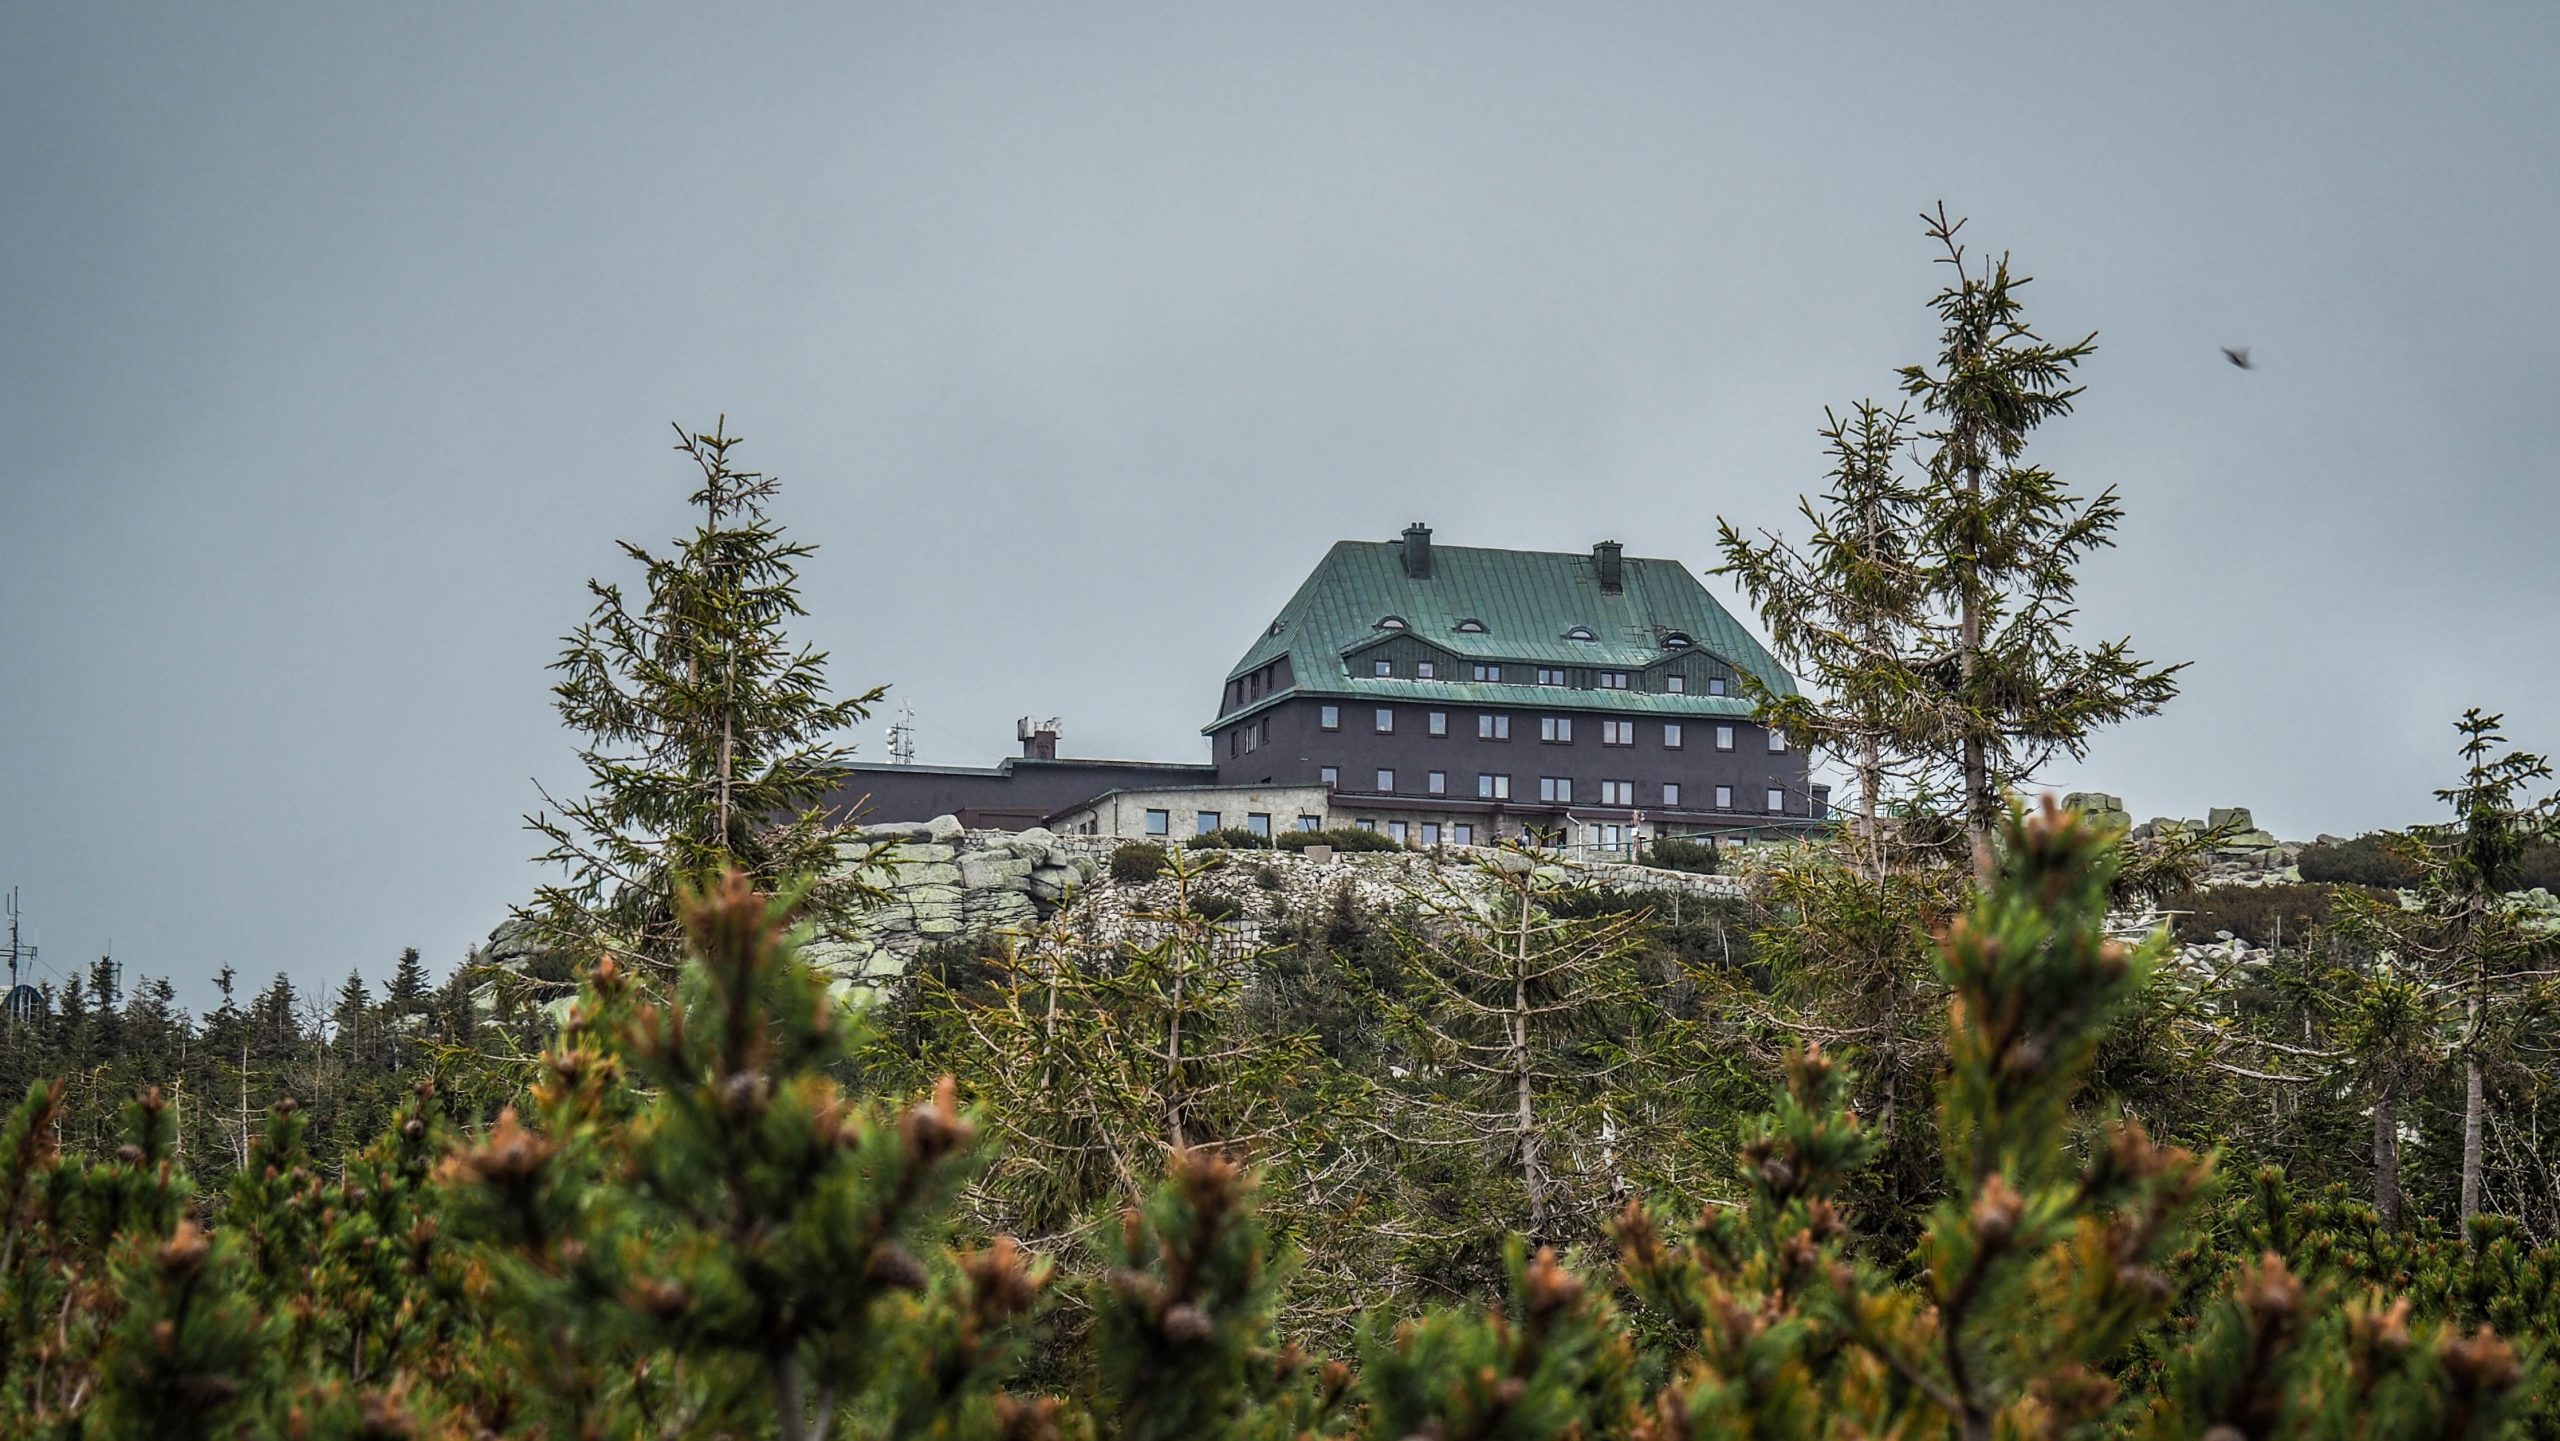
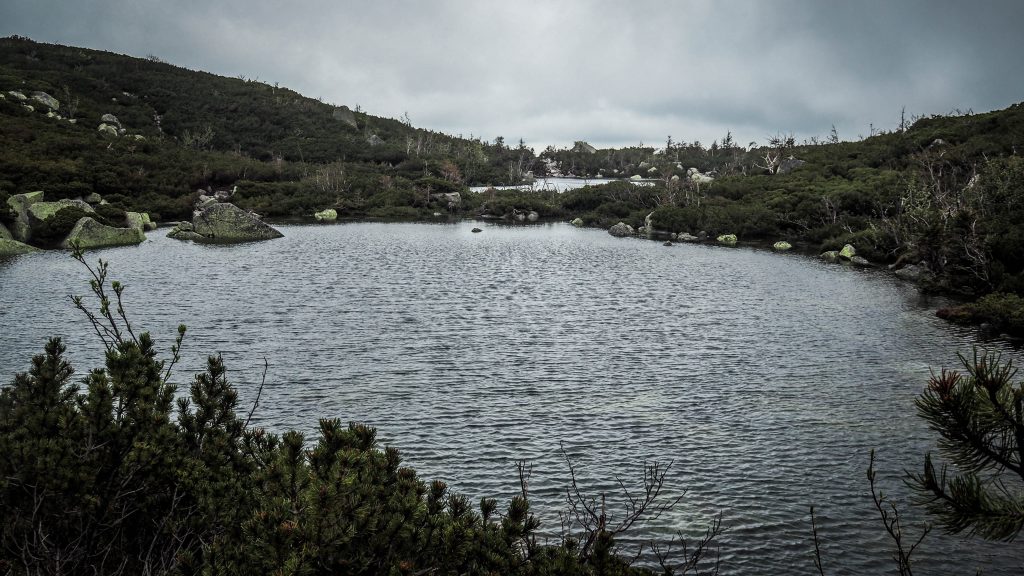
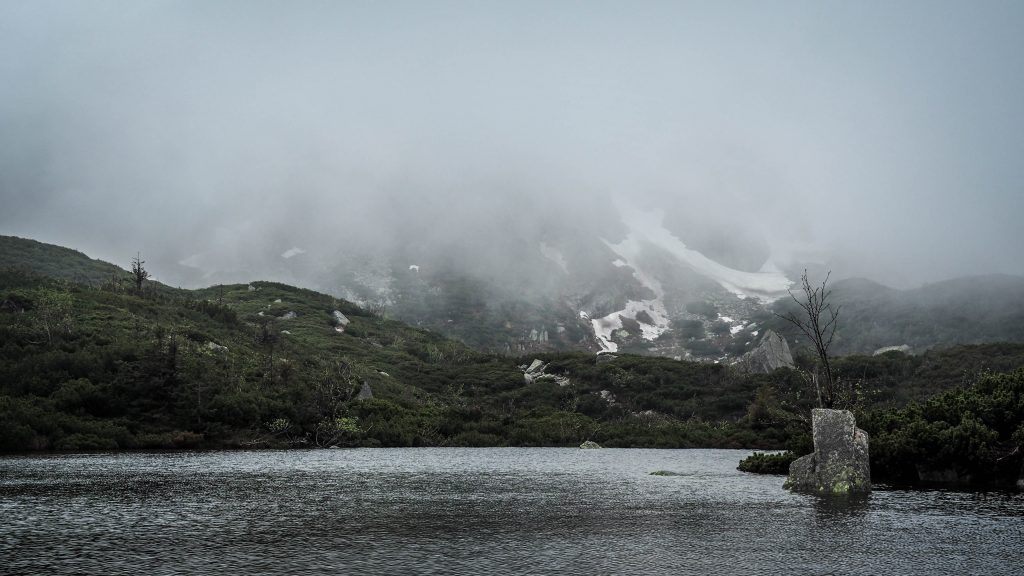
Luckily, the detour took us to one of the most scenic locations in Karkonosze Mountains – Samotnia Hut. The place is a kind of a legend as the first records say about a man guarding trout kept in the water and living in the hut as early as 1670. It is located just at the edge of the Small Pond surrounded by snow-capped peaks and ridges. Karkonosze aren’t the highest mountains you will see in your life, but here I had a feeling that I am in much more serious mountains that I really was. The only negative side is that proximity to Karpacz (1.5 – 2 hours walk) make is a very busy and crowded place.
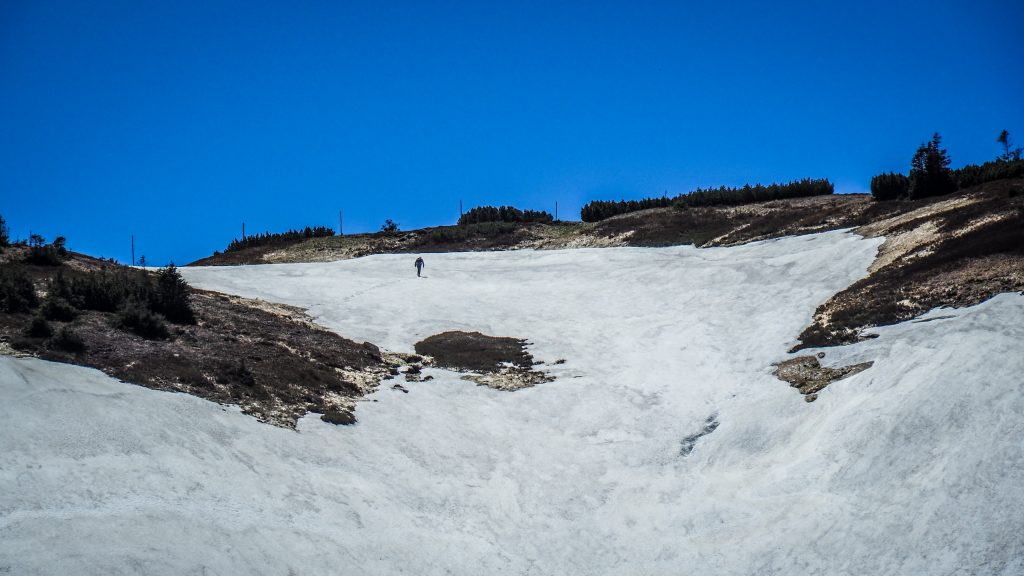
Cascades on the way to Samotnia HutSamotnia HutSmall Pond around Samotnia HutLonely soul wandering up there in a snow
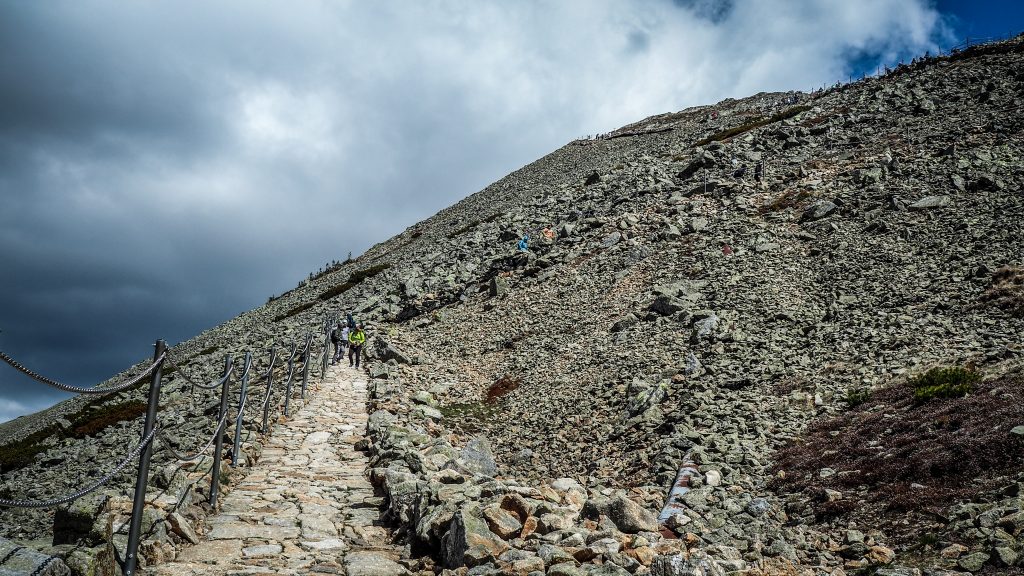
After a decent photo session and snack break, we pushed forward towards via blue track towards Sněžka /Śnieżka in excellent moods. It was a short ascent to Strzecha Akademicka Hut. From there it was another hour to Silesian House (Dom Śląski) and meanwhile we met the red track again. Hopefully no more detours! Here the way turns into concrete blocks, which is never good. I really hate all those concrete roads in the mountains. Keep it in the cities!
At first, we were thinking of leaving the backpacks at the hut and going to the top just with cameras and water but all the madness with COVID-19 made it impossible. There was a long queue of guys waiting to get inside to order the meal and we did not want to take part in this parody. After all, you can’t let the people inside the building because of social distance but they stand in line one after another like penguins. Very logical 🙂
Silesian House, just before final ascent to Sněžka / ŚnieżkaAscent to Sněžka / Śnieżka
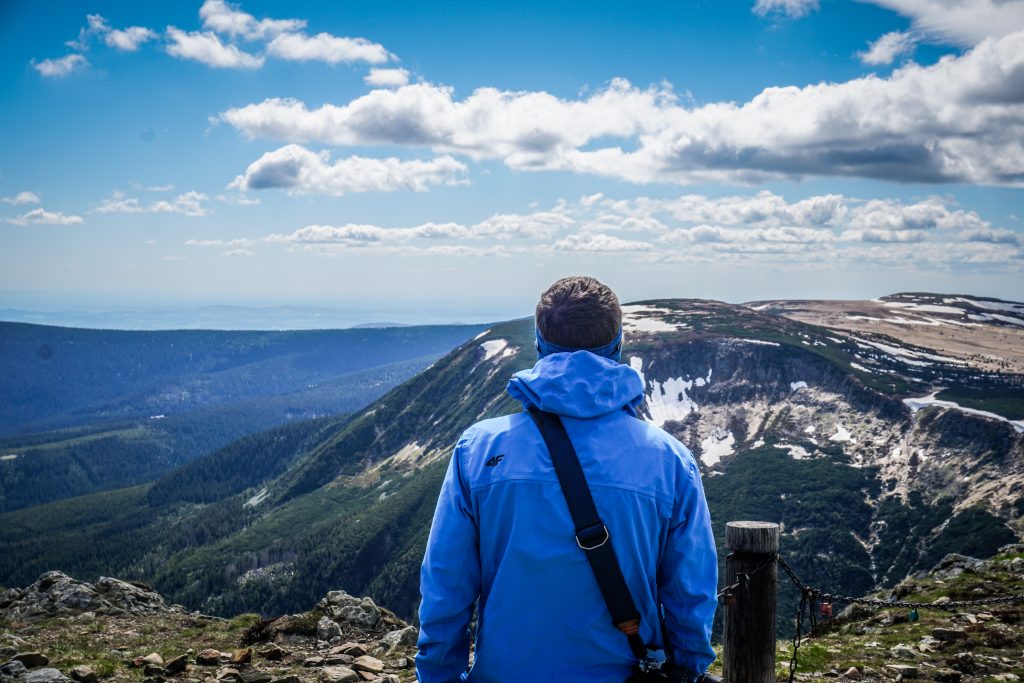
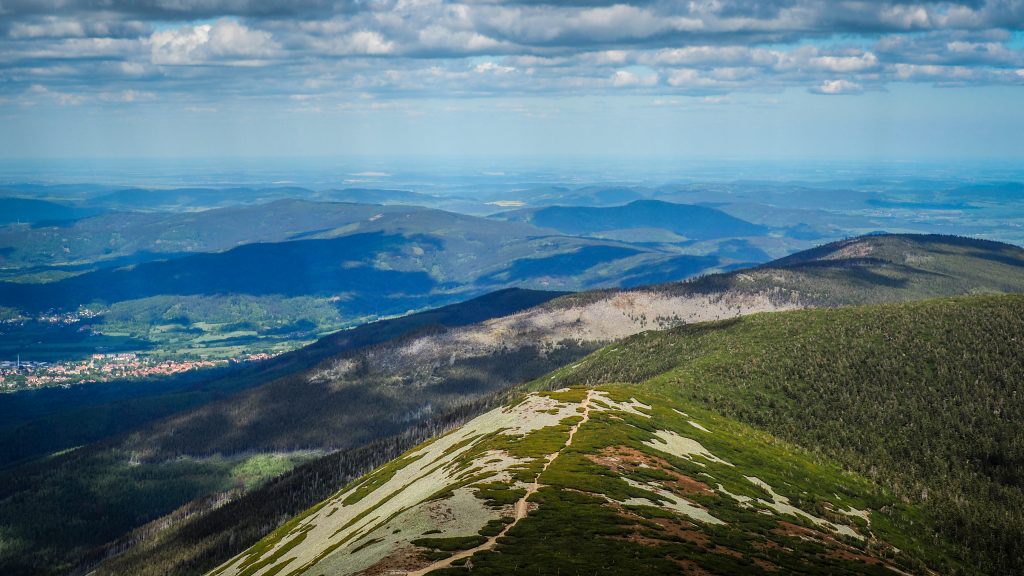
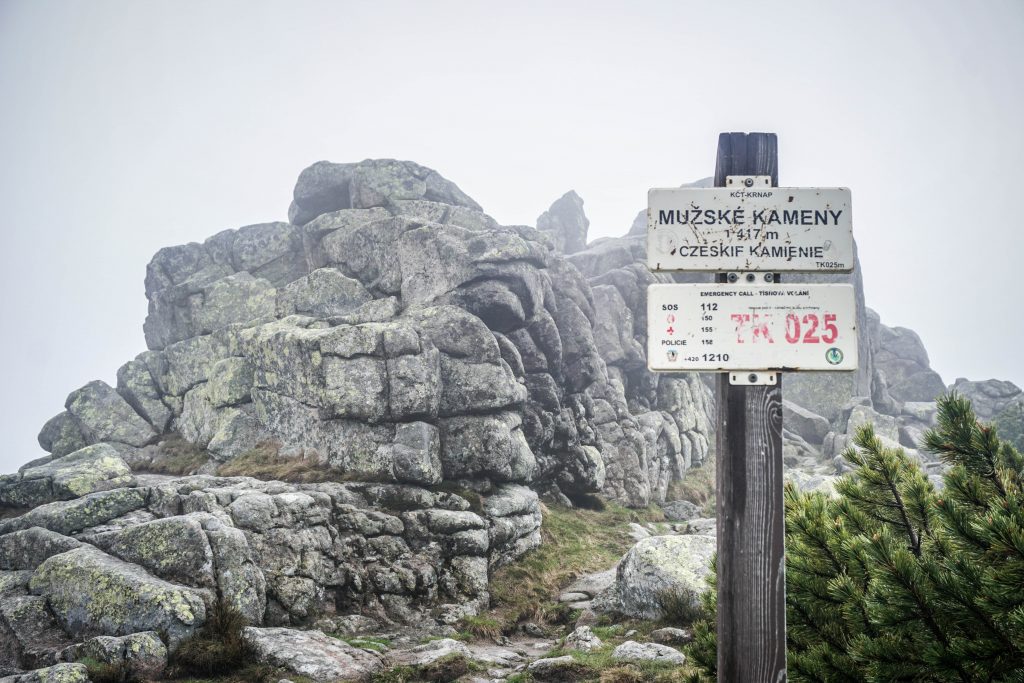
It was around half an hour of quite a steep ascent and strong winds didn’t make it easier. With its 1603 m a.s.l. Sniezka is the highest mountain in the Karkonosze Mountains. On top, there is a meteorological observatory, a chapel and obviously splendid panoramic views over Polish and Czech parts of Karkonosze Mountains. There is a gondola providing easy access to the summit from the Czech side, and thanks to that the atmosphere on the kinda like picnic-style which is not really my taste. Every time in places like that, I miss the real mountain experience in New Zealand, where you have to hike long hours to reach beautiful, remote places, not to mention the need of being totally self-dependent.
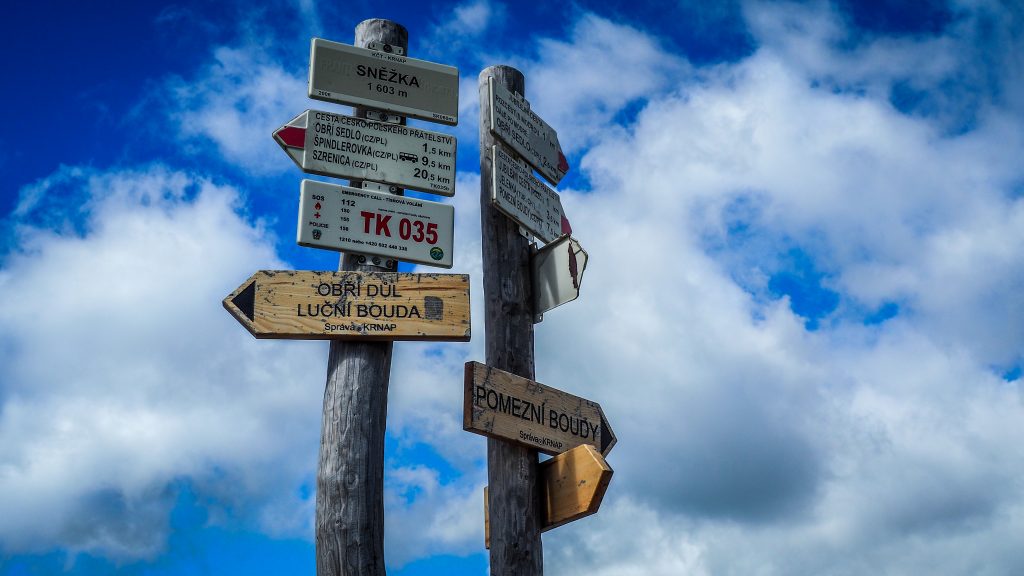
Meteorological observatory on top of Sněžka / ŚnieżkaPanorama from Sněžka / ŚnieżkaAnother panorama, just from the different side 🙂Tracks directions on the summit
The wind was even more annoying when going down and a few times I nearly lost my balance after strong and sudden blows. Back to Silesian Hut again and from there it was nothing but descent all the way to Karpacz (~ 8km). We passed by the memorial to the victims of the mountains which reminds to never underestimate your target.
We booked a room in Noclegi Karpacz Centrum which looks pretty spooky from the outside but the room was decent and the internet connection was very fast. The fact that we were the only guests could have something to do with that 🙂
Please remember that the distance covered in that stage is only the description of my preferred itinerary. If that sounds too much for you, consider staying overnight in another place. Never underestimate the mountains.
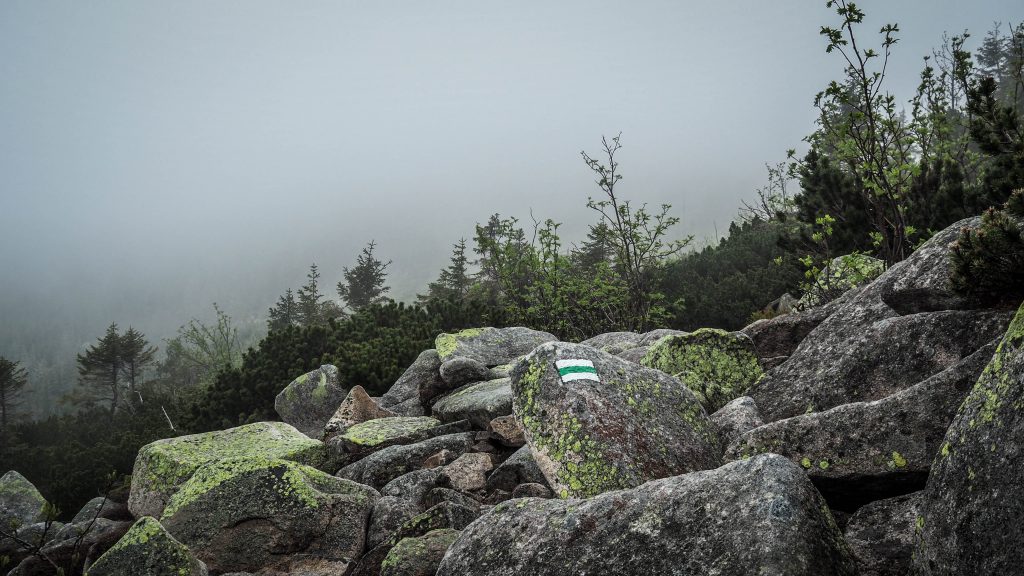
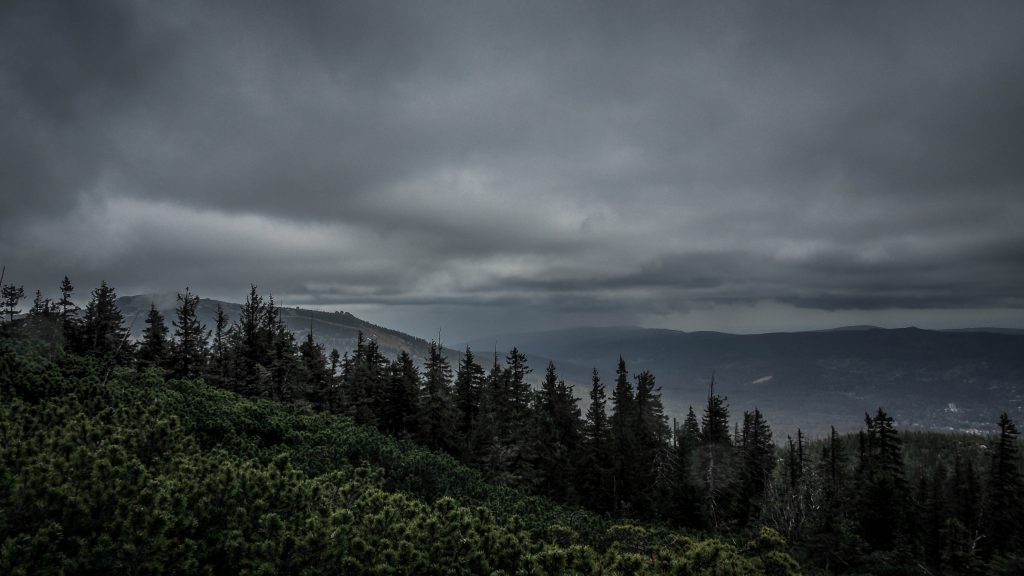
Day 1 made us tired but warm dinner and good sleep helped to recover quickly. At 9 AM we were packed and ready to go. The weather wasn’t as good as the day before. The sky was covered with dark clouds and it was significantly colder. It seemed that the experience up in the mountains could be limited to “walk in the fog”. Moreover, parts of the red track were apparently closed due to the proximity of the border of Poland with the Czech Republic which wasn’t allowed to cross due to the epidemy of COVID-19. In fact, the track meanders just between these two countries, sometimes with hikers having one leg in Poland and another one in the Czech Republic. For common sense – who cares? Unfortunately, virus paranoia was taking its toll.
We had met a fellow hiker the day before saying that he passed through without any issues even though he was seen by border guards. With uncertainties about our route for today, we decided to hit the road and make further decisions on the way.
Route: Szklarska Poręba to Odrodzenie Hut Distance: ~ 20 km
Skalny Pensjonat was way off the red track so it took us a good half an hour wandering around Szklarska Poręba to finally get to the road leading towards Kamieńczyk Waterfall. Here, uphill walk began. Maybe it was better. We could quickly warm up and burn poor breakfast within 1 hour 🙂
We left our backpacks next to the ticket boot and armed ourselves with a helmet. Then it was just a few steps down on a metal construction to see the first glimpse of the highest waterfall on the polish side of Karkonosze Mountains. There are 3 cascades of total high 27 m. Not the most impressive ones but still very photogenic and definitely worth a stop. A regular ticket costs 8 PLN once discounted one 4 PLN.
From the waterfall, a boring concrete road leads all the way to PTTK Hut “Na Hali Szrenickiej” (1195 m a.s.l.). It’s time for a coffee. Clouds are passing by so quickly like it’s some kind of weird race and it’s getting certain than in a few hundred meters, we will disappear in the clouds as well.
The hut visible close by is on the top of Szrenica (1361 m a.s.l.) and it’s possible and recommended to do a short detour there. Afterwards, it was decision time. The red track was closed and we saw a group of tourists discussing options so I happily join the conversation. The outcome was very Polish – let’s fuck the rules and go anyway.
PTTK Hut “Na Hali Szrenickiej”
PTTK Hut “Na Hali Szrenickiej”
Szrenica Hut
Maybe I didn’t get the sense of humour of those enthusiastic folks because when we left slightly behind taking pics of the rock formation The Three Pigs (Trzy Świnki), the group didn’t go to the red track at all but instead followed the green one towards PTTK Hut “Pod Łabskim Szczytem”. So did we, as being the only outlaws in the area didn’t sound right. From there we planned to continue along the green track to meet a blue one that should link us back on the red just after Śnieżne Kotły.
The Three Pigs
The Three Pigs
Guess what? After PTTK Hut “Pod Łabskim Szczytem” the green track was closed as well and the available alternative was a big detour through the forest, far from all the cool sights. That time our dark side won and we decided to bend the rules and simply follow the closed green track called “Ścieżka nad Reglami”. Just to be clear – we are not proud of it and absolutely do not encourage anyone to do the same. However, having lots of kilometres to go, we weren’t convinced that we will make it to the next overnight stopover before the night. It’s a poor excuse and only shows that we were underprepared but yeah, that’s a story.
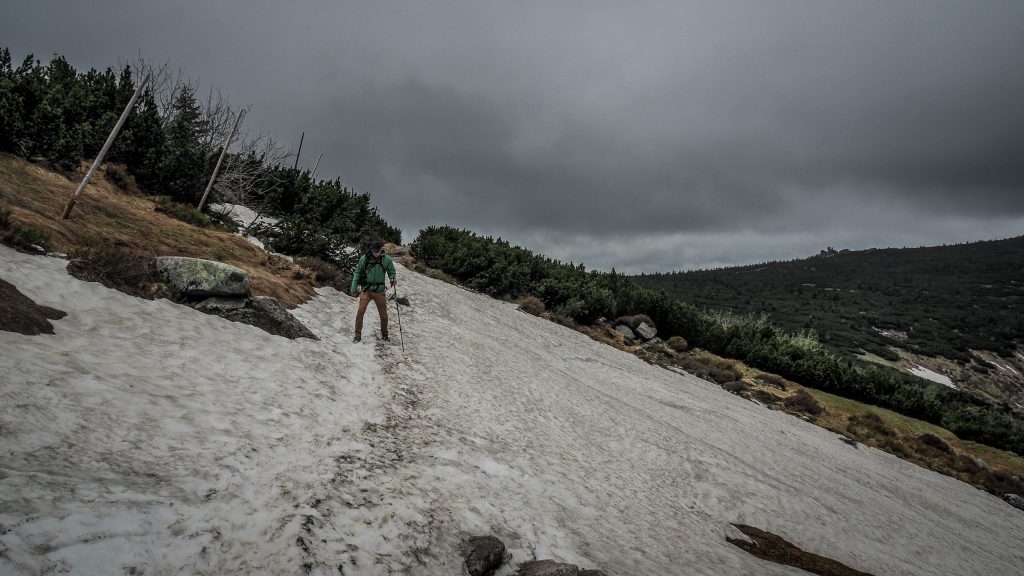
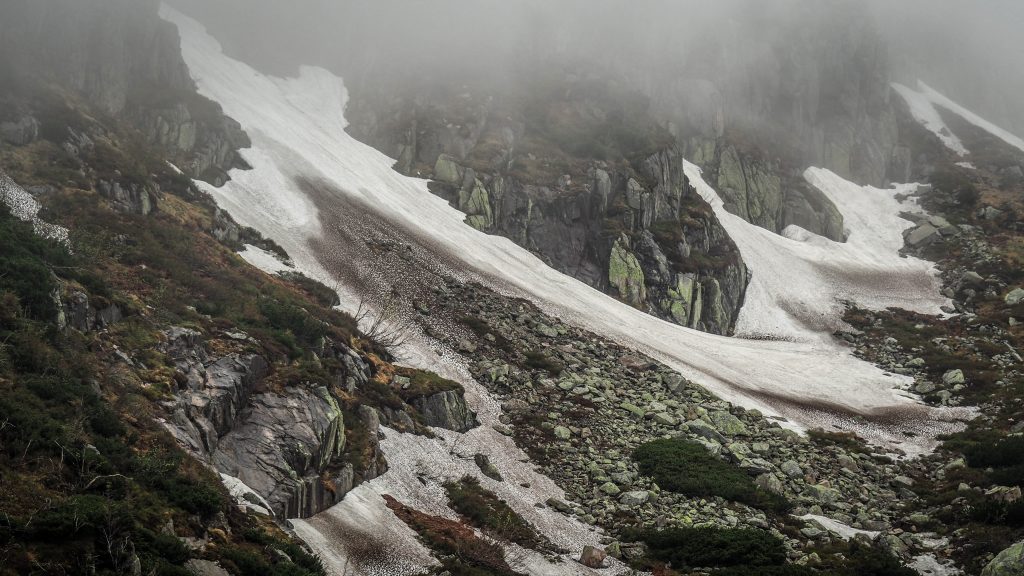
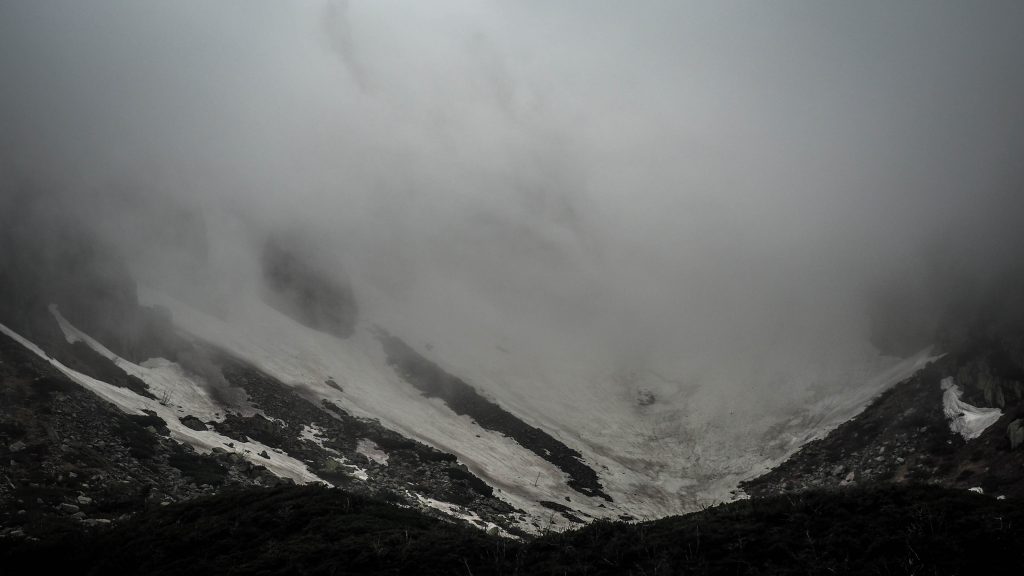
The path was forbidden but incredibly interesting. Fog, snow and passing clouds only added to the atmosphere. No words can describe the fun we had there so just have a look at these pics:
Not too bad, isn’t it?
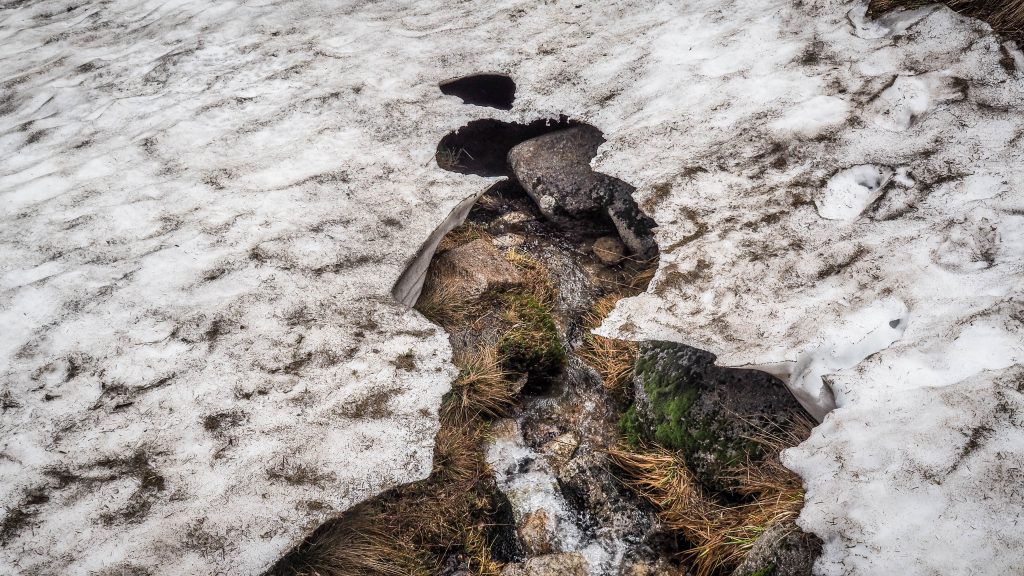
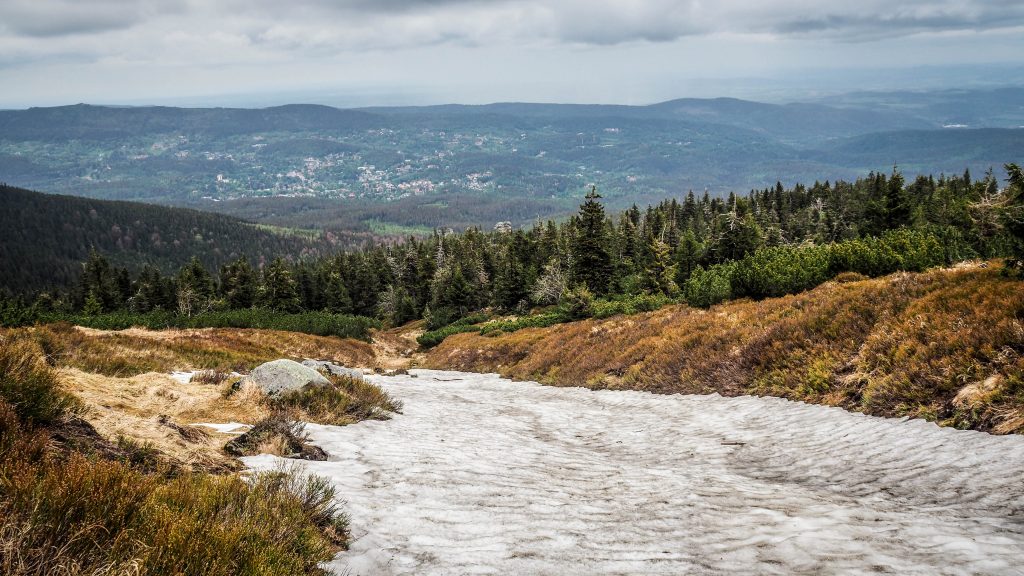
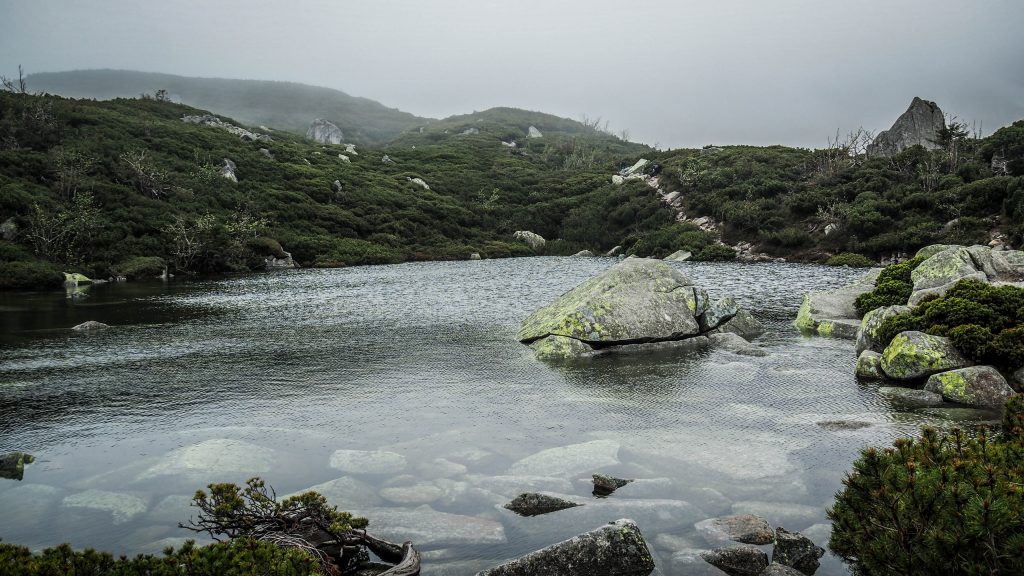
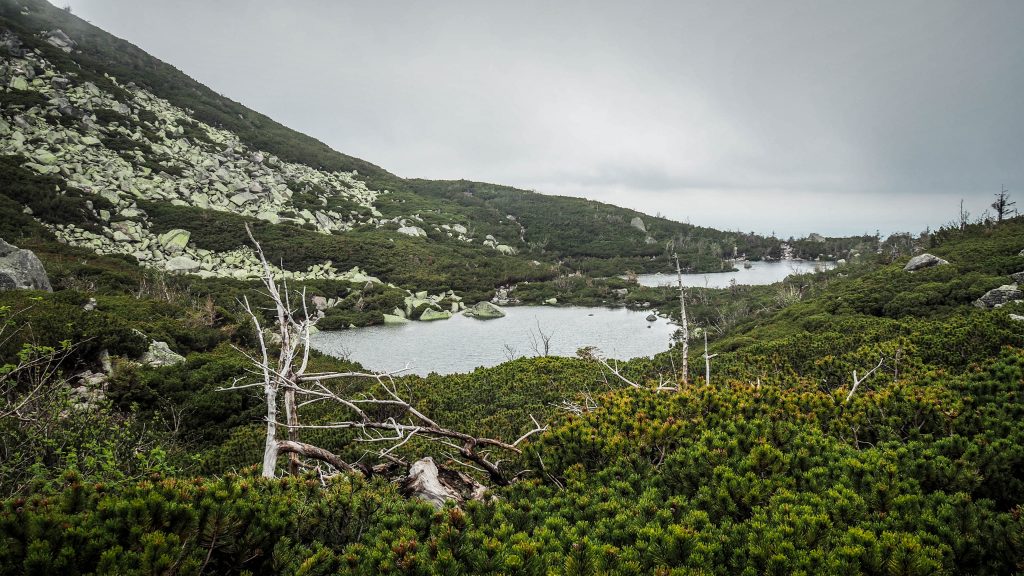
There were wide panoramic views all the way towards Snowy Ponds “Śnieżne Stawki” where the track got a bit rough. The level of the water in ponds was so high that track partially got completely flooded and we had to scramble on the wet and slippery rocks and tree roots. Honestly, that looked like a decent reason for the track being closed for the average hikers (so the group we belong to). Turning around wasn’t preferred solution so we pushed forward very slowly but successfully, somehow even keeping feet dry.
Finally, we met blue track and went up to Śmielec Pass (Przełęcz pod Śmielcem). Back on the red track again. Continuing in the dense fog was fine but at the same time, we felt lucky that we chose the green track instead. With lower altitude, it was still possible to see the landscape, which most likely wouldn’t be the case up there. Plus we avoided the risk of getting spotted by the border guards (even though we went on the closed track anyway).
After Black Pass (Czarna Przełęcz) energy level dropped significantly but we still had ~ 6 km to Odrodzenie Hut. It was a long 6 km. I went a bit faster downhill, passing Petrova Bouda on the Czech side and Taito stayed behind. Then I took off my backpack and was waiting for him but time was flying and the dude was clearly not there. Probably something had happened. I started to go back only to see him wandering around like stupid around the abandoned Petrova Bouda thinking that it’s our hut and trying to get inside. Well, just desperate hikers 🙂
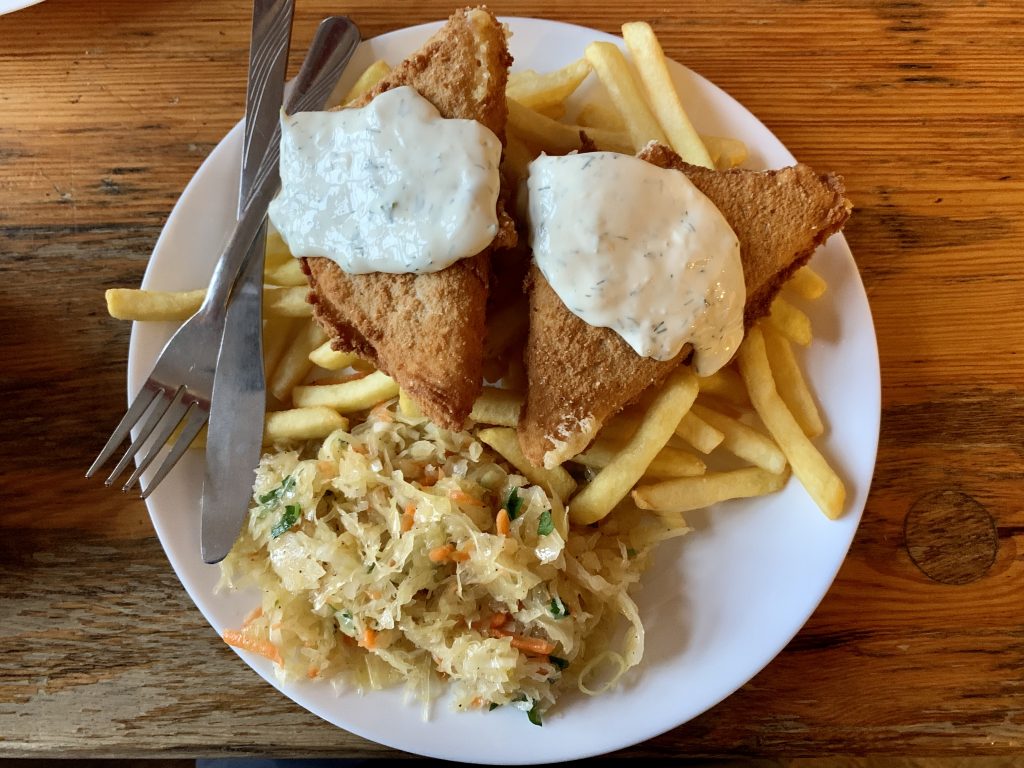
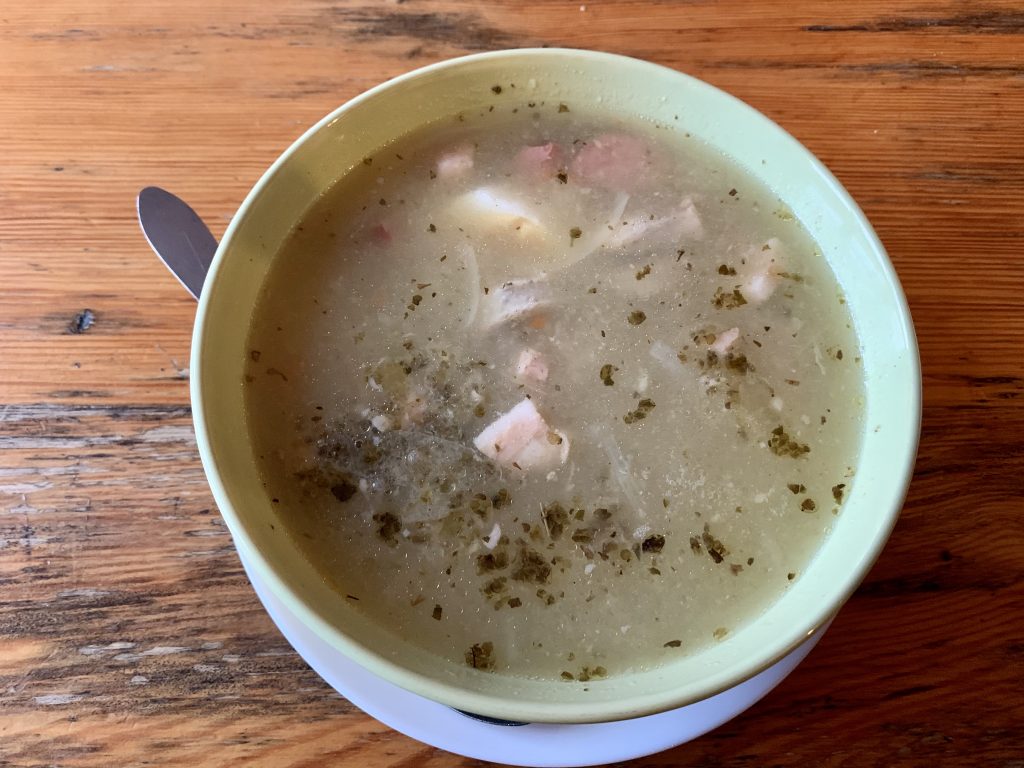
Finally, after another 30-40 minutes, we reached Karkonoska Pass (Przełęcz Karkonoska) at 1198 m a.s.l. from where we ascended final meters thinking very intensively about żurek that we wanted to order for the dinner. We were super lucky to arrive literally 15 minutes before kitchen and as żurek didn’t seem to be enough, fried cheese with fries landed on the table as well.
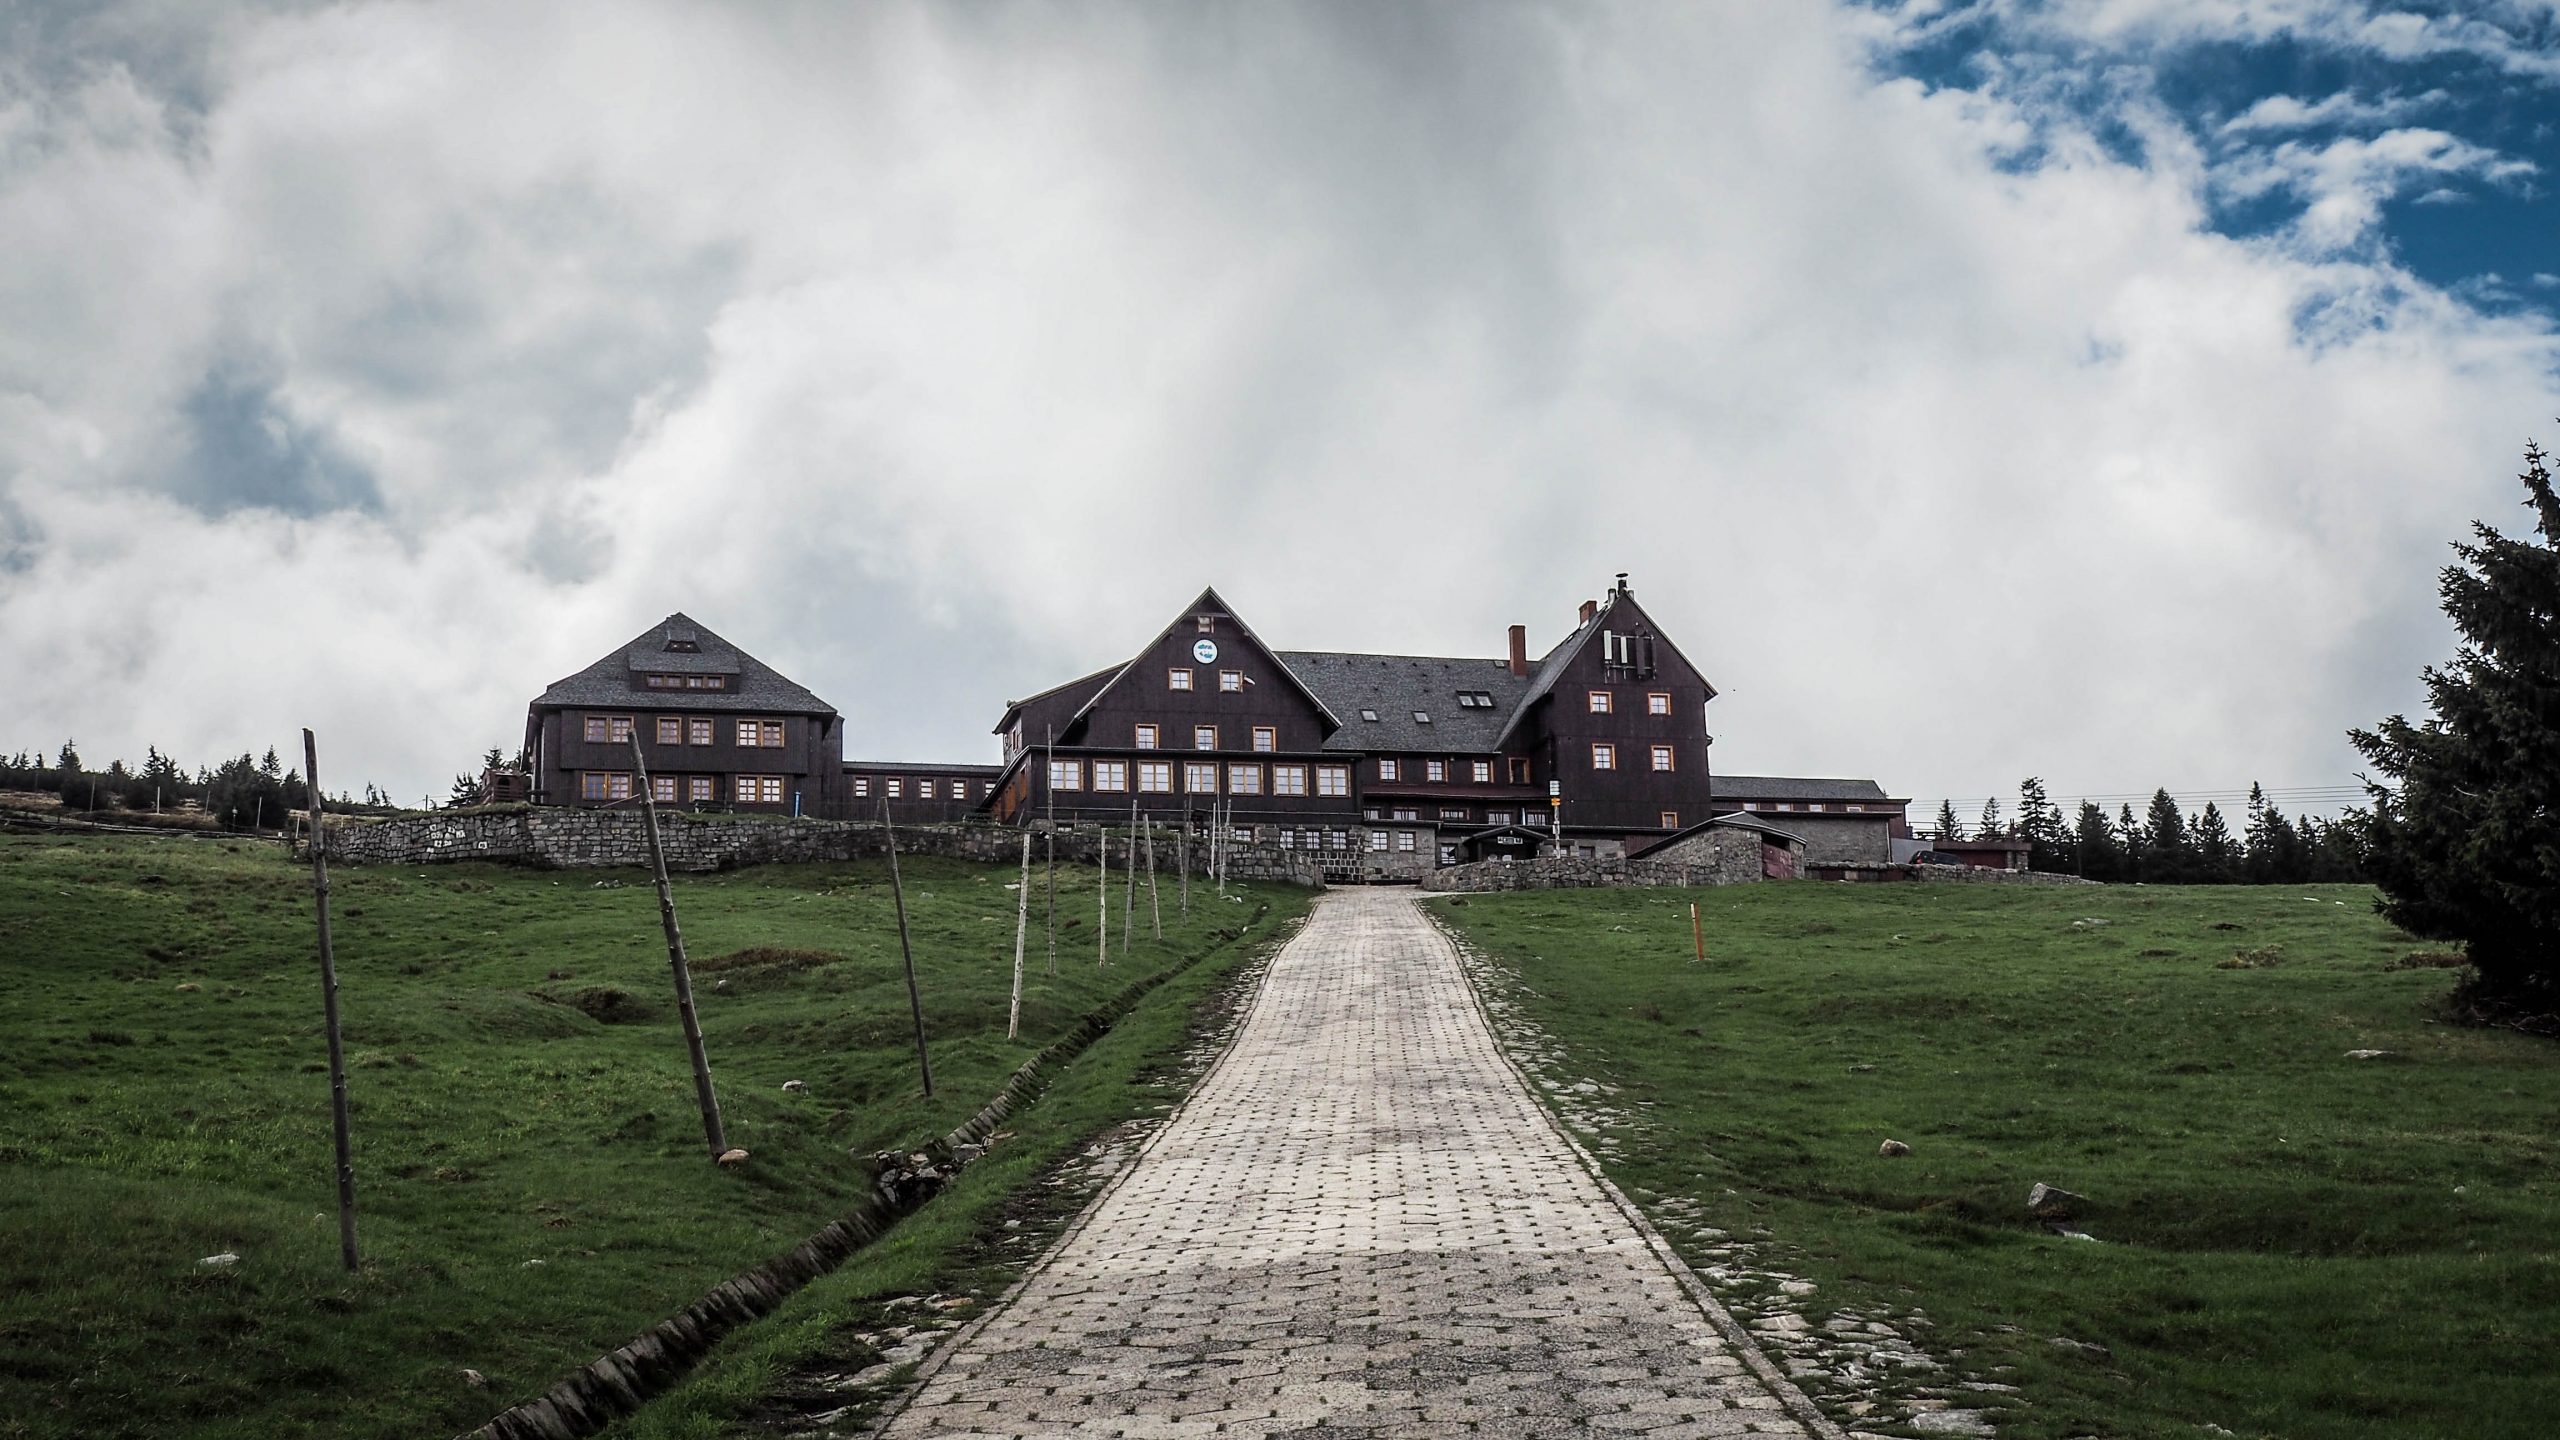
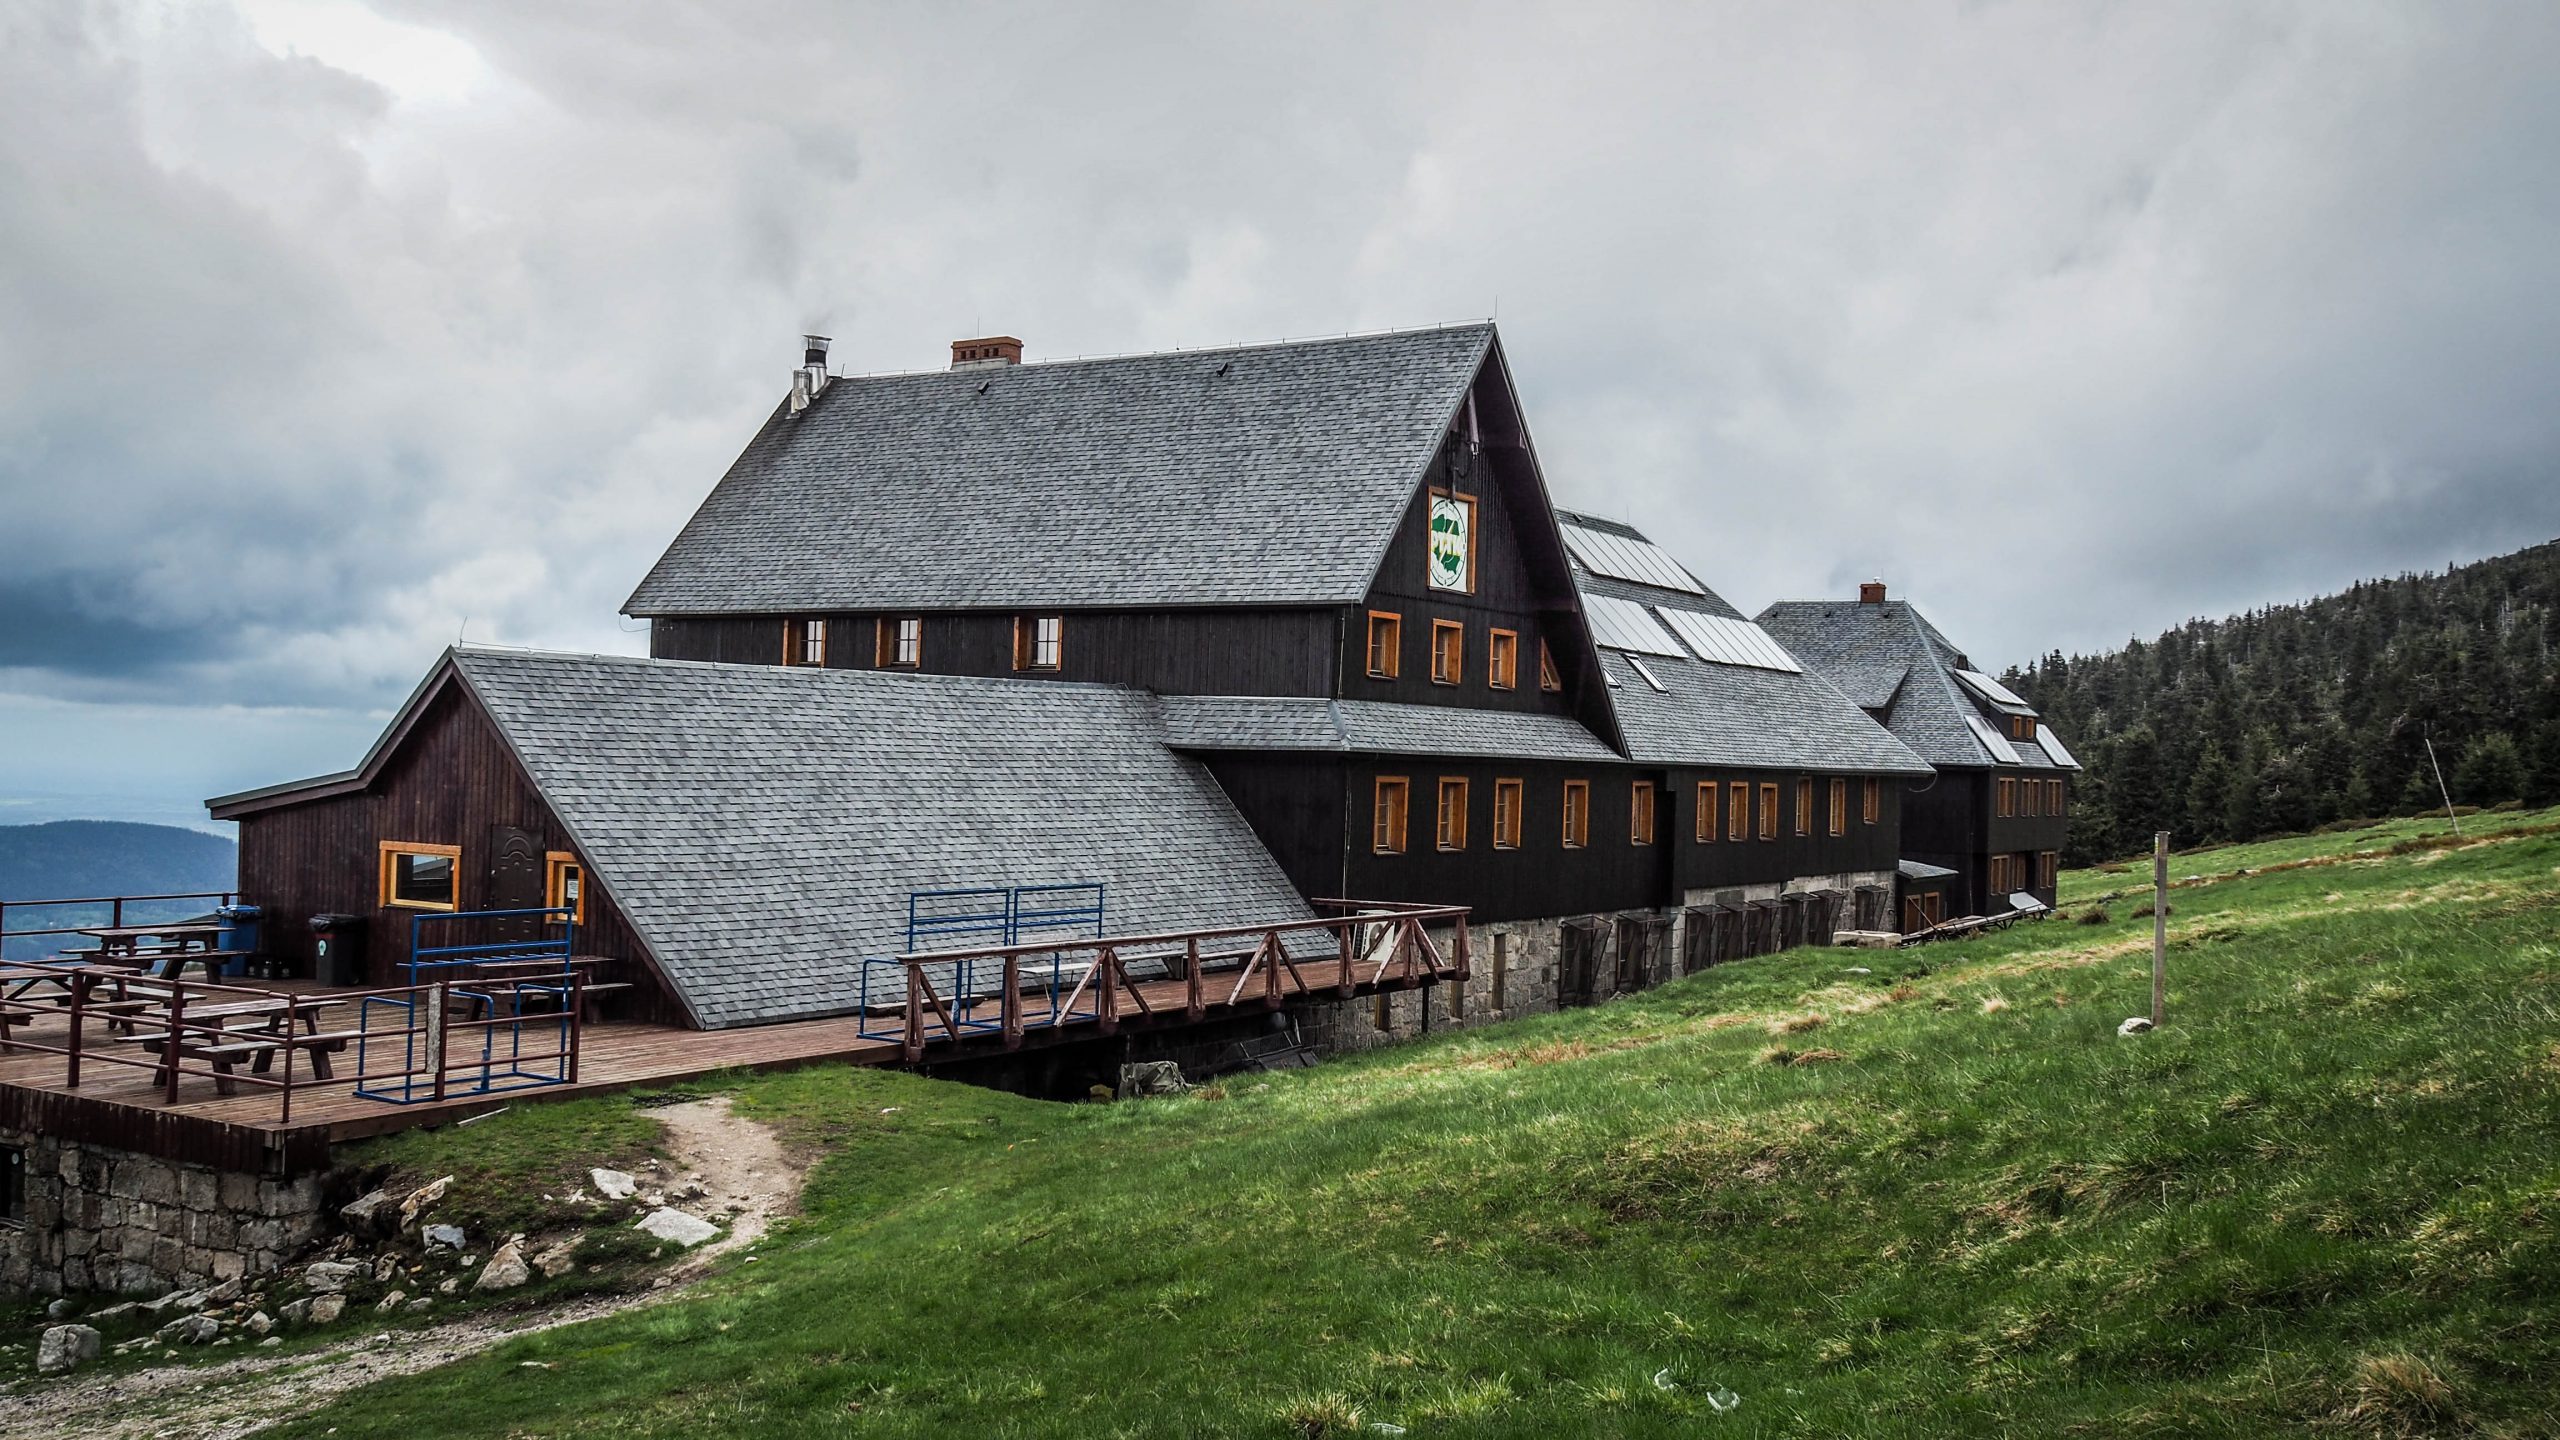
The Odrodzenie Hut was built in 1928 and it sits 1236 m a.s.l. Believe me or not, it was my first overnight stay in a mountain hut in Poland. What a positive surprise! The food was great, rooms very cosy and hot shower after the day like that was a treasure.
PS: After foggy afternoon, next morning greeted us just like that:
Please remember that the distance covered in that stage is only the description of my preferred itinerary. If that sounds too much for you, consider staying overnight in another place. Never underestimate the mountains.
The day has come! The clock showed 10 AM when I was parking the car at the guarded yard at the Wyszyńskiego and Sienkiewicza streets crossing. The price for leaving a car for 3 weeks was very decent (200 PLN) and probably could have been negotiated even more but somehow due to all this hassle with COVID-19 and lack of tourists, it didn’t seem right to discuss it further.
Route: Świeradów Zdrój to Szklarska Poręba Distance: ~ 26 km
The backpack seemed to be heavy, but at that time I didn’t know that after a few kilometres it would seem much too heavy. Maybe because I was just in a good mood, chatting with my hiking mate Taito and not thinking enough about the things that I don’t need and can be left in a trunk.
Taito wasn’t joining me for the full hike, just for a week or so. However, his backpack was pretty heavy too so I guess we both made mistakes that we would need to pay for during the next couple of days.
Świeradów Zdrój looks like a typical Polish spa. There are several holiday houses hosting patients on a few weeks stays as well as private tourists coming independently to try treatments, taste mineral waters and relax on mountain tracks. Getting a drink isn’t a bad idea. Maybe it will boost your energy level on the first uphill stage ?
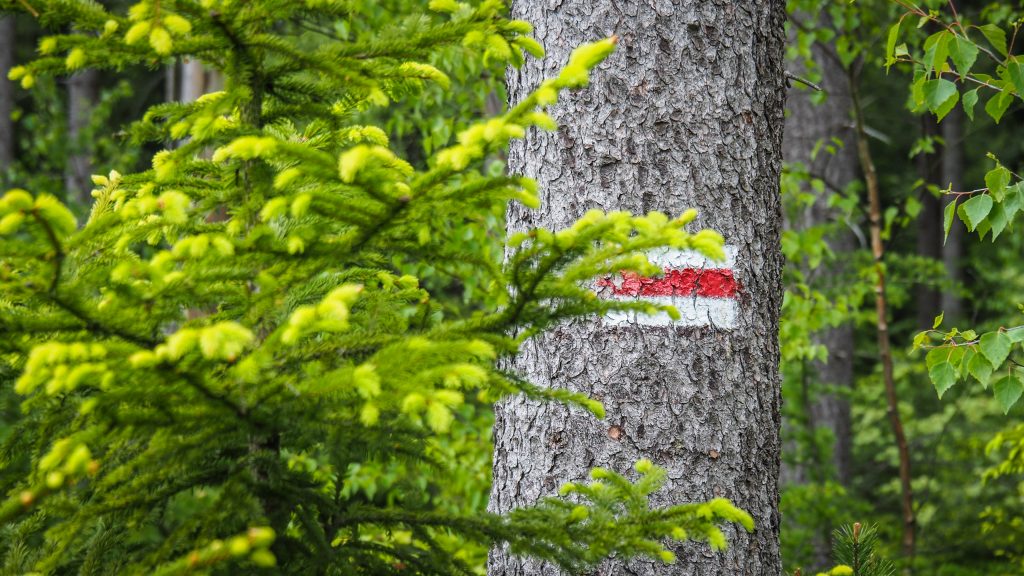
The red track starts just a short walk down the Wyszyńskiego street. Yes, red would be the desired colour for the next several days. Painted on the trees, stones, branches or simply direction boards. Every glimpse of it would bring me a wide smile and satisfaction.
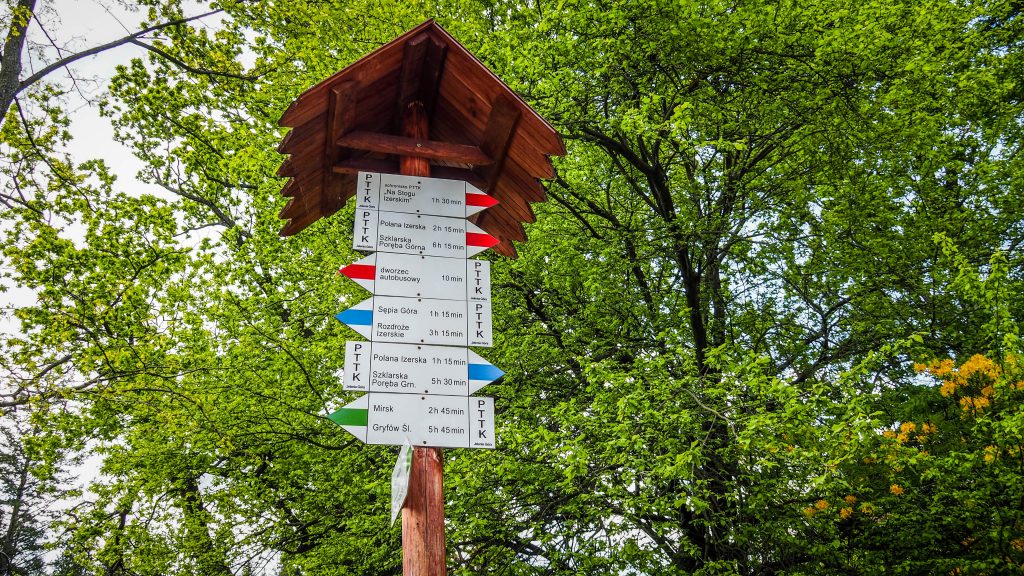
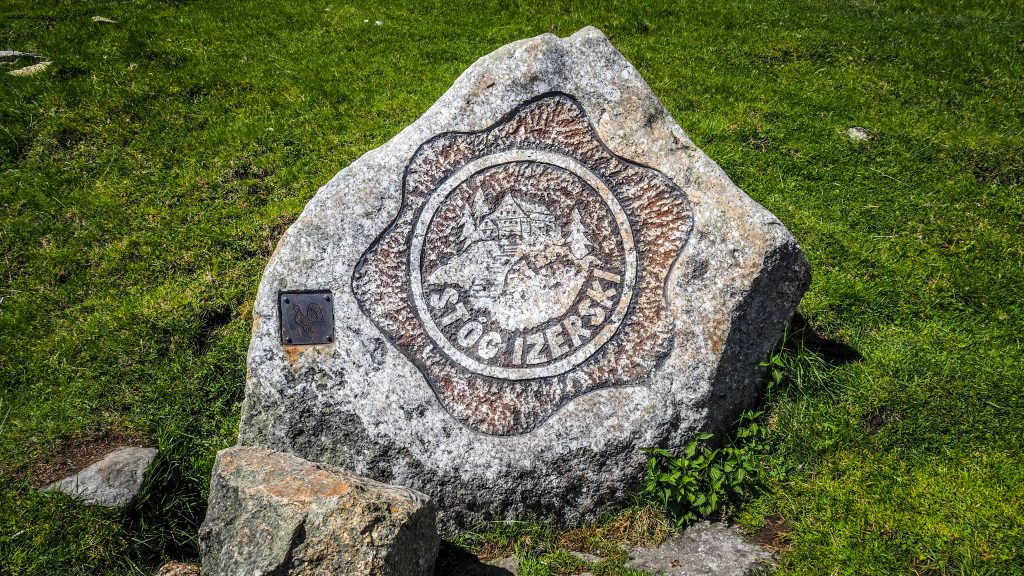
Our final destination for today was Szklarska Poręba ~ 6 – 6.5 hours away. The nearest point of interest was much closer though: PTTK Hut “Na Stogu Izerskim”. Less than 5 km walk (1 hour 30 min away) but all the way is uphill giving a decent warm-up at the start of the adventure.
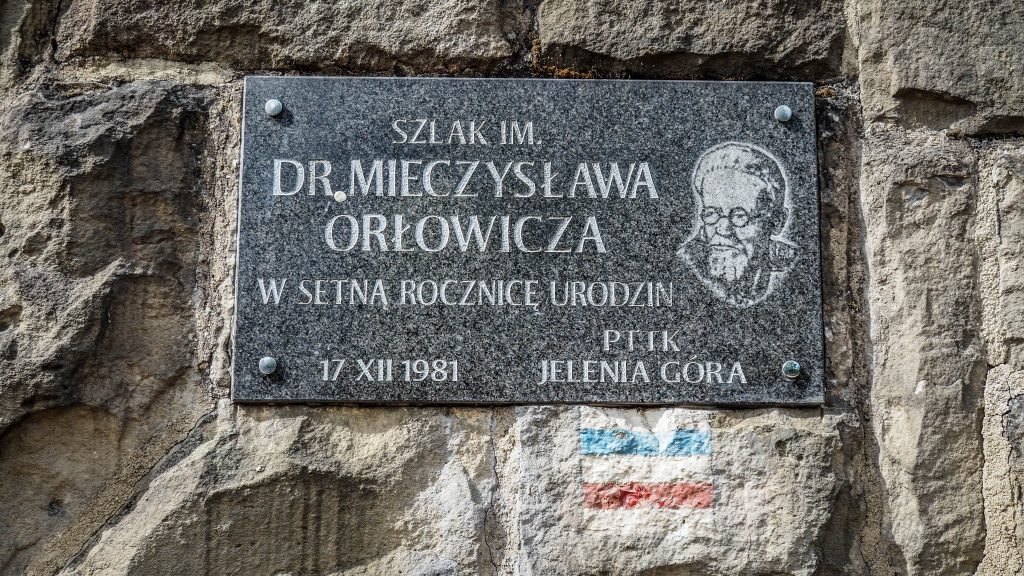
In recognition of his merits for tourism and sightseeing, Mieczysław Orłowicz is the patron of the track
The first fragment of the track isn’t particularly interesting as we were gaining elevation following an asphalt road. After approximately 4 kilometres, the path turns left and the final steep push towards PTTK Hut “Na Stogu Izerskim” begins. From time to time I had to stop and caught my breath. Luckily, the way up was worth the effort and surrounding views kept my camera busy.
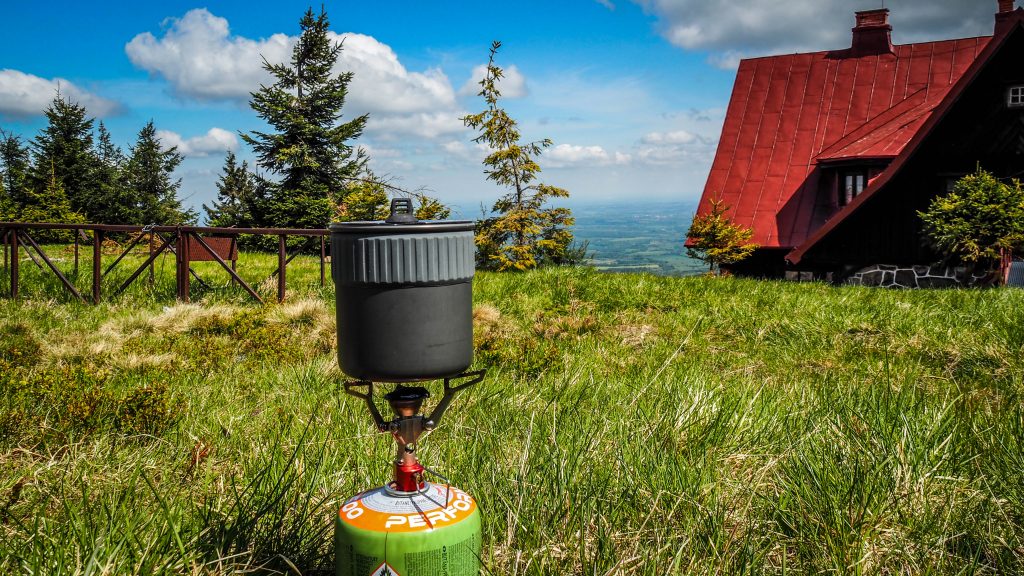
Finally, we reached upper gondola’s station and PTTK Hut “Na Stogu Izerskim” (1060 m a.s.l.) was just around the corner. Hassle (and sweat) free accessibility makes that area very popular, at some times even crowded. Anyway, it was coffee time!
There is something magical about preparing and drinking coffee in places like that one. Even the worst mud tastes like heaven.
The building was constructed in 1924 and at first, it was a private residence of doctor Josef Siebelt. After World War II, it was refurbished into mountain shelter for tourists and it remains one until today.
From the hut, the track becomes much flatter and continues ~ 5 km towards Polana Izerska and then ~ 3 km to Wet Pass (Mokra Przełęcz). From there, climbing for ~ 2.5 km first to Crossroads under Kopa (Rozdroże pod Kopą) and then to Sine Skałki (1122 m a.s.l.). Afterwards, the track descents ~ 5 km towards Zwalisko, passing by Quartz Mine which is worth to have a quick look. Zwalisko is not less interesting either. First of all, here your covered distance should already be around 20 km. Secondly, there is the legend connected with one of the rock formations – Evening Castle (Wieczorny Zamek).
Once in a year, in the midsummer night, the rocks take the shape of the castle and magic door let the brave people inside. And it’s worth it as the castle is filled with treasure. Everyone going inside is allowed to take as much gold as he or she is able to carry out. On one of these nights, the woman with a child noticed the opened door and went inside. She took so many treasures that at first didn’t even notice her young kid staying behind. Finally, the door closed, trapping him inside. The woman was devastated and kept coming to the place every other night hoping for the door to appear again. After the year, she saw the door and rushed inside hopelessly looking for a body of her kid. How surprised she was seeing the kid all fine playing with a golden apple. She quickly grabbed his hand and left the place leaving the treasures behind.
Does it sound like a good life lesson about greediness? I bet it does.
From Zwalisko it is ~ 3 km to the High Stone Hut (Schronisko Wysoki Kamień) which provides magnificent views over Karkonosze Mountains and is a popular spot for couples coming from Szklarska Poręba to see the sunset.
The last stage of that day was ~ 3.5 km steep descent towards the city. We spent the night in Skalny Pensjonat which I can fully recommend. It was a fair compromise between quality and price, though getting there was quite off the red track and made me cover extra kilometres.
The first day of the hike was challenging and we both could feel that bodies need time to adjust to all-day effort and carrying quite some weight. Around halfway, my feet were surprisingly good but shoulders were literally killing me. Every short stop to take a backpack off for some minutes was like long-awaited pleasure. On the other hand, it was exactly as I expected and I knew that every next day will be physically easier.
Please remember that the distance covered in that stage is only the description of my preferred itinerary. If that sounds too much for you, consider staying overnight in another place. Never underestimate the mountains.
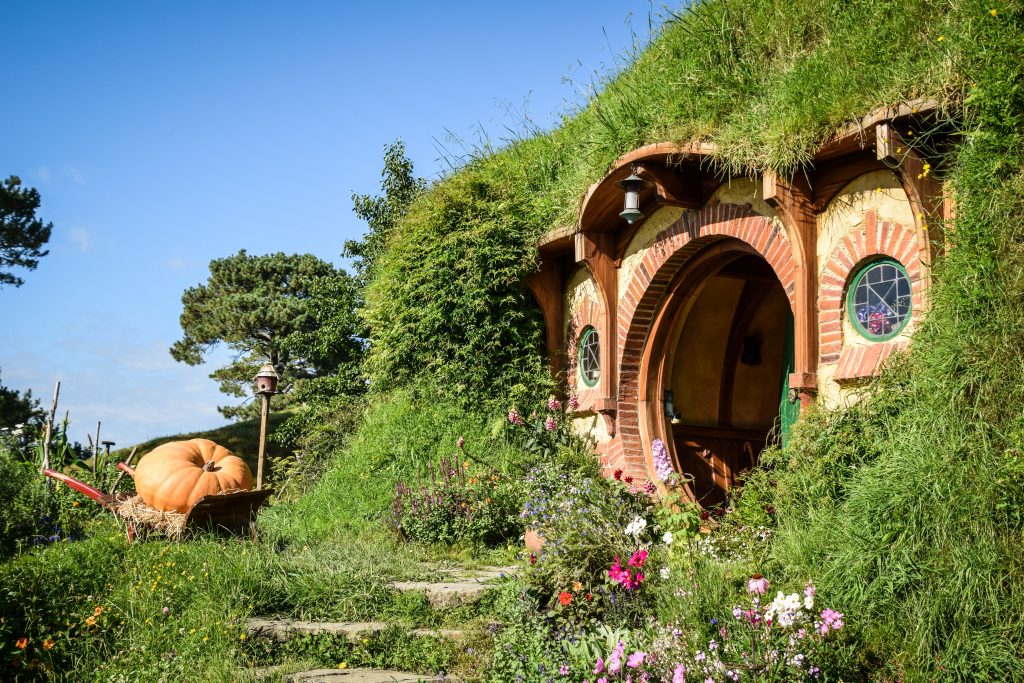
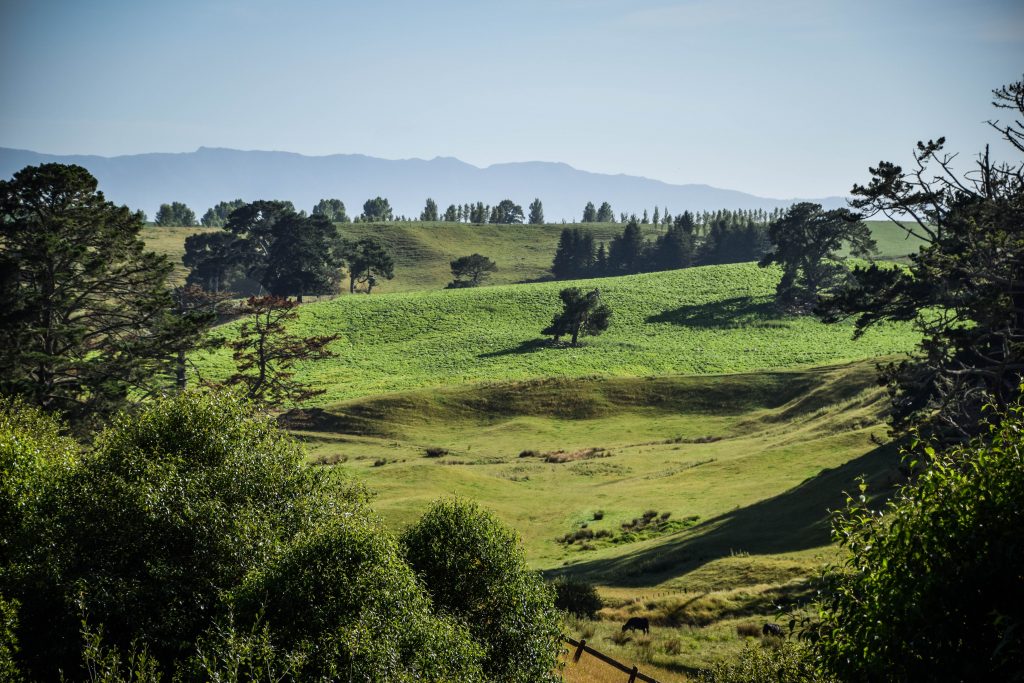
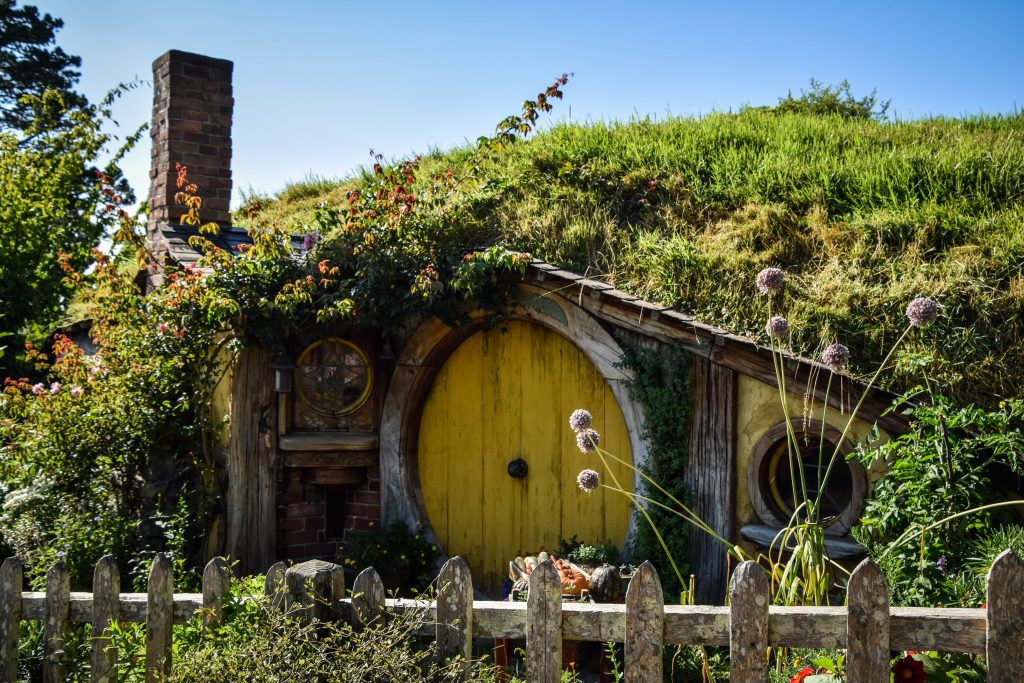
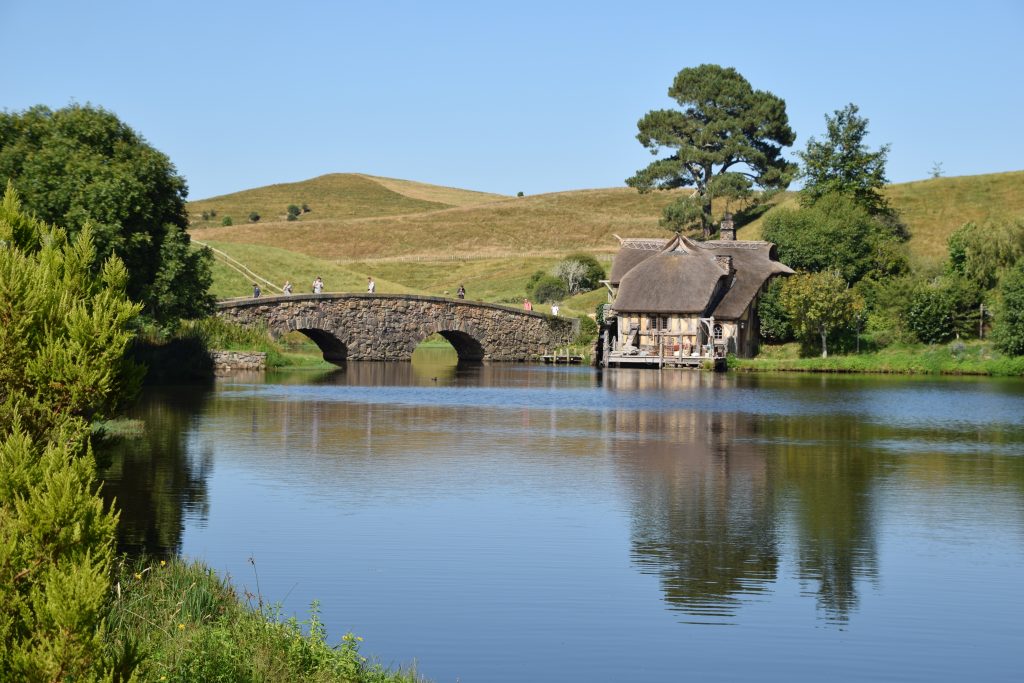
The story began when Sir Peter Jackson and his crew were searching for a possible location of The Shire that meets detailed descriptions from J.R.R. Tolkien books. They took a helicopter to fly above the green hilly landscape of New Zealand’s North Island to find exactly what they were looking for.
Apparently, Mr Alexander who was the owner of the farm informed the crew that there is a rugby game going on and they should come back later. Needless to say, they came back and made a deal.
At first, the movie set was not built with the intention to act as a tourist attraction after filming is over. Temporary materials were used and the whole thing was dismantled after The Lord of The Rings trilogy was made. But the growing popularity of both books and movies made first tourists flocking to see the place. For the filming of The Hobbit, permanent materials were used and everything was left at it’s place. Today approximately 17 per cent of international visitors come here, bringing about 78m NZD to the Matamata-Piako district annually.
I’m not an ultimate fan of The Lord of the Rings or The Hobbit but after watching movies and reading books it was really cool the see the place with my own eyes.
In a hole in the ground, there lived a hobbit. Not a nasty, dirty, wet hole, filled with the ends of worms and an oozy smell, nor yet a dry, bare, sandy hole with nothing in it to sit down on or to eat: it was a hobbit-hole, and that means comfort.
J.R.R. Tolkien, The Hobbit, or There and Back Again
Hobbiton Movie Set
Bookings and prices
Entrance to Hobbiton Movie Set is with guided tours only, which last about 2 hours.
The place is popular. No, wait. Extremely popular! It’s one of a few places in New Zealand where you can be sure to meet organized tours flowing out of huge buses and running towards the entrance armed with cameras in their hands like there is no tomorrow. Therefore, it’s not surprising that a big part of the tickets goes to them.
To avoid disappointment or losing precious time waiting, I strongly recommend booking the tickets online. Once doing that, opt for one of the first or last tours available. Organized tours usually come a bit later after breakfast and depart earlier to reach their next destination in time for dinner.
The tours cost 89 NZD for Adult and 44 NZD for Kids (9-16 years old).
If 2 hours guided tour is not enough, you may want to join 4 hours long Evening Banquet Tour. You will witness the atmosphere of the place dusk and get the chance to feast like a hobbit, though it comes with a much higher price: 199 NZD for Adults, 162 NZD for Kids (9-16 years old) and 104 NZD for Young Children (5-8 years old). Book ahead.
How to get there?
Hobbiton Movie Set is usually visited by tourists approaching from Auckland, Coromandel Pennisula, Hamilton or Rotorua. Wherever you are driving from, it’s easily accessible and you should have no problems finding it. Just don’t forget to keep left 🙂
If you have self-contained vehicle, there is a nice and cheap parking at Firth Tower Museum in Matamata.
If you don’t have your own vehicle, there are tours departing from several bigger cities, such as Auckland, Rotorua, Matamata and others.
Let’s play the hobbit!
I was heading from Coromandel Pennisula full of great memories from the coast and expecting further positive feelings after a visit to Hobbiton Movie Set. The landscape changes and I could feel the spirit of the countryside when getting closer to Matamata and parking my van for the night in picturesque parking next to Firth Tower Museum.
Luckily, a few days before I came across the information that it’s worth buying the tickets to Hobbiton Movie Set online. I’m an early bird so secured the first free timeslot available at 8:30 am. When I stepped outside at 7:30 am, the fresh air made me awake instantly. To avoid being late for the tour, I quickly made my bed and departed full of positive vibes. It was just a 20 minutes drive to reach The Shire’s Rest so I had plenty of time to eat my breakfast and enjoy morning sun which was slowly warming me up.
Our group boarded the green coach bus, tickets were scanned and journey to the Shire began. Our guide Lola introduced herself as well as the driver and then we watched a short welcoming video with Peter Jackson himself.
The whole organization of the tour was top-notch. The route, scenery, hobbit holes, gardens. Not to forget our extremely knowledgable guide sharing all the interesting facts about the movie set. I had the feeling that she treats the job like her dream and that positive vibes helped everyone to dive into the atmosphere of the place.
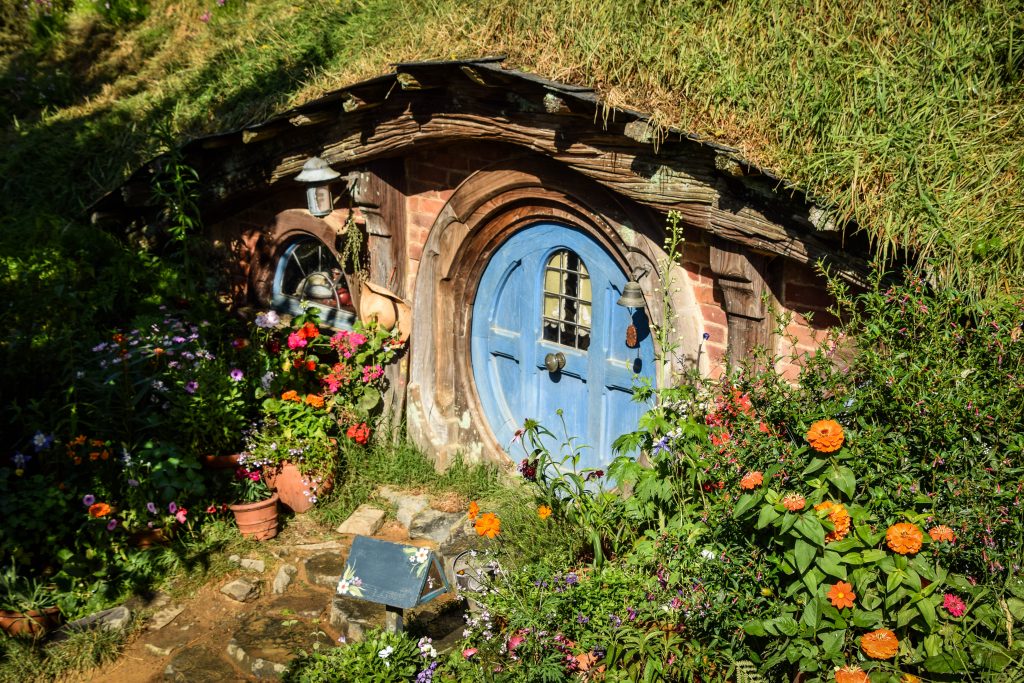
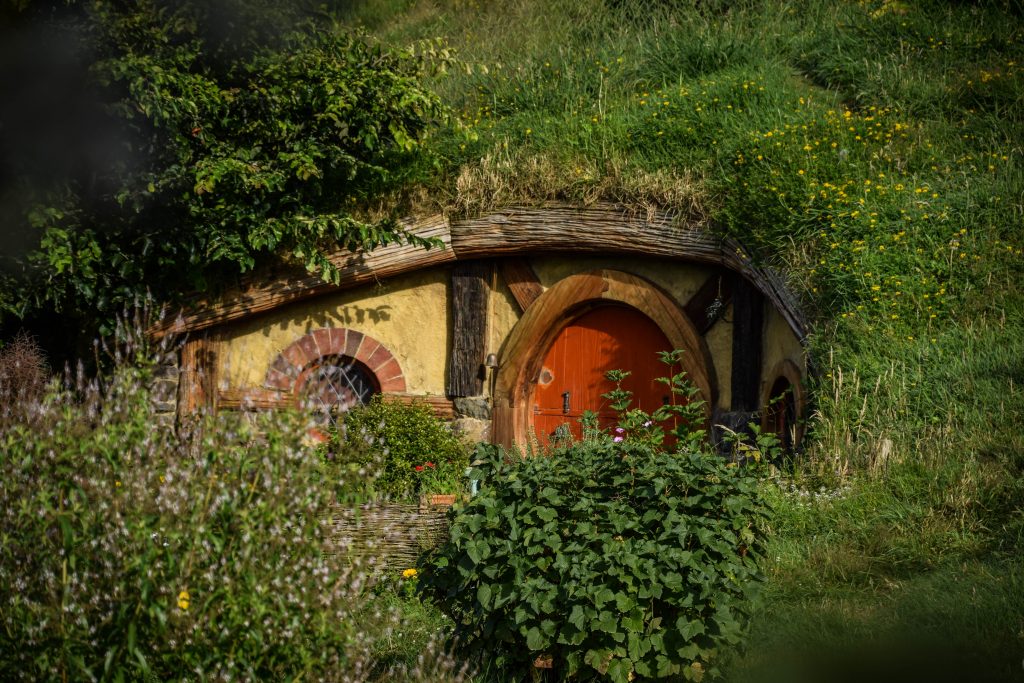
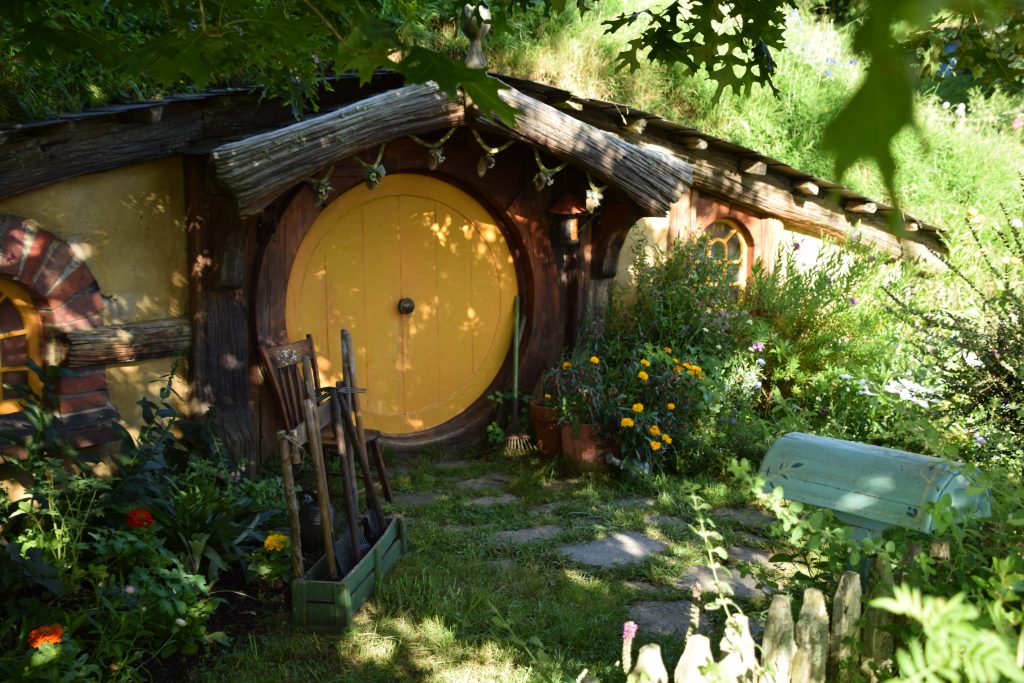
It was a pity that most of the hobbit holes are the facades and only one of them is open to go inside and take pictures when standing in the round entrance, which obviously most tourists do. It creates a bit of a traffic jam but on the other hand, gives a chance to take some more shots of the area or chat with the guide.
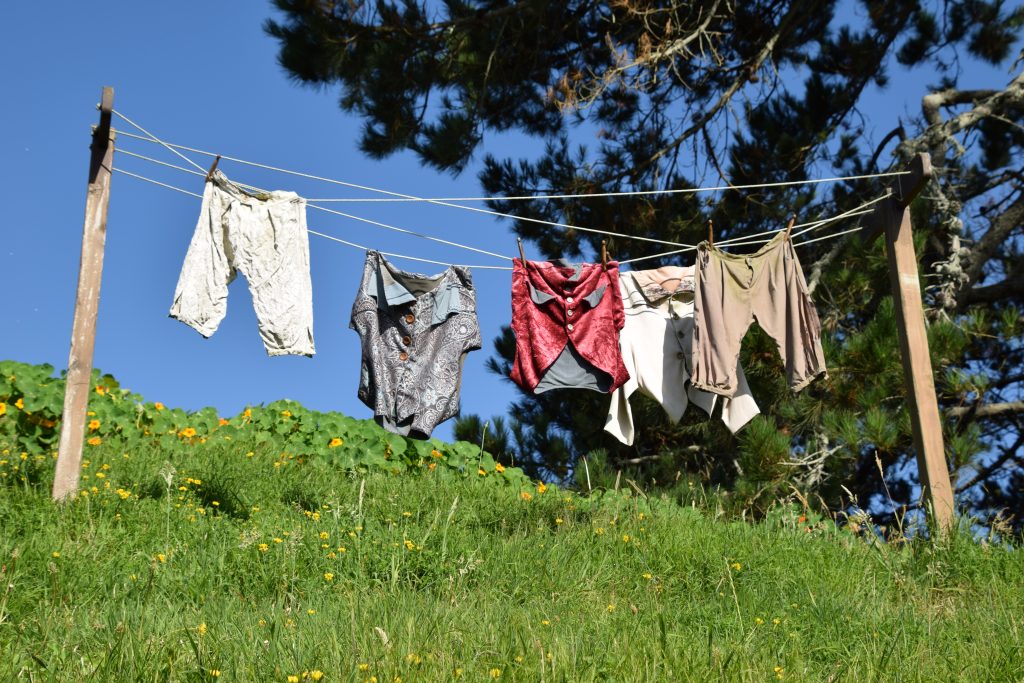
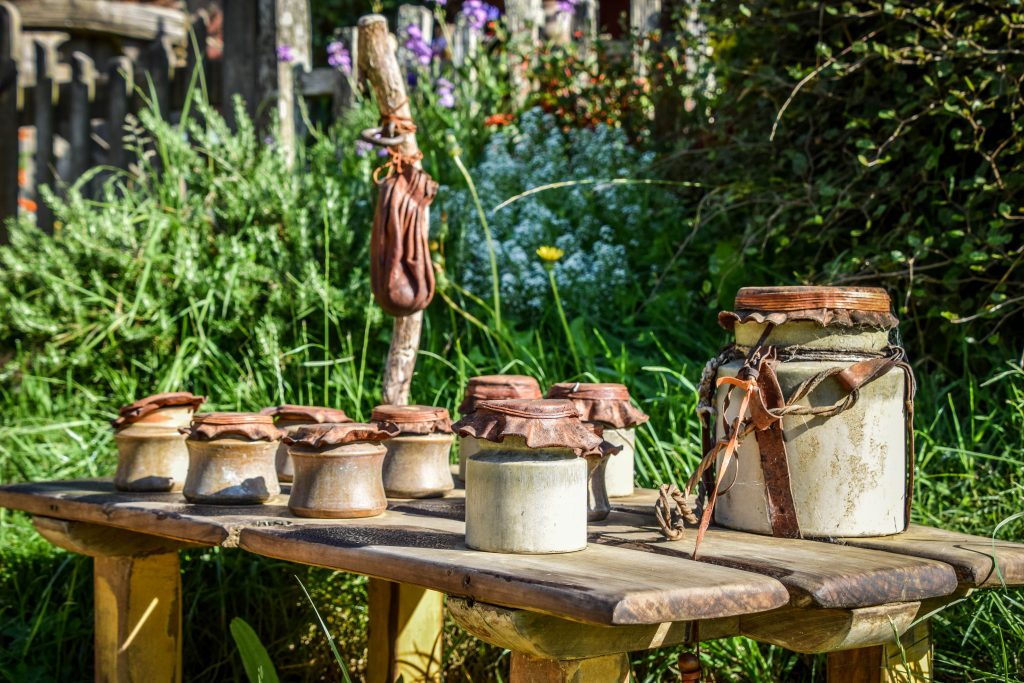
Pay attention to all the details around hobbit holes as well as the gardens as they are simply impressive. Small Hobbit’s clothes hanging on the strings, jars with honey, scarecrows and many more.
The last stop of the tour was the visit to the Green Dragon Inn. Southfarthing beverages such as apple cider, ginger beer and two ales are available and one drink is included in the entrance ticket. It was really nice to cool down and think again about what I just saw and experienced.
To sum up, the visit to Hobbiton Movie Set was definitely worth doing and if I come back to New Zealand one day, I could easily imagine doing it again. It was a beautiful sunny day in a wonderful Middle Earth location 🙂
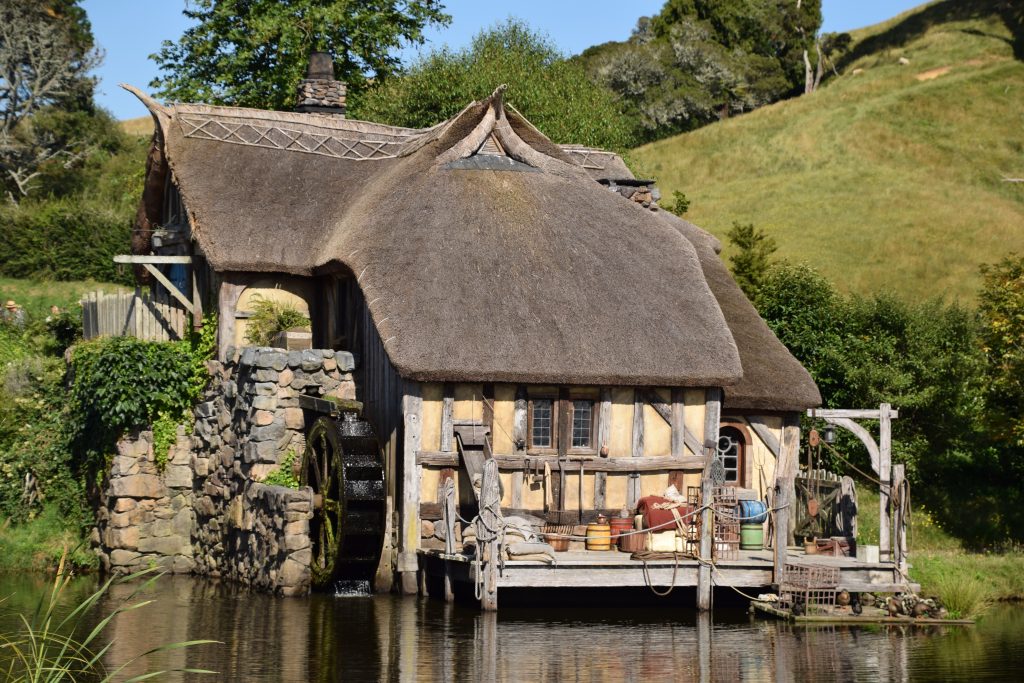
The Mill
What could be improved?
Sometimes the pace was too fast and I had to make the choice of either listening to the guide or focusing on taking pictures as another group was already not far behind. If you listen to the guide, you need to stay somewhere at the front of the group but then it’s getting difficult to take a shot without people on it.
The free time at the Green Dragon Inn could be extended beyond 20 minutes that tourists usually have there to rest and enjoy the drink. It’s a really nice area just by the water so I could easily imagine chilling here a bit longer or at least be given a choice.
Last but not least, I would add a decent visit to the interior of a hobbit hole with the opportunity to take pictures.
In the second half of the day I made my way to Royal Botanic Gardens in Hamilton but that’s the story for another post.
Interesting facts about Hobbiton Movie Set
1. It’s located on a working farm
The movie set covers the are of 4.8 hectares and is located on an actual 500-hectare working sheep farm belonging to the Alexander family. Russel Alexander is the general manager of Hobbiton Movie Set Tours with Peter Jackson owning about half of it.
2. Built and re-built
The Shire was dismantled after filming The Lord of the Rings finished and was re-build, this time for good, to make The Hobbit movies.
3. Is it a place for real fans only?
Not at all. Almost 40% of the visitors haven’t seen the movies and they say it was an awesome tour anyway.
4. People were paid for walking
It sounds like a good job description, doesn’t it? To make the tracks look more authentic and worn out, staff members were hired to walk on top of the houses and around washing lines. I could imagine myself doing that!
5. Fake houses and trees
There is only one hobbit hole with open doors and visitor groups usually queue to take a picture there. Every tourist gets that very same shot and there is absolutely nothing unique about it. Check hashtag #hobbiton on Instagram and you will know what I’m talking about. What about other houses? Most of them are just facades as the interior scenes were filmed in the studio in Wellington.
Other fakes relate to trees. The oak “growing” above Bag End looks real but in fact, is made from fiberglass and has silk leaves. In Tolkien’s book, there is a description of kids playing under the plum trees. You won’t find ones in Hobbiton though. For filming purposes, those were replaced by apple and pear trees which are smaller. Real fruits and leaves were stripped and replaced with fake plums. In the end, probably it didn’t look too good as the scene was cut out from the movie.
6. Scale and right perspective
The hobbit holes were built to different scales, depending on the high of the actor being filmed. Shots with a tall guy such as Gandalf were made at 60 percent scale and the ones with hobbits at 90 percent.
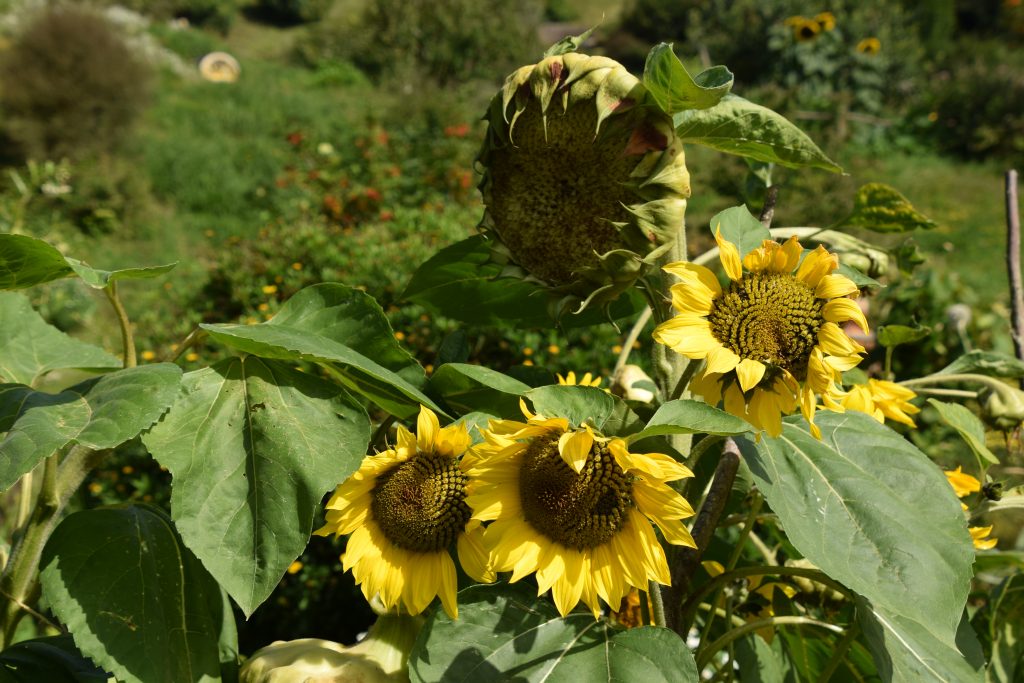
7. Perfect gardens
The plants, flowers, grass – everything looks fresh and very organized thanks to several gardeners working here full time and making sure it catches an eye.
8. Frogs didn’t want to comply
The population of the frogs in this area was huge and they clearly wanted to mark their territory by being loud. The direction Peter Jackson had to take decisive steps. Frogs were removed from the filming location and reintroduced after the job was done.
9. Discrimination of white sheep
Even though there were plenty of local sheep on the farm (over 13.500 to be precise), Peter Jackson didn’t decide to use any of them because of their white faces. Black-faced sheep were brought to the place and appeared in the movie.
10. Sunset which happened to be a sunrise
Do you remember a scene with Bilbo and Gandalf sitting facing a sunset? Another fake as the location faces east 🙂 Therefore, the crew was filming at the sunrise instead and edited in post-production. In the first cinema version, you could have seen birds flying backwards. Later on, it was fine-tuned!
11. Drink to look authentic
Filming of Bilbo’s birthday party was desired to look so authentic that actors were allowed to drink as much as they wanted. Unfortunately, they didn’t know that Peter Jackson supplied a beer containing only 1 percent of alcohol. It’s called Sobering Thought and can be purchased onsite.
12. Treat yourself too
Southfarthing beverages are available at the Green Dragon Inn. Those are an apple cider, ginger beer and two ales. One glass is included in your entrance ticket so don’t forget to make use of it!
Mt Taranaki or Mt Egmont, is a volcano in the center of one of the most popular wilderness areas in New Zealand – Egmont National Park. Standing 2.518m above the sea level gives it a status of the second-highest volcano in the country, just after Mt Ruapehu (2.797m).
Taranaki is a Maori name consisting of two parts: tara means “mountain peak”, and naki (coming from ngaki) means “shining”. The shiny mountain peak clearly relates to the snow covering its upper sloper all year long.
The second name was given by James Cook on 11 January 1770. Yes, this guy is really all over New Zealand and this time the name was given in the honor of John Perceval, 2nd Earl of Egmont, who was one of the supporters of search expeditions for the new continent – Terra Australis Incognita.
Track details
The way to the summit is challenging 12.6 km hike (there and back) with 1.6 km of vertical climb. However, it doesn’t discourage adventure seekers.
Distance: 12.6 km return
Time: 7-10 hr
Best time to go & safety
The best chance for good weather and higher temperatures is from December to April. In other months, the mountain will most likely be covered in snow and ice. Therefore, tourists without experience and proper equipment should not try their luck there.
The last major eruption occurred around 1655, meaning there is an extremely low risk of any volcanic activity going on in the area. However, it doesn’t mean that you should underestimate the mountain. More than 80 people have died since 1891 when records began. Weather can change quickly at any time of the year and even though it’s not a very high or difficult mountain, pay attention and make smart decisions on the way.
Check weather conditions on MetService prior to your summit climb.
How to get there?
North Egmont National Park Visitor Centre is only about 30 min (29 km) drive from New Plymouth. Take a turn off at Egmont Village and continue straight until you reach the parking. When driving from the south, it takes about 2 hours (160 km) from Whanganui.
Where to stay overnight?
Climbing Taranaki Summit is a full day hike so if you stay overnight in New Plymouth, I recommend departing early in the morning.
If you have a self-contained vehicle, there is awesome parking just in front of the visitor centre. In the high season, it gets full pretty quickly so try to arrive in the early afternoon. By doing so, you will secure your place, have time for a nice dinner in the shadow of the mountain and even the chance to tackle some easy and short hikes around the area as a warm-up.
Other than that, there are couple of camping sites or lodges along the way from New Plymouth.
What I did was to stay a night prior to the hike in a self-contained vehicle just next to the visitor center and after the hike, I drove to Ariki Hostel in New Plymouth to take advantage of a hot shower. After a tough hike, it always brings me back to life 🙂 Such a plan was really optimal for me, as I had the chance to enjoy the evening and morning right at the foot of the mountain and then relax in a warm and cozy place.
Interesting facts
The legend has it…
There is a legend that connects all the volcanic summits in the central area of North Island, which adds an extra flavor to the experience. Apparently both Mount Taranaki and Mount Tongariro were in love with Mount Pihanga and the fierce fight between them started. Tongariro won and Taranaki escaped to the west coast where he was trapped by Pouakai Ranges in the place he stands now. It’s often covered in clouds, hiding the tears shed after his lost love. Therefore, be gentle and show compassion when walking on Taranaki’s slopes 🙂
Mt Taranaki covered in clouds
Filming location
Did you know that Mount Taranaki is an actor too? Due to its similarity to Mount Fuji in Japan, it played in the movie The Last Samurai. Reason? Much more space for filming crew than around actual location in the Land of the Rising Sun.
Itinierary
Day 1 – Dawson Falls and Kapuni Loop Track, North Egmont Visitor Centre
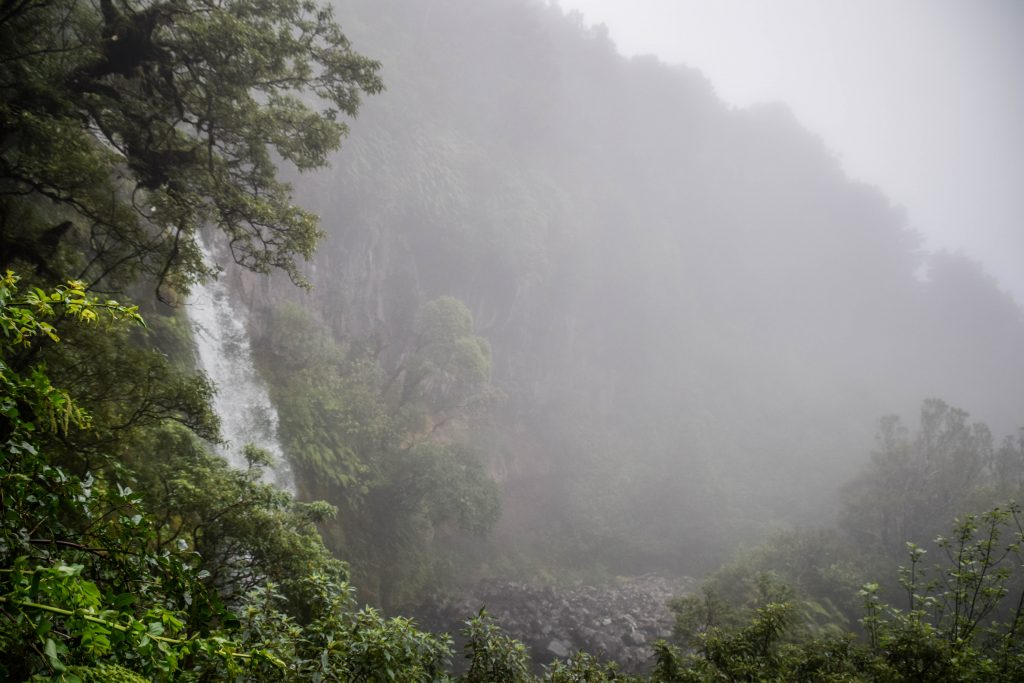
As I was approaching Egmont National Park driving along West Coast, the second-highest volcano of New Zealand’s North Island was hidden in thick clouds and I just trusted my map that it’s really there. The road was gaining altitude and after a while, I was in the clouds as well. It was still early afternoon so I took a detour to visit Dawson Falls and make a warm-up on a short Kapuni Loop Track (45-60 min round trip).
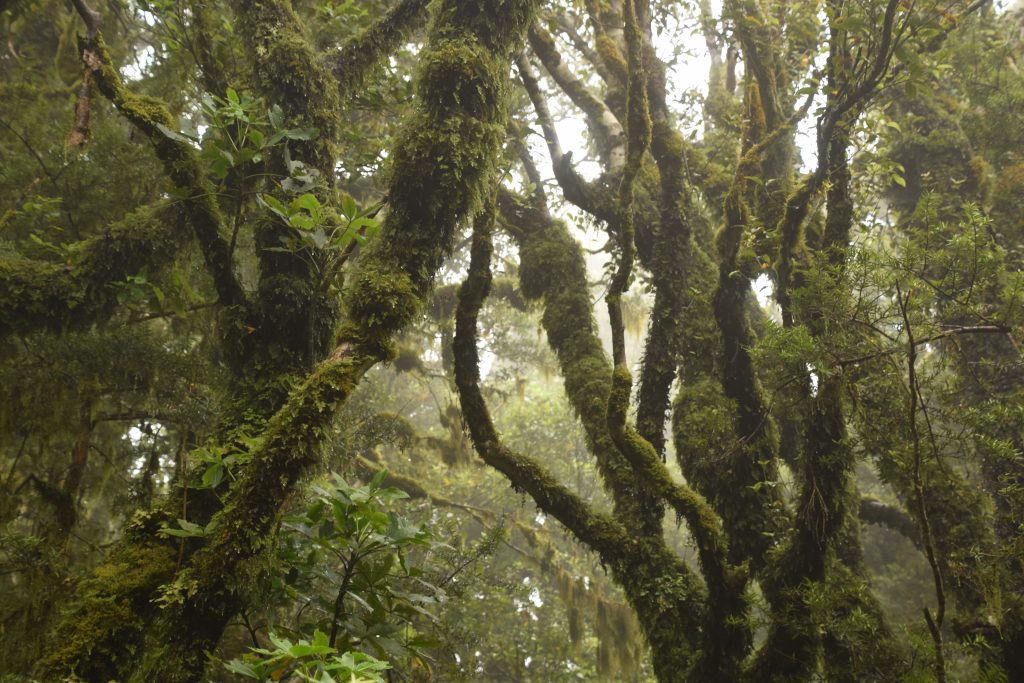
The path leads through the so-called ‘goblin forest’, which indeed looked like a separate fairy tale world, especially in misty weather conditions. I didn’t spot any actual goblins, but twisted trees that grow over the remains of the previous forest destroyed by the volcanic eruption made create the atmosphere of mystery.
Goblin Forest, Egmont National ParkDawson Falls
Turn off from the main track takes you down to 18 m high Dawson Falls. Like many places in New Zealand, they were named after the first European explorer that reached them in 1885 – Thomas Dawson.
Moving to the other side of the mountain brought significant weather improvement. Strong winds chased the clouds away and once I parked my van next to North Egmont Visitor Centre, the first rays of the sun timidly broke through. Or was it Taranaki itself that stopped hiding his bad mood and decided to present its beauty? I used the remaining time of the afternoon to explore short walks around the place and admire the sunset with a perfectly blue sky. It filled me with confidence that tomorrow I will be lucky enough to go up the summit and enjoy spectacular cloud-free views over North Island.
Day 2 – Taranaki Summit Track, New Plymouth
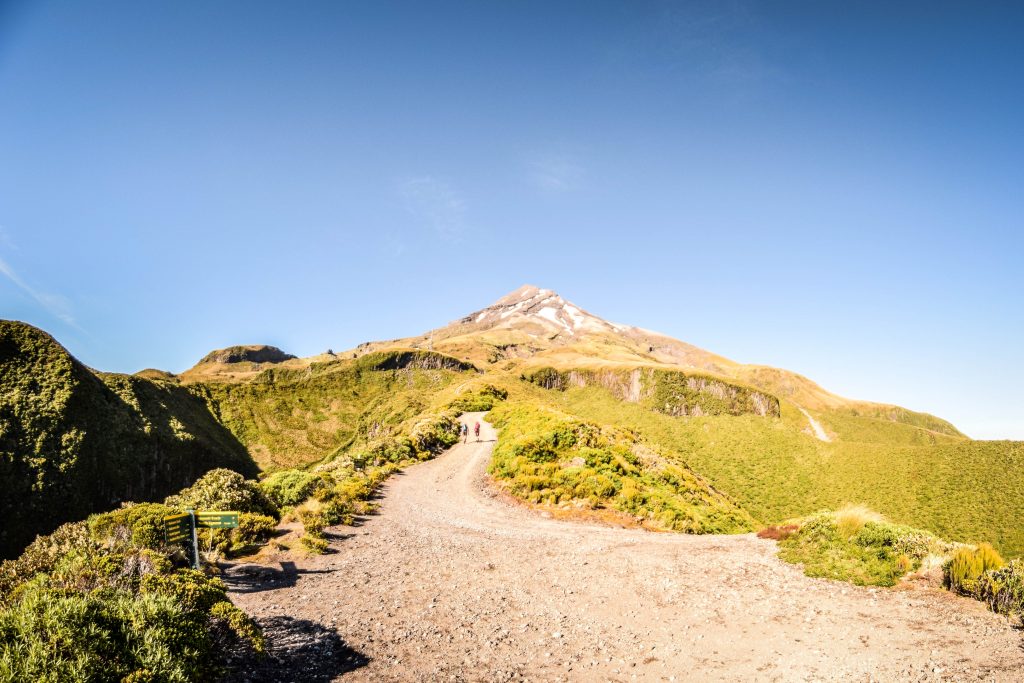
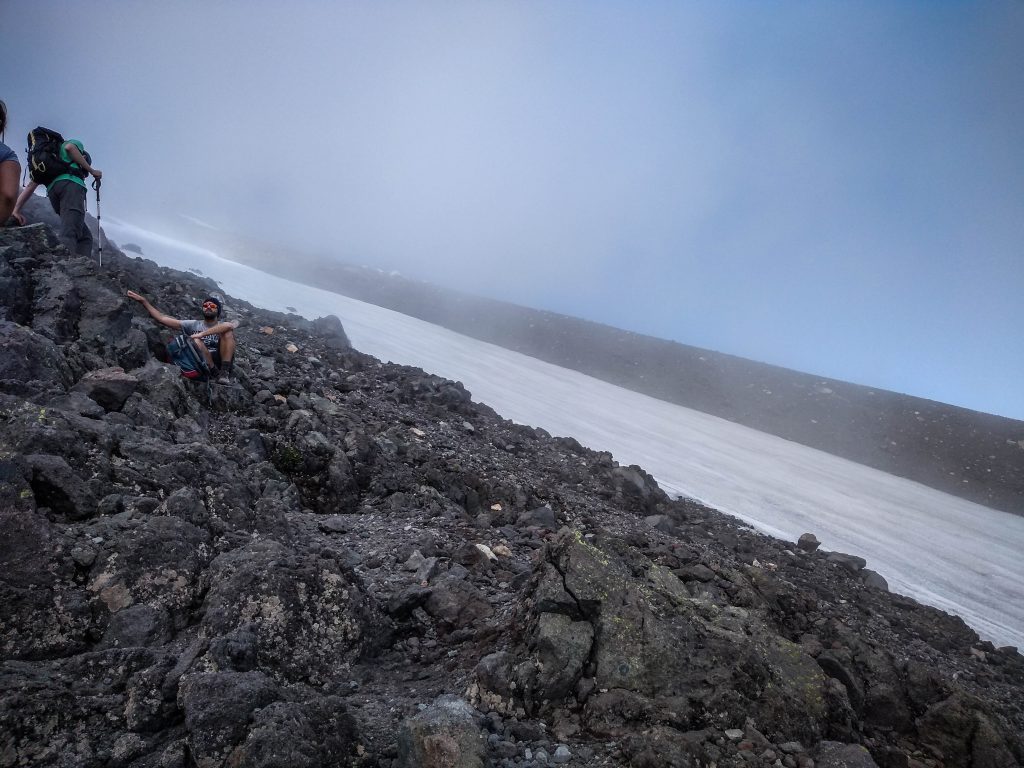
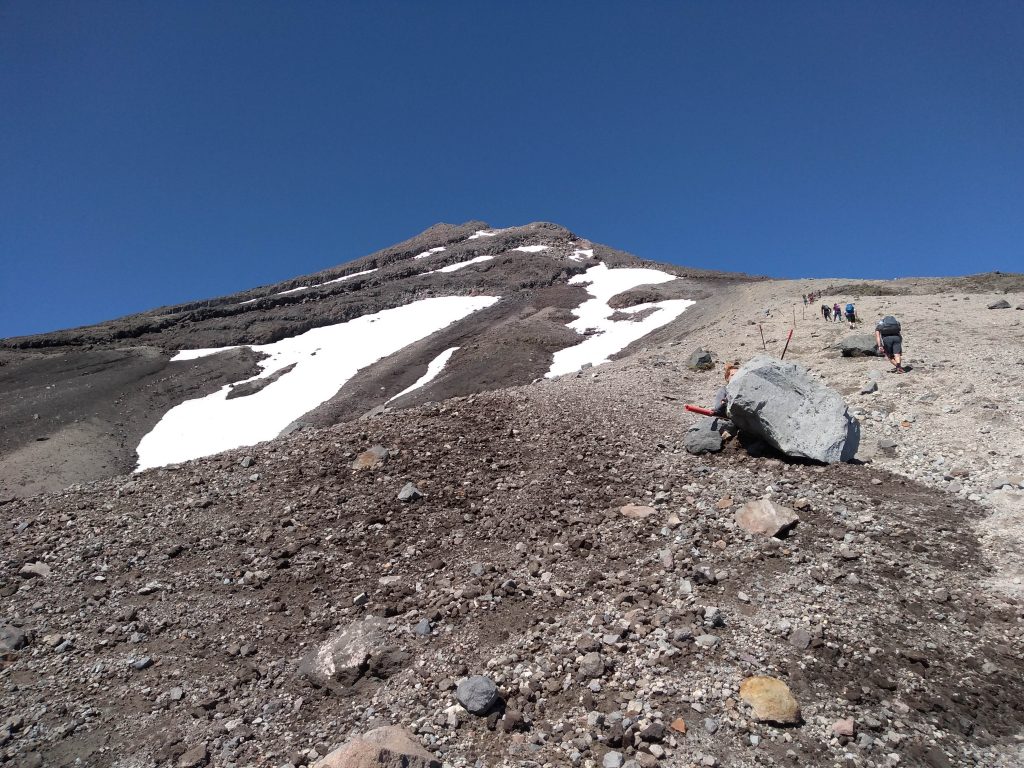
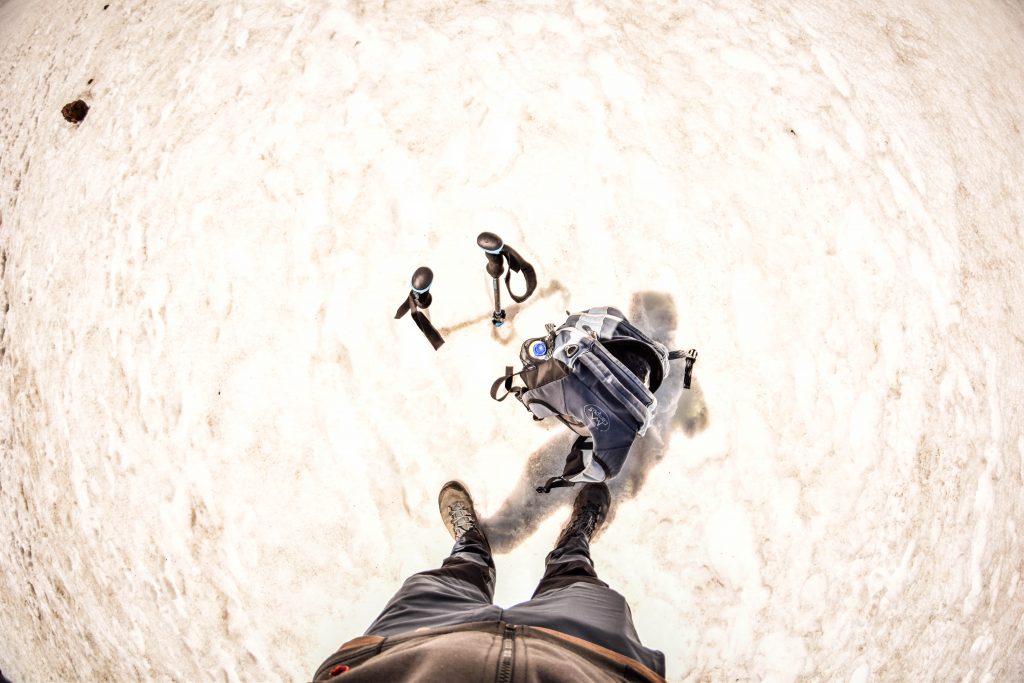
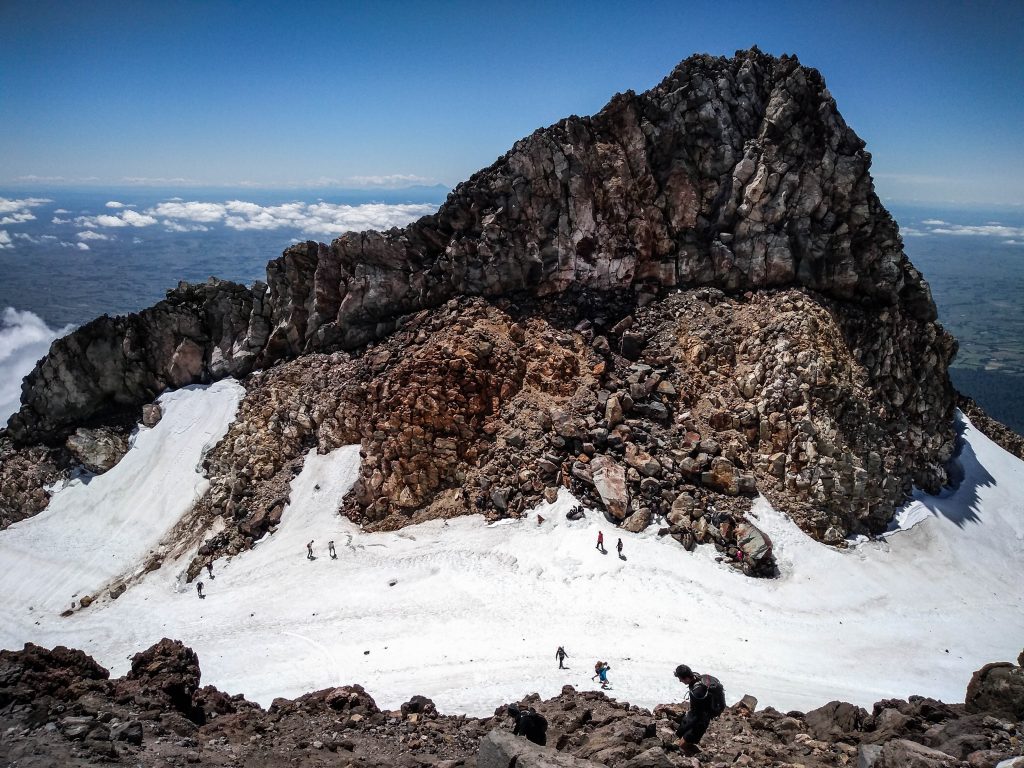
I departed 8 am sharp and the track was rather empty. Though, it didn’t take longer than 1 hour when I stopped for the first time and saw lots of people down there following my steps. The weather was horrible last days and it seems that everyone was waiting for this perfect sunny window which happened on that day. The way up is definitely a challenging one. It has nothing to do with the zig-zag style that gains altitude in a moderate way. Instead, it’s a straightforward climb first along the wide gravel road and then up the steep slope of the mountain. Tahurangi Lodge was a perfect spot to boost my energy and get rid of the second breakfast. As I pushed forward to the summit, there was more and more snow lying around, the wind blew stronger in my face and the temperature dropped down.
The first stage of Taranaki Summit TrackStairs on the way up to Taranaki SummitMore and more snow on both sides of the trackLoose stones on the way up to Taranaki Summit
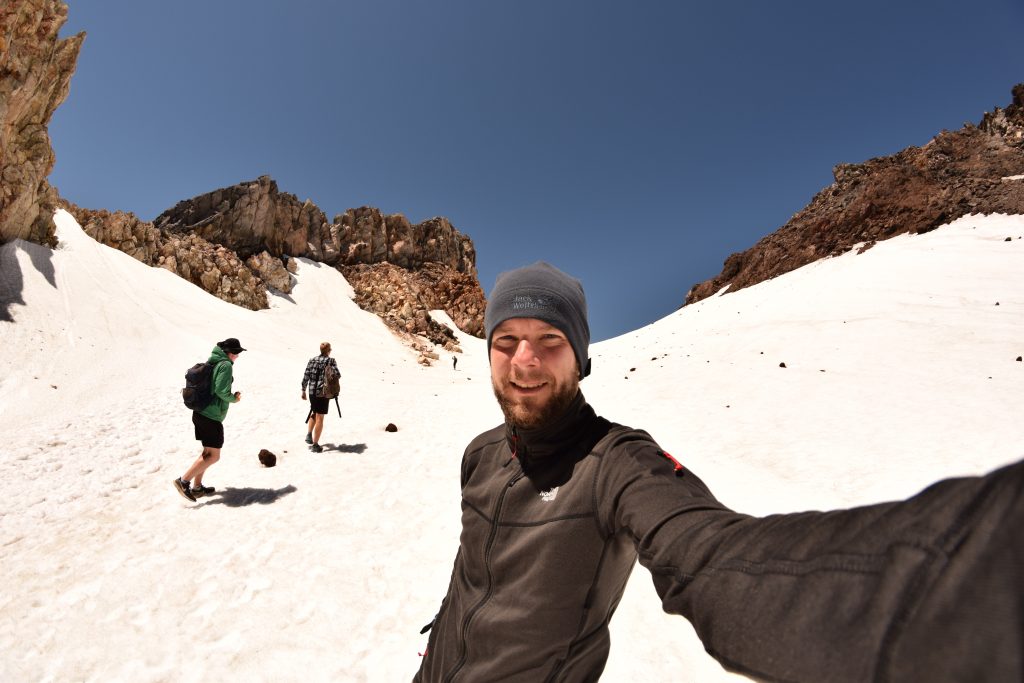
Orange poles, the same as on many other tracks in New Zealand, guided me towards the destination. It was extremely helpful to support myself with hiking poles, especially on the snow around the crater and when going down the mountain. I recommend taking at least one with you to keep the balance. Otherwise, you have a high chance to slip and land on your ass. Not a big deal, but could be painful on some bigger stones 🙂
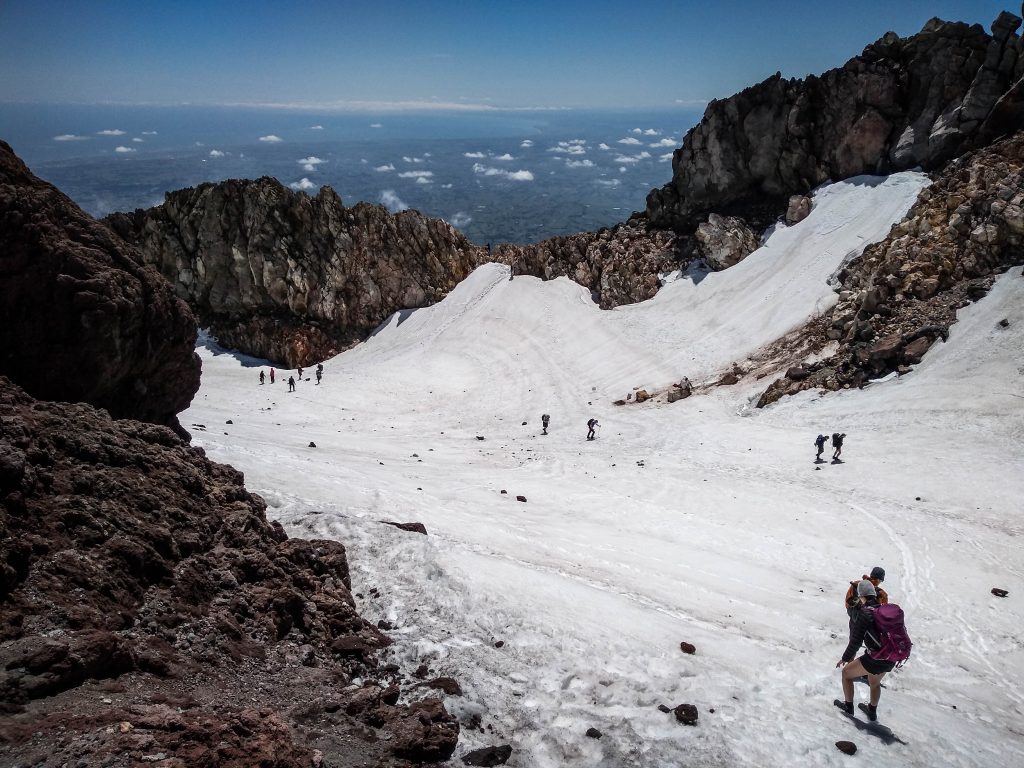
Mt Taranaki craterHikers sliding down in Taranaki craterHiking poles were extremely useful when walking on the snow and loose rocks
Finally, I put my feet in the crater. There are ice and snow all year round which makes tourists very happy when they play around and slide down on their shoes or ass down the path. But the crater is not the end. From there, it’s another final short climb up to the summit rock.
Final push to the summit rock
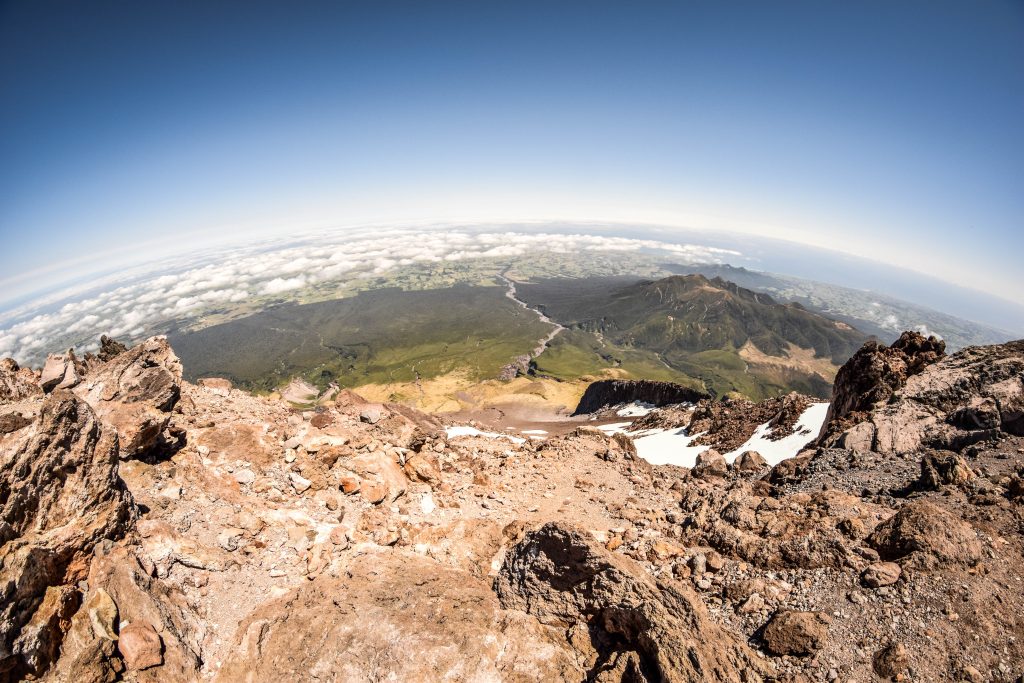
I got two things as a reward for reaching the summit. The first one was the chance to admire 360 degrees panorama across the south-west area of North Island. With good visibility, it was possible to see as far as volcanic summits in Tongariro National Park one side and the Tasman Sea on the other.
The second one was the ultimate satisfaction that I conquered the second highest volcano in New Zealand. Believe me, that was a great feeling. Moreover, Taranaki is one of these places that I’m already dying to visit again as soon as I’m back to the kiwi country.
Panorama from the summit
The way down was significantly easier than the way up. It took me only 2.5-3h to reach the parking lot, comparing to 4-5h that I spent pushing to the summit. Why is it like that? I was basically sliding down on loose stones, very often simply running all the way down as it was the easiest way to keep the balance. I saw many hikers struggling and falling down. I landed on my ass twice, even though I had my hiking poles for support. It was a really fun experience though 🙂 In the afternoon, more and more clouds started to cover the mountain and when I was halfway down and turned around, I couldn’t see the summit anymore. Taranaki started crying after his lost love once again.
Final thoughts
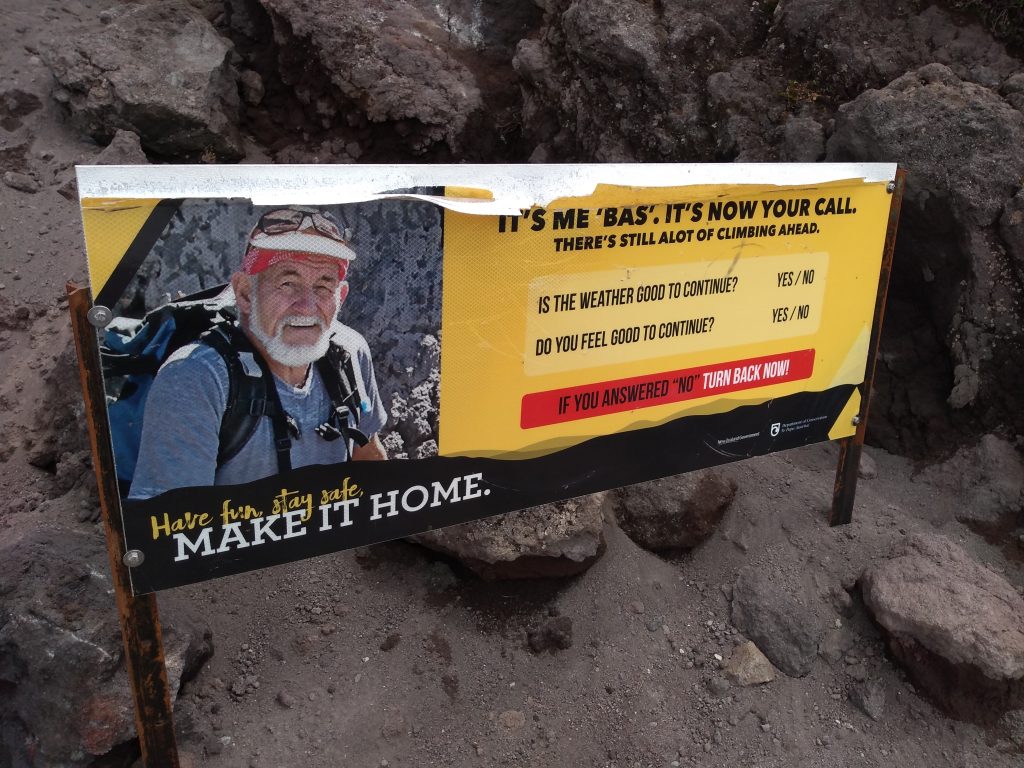
Climbing Mt Taranaki was certainly one of the most memorable hikes on North Island. Be patient and attempt it when the conditions are good. In the end, it’s not only about reaching the summit, but also about enjoying panoramic views. And if the conditions change or you don’t feel well, just listen to Bas and make it back home. The mountain will be always there. Have fun and stay safe!
Other tracks in the area
If the weather is not on your side or you just think that tackling Taranaki Summit Track is too much, don’t let it discourage you! There are several other options in Egmont National Park ranging from the very short and pleasant ones to more challenging multiple days hikes such as Around the Mountain Track. Check the website of the Department of Conservation and select the one that fits you best.
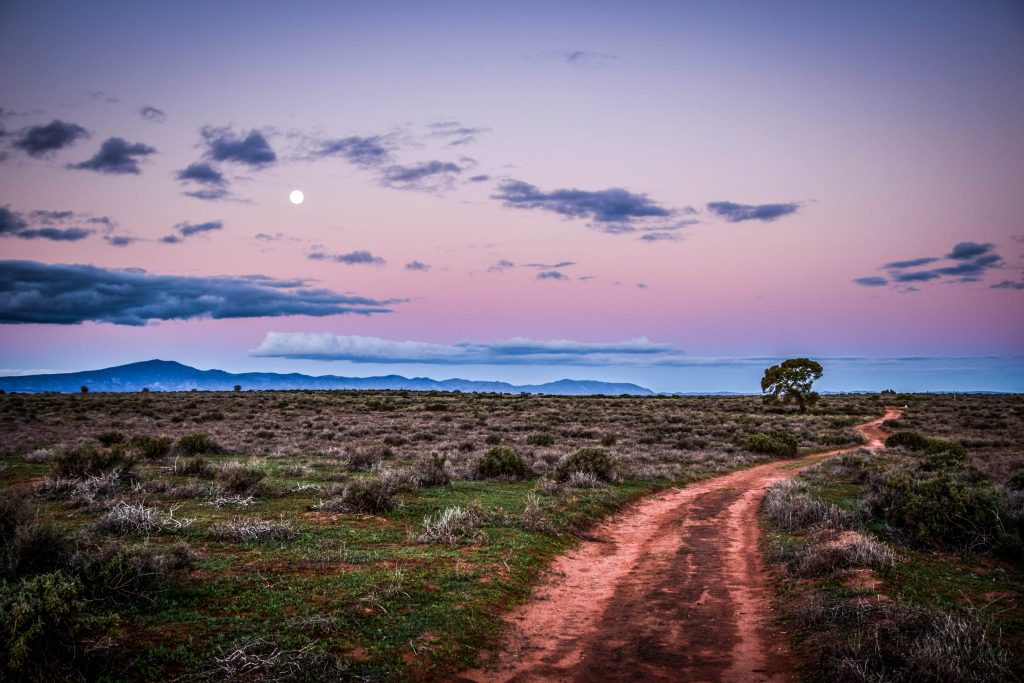
Flinders Ranges National Park was my first stop on the way from Adelaide to Darwin. Well, not exactly on the way as I had to make nearly 200 km detour from Port Augusta. However, the first stop on the way through the iconic scenery of outback Australia. I expected it to be marvellous and pristine. Driving from Melbourne to Adelaide was fun. Great Ocean Road, detour to Kangaroo Island and multicultural city of Adelaide. But now it was a time to get inland. To see the Red Centre. To feel the heartbeat of Australia.
I knew that there are long days of driving ahead of me but all emotions were covered by pure excitement. I love desert landscapes. Silence, remoteness, huge open spaces with me standing in the middle like a small pawn on a giant board. I feel I am self-dependent. Far away from the mess of daily life. Free.
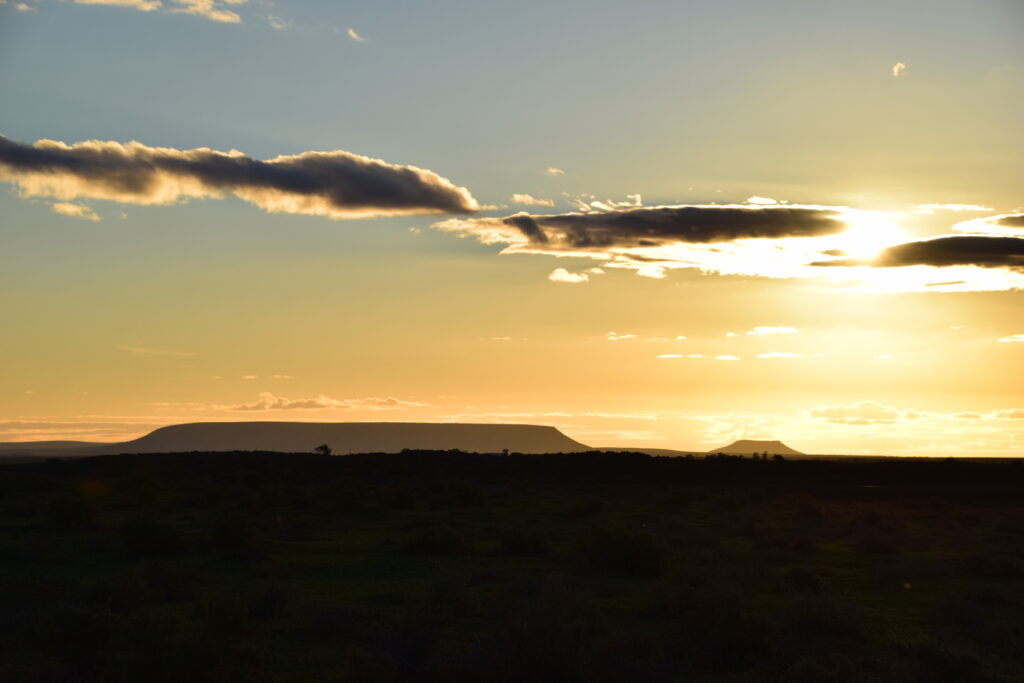
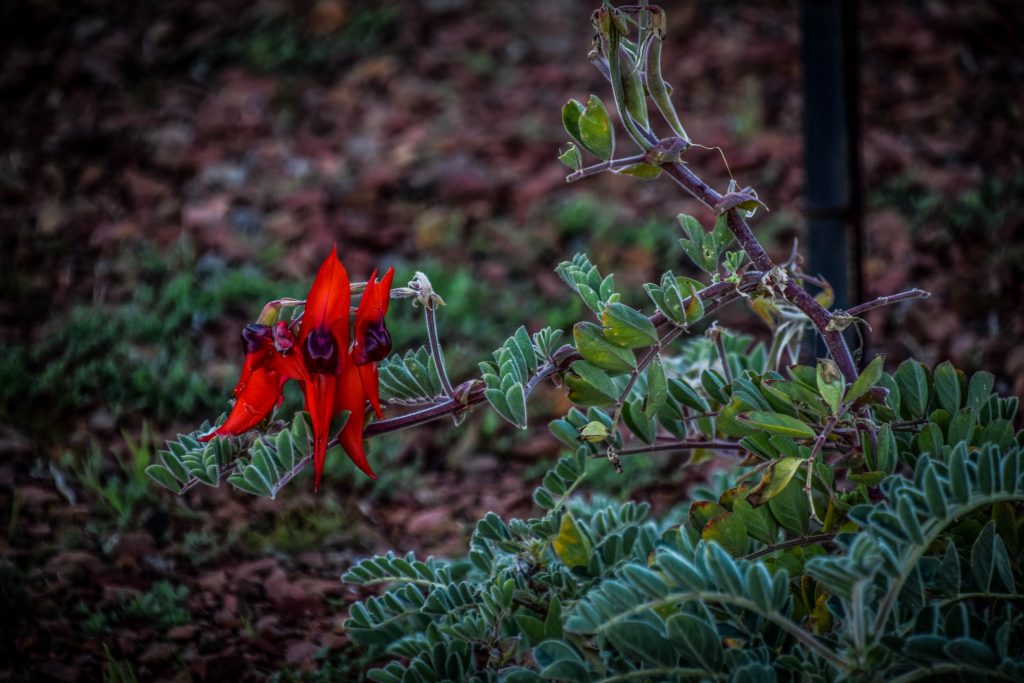
I hit the road in the morning and left Adelaide before traffic jams. The day was beautiful with a blue sky and a pleasant temperature of 20-25C. The plan was to get to Port Augusta with a stop in Mount Remarkable National Park. After a short hike there, I still had enough time to visit Australia Arid Lands Botanic Gardens. I didn’t expect more than boring walk among plants just to kill some time but instead, I got one of the biggest positive surprises in South Australia. Learning about the flora doesn’t come with the thrill of joy in my heart, but the walk through the garden was very relaxing and the landscape around it at sunset time was simply stunning. Look at the pictures below and tell me I’m wrong!
Landscape around Australia Arid Lands Botanic Garden in Port AugustaLandscape around Australia Arid Lands Botanic Gardenin Port AugustaSunset around Australia Arid Lands Botanic Garden in Port AugustaSturt’s Desert Pea
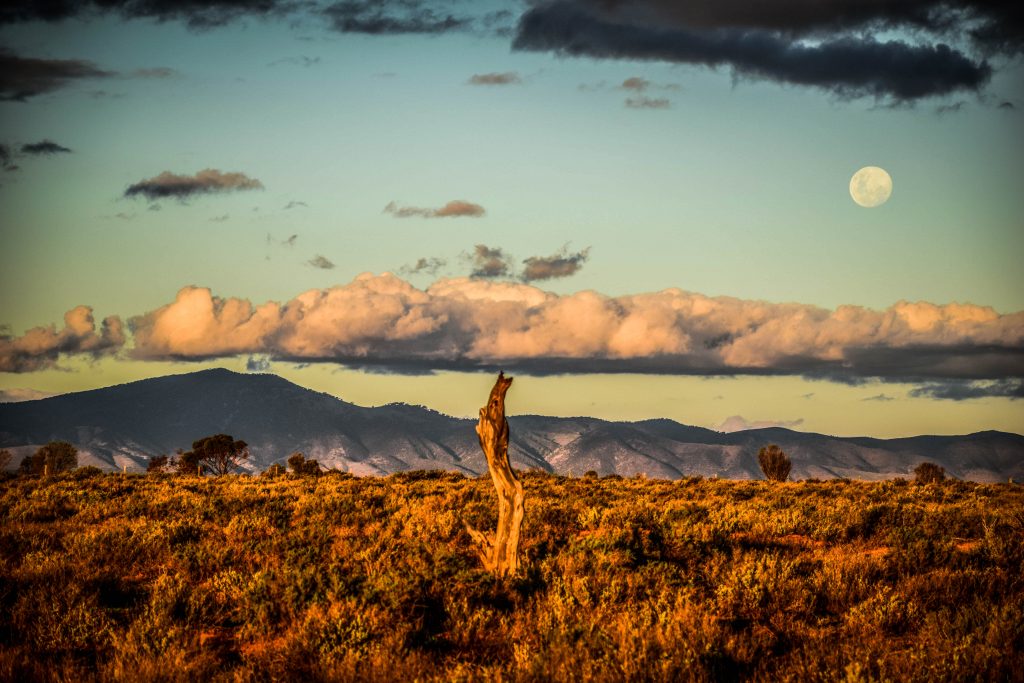
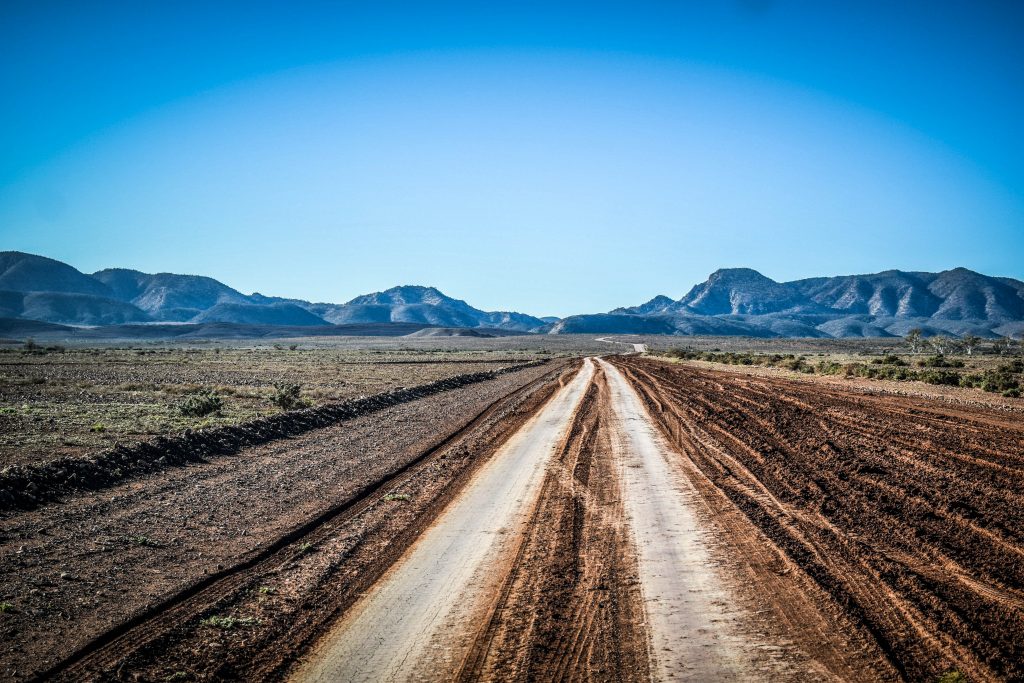
After the night at the gas station, I hit the road well before sunrise. It took me around 2 hours to reach the turn into Brachina Gorge Road. From here, dust road led me as far as I could see, pulling towards mountain ranges growing on the horizon with every second.
Brachina Gorge Road leading towards Flinders Ranges
Flinders Ranges National Park was named for Matthew Flinders, the English navigator who sighted and explored the peaks in 1802.
There is a lot to see here. The largest mountains range in South Australia with stunning gorges rich in wildlife as well as historical sites. Ikara/Wilpena Pound is an ancient meeting or initiation place for Aboriginal people and several ruined buildings around Wilpena, Arkaba and Aroona remind about first settlements of Europeans in this region. Contacts between traditional owners (Adnyamathanha people) and newcomers were not always peaceful, especially when it comes to water and land rights.
Best time to visit
The most comfortable time for exploring the area is between April and October. In summer, the temperatures can rise well over 40ºC, which can already be dangerous for your health and safety.
I would suggest staying at least 2 days to do plenty of bushwalks and admire night sky at the campsite.
How to get there
The easiest way is to start from Adelaide and drive around 450 kilometers to the north in the direction of Hawker and Wilpena. You don’t need 4WD at any point.
Alternatively, you can approach Flinders Ranges from the north, following Birdsville Track or from Broken Hill, turning right at Yunta but in both cases don’t think about it without 4WD.
For getting around the park, a 2WD car with high clearance is enough. Roads are unsealed and sometimes rough, especially in Brachina Gorge, but just take it slowly and it’s gonna be fine. I had no problems driving my Toyota Tarago.
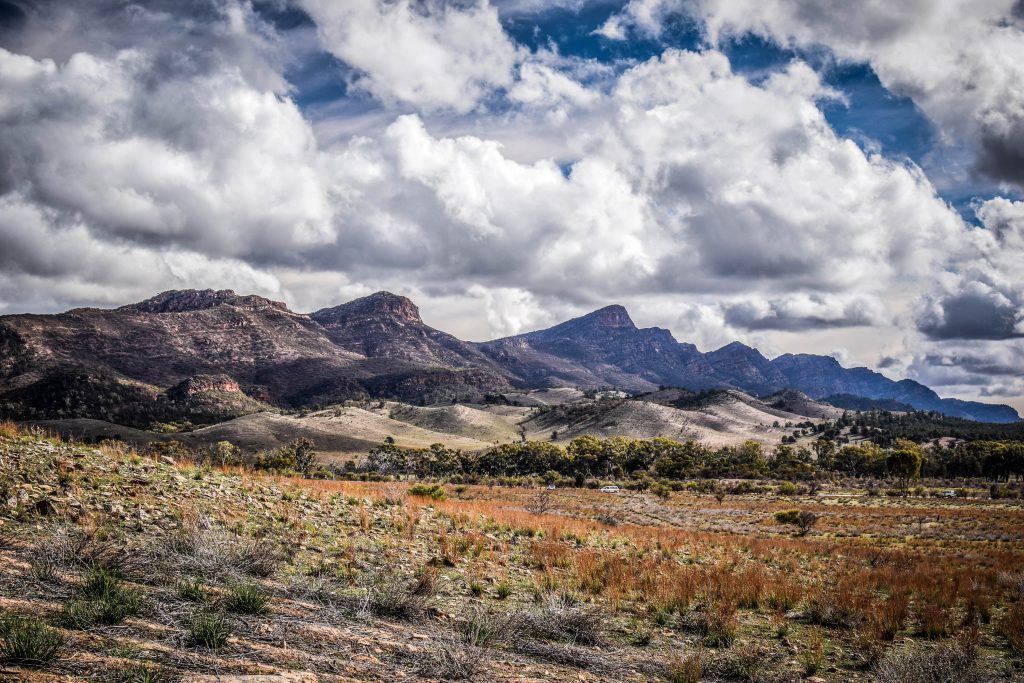
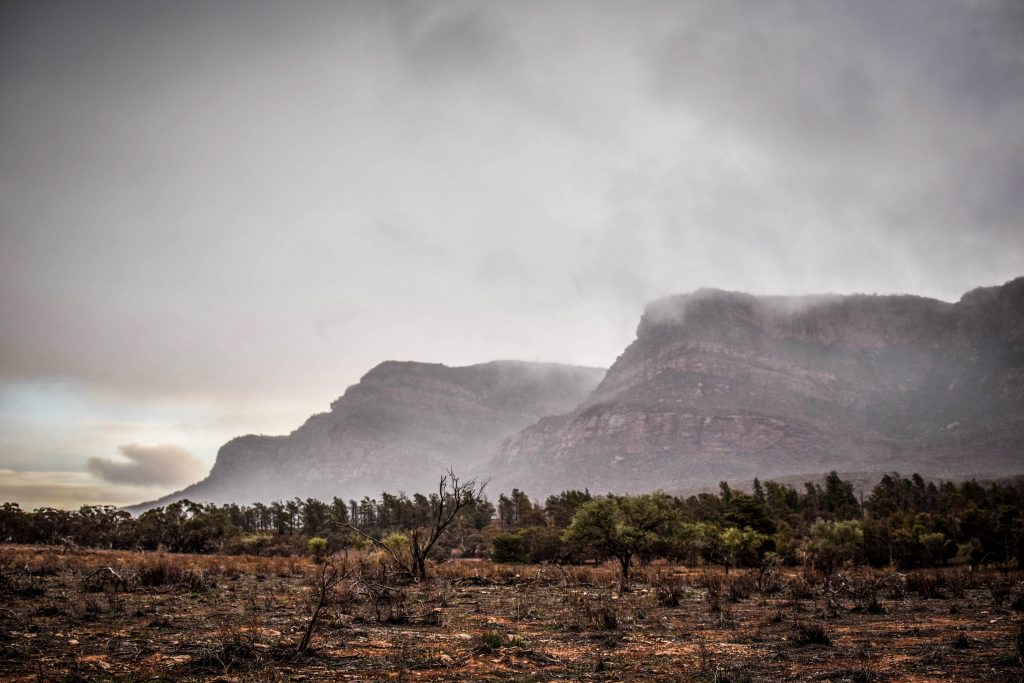
Views around Wilpena Pound Resort
Camping
There are 10 campgrounds in the national park. Most of them have basic facilities, such as toilets and fire pits (can be used outside of the fire danger season). As there is no mobile signal at campgrounds, therefore book your spot and vehicle entry fee online or at the Wilpena Pound Visitor Centre. I really recommend staying for the night in Ikara-Flinders Ranges National Park. There is no light source here, so take your own and don’t forget to just turn it off for a while. Then, enjoy the magical spectacle full of stars.
Worth to know
Take Georama virtual tour – a great chance to have the first look at the national park scenery before heading there in person. Views include Wilpena Pound, Pine Hut, Parachilna Gorge and more.
Download mobile apps: Discover the Flinders Ranges (iOS / Android) and Flinders Ranges Walks (iOS, Android). The first one includes driving and walking tours as well as information about geology, wildlife and plants. On the other hand, the second one covers 16 walking tracks in the national park.
Maps can be downloaded from the website National Parks and Wildlife Service South Australia.
Park Passis required to access the Flinders Ranges National Park and costs 11 AUD per vehicle. It can be purchased at the Wilpena Pound Visitor’s Centre.
Top sights in Ikara-Flinders Ranges National Park
Wilpena Pound – 80 sq km amphitheatre of mountains that is also known by its Adnyamathanha name of Ikara, meaning “meeting place”. According to Dreaming stories, the surrounding mountains are the bodies of two giant snakes that laid around during the initiation ceremony. After feasting on the people, they couldn’t move and died, creating the most iconic landmark of the national park.
If you have some cash to spare, take a scenic flight and admire this miracle of nature from the sky. Scenic flights can be booked through the Wilpena Pound Visitor Centre and such a pleasure costs between 100-200 AUD.
Pound Gap Track and Wangarra Lookouts – there are several walking tracks starting at the Wilpena Visitor centre, including the Pound Gap Track (8 km return). It follows Wilpena Creek through tall river red gums and pines. After some time, you will reach Hill Homestead which is worth a stop to read information about historic inhabitants of the cottage and difficult conditions they struggled with. Refill your body with water and calories and continue to lower and then to the upper Wangarra Lookouts to fully enjoy spectacular Wilpena Pound from the inside.
If you are lazy, there is an option to take a shuttle bus that stops around 1 km from Hill Homestead. It runs 3 or 4 times a day but check the schedule at Wilpena Pound Resort.
View from upper Wangarra Lookout
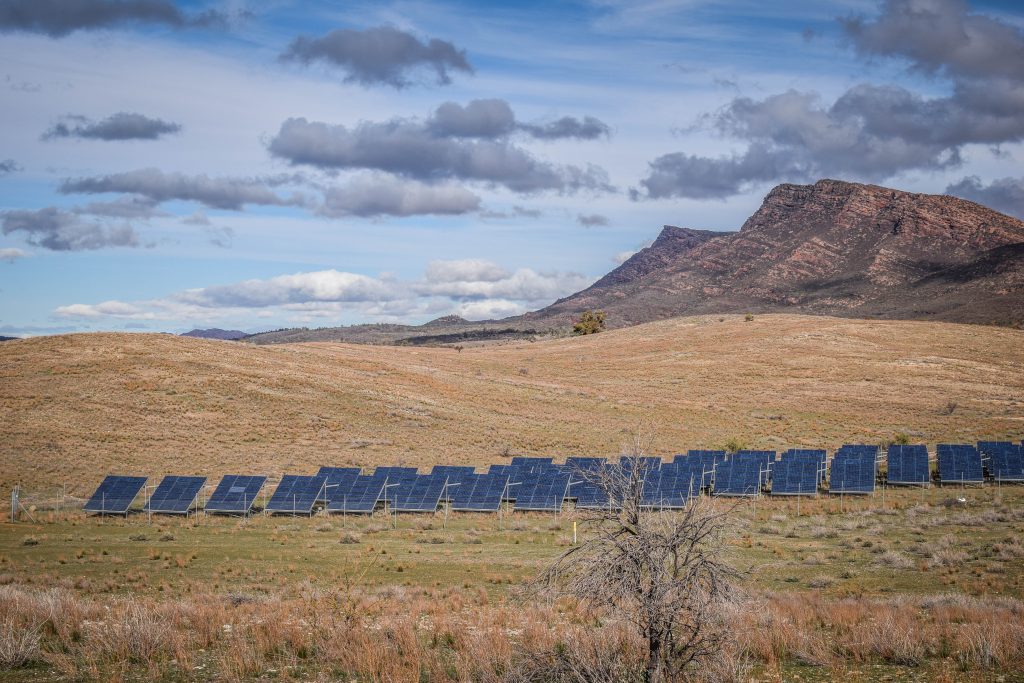
Solar Panel Station – nice short walk on the road towards Wilpena Pound Resort. Nice not because of solar panels but the gang of kangaroos hopping around.
Solar Panel Station
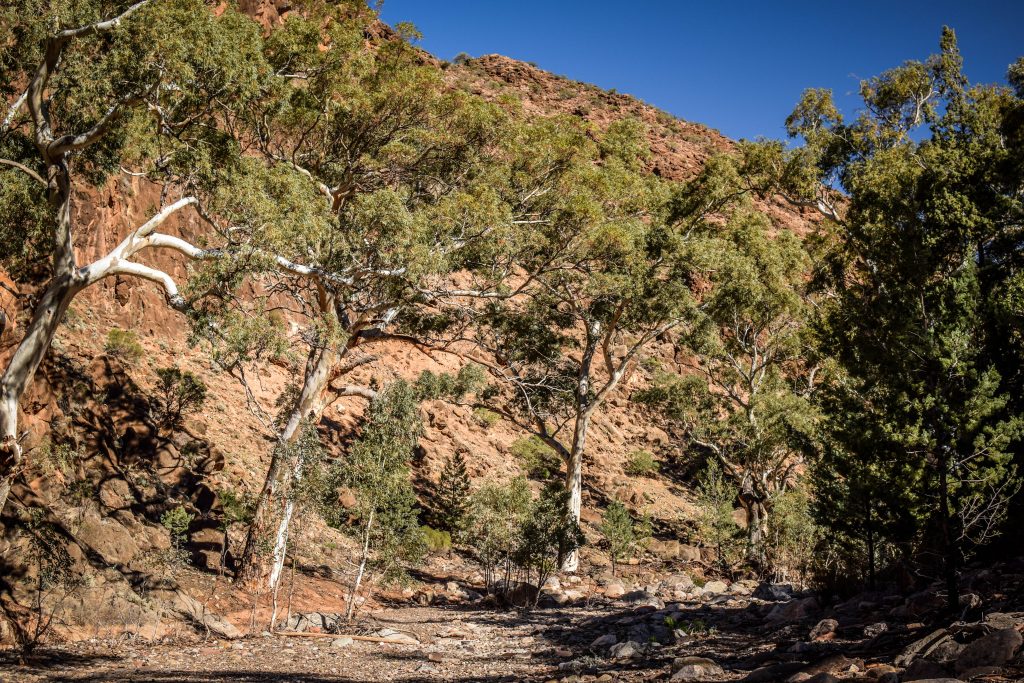
Brachina Gorge – 20 km drive with informative signs along the way telling about the age and formations of the rock and cliffs. Some of the oldest fossils on earth have been found here! If that doesn’t excite you, then just sit back and enjoy the ride with the bumps adding a bit of adventure feel. Amazing experience! If you are lucky, there is a chance to spot a yellow-footed rock wallaby, especially active in the afternoons.
Road through Brachina Gorge
Bunyeroo Gorge – a great opportunity for a walk surrounded by rocks and gum trees. The 7.5 km return hike will take about 3-3.5 hours to complete.
Hiking trail in Bunyeroo Gorge
Razorback Lookout – only a short drive away from the parking at Bunyeroo Gorge following scenic Bunyeroo Valley road lays this iconic viewpoint. Breathtaking panorama of Ikara-Flinders Ranges National Park.
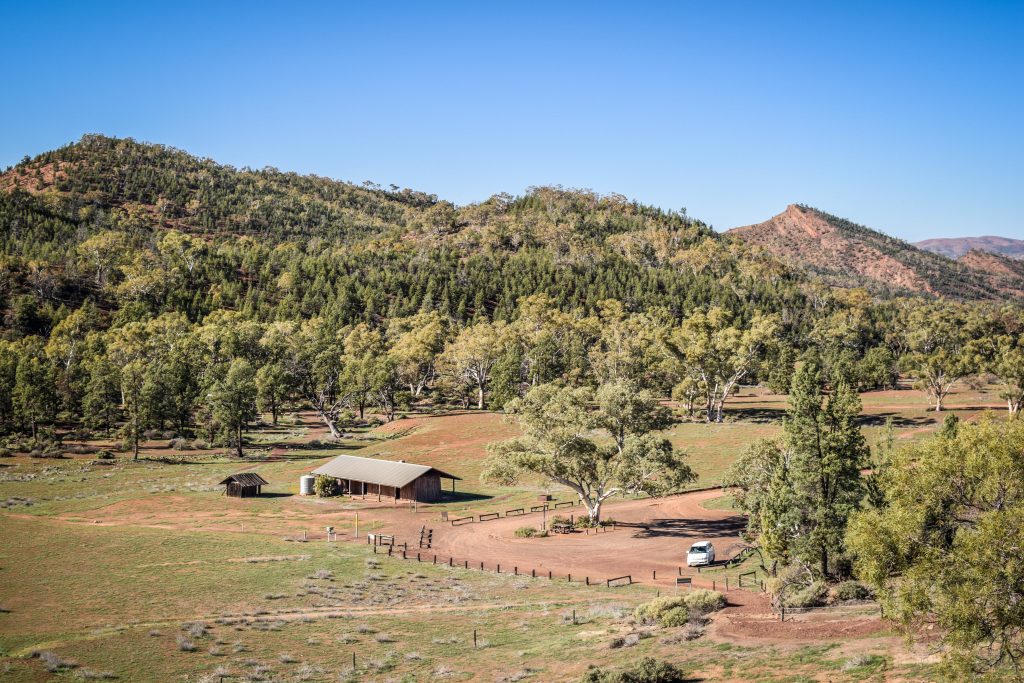
Old Wilpena Station – the oldest pastoral site in South Australia, working until 1985. Remainings of old buildings and cemetery remind about harsh conditions that first European settlers faced after arrival to the region. Two options for a walk here: 1km loop or 3.2km loop.
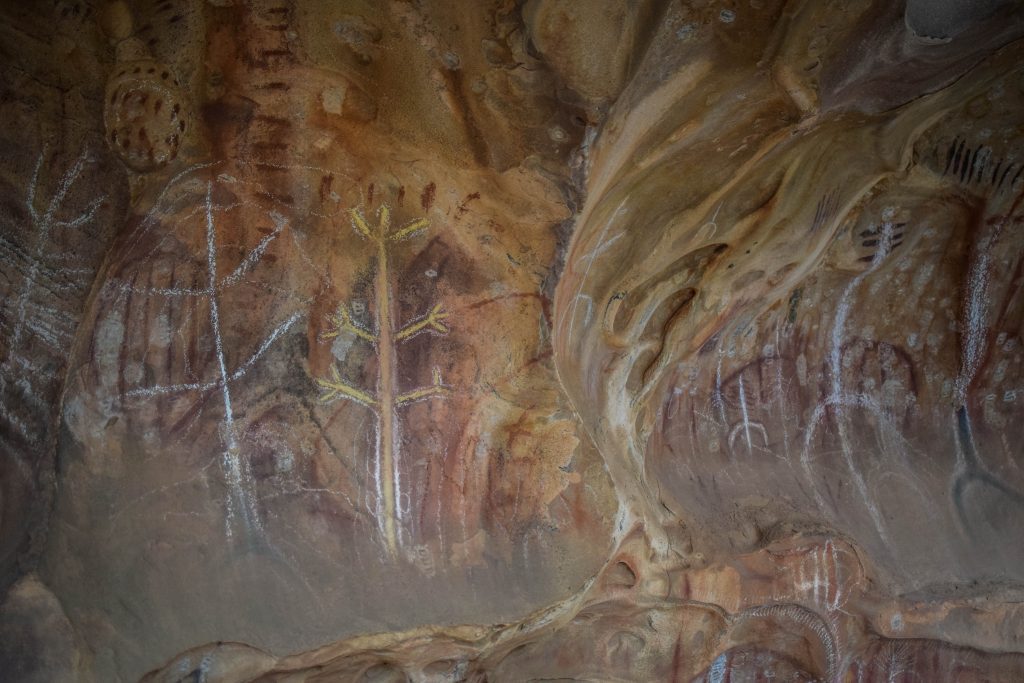
Arkaroo Rock – Short bushwalk taking you to ochre and charcoal rock paintings from the land’s traditional owners. Parking is easily accessible from Ikara/Wilpena Pound (around 17 km). From there, it’s uphill but gentle loop track which shouldn’t take longer than 1-1.5 hours to complete. Other spots to admire aboriginal art are at Perawurtina and Sacred Canyon, however, the last one can be visited only on an organized tour with an Aboriginal guide from Wilpena Pound Resort.
Aboriginal art inside Arkaroo RockLandscape around Arkaroo Rock
St Mary Peak – The highest point of the Flinders Ranges (1171m above sea level) and significant place for aboriginal people of Adnyamathanha. Due to this fact, it’s recommended to respect the summit and not to go beyond Tanderra Saddle. There are two options: the direct route, which is 14.6 km long and takes about 6 hours or the loop route, which is 21.5 km and takes about 8-9 hours. I didn’t do the hike but I heard it’s pretty difficult so take enough supplies and tell someone about your plans.
Aroona Ruins – Above the spring are the remains of sheep station from the early nineteenth century. The area is strongly connected with Hans Heysen, the German watercolour artist.
Parking and campsite around Aroona Ruins
Appealinna Ruins – In the 1850s, Joseph Wills was a local pastoralist who built the homestead and stockyards on the southern side of the creek, while the ruins on the north side were once a busy mining settlement.
Walks and hikes – There are enough tracks to satisfy even the most demanding wanderers and spend several days with nature. Check the full list on the website of the national park and get a map from Wilpena Visitor Centre. Never forget your water and keep in mind safety rules!
: Lubawka – Krzeszów")
: Średnica Pass – Lubawka")


: Karpacz – Średnica Pass")


: Odrodzenie Hut – Karpacz")


: Szklarska Poręba – Odrodzenie Hut")


: Świeradów Zdrój – Szklarska Poręba")