Tag

volcanoes

Browsing

Introduction

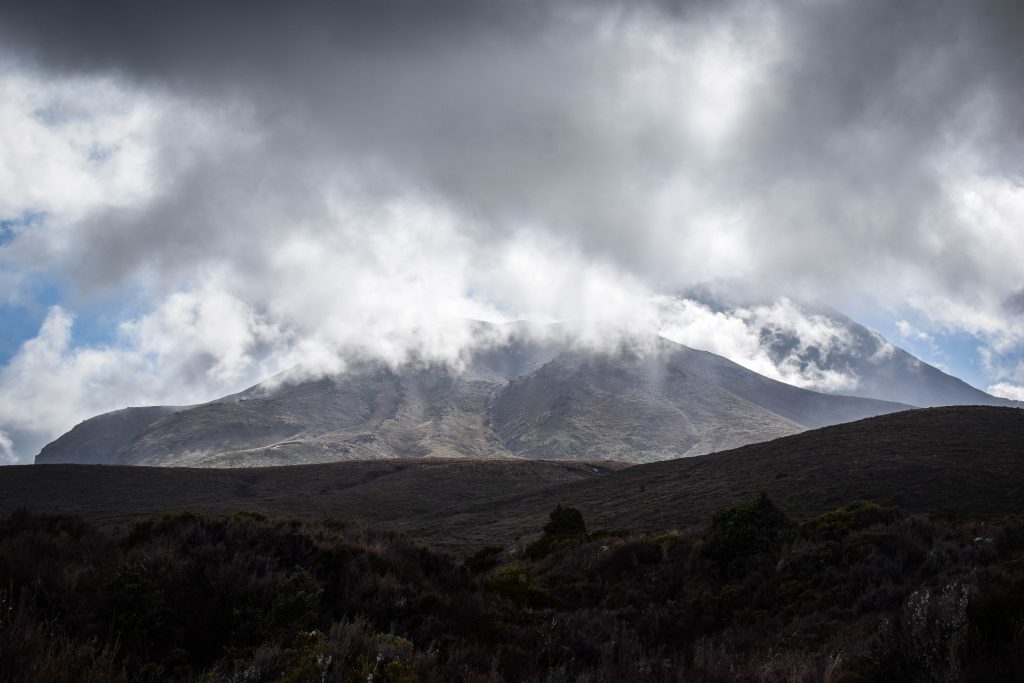
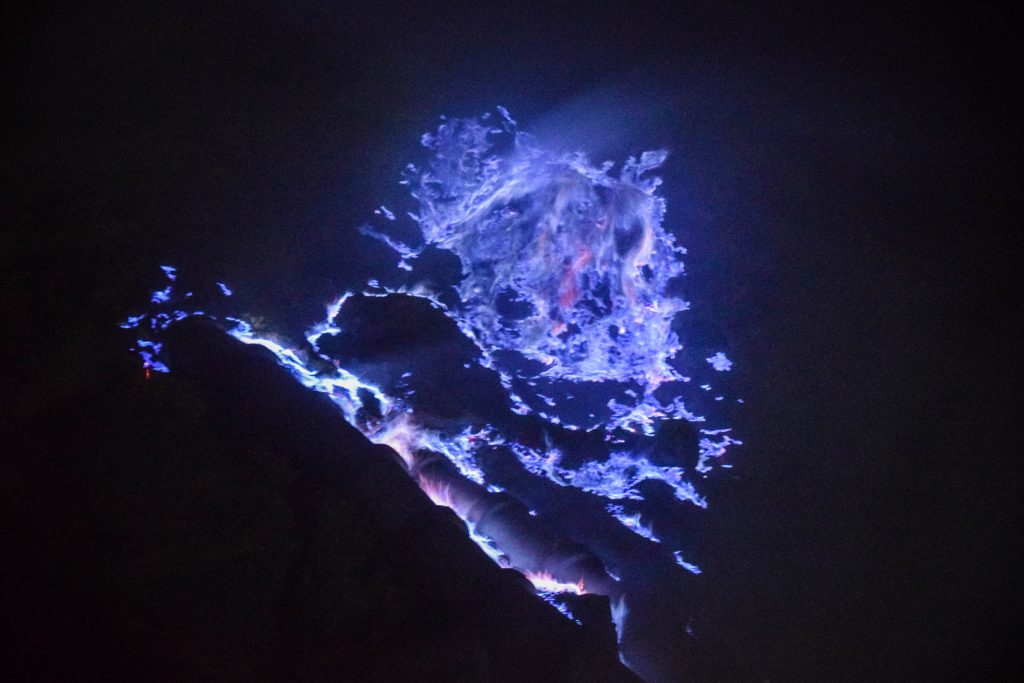
Kawah Ijen is an active but recently quiet volcano in East Java. Being home to the natural phenomenon of blue fire, it attracts thousands of tourists ready to set off in the middle in the night to witness the unique flames that can be seen only here and in Iceland!

How to get to Ijen Volcano?

Mount Ijen is located in East Java and the easiest way to get there is by ferry from Bali or from the nearest airport in Surabaya. Tour operators offer 1 day trip from Bali with pick up at your hotel and it is popular among tourists. Keep in mind that East Java has much more to offer so staying longer is definitely a better idea.

For independent travellers, the best is to base yourself at Banyuwangi and look for private transport (car/scooter) or organized tour there.

Where to stay?

Javalindra Homestay was a perfect base for exploring the area. The room, as well as a shared bathroom, were very clean, there was a spacious hall with a comfortable couch for chilling, they provide breakfast and rent scooters as well. Plus the owner is simply a friendly guy and he even dropped me to the bus station when I was about to leave to Semarang.

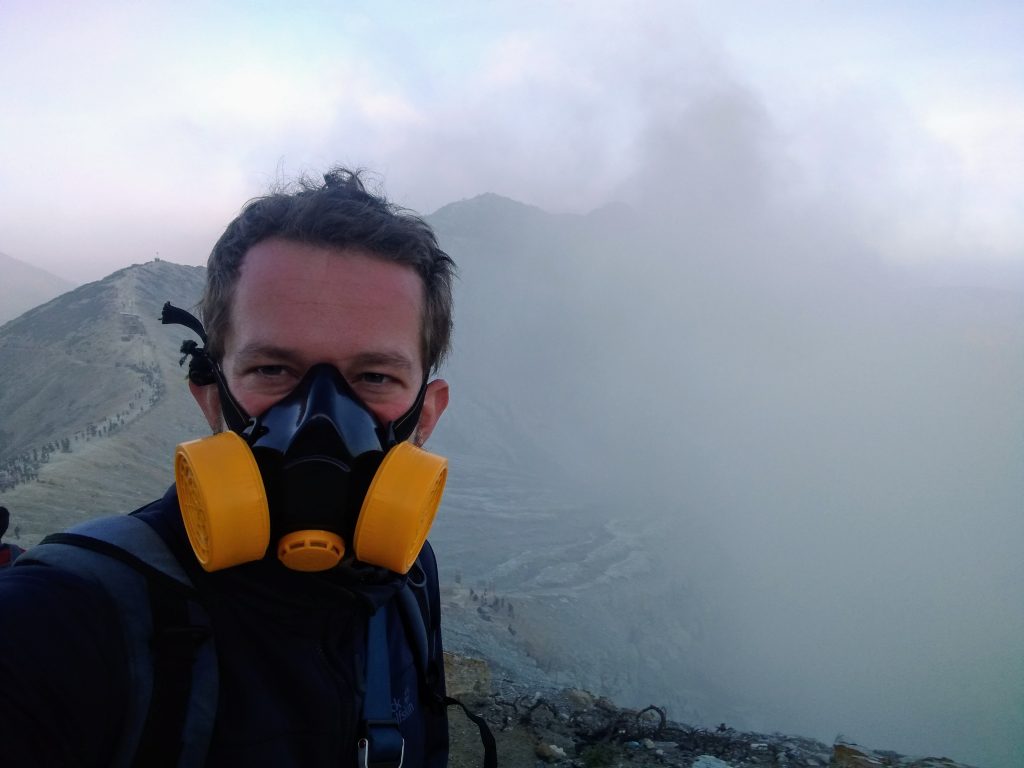
If you tell them about your plans to go to Ijen, they will also provide you with a breathing mask which is obligatory and at least partially helps to handle the intense smell of gases. You could also get one later from one of the guys hanging out at Ijen, but the quality may be questionable.

Adventure begins: trekking to Ijen

The alarm went off at 11:30 PM. Time to start a new day before the previous ends! It was really hard to play it right as I usually don’t go to sleep very early so even though I tried to force myself to fall asleep at 9 PM, it turned out to be big failure.

Quickly packed some warm clothes and hat (the summit is at 2,799 metres a.s.l. so it can get chilly up there), headlight, camera, snacks, put on my hiking boots and it was a few minutes past midnight when I turned on the engine of my rented scooter.

Ijen volcano in Indonesia
Masks are a must when walking on Ijen

The night was cold and very dark as I was basically the only vehicle on the road. At some point, I was wondering if I am going the right way, but the closer I got, the more cars there were. After 1.5 hours (yes, it’s quite a long drive) I arrived the parking lot where first organized groups had their hot drinks before the hike to the crater.

The entrance ticket costs 100.00O IDR on weekdays and 150.000 IDR on the weekends. From the ticket office, the path goes steeply uphill but it’s wide and well maintained. You certainly don’t need a guide and it’s impossible to lose the way. Having said that, be prepared to meet many guys who normally work in the crater getting the sulphur out of it and carrying in big baskets down to the village. They usually offer to take tourists down to the crater for another 150.000 or 200.000 IDR as it’s on their way anyway.

It’s not big money so if you find it more comforting than descending on your own, go for it. I was hesitating because I started the hike quite early and there weren’t too many people to follow. If this is the case, just have a snack and wait patiently for the first wave of tourists, then follow them. In the end, they all go to the same spot, so it’s easy to follow their headlights.

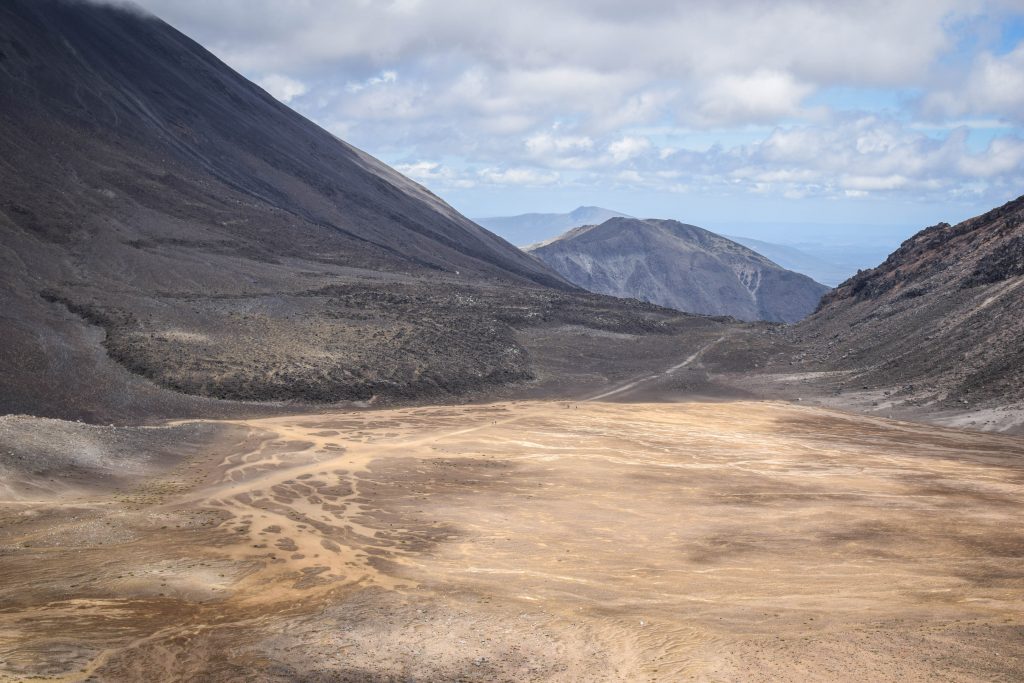
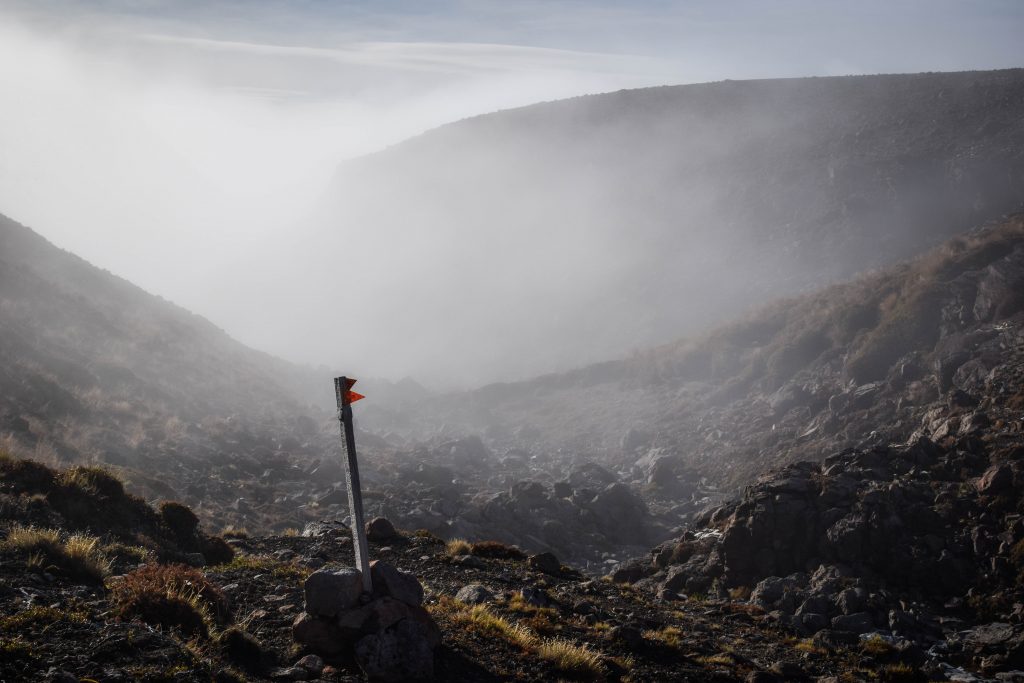
From the beginning of the hike, depending on your fitness, it takes roughly 1-1.5 hours to reach the caldera rim. Here you can decide to either continue hiking up to the sunrise spot or descent down to the crater and see the blue fire. Obviously, most of the people go down to the fire first and then come back all the way up for sunrise (usually around 5 -5:45 AM depending on the time of year).

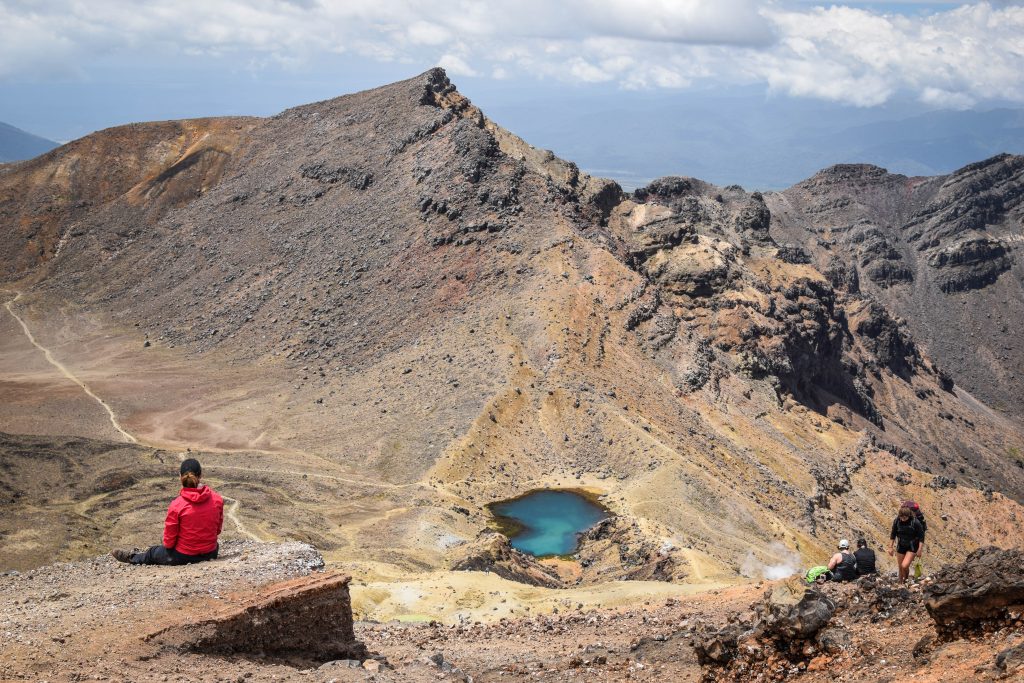
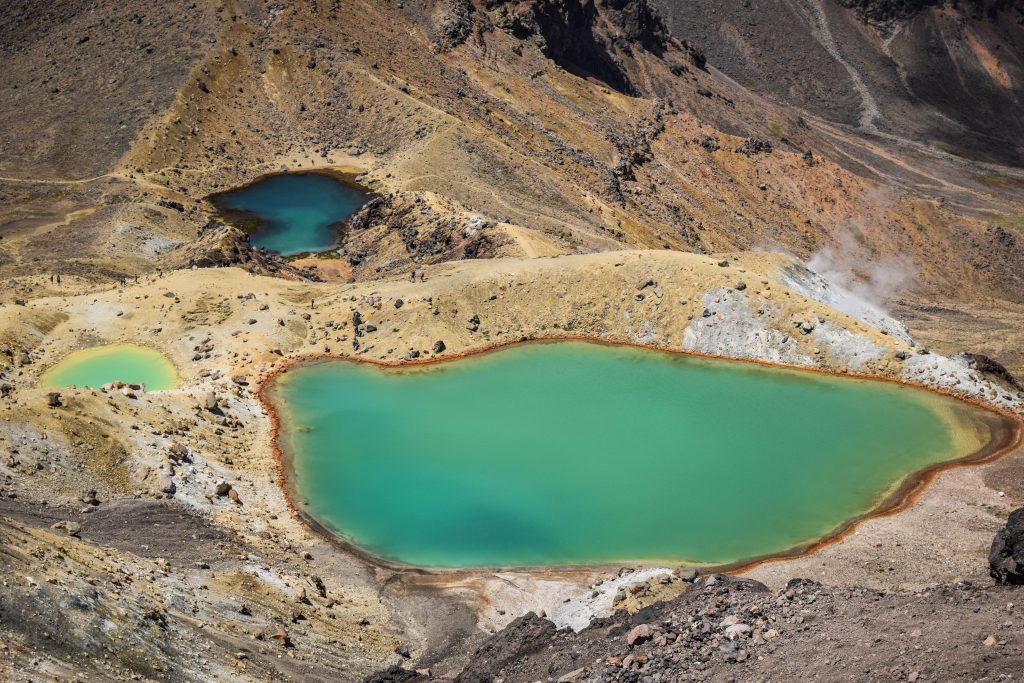
Descent to the crater is on a rocky path but nothing too challenging. It just looks more difficult than it really is in the middle of the night. Here you should already put your gas mask on. After 20-30 minutes you should be already next to the largest highly acidic crater lake in the world waiting for the spectacle of blue fire. The pH of the water containing hydrochloric and sulphuric acids is less than 0.3, meaning it can dissolve metal. It has a unique turquoise-green colour which you won’t be able to see in the dark, but certainly later on after sunrise.

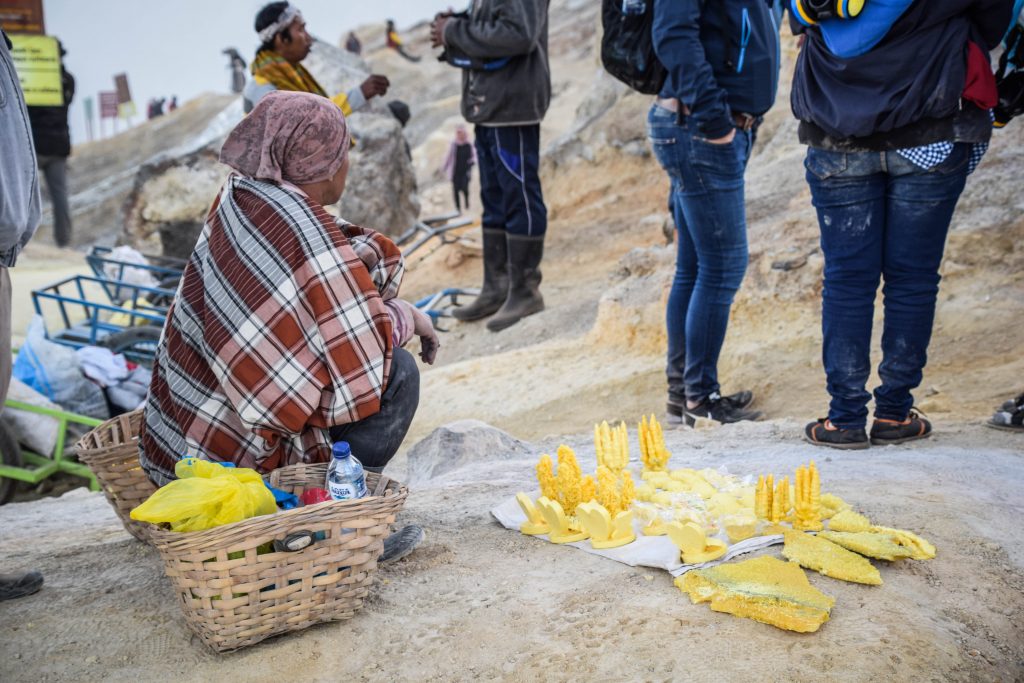
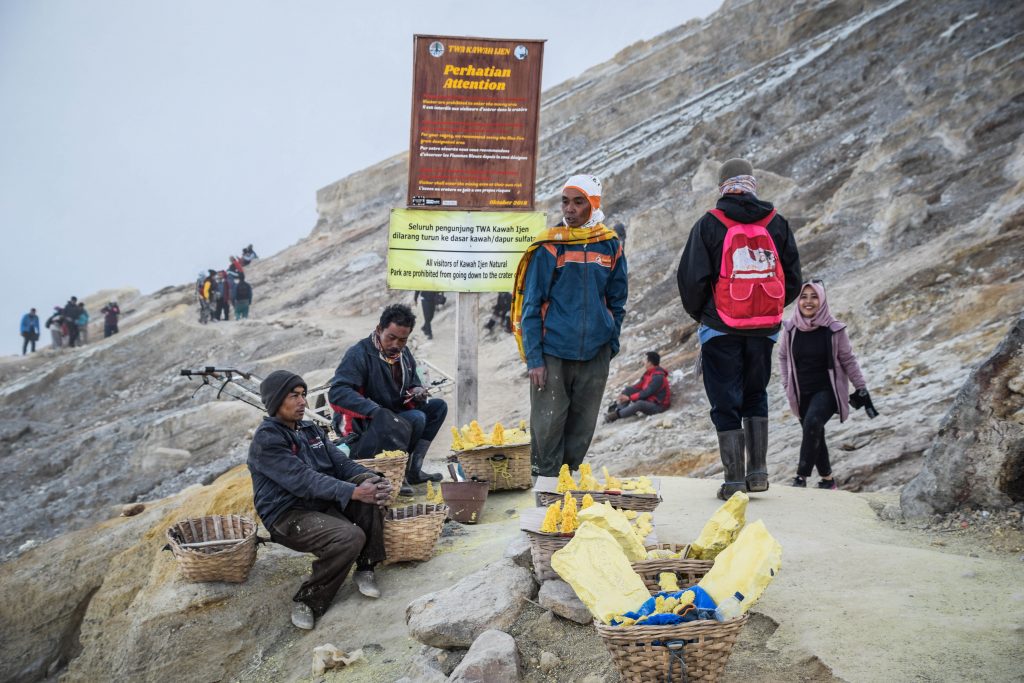
Being there, I had time to simply stand in silence and watch the work of sulphur miners. They are residents of nearby villages, working without masks, walking the same route as tourists do but 3-4 times a day and with the load up to 80 kg on their back. All of these for around 800-1,000 IDR per kilo of sulphur which sounds like a joke but unfortunately it’s true. That’s why they also offer to be your guide or sell small souvenirs made from sulphur.

Mount Ijen, Indonesia
Sulphur miner working just next to the blue fire
Mount Ijen, Indonesia
Miners selling small figures made from sulphur
Mount Ijen, Indonesia
Miners selling small figures made from sulphur

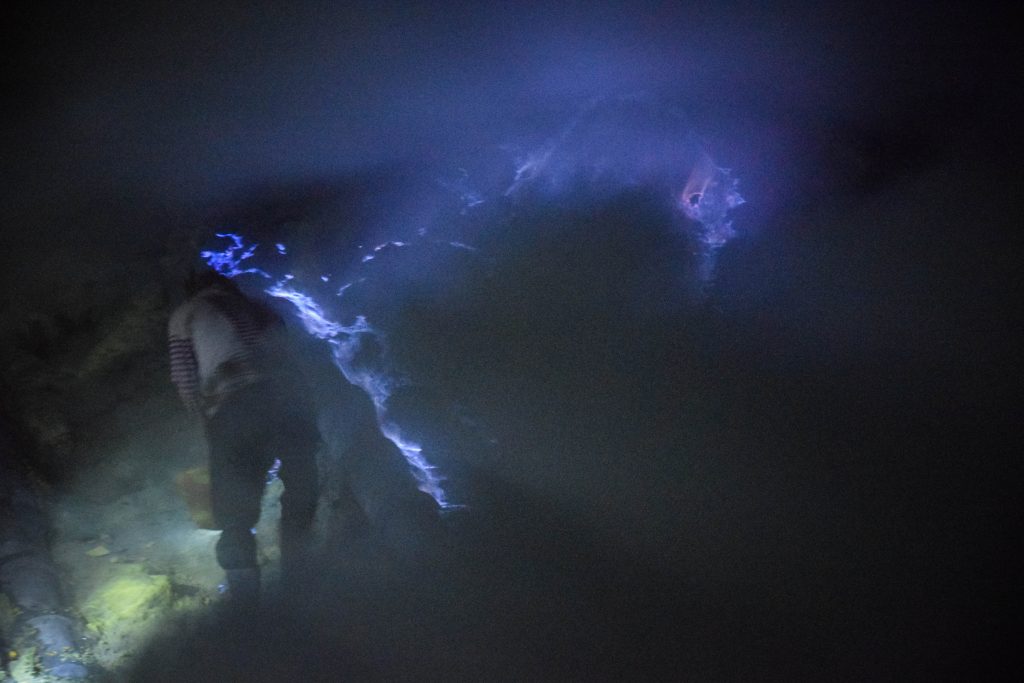
Finally, the blue fire went off and it was truly amazing to observe, even though I expected it to be a bit larger. I had the big luck to be in the crater way before all organized groups and I easily spent there over 45 minutes before it got crowded. From time to time the cloud of gases was blown by the wind into my direction but it wasn’t anything too disturbing. Just wear the mask, close your eyes and watch out for your electronics if you don’t want them to end up rusty.

The blue fire is a result of sulphuric gases combusting. They escape through the cracks in the volcano at high pressure and temperatures up to 600 C and igniting after reaction with air. The blue fire is often mistaken for lava, as some of the gases turn into liquid sulphur and keep burning on the slopes of Ijen.

Blue fire in the crater of Mount Ijen

I started my way back to the crater rim and after passing the crowds going in the opposite direction, I was sooooo happy I got to the fire early enough to avoid them. It was like a long line of headlights on the path. From there, I continued up towards the sunrise viewpoint.

Mount Ijen in Indonesia
Sunrise at Mount Ijen
Mount Ijen in Indonesia
Sunrise at Mount Ijen

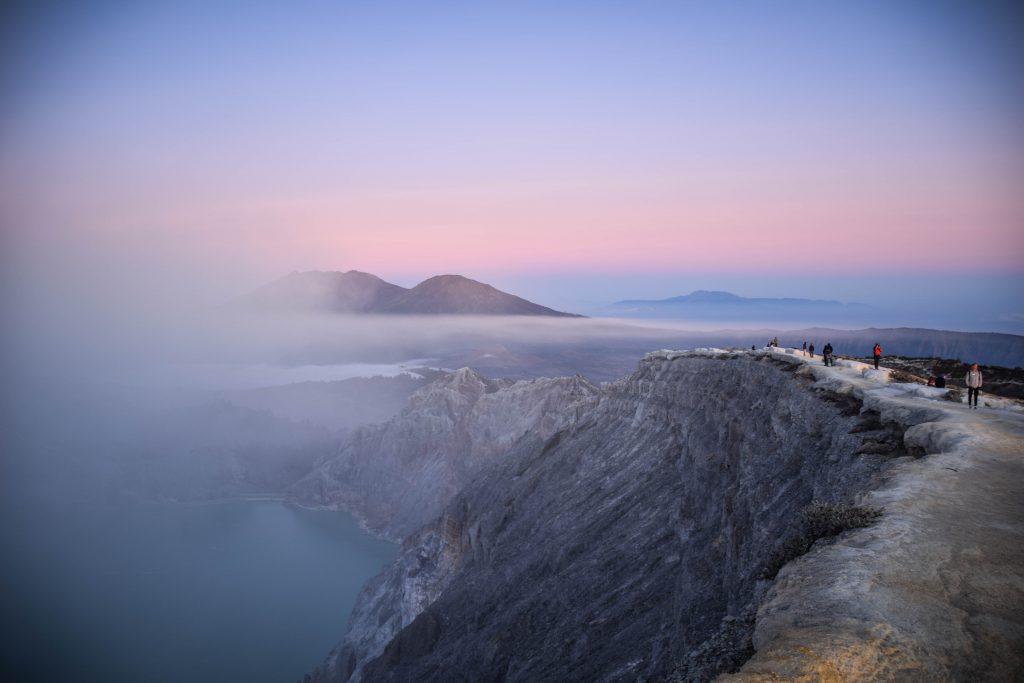
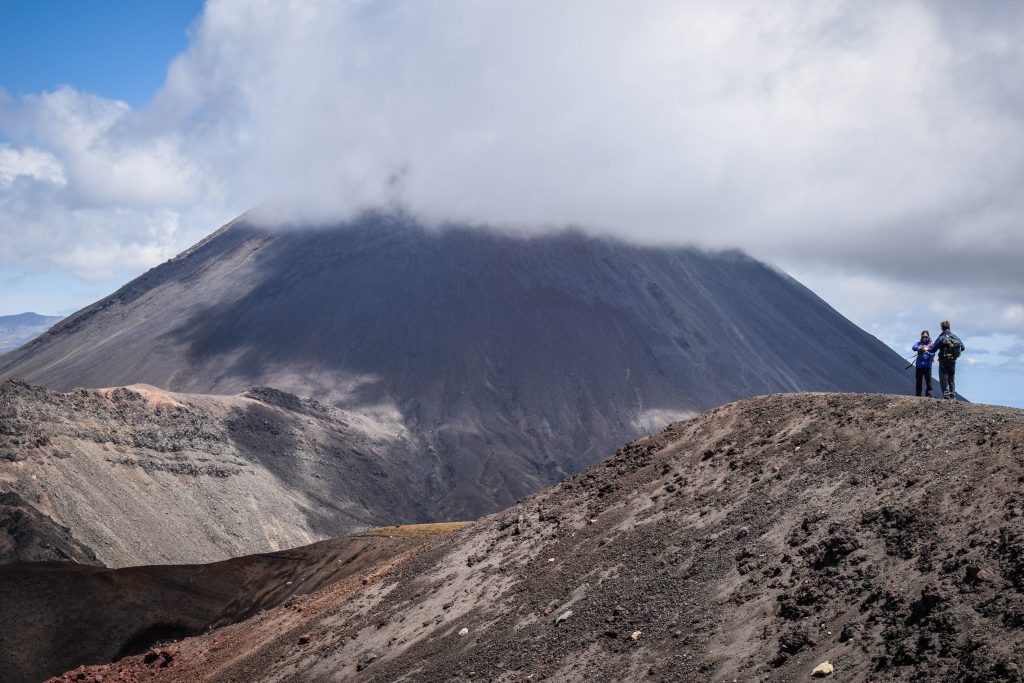
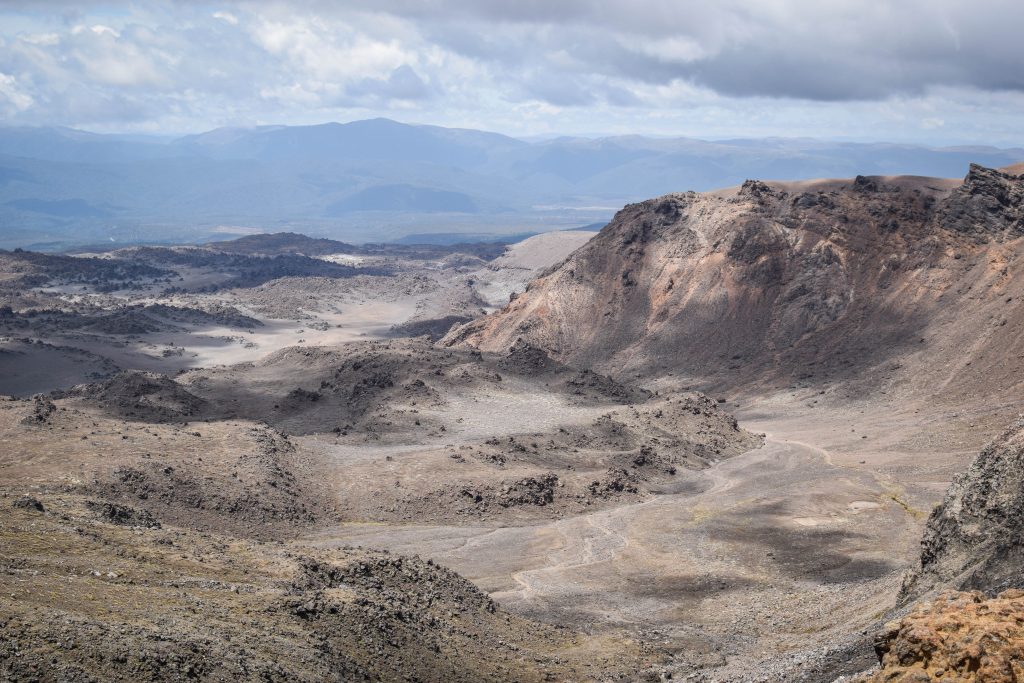
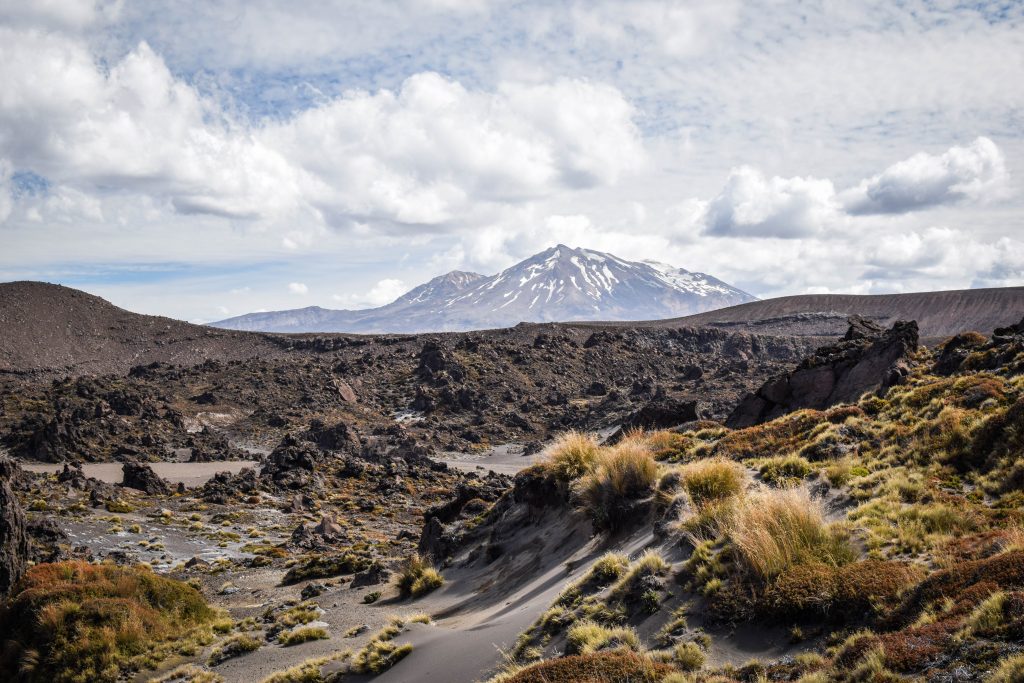
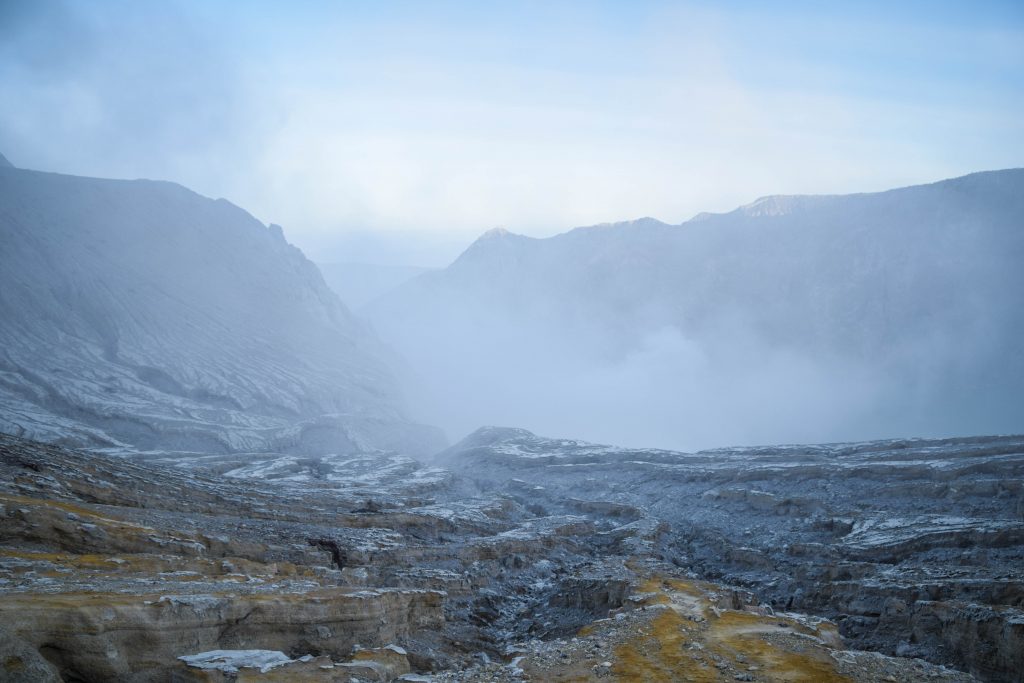
The views and colours of the sky were really impressive. I saw the most sunrises in my life in Indonesia and it was certainly one of the most spectacular ones. Finally, after wandering in the darkness, I could admire the whole landscape of Mount Ijen around me.

At the top, I met a group of friendly local folks that wanted to take a picture together. Why not, my pleasure! In fact, it happens in many places. Somehow I can’t imagine that someone stops another person on the street in Europe, just because of different skin colour and asks for pictures. But people in Indonesia don’t create stupid and unnecessary social borders as we do and they are extremely friendly.

Mount Ijen in Indonesia
With the group of locals at Mount Ijen

The way down took me a while, not because it was difficult but rather because I couldn’t stop taking pictures. The lake inside the crater and the place where I was just an hour ago next to the blue fire were clearly visible now.

Mount Ijen in Indonesia
Mount Ijen at sunrise
Mount Ijen in Indonesia
Mount Ijen at sunrise

If you don’t feel like walking, local guys will be happy to take you down in carts. It looks a bit ridiculous for me, but in the end, it’s another way to somehow support this hard-working community.

Once back at the parking, I had to wipe the seat of the scooter as it was all wet from morning dew. Put my helmet on, turned on the keys and… the engine didn’t start! I was sure I had enough fuel and I used the same scooter the day before without any problems. Luckily, some locals seeing me struggling hard, helped me to start the engine in an old-style way – with kick start. Indonesia was the first country where I drove scooter nearly every day so I didn’t have all the knowledge 🙂 This is something that I value a lot in this country. Even if you travel alone, far away and you need help – you can always count on it. It’s a totally different mindset than in Europe where everyone minds their own business.

Would I recommend the night trip to Mount Ijen?

Definitely. Night trip to the active volcano to admire spectacular nature is definitely something that I love and fits well into my travel character. I can easily put it next to ascents to Semeru, Inierie or Kerinci, also in the middle in the night, to see the sunrise from the summits.

Mount Ijen is much less demanding comparing to those, making it more accessible for moderate hikers. On the other hand accessibility make it crowded.

5 tips before your go

Go early and do it by yourself

Arrive at the crater before organized tours. It will give you enough time to enjoy the blue fire and take nice photos. To do this, start from Banyuwangi around midnight. I wouldn’t bother too much with joining tours unless you need it for psychical comfort. You certainly don’t need a guide to walk around and find your way. To go independently, hire a scooter or a car with driver (ask at your accommodation).

Take warm clothes and gas mask

The temperature certainly won’t be like in the middle of the night in Bali. It’s gonna be much colder so take enough layers to feel comfortable. Your clothes will need proper washing afterwards or everyone will know that you were at Ijen last night (intense smell of sulphur). A gas mask can be hired at your accommodation or from one of the guys on the way to the crater.

Take hiking shoes

It isn’t a hardcore hike but still a hike and proper shoes will make it much more enjoyable, especially when descending down to the crater.

Avoid the cloud of gases

Once next to the blue fire, try to get off the way of the cloud of gases occasionally being blown by the wind all over the place. If you can’t avoid it, close your eyes and hide your camera under the jacket.

Be friendly and support local community

Local guys can be a bit pushy and try to convince you to use their services as a guide. Take one if you wish or refuse politely and keep going. Small sulphur figures are great souvenirs from the place have small money and buy some for yourself or your friends.

Introduction

Tongariro Northern Circuit was my first New Zealand’s Great Walk. It was also the first overnight hike in my life! I did camp before, but it was rather during road trips. Carrying food supplies, water, tent, sleeping bag, gas stove, cooking pot, water filter, clothes for change – all of it on my back for 2 days in volcanic landscape sounded like a challenge. What an exciting one!

Tongariro National Park

You will be hiking in one of the oldest National Parks in the world!

In 1894, Tongariro became the first National Park established in New Zealand and the fourth to become such worldwide. From 1993 it is on the World Heritage List for both Maori cultural significance and volcanic landscape. There is a wide choice of walks available in the area, suitable for all levels of fitness. Two of them are especially worth considering!

Tongariro Northern Circuit is the longer version of more popular 1-day Tongariro Alpine Crossing. It only depends on your personal preference which version you decide to hike. However, I do encourage you for longer exploration. Northern Circuit includes the most scenic part of Alpine Crossing and adds the chance to camp among active volcanoes in Taupo Volcanic Zone: Ngauruhoe, Tongariro and bit further on the horizon – Ruapehu. It gives you extra time to stop and enjoy the breathtaking scenery, an opportunity to test your limits on over 40 km track and make new friendships with all the fellow hikers that you get to meet on the way! Most likely you will also beat the crowds that start Alpine Crossing every morning from Mangatepopo Road End. And believe me, in high season is A LOT of people. You also won’t need to pay extra for the transport as it is in case of one-way Tongariro Alpine Crossing.

Do you feel encouraged?

Tongariro National Park, New Zealand

The legend has it…

Before going to Tongariro National Park, I visited the second highest volcano of New Zealand – Mount Taranaki. There is a legend that connects all the peaks in the central area of North Island. It says that both Taranaki and Tongariro were in love with Mount Pihanga and the fierce fight between them started. Tongariro won and Taranaki escaped to the west coast where he was trapped by Pouakai Ranges in the place he stands now. Taranaki is often covered in clouds, hiding the tears shed after his lost love.

Welcome to Mordor

Tongariro National Park acted as a filming location for Peter’s Jackson world-famous trilogy Lord of the Rings. Volcanic rocks and unique landscape were ideal for creating Mordor and Mount Ngauruhoe shape was digitally enhanced to make Mount Doom. Other locations include Emyn Muil (Iwikau Village at Whakapapa), Ithilien Camp (Mangawhero Falls) and scenes with Orc Army (Rangipo Desert). It’s quite cool add-on for all fans, even though sometimes you need to use your imagination to recognize the places.

Tongariro National Park, New Zealand

Clockwise or anticlockwise?

Tongariro Northern Circuit is a loop track and can be hiked in either direction. I started clockwise from Whakapapa Village towards Mangatepopo Hut and further to Oturere Campsite. In this way, I tackled more difficult part on the first day. It’s a good choice because of higher energy level at the beginning, however, you will be carrying a backpack loaded with most of your food supplies on the ascent to Red Crater. That’s also the more popular directions among hikers. I personally think that the track is so spectacular that it doesn’t matter which direction you choose.

Tongariro National Park, New Zealand

Bookings of huts and campsites

The season for Great Walks begins usually at the end of October and lasts until the end of April. In this period, bookings for huts and campsites are required. Outside of the season, they work on a first-come, first-served basis, however, please do remember that because of weather conditions the trail becomes much more difficult to tackle (avalanche risk) and experience is required.

Booking can be done at the Department of Conservation website. After a booking is done, don’t forget to drop by to DOC Office in the Whakapapa Village to pick up physical tickets and re-check weather conditions.

Both huts and campsites have pros and cos. Doing all Great Walks, I used huts only on Milford Track and that’s because camping there is forbidden. I like to feel that I am totally independent and rely only on own supplies and equipment. Moreover, camping gives more flexibility to re-schedule the hike when the weather turns bad. Huts are rather booked out weeks in advance, especially on the most popular tracks like Tongariro Norther Circuit, Milford Track, Kepler Track or Routeburn Track. The chance to postpone the adventure is small, meaning you either go in bad weather or don’t go at all.

Great Walks huts have bunk beds, mattresses, heating, toilets, basic gas cooking facilities, solar-powered lighting and cold water.

List of huts and campsites

Mangatepopo Hut and Campsite – it’s only 9.4 km from the trailhead at Whakapapa Village and unless you really want to take your time and enjoy the landscape, it’s simply not far enough to justify overnight stay.

Oturere Hut and Campsite – the most picturesque overnight stop and the only one I stayed on the track. It’s 21.4 km from the trailhead and I must say that for the last 2-3 km I was tired and couldn’t wait to reach the place. But it’s worth pushing. The clouds passing through the top of Ngauruhoe at dusk were unforgettable. It’s just next to the hut where you can use the facilities as well as have a chat with fellow hikers. It can get quite windy there and before I started to set up a tent, the ranger approached me. First, I thought that she wants to collect a ticket, but it wasn’t a case. Instead, she warned me that the day before, one of the hikers tried to set up a tent but the wind was so strong that the tent was blown away into the valley in a matter of seconds. The rather surprised hiker was forced to spend the night on the floor in a hut.

Tongariro National Park, New Zealand

Waihohonu Hut and Campsite – I had a booking there for the second night, but it took me only 2 hours to reach the place from Oturere. Therefore, I decided to spontaneously change the plans and push until the end of the trail. But again, if you want to take your time and not rush, then it’s a nice place to stay.

Pricing

Huts: 36 NZD per adult per night, 17 years old and under free (booking still required)

Campsites: 15 NZD per adult per night, 17 years old and under free (booking still required). Campers can use huts facilities (except for the beds obviously).

Tongariro National Park, New Zealand

Weather

It’s best to monitor the conditions on MetService. The weather can change quickly, and strong winds are known on this track due to exposed terrain. It’s also worth dropping by to DOC office and reconfirm weather conditions. I learned the importance of it on my own skin (more below)!

2, 3 or 4 days?

Many people keep asking how many days they should split the distance for. The track offers 3 huts and campsites on the way, however, if you decide to stay in all of them, you won’t hike for longer than 3-4 hours per day. That’s rather short for me. I initially planned to have a tough first day, spend the night at Otutere campsite and on the next day stop for the second night at Waihohonu campsite. After departing from Otutere early, I arrived Waihohonu only after 2 hours. It was 9 am, the weather was perfect, my level of energy high enough so I just decided to push till the end. I wasn’t the only person that changed the plans in this way.

Tongariro National Park, New Zealand

If you are reasonably fit and don’t mind walking over 20 km a day, do it in 2 days.

If you prefer to sleep longer, make picnics along the way and do side trips, do it in 3 days.

If you prefer to do all of the above plus read a book and take all the scenery really slow-paced, then 4 days is the answer.

Track details and profile

Distance: 43.1 km (loop)

Time: 2-4 days

Tongariro Elevation
www.doc.govt.nz

The track profile and other useful details can be found inside the Department of Conservation (DOC) brochure.

Stage 1 – From Whakapapa Village to Mangatepopo Hut and Campsite (2-3h, 9.4km)

The start of the hike took me… 3 days. I arrived at Whakapapa Village a day before and was welcomed by cold weather, fog and pouring rain. Not perfect conditions for the first overnight hike. I didn’t know what to do so I went to the Visitor Centre asking DOC staff for advice and they said that indeed it won’t be very enjoyable to walk out there. „If you have time, go to see Taupo and Rotorua first, and we will postpone your bookings by 3 days”. It was an excellent decision and I must say that the DOC staff is always very helpful and professional. In the end, it’s not only about covering the distance of 40+ km but actually seeing some landscape.

I came back 3 days later and that time the weather seemed to be more friendly. I left the car at the parking near the Visitor Centre and hit the track in the early morning. I was the only hiker walking the narrow path across huge wide spaces with the cone of Ngauruhoe appearing on my right side. After around 1 hour, I met the only hiker during that stage. The guy was walking with a backpack 3 times smaller than mine and he was actually doing Te Araroa Trail which is 3000 km route from the top of North Island to the bottom of South Island. What a badass.

Tongariro National Park, New Zealand

I don’t know if I was shocked after a short chat with another hiker or maybe my backpack was too heavy with all the unnecessary things I took (more likely), but I slipped on one of the big and wet stones, lost my balance and fell down on my face. Hiking poles didn’t help! Falling was quite straightforward, getting up with huge and heavy backpack not so much.

After around 2-2.5 hours I arrived at Mangatepopo Hut and here I realized that walking times provided by DOC are way overestimated (it is around 4h in track description). Refill your water bottle here if necessary, you will need for next, much more demanding stage.

Tongariro National Park, New Zealand

This stage is the least impressive, therefore if you doubt your fitness level, you can start the hike from Mangatepopo Road End and cut 9 km from your first day. You would need to arrange transport, as you will not complete the full loop.

Stage 2 – From Mangatepopo Hut to Oturere Hut (3.5 – 4h, 12km)

Here the most popular part of the hike known as Tongariro Alpine Crossing starts. Luckily, I was already on the way for over 2 hours so all the crowds doing the 1-day version of the hike were far ahead of me.

The track becomes wider and continues up the valley towards Mangatepopo Saddle. The wide valley is just impressive, and I seriously had the music theme from Lord of the Rings playing in my head.

Tongariro National Park, New Zealand

Climb to the Saddle is the most challenging part of the day and here backpack starts to be really heavy. It also becomes warmer and the sun starts to burn my skin. I knew I forgot something, and that something was sun cream. Luckily it didn’t take long until I saw a couple having a rest and being kind to save me from sunburns by sharing the cream. The climb continues up to the Red Crater where I took the long break to take in all the views. In clear weather, you can even see Mount Taranaki! Magnificent.

Tongariro National Park, New Zealand

Then the track goes down to Emerald Lakes. It’s a steep way down with plenty of small and slippery stones that proved to be challenging for a lot of tourists. My hiking poles proved to be very helpful to keep the balance. After descending, there is an option for 30min return side trip to Blue Lake which I took. It’s a sacred place for Maori and you must not touch the water. After that, I retrieved my steps and followed the track into Oturere Valley. Here I got the feeling like walking in the desert among lava forms. Ruapehu with its snowy peak is clearly visible on the horizon. After around 1 hour, I reached Oturere Hut and Campsite. If you desperately need a bath in ice-cold water, there is a waterfall close by (ask the ranger).

Tongariro Northern Circuit
Tongariro National Park, New Zealand

Stage 3 – From Oturere Hut and Campsite to Waihohonu Hut and Campsite (2-2.5h, 8.1 km)

The track continues for over 8 km through stream valleys and gravel fields. The morning fog made the atmosphere during the walk unique. On that day, there was a running event going on so I was passed by hundreds of runners. After around 2 hours I reached Waihohonu Hut, changed my initial plan of staying there overnight and continued until the track end.

Tongariro National Park, New Zealand

Stage 4 – From Waihohonu Hut and Campsite to Whakapapa Village (4-4.5h, 15.4 km)

The track follows Waihohonu Stream and climbs Tama Saddle. The area is known for strong winds. I experienced it on my skin, especially during a side trip to upper Tama Lake (1.5h return). Even though I left the backpack at the crossroad and continues just with a bottle of water, it was a steep incline and the wind made it very difficult to keep the balance. From the upper viewpoint, you get fine views over the lakes as well as Mount Ruapehu. After coming back to the crossroad and taking my backpack, it was another 2 hours to Whakapapa Village. I decided to add a bit more to the distance and check out Taranaki Falls as well. Don’t miss it!

Side trips

Blue Lake – Half an hour detour from the track junction nearby Emerald Lakes (along the Tongariro Alpine Crossing Track).

Tama Lakes – Two crates filled with water. It takes 15min return to Lower Tama and 1h return to Upper Lama. You can leave your backpack at the junction of the tracks and go light. Be careful of strong winds.

Tongariro National Park, New Zealand

Taranaki Falls Track – An alternative way to reach Whakapapa Village. Go down the steps to the base of the waterfall.

Mount Tongariro and Mount Ngauruhoe Summits – Technically, both summits can be climbed as a side trip. However, the route is not poled and the same as lakes, mountain’s summits are sacred for local Maori tribe and climbing is discouraged. I didn’t go to either of them and will not advertise this option.

Time to chill

It was wonderful 2 days in an out of this world landscape. When I reached parking, I was tired as hell. It’s a kind of physical exercise that consume your calories but build psychological strength and satisfaction. If I would need to select 3 places that I would like to visit again on North Island, Tongariro National Park would be one of them without a doubt!

Being a bit tired of big city life, I decided to spend another day in NZ closer to nature. Waking up early (probably jet-lag started to catch up on me) made it possible to board the first ferry of the day going to Rangitoto Island. 

Rangitoto is one of 50 volcanoes around Auckland, last time erupting around 600 years ago. It is still active and basically can erupt anytime. How fun for Aucklanders!

How to get to Rangitoto?

The connections between Auckland and surrounding islands are operated by Fullers and the return trip to Rangitoto lowered my budget by only 39 NZD. Not too bad for the whole day trip visiting two islands, isn’t it? The cruise takes just 25 minutes but what a scenic 25 minutes it is. You will pass by Auckland Port as well as fancy Davenport district with its Mount Victoria and historic reserve at Davenport.

Rangitoto

Hiking on Rangitoto Island

Once the boat arrived at the wharf, I and pretty much all the other passengers went on to climb the top of the Rangitoto volcano which stands 259m above the sea level. The climb is a too big word though, it’s rather a gentle walk up through lava fields that is 3.1 km long, with the only steep part at the very end (stairs). The effort was rewarded with the view of the crater rim and, once at to the higher viewpoint, your eyes open to the sublime panorama of Auckland and Hauraki Gulf.

Along the path to the top (or when going back down), you can make a small 15 minutes detour to explore lava caves. If you like dark, wet and insects’ friendly places – you just found one.

After taking a couple of panoramic pictures, I decided to take another way down towards crossroads with Summit Rd, then turn right and go to the beginning of Boulder Wreck Bay Track. Here I understood why everyone suggests wearing sturdy shoes on Rangitoto. I was walking on lava rocks. Big. Sharp. Getting hotter and hotter with every minute. My sports shoes tackled the summit without an issue, but here the discomfort and (shortly after) pain became significant. 

The track is about 45 minutes one way until you reach the bay that is now the graveyard of over 10 vessels that were parked here for disposal between 1887 and 1947. Some parts are well visible, especially during low tide.

After another 45 minutes back to the main road, it was time to change the scenery and cross the bridge to much grassier Motutapu Island.

Hiking on Motutapu Island

There are several tracks on the island (including 4.5 h loop track) passing by remains of island’s rich history from the times when there were Maori settlements, Victorian picnic parties or WWII military base. However, having covered a couple of kilometres on Rangitoto already and being short on time before the last ferry back to Auckland, I decided to walk to Emu Point and back. After all, missing the last ferry and being stranded on the island without food and water didn’t sound like a good idea.

What a change after rough rocks at Rangitoto! Here you are walking through grassland that is mainly a playground for bulls so the only thing you must take care of is not to step into their fresh poo. Views are particularly nice with Rangitoto Island on one side, the panorama of Auckland on another and plenty of yachts in between.

Motutapu Island

If you wish to extend your adventure, it’s possible to camp overnight at Home Bay. Home Bay is also a place where you can catch the ferry back to Auckland (less frequent than from Rangitoto, check the schedule first). In my case, I just retrieved my steps and came back all the way to the wharf on Rangitoto Island following very scenic and even very rocky Coastal Track (around 2 hours). Rocks were not the only bad news. Another one was that I was running low on drinking water so during the last hours I had to deal without it.

If you still have some time before the departure, you can check the small Bach Museum. Baches are a typical kiwi style summer houses built here. Quite cool to have a summer house on the active volcano and just drop by from time to time from Auckland! This is also probably the only place on the island where you can buy drinking water. A small bottle cost 2 NZD but I was seriously so thirsty that I would have probably paid 20 NZD if necessary. Such a relief!

Is it worth visiting Rangitoto and Motutapu Islands?

I can say it was an awesome second day in New Zealand. Both islands are full of incredible scenery and even though they are so close to Auckland, it feels to be miles away. The trip taught me important kiwi lessons, that stayed in my mind for next travels.

Firstly, if you are uncertain about how hiking track looks like, always prepare for the worst and take sturdy shoes

Secondly, don’t underestimate your water supplies. Taking too much and carrying it in your backpack is still better than walking in the heat without a single drop.

Finally, always use sun cream! This part I learned after being back at the hostel. Probably I looked like a typical tourist on the first days in New Zealand. Well, true story. New Zealand’s sun can be very deceptive. Even though it doesn’t look very sunny, you can still get badly burned.