Tag

trekking

Browsing

Introduction

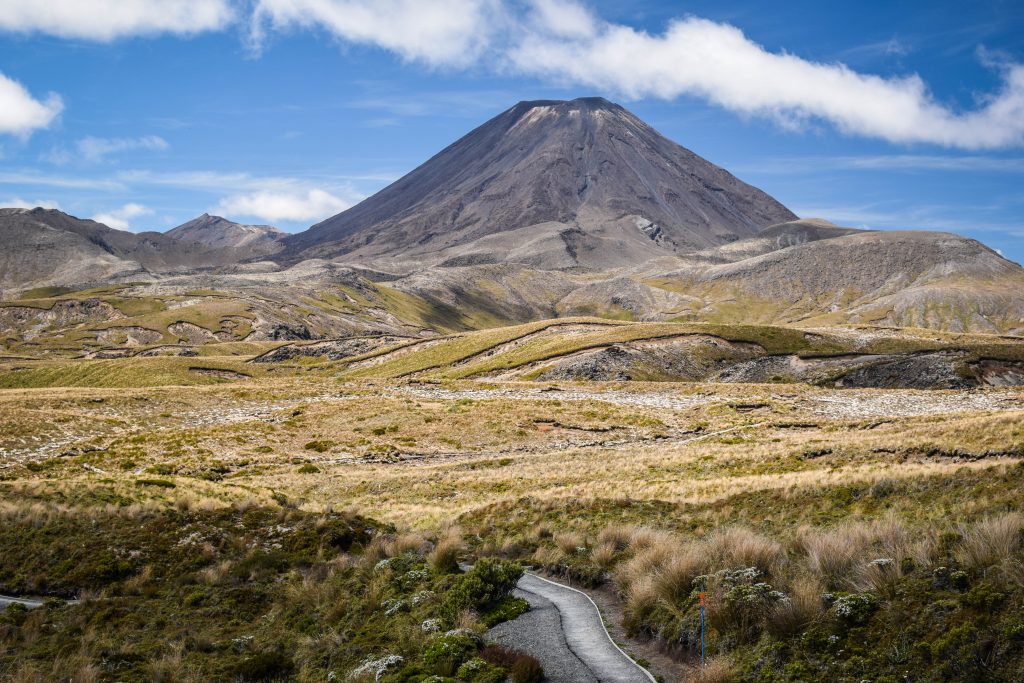
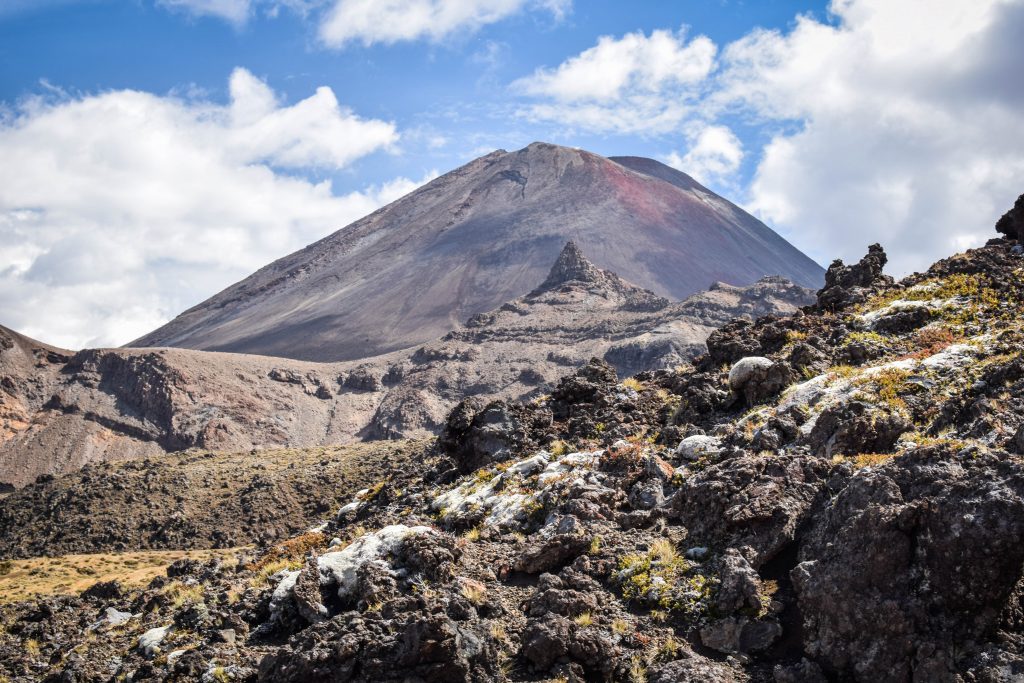
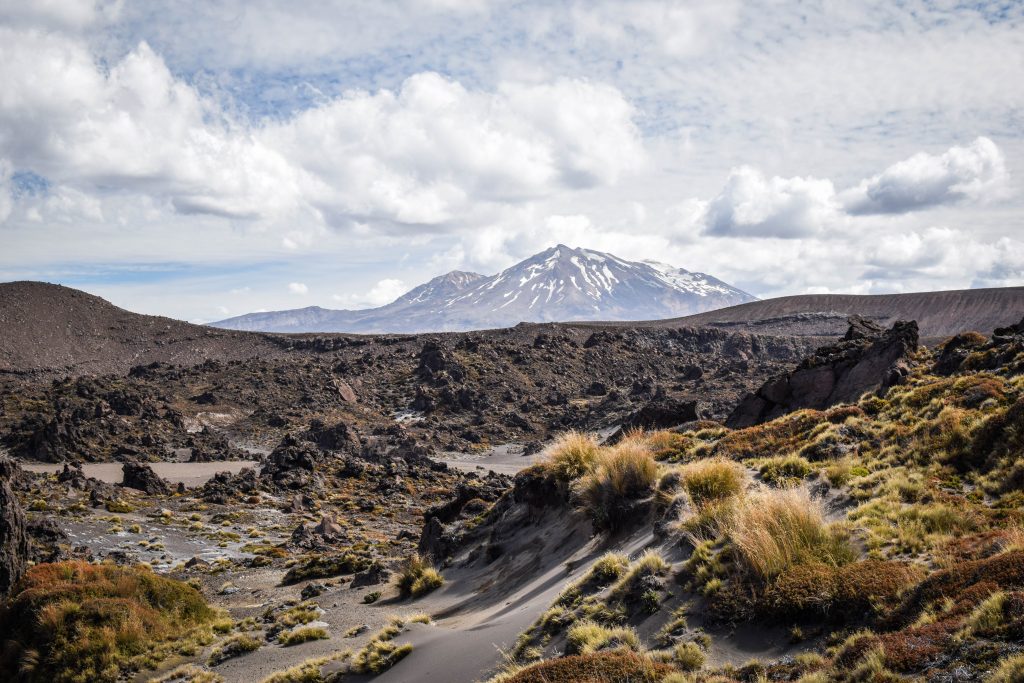
Mt Taranaki or Mt Egmont, is a volcano in the center of one of the most popular wilderness areas in New Zealand – Egmont National Park. Standing 2.518m above the sea level gives it a status of the second-highest volcano in the country, just after Mt Ruapehu (2.797m).

Taranaki is a Maori name consisting of two parts: tara means “mountain peak”, and naki (coming from ngaki) means “shining”. The shiny mountain peak clearly relates to the snow covering its upper sloper all year long.

The second name was given by James Cook on 11 January 1770. Yes, this guy is really all over New Zealand and this time the name was given in the honor of John Perceval, 2nd Earl of Egmont, who was one of the supporters of search expeditions for the new continent – Terra Australis Incognita.

Track details

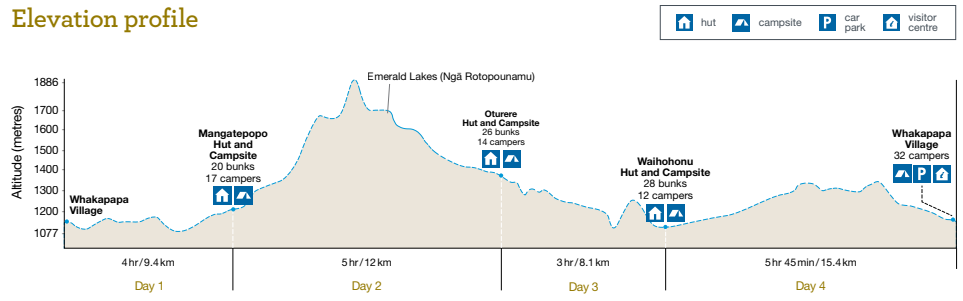
The way to the summit is challenging 12.6 km hike (there and back) with 1.6 km of vertical climb. However, it doesn’t discourage adventure seekers.

Distance: 12.6 km return

Time: 7-10 hr

Best time to go & safety

The best chance for good weather and higher temperatures is from December to April. In other months, the mountain will most likely be covered in snow and ice. Therefore, tourists without experience and proper equipment should not try their luck there.

The last major eruption occurred around 1655, meaning there is an extremely low risk of any volcanic activity going on in the area. However, it doesn’t mean that you should underestimate the mountain. More than 80 people have died since 1891 when records began. Weather can change quickly at any time of the year and even though it’s not a very high or difficult mountain, pay attention and make smart decisions on the way.

Check weather conditions on MetService prior to your summit climb.

How to get there?

North Egmont National Park Visitor Centre is only about 30 min (29 km) drive from New Plymouth. Take a turn off at Egmont Village and continue straight until you reach the parking. When driving from the south, it takes about 2 hours (160 km) from Whanganui.

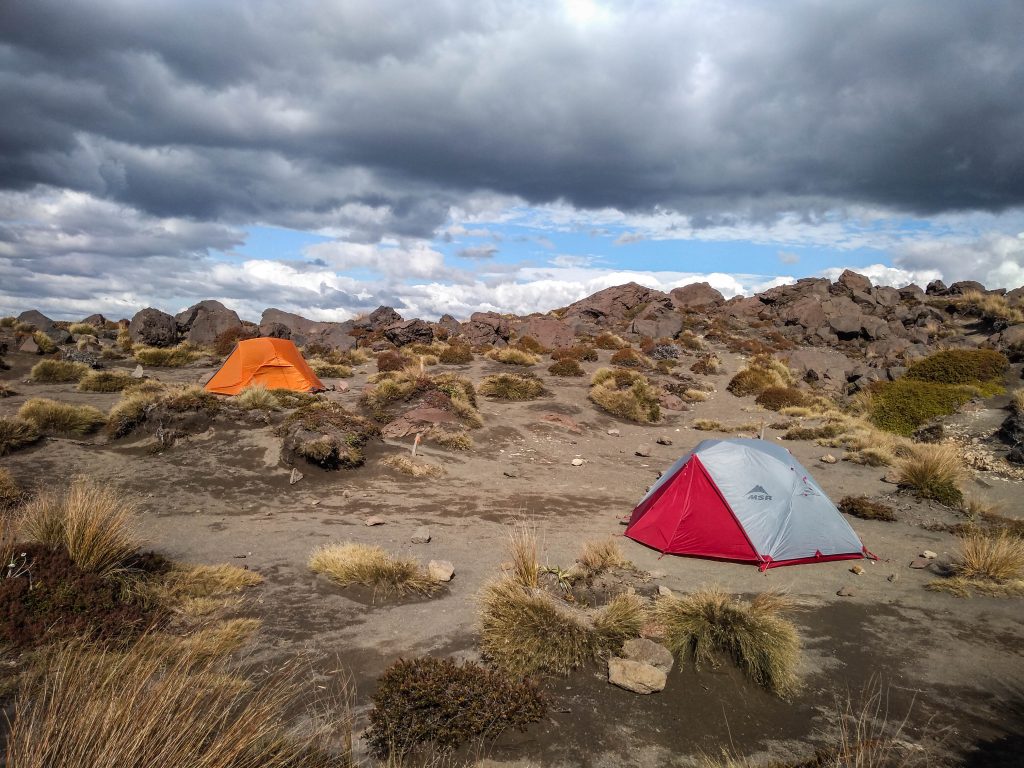
Where to stay overnight?

Climbing Taranaki Summit is a full day hike so if you stay overnight in New Plymouth, I recommend departing early in the morning.

If you have a self-contained vehicle, there is awesome parking just in front of the visitor centre. In the high season, it gets full pretty quickly so try to arrive in the early afternoon. By doing so, you will secure your place, have time for a nice dinner in the shadow of the mountain and even the chance to tackle some easy and short hikes around the area as a warm-up.

Other than that, there are couple of camping sites or lodges along the way from New Plymouth.

What I did was to stay a night prior to the hike in a self-contained vehicle just next to the visitor center and after the hike, I drove to Ariki Hostel in New Plymouth to take advantage of a hot shower. After a tough hike, it always brings me back to life 🙂 Such a plan was really optimal for me, as I had the chance to enjoy the evening and morning right at the foot of the mountain and then relax in a warm and cozy place.

Interesting facts

The legend has it…

There is a legend that connects all the volcanic summits in the central area of North Island, which adds an extra flavor to the experience. Apparently both Mount Taranaki and Mount Tongariro were in love with Mount Pihanga and the fierce fight between them started. Tongariro won and Taranaki escaped to the west coast where he was trapped by Pouakai Ranges in the place he stands now. It’s often covered in clouds, hiding the tears shed after his lost love. Therefore, be gentle and show compassion when walking on Taranaki’s slopes 🙂

Mt Taranaki, New Zealand
Mt Taranaki covered in clouds

Filming location

Did you know that Mount Taranaki is an actor too? Due to its similarity to Mount Fuji in Japan, it played in the movie The Last Samurai. Reason? Much more space for filming crew than around actual location in the Land of the Rising Sun.

Itinierary

Day 1 – Dawson Falls and Kapuni Loop Track, North Egmont Visitor Centre

As I was approaching Egmont National Park driving along West Coast, the second-highest volcano of New Zealand’s North Island was hidden in thick clouds and I just trusted my map that it’s really there. The road was gaining altitude and after a while, I was in the clouds as well. It was still early afternoon so I took a detour to visit Dawson Falls and make a warm-up on a short Kapuni Loop Track (45-60 min round trip).

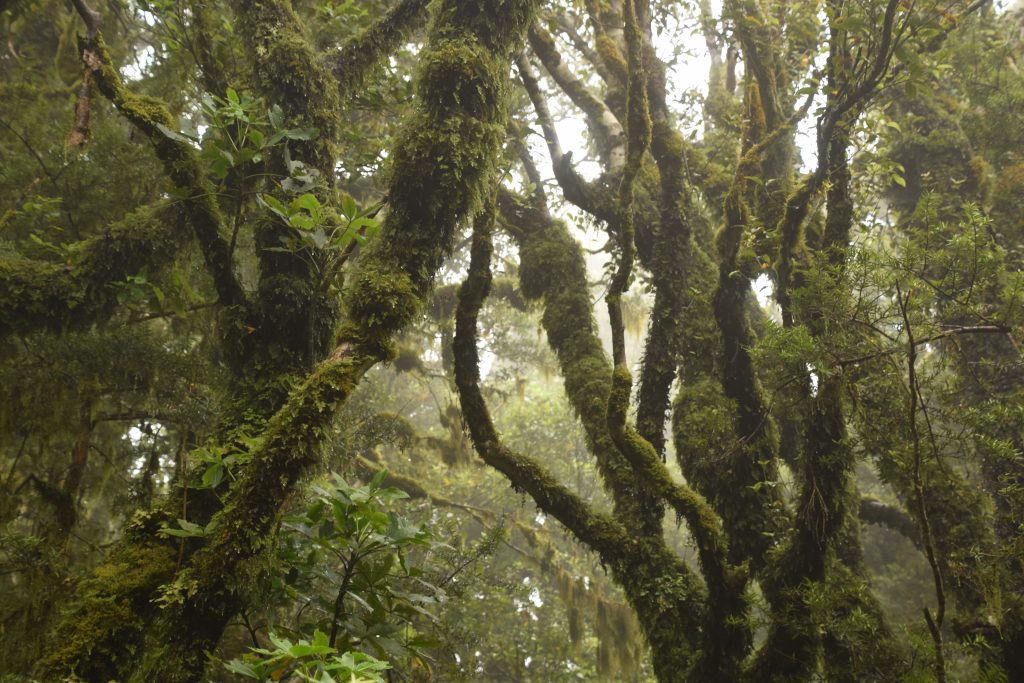
The path leads through the so-called ‘goblin forest’, which indeed looked like a separate fairy tale world, especially in misty weather conditions. I didn’t spot any actual goblins, but twisted trees that grow over the remains of the previous forest destroyed by the volcanic eruption made create the atmosphere of mystery.

Mt Taranaki, New Zealand
Goblin Forest, Egmont National Park
Dawson Falls, New Zealand
Dawson Falls

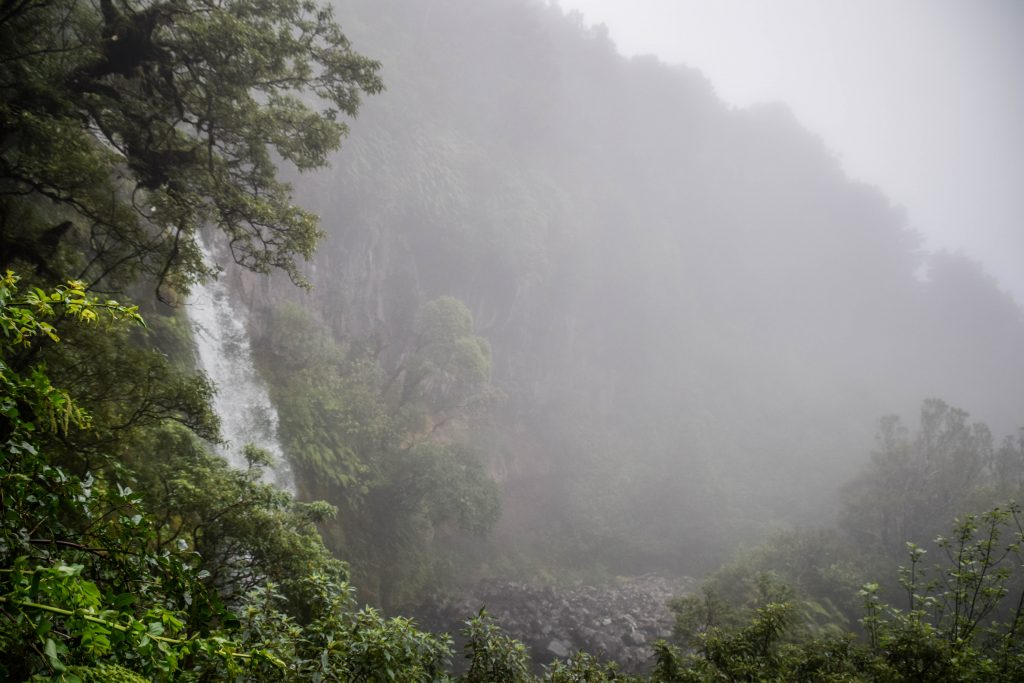
Turn off from the main track takes you down to 18 m high Dawson Falls. Like many places in New Zealand, they were named after the first European explorer that reached them in 1885 – Thomas Dawson.

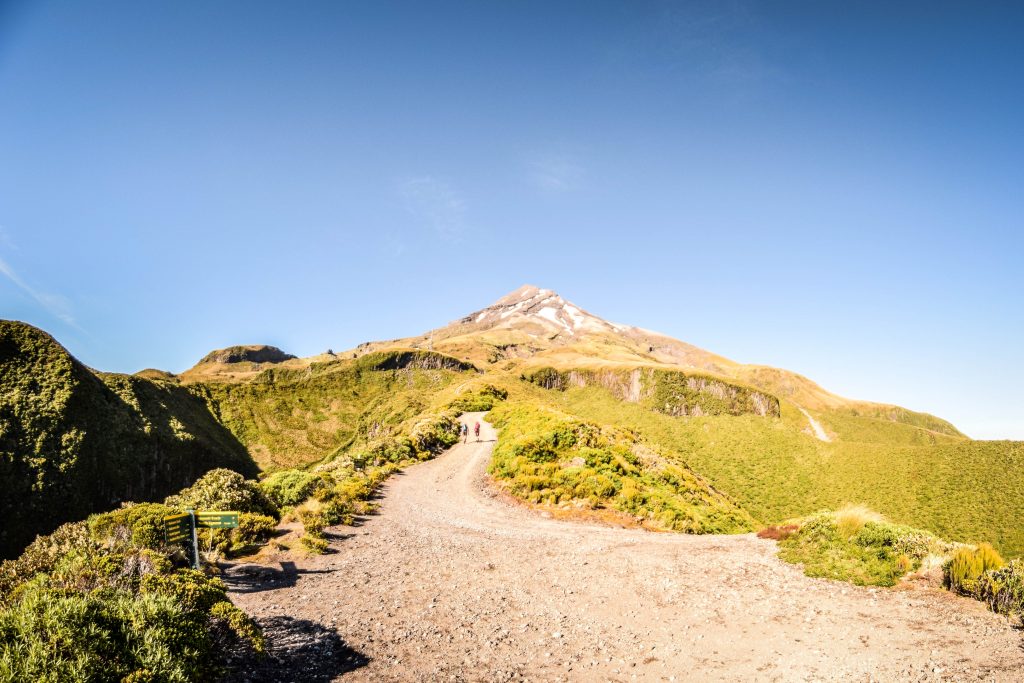
Moving to the other side of the mountain brought significant weather improvement. Strong winds chased the clouds away and once I parked my van next to North Egmont Visitor Centre, the first rays of the sun timidly broke through. Or was it Taranaki itself that stopped hiding his bad mood and decided to present its beauty? I used the remaining time of the afternoon to explore short walks around the place and admire the sunset with a perfectly blue sky. It filled me with confidence that tomorrow I will be lucky enough to go up the summit and enjoy spectacular cloud-free views over North Island.

Day 2 – Taranaki Summit Track, New Plymouth

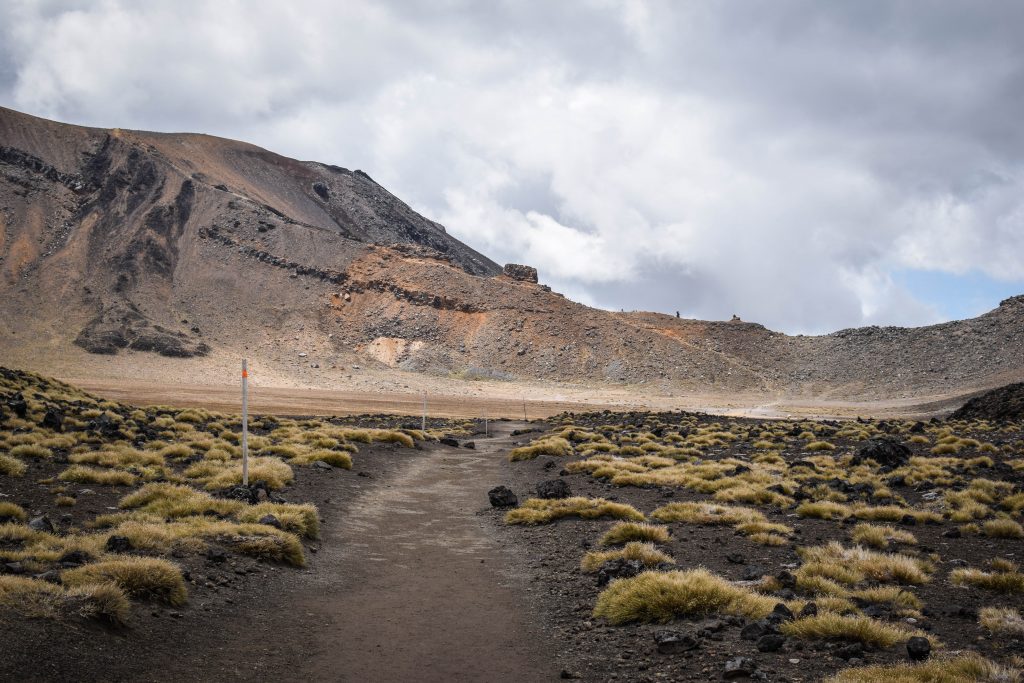
I departed 8 am sharp and the track was rather empty. Though, it didn’t take longer than 1 hour when I stopped for the first time and saw lots of people down there following my steps. The weather was horrible last days and it seems that everyone was waiting for this perfect sunny window which happened on that day. The way up is definitely a challenging one. It has nothing to do with the zig-zag style that gains altitude in a moderate way. Instead, it’s a straightforward climb first along the wide gravel road and then up the steep slope of the mountain. Tahurangi Lodge was a perfect spot to boost my energy and get rid of the second breakfast. As I pushed forward to the summit, there was more and more snow lying around, the wind blew stronger in my face and the temperature dropped down.

Taranaki Summit Track
The first stage of Taranaki Summit Track
Mt Taranaki, New Zealand
Stairs on the way up to Taranaki Summit
Mt Taranaki, New Zealand
More and more snow on both sides of the track
Mt Taranaki, New Zealand
Loose stones on the way up to Taranaki Summit

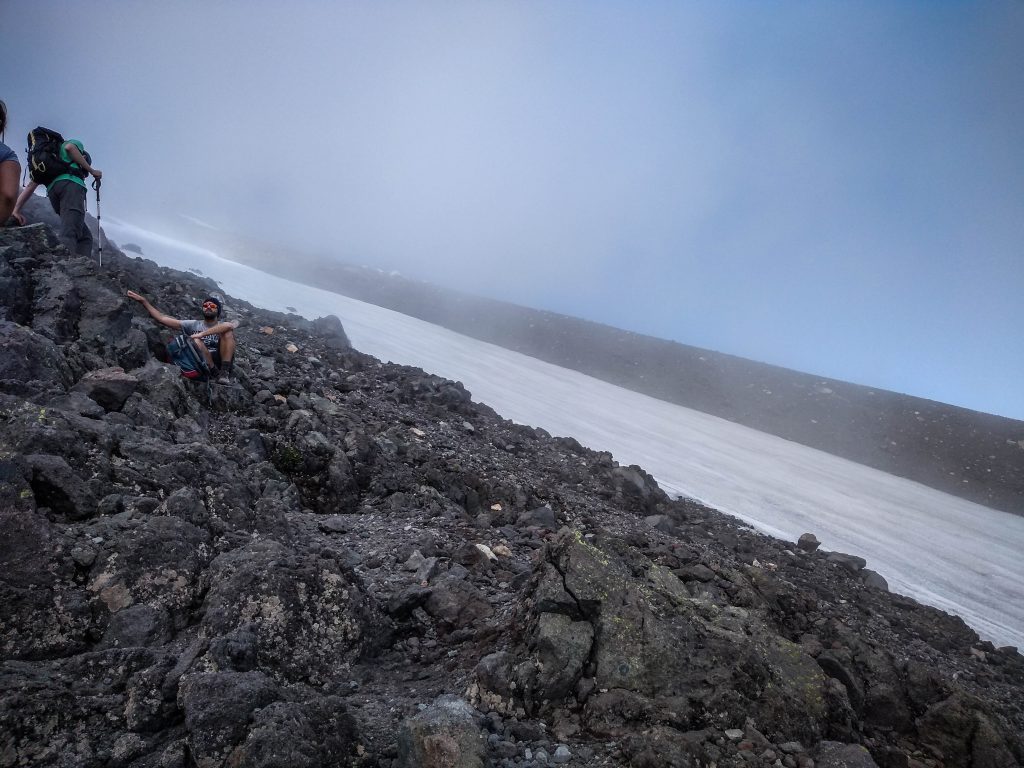
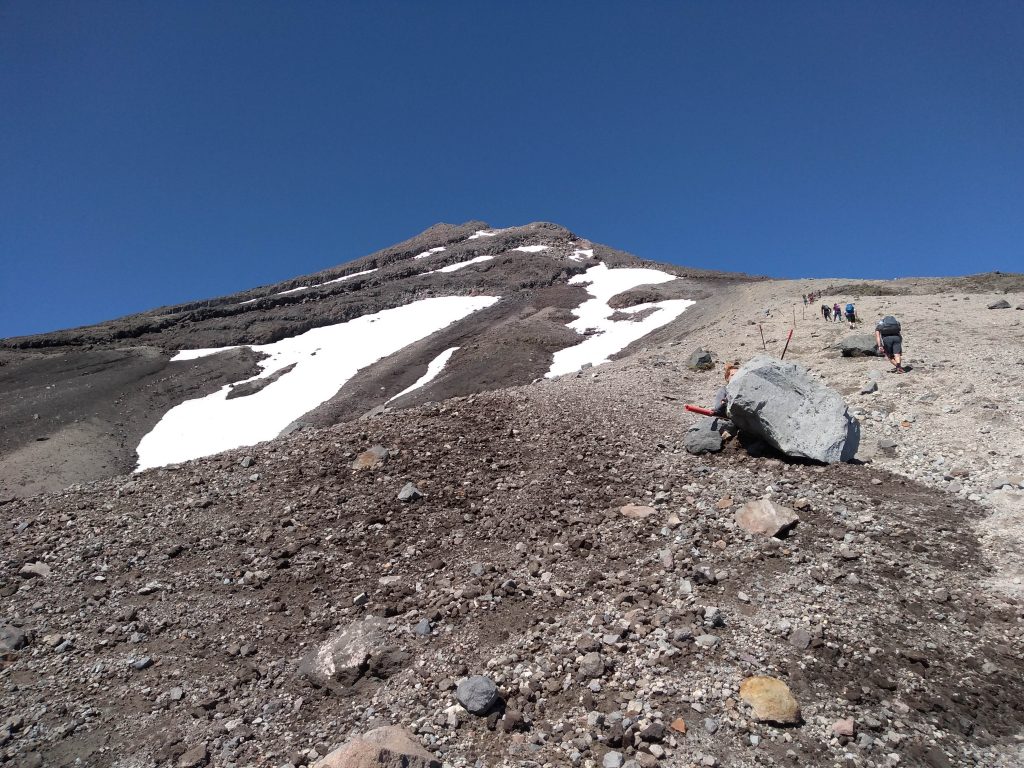
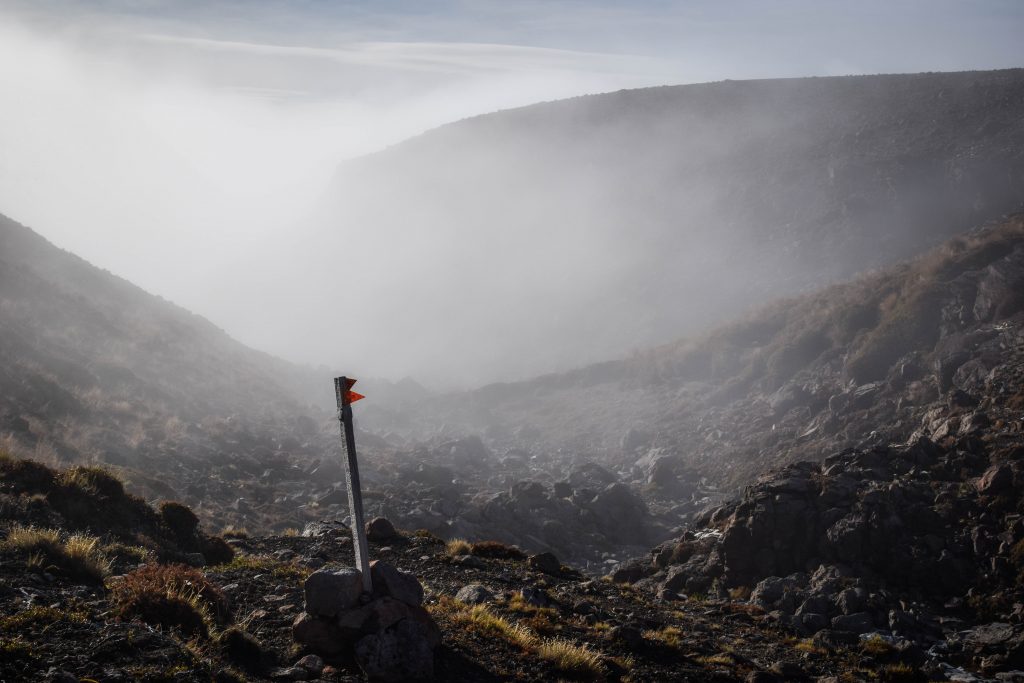
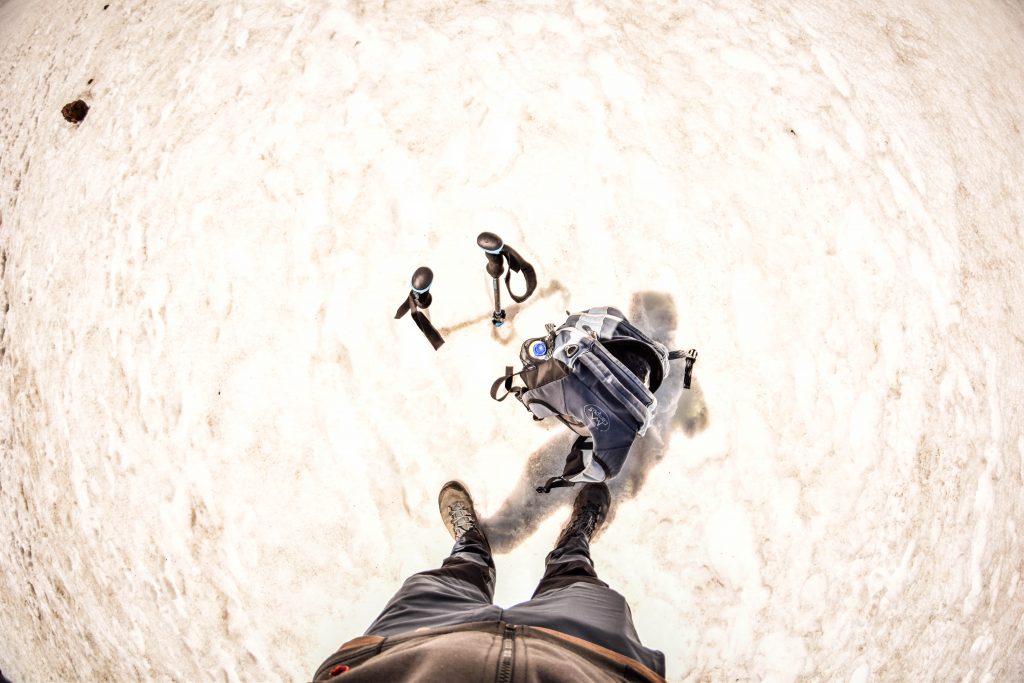
Orange poles, the same as on many other tracks in New Zealand, guided me towards the destination. It was extremely helpful to support myself with hiking poles, especially on the snow around the crater and when going down the mountain. I recommend taking at least one with you to keep the balance. Otherwise, you have a high chance to slip and land on your ass. Not a big deal, but could be painful on some bigger stones 🙂

Mt Taranaki, New Zealand
Mt Taranaki crater
Mt Taranaki, New Zealand
Hikers sliding down in Taranaki crater
Taranaki Summit
Hiking poles were extremely useful when walking on the snow and loose rocks

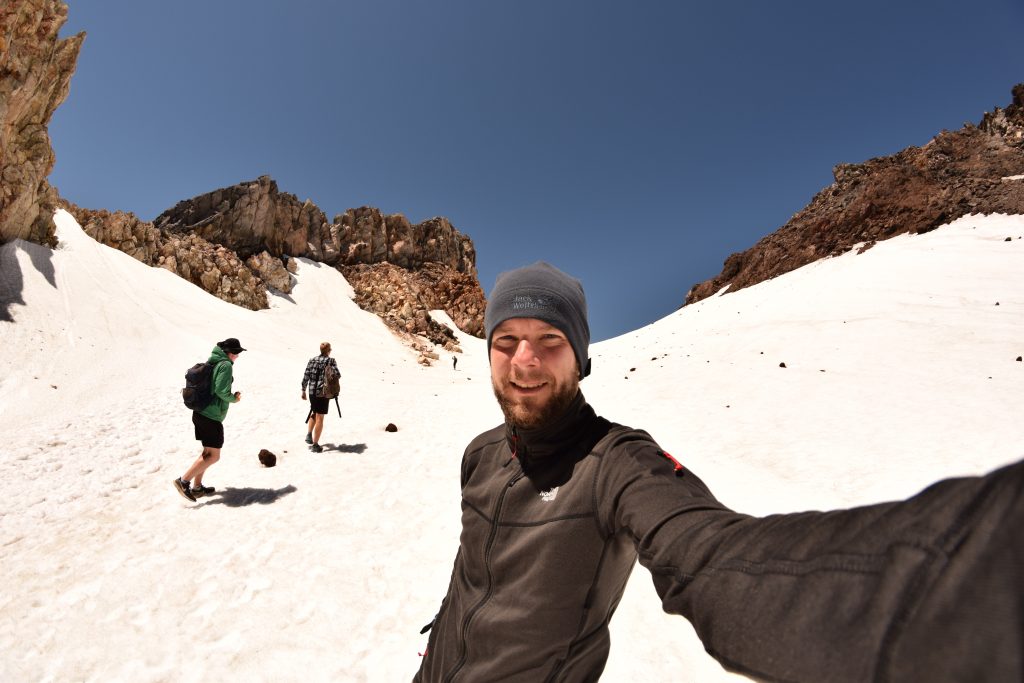
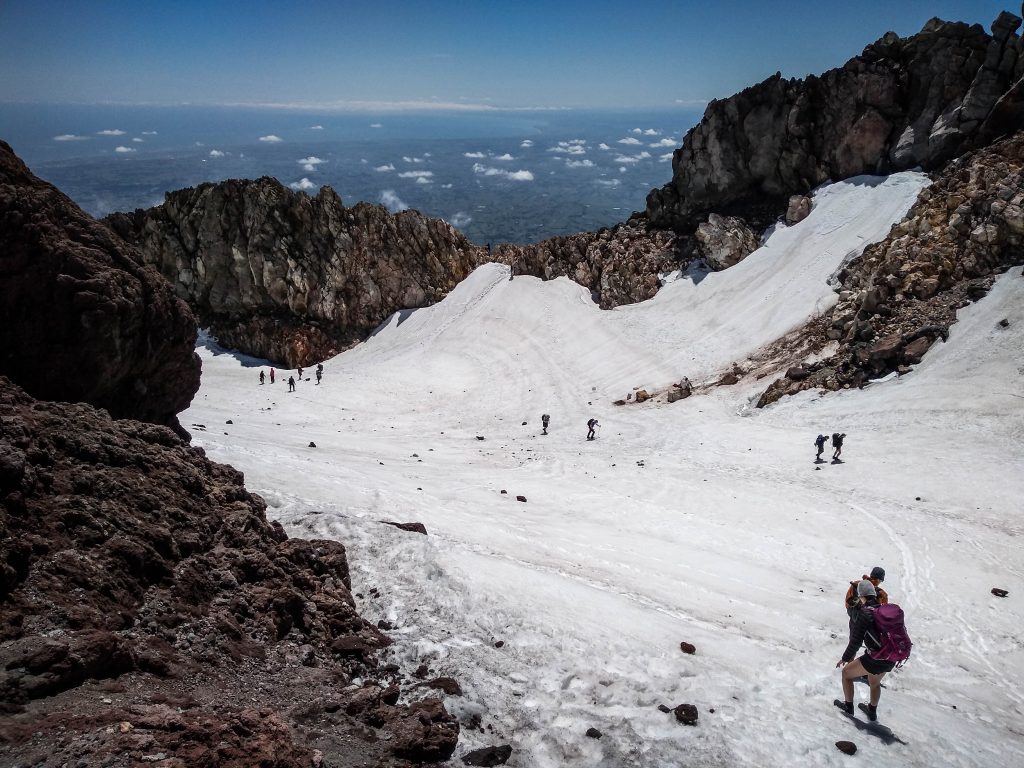
Finally, I put my feet in the crater. There are ice and snow all year round which makes tourists very happy when they play around and slide down on their shoes or ass down the path. But the crater is not the end. From there, it’s another final short climb up to the summit rock. 

Mt Taranaki, New Zealand
Final push to the summit rock

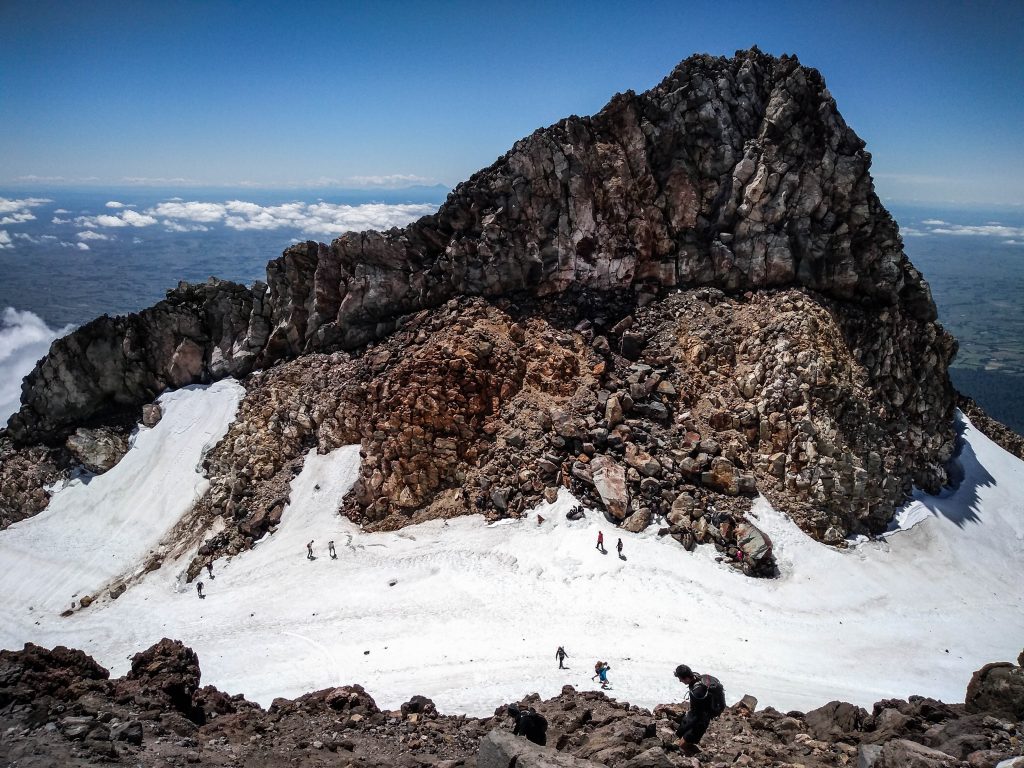
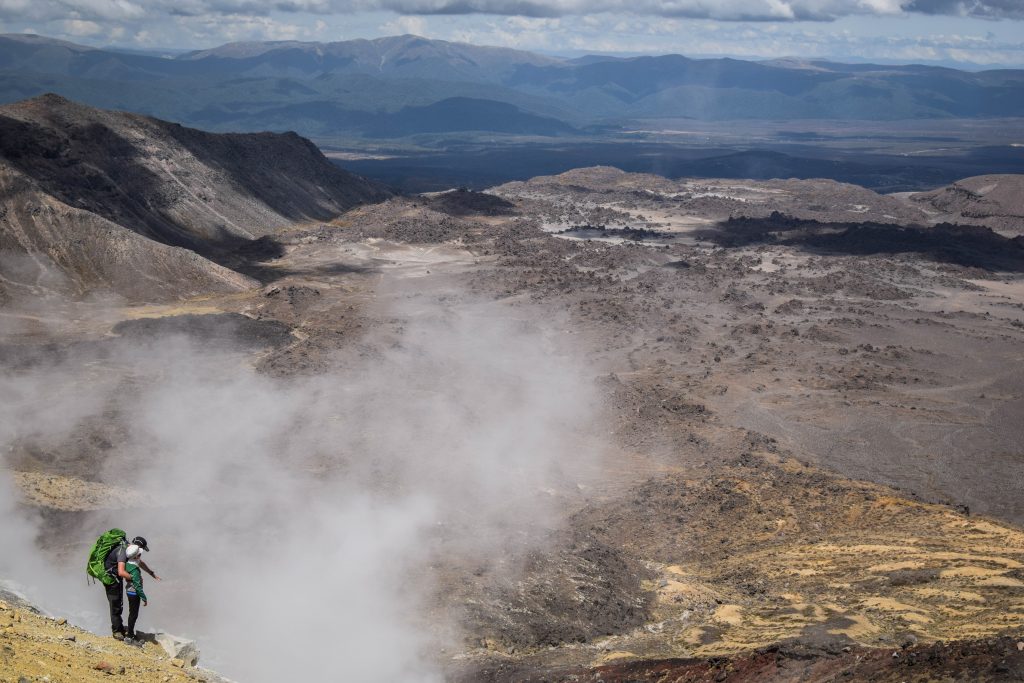
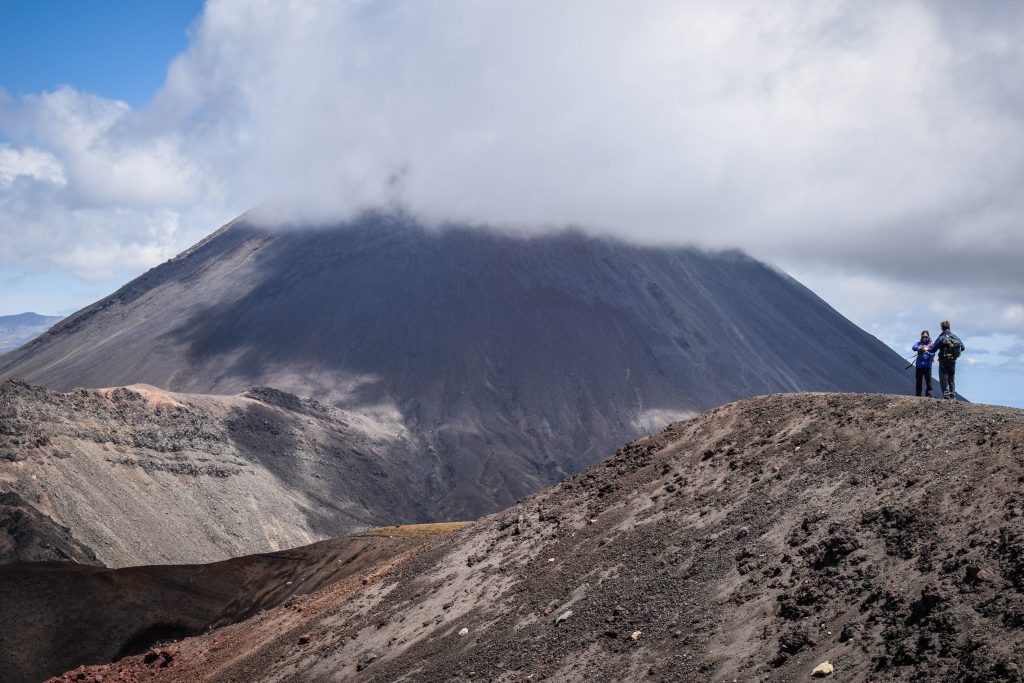
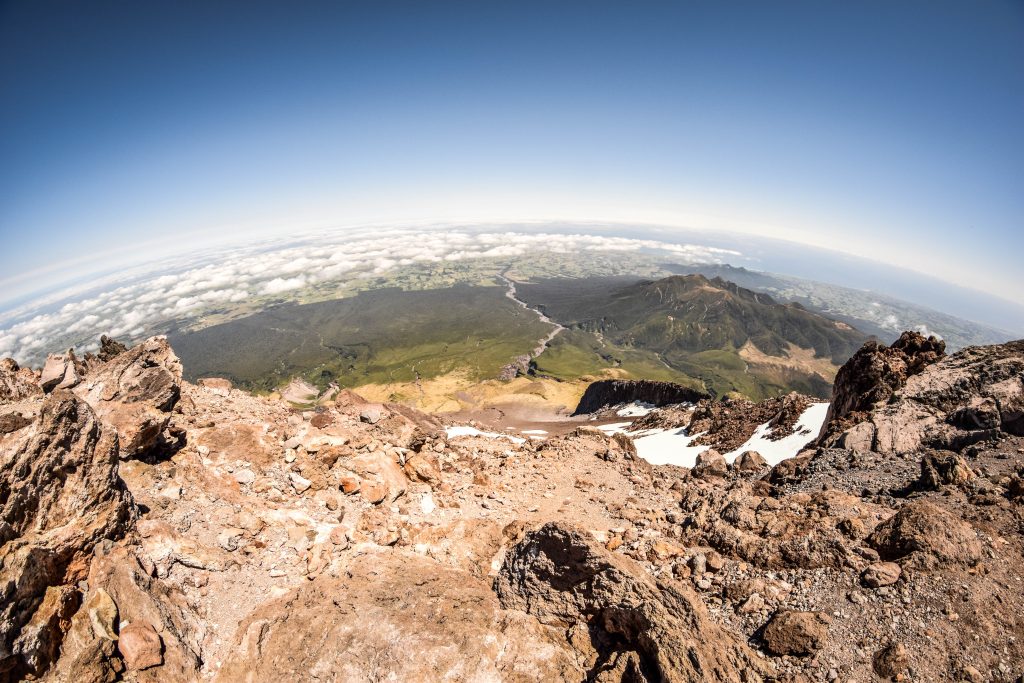
I got two things as a reward for reaching the summit. The first one was the chance to admire 360 degrees panorama across the south-west area of North Island. With good visibility, it was possible to see as far as volcanic summits in Tongariro National Park one side and the Tasman Sea on the other.

The second one was the ultimate satisfaction that I conquered the second highest volcano in New Zealand. Believe me, that was a great feeling. Moreover, Taranaki is one of these places that I’m already dying to visit again as soon as I’m back to the kiwi country.

Taranaki Summit
Panorama from the summit

The way down was significantly easier than the way up. It took me only 2.5-3h to reach the parking lot, comparing to 4-5h that I spent pushing to the summit. Why is it like that? I was basically sliding down on loose stones, very often simply running all the way down as it was the easiest way to keep the balance. I saw many hikers struggling and falling down. I landed on my ass twice, even though I had my hiking poles for support. It was a really fun experience though 🙂 In the afternoon, more and more clouds started to cover the mountain and when I was halfway down and turned around, I couldn’t see the summit anymore. Taranaki started crying after his lost love once again.

Final thoughts

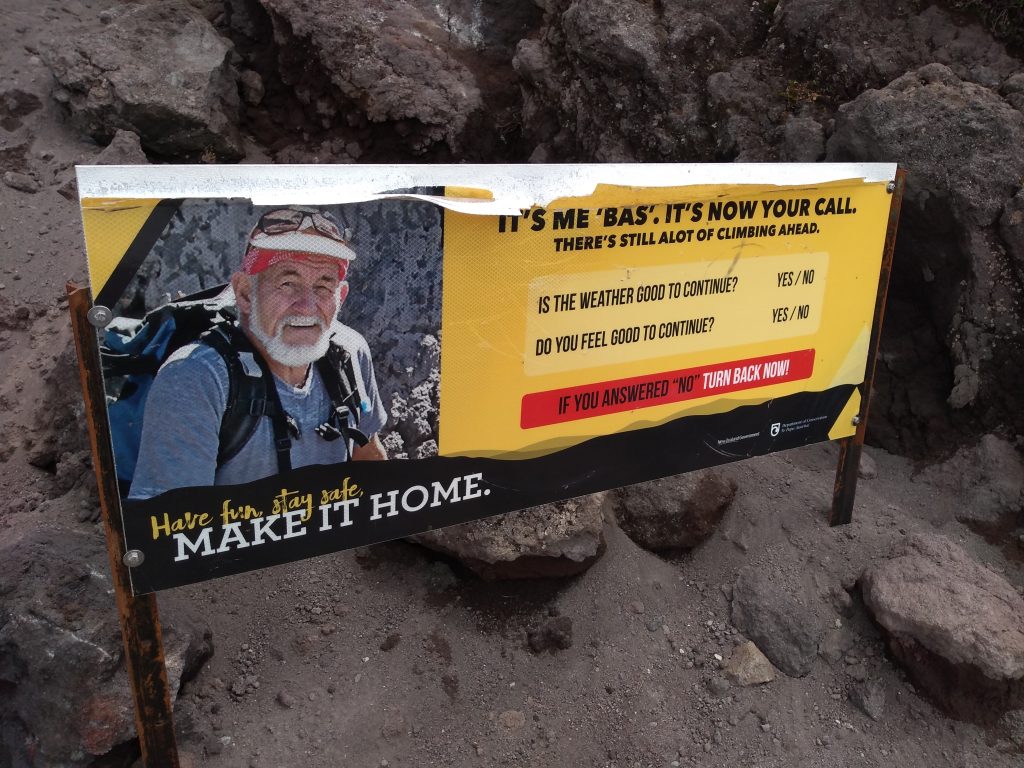
Climbing Mt Taranaki was certainly one of the most memorable hikes on North Island. Be patient and attempt it when the conditions are good. In the end, it’s not only about reaching the summit, but also about enjoying panoramic views. And if the conditions change or you don’t feel well, just listen to Bas and make it back home. The mountain will be always there. Have fun and stay safe!

Taranaki Summit Track

Other tracks in the area

If the weather is not on your side or you just think that tackling Taranaki Summit Track is too much, don’t let it discourage you! There are several other options in Egmont National Park ranging from the very short and pleasant ones to more challenging multiple days hikes such as Around the Mountain Track. Check the website of the Department of Conservation and select the one that fits you best.

Introduction

There are endless hiking possibilities in New Zealand and if you nature enthusiast, that’s the perfect country for you. I prefer camping, however, with the network of more than 950 backcountry huts operated by the Department of Conservation (DOC), carrying your own tent all the way is not always needed.

10 tracks with the status of the Great Walk are multiday adventures located in the most scenic landscapes in the country and providing hikers with good facilities. My story with them is rather simple. I went for one (Tongariro Northern Circuit) and I knew that I want to complete all of them.

North Island

Tongariro Northern Circuit

Distance: 41 km

Time: 2-4 days

Definitely my favorite walk on the North Island. It was also my first Great Walk after arrival to New Zealand so I’m still sentimental about it. Being a loop, there is no hassle with extra transportation so it’s also budget-friendly.

I was extremely lucky with the weather and even though I initially planned the hike for 3 days, I finished it in 2 days which is perfectly doable but tiring. Do it in 3 days or 4 days if you like a more relaxed pace.

The track meanders through the rugged volcanic landscape with cones of Mt Tongariro, Mt Ruapehu and Mt Ngauruhoe around you. It includes most of Tongariro Crossing which is a day hike done by most of the tourists coming to Tongariro National Park and this section can get crowded.

Don’t miss Blue Lake, Tama Lakes and Taranaki Falls as side trips. They are all worth it!

Read the full description of the track.

Lake Waikaremoana Track

Distance: 46 km

Time: 2-3 days

The track follows the shoreline of Lake Waikaremoana and if fairly easy except quite a steep uphill section between Onepoto and Panekire Hut (if walking from Onepoto) or Waiopaoa Hut and Panekire Hut (if walking from Hopuruahine Landing). Rainforest, waterfalls, beaches – you have it all here. Just don’t forget your swimwear!

I started the track at Onepoto and in this way covered the more difficult uphill section on the first day.

Whanganui Journey

Distance: 87 or 145 km

Time: 3-5 days

First of all, it’s not a walk. Unless you can walk on the water. If not, then grab a kayak or canoe, pack your things into waterproof containers and paddle your way down the Whanganui River.

The full version is 145 km long, starts at Taumarunui and finished in Pipiriki (5 days). If you are not such a big enthusiast of paddling, start at Whakahoro instead and cut the distance to 87 km (3 days).

It’s worth stopping at the Bridge to Nowhere, that was built in the times when soldiers coming back from World War I were granted land in the area. The land proved too difficult to cultivate and after building the bridge in the middle of the bush, the plans to continue with the road were abandoned. Therefore, today it’s quite a unique tourist attraction in the beautiful scenery.

South Island

Abel Tasman Coastal Track

Distance: 60 km

Time: 3-5 days

The trail goes along the coast and many hikers rate it as one of the easiest of Great Walks. There are several great campsites on the way where you can pitch your tent on the sand and even enjoy the shower. Jumping in the kayak and doing the whole route or only some fragments from the water perspective is a nice and popular alternative. It’s not a loop so at the end of the track, take a water taxi back to the starting point or if you have a couple of more days to spare, walk back via alternative inland track.

I did it over 3 days starting at Marahau and it seems to be an absolute minimum if you want to cover the whole distance. I camped at Onetahuti Bay and Totaranui. For more relaxed experience and longer breaks at the spectacular bays and beaches, plan 4 or 5 days.

There is one really critical tidal crossing at Aweroa that is passable 1.5 hours before and 2 hours after low tide under normal conditional. Therefore, plan your day accordingly and check tides hours online as there is no alternative way. For me, it was one of the most unique and breathtaking spots on the trail. Oystercatchers wandering around looking for food, a huge area with sand shaped by the water, hilly background and adventurous crossing on its own, sometimes with water above my knees.

Heaphy Track

Distance: 78.4 km

Time: 3-6 days

The longest and one of the most diverse of Great Walks. Being located in Kahurangi National Park, it takes not only good shape to tackle it, but you need extra cash to organize logistics. To come back from one trailhead to another, it’s a long bus trip that takes around 5 hours and costs over 100 NZD.

I hiked the track in 3 days. The first one was a mostly uphill walk in the mountainous area and forest. The second day was way flatter and the forest gave place to wide grasslands at the end arriving at the West Coast. On the last day, walking along the beach I got the chance to admire one of the most remote coasts that I have ever seen.

I spent the nights at Saxon and Heaphy campsites and both had superb location.

Outside of the Great Walks season (1 May – 30 November), it’s allowed to go on the track with a mountain bike.

Paparoa Track

Distance: 55 km

Time: 2-3 days

The only Great Walk that I didn’t experience but that’s because it’s a brand new one due to open in the second half of 2020. When I see its location on the West Coast, I have no doubts it’s on my bucket list for the second visit in New Zealand.

The track crosses the rainforest and the Paparoa Range. According to the Department of Conversation (DOC), mountain bikers are allowed as well.

Routeburn Track

Distance: 32 km

Time: 2-3 days

My favorite of 3 Great Walks in Fiordland National Park. It’s short but breathtaking and there are no boring sections. The weather on my first day was simply horrible with pouring rain and strong winds all the way. But if everything is booked…. gotta go 🙂 Luckily, it had a positive side too, as the passing dark clouds were extremely photogenic.

I spent the night at Lake MacKenzie campsite trying to dry my completely wet clothes at least a little bit. Of course, I failed.

The second day was much better and the sun welcomed me as soon as I opened the tent. After a full day of rain, the Earland Falls were so huge that I had to take a detour built for such situations.

It’s a great track for mountain enthusiasts. I recommend making a side trip to Key Summit which takes around 1.5-hour return. Leave your heavy backpack at the crossroad, there is no need to carry the things all the way up.

[update from DOC website as of 15.03.2020 – check regularly for further news]

The Routeburn Track partially reopens from 12 March 2020 as a new walking experience, named Routeburn Return. It’s a 4-day, 3-night hike beginning and ending at the Routeburn Shelter. This return journey starts and finishes near Glenorchy.

Routeburn Return replaces the Routeburn Great Walk, which is closed for the rest of the season due to storm damage.

The Routeburn Return route may be more challenging than the usual route because of changes in elevation and one of the days is longer than a usual Great Walks experience.

Kepler Track

Distance: 60 km

Time: 2-4 days

Being a circuit makes it easily accessible and budget-friendly. I did it over 2 days in a clockwise direction with overnight at Iris Burn but I must say it was pretty challenging and I finished completely exhausted.

The weather conditions in Fiordland National Park are pretty unpredictable which I experienced on the second day. The thin layer of snow was covering the ground and people coming from the other direction said that yesterday they were walking in a snowstorm. I was really lucky that DOC advised me to follow the clockwise direction!

There are limestone caves near the Luxmore Hut that make for a nice side trip. Take a torch!

Milford Track

Distance: 53.5 km

Time: 4 days

Only 40 independent hikers can start the track each day which makes it extremely difficult to book. I did it 4 months in advance, refreshing the page several days hoping for someone to cancel. I got lucky, but it’s also easier for solo travelers.

This time I left the tent in the car as camping on Milford Track is not allowed. Even though it’s only 53.5 km long, you need to stay in all 3 huts on the way. It has pros and cons. I could easily walk such a distance in 3 or even in 2 days. On the other hand, I was ‘forced’ to take it slowly having more time to appreciate nature. Which was just fine. However, the popularity of the track, lack of campsites and additional transport from one end to another, demand quite a big budget as for the hike in the mountains.

And even though it’s my least favorite of Great Walks in Fiordland National Park, there is still a lot to appreciate. Spectacular views from MacKinnon Pass, the highest waterfall in New Zealand – Sutherland Falls (580m) and of course plenty of wildlife.

Rakiura / Stewart Island

Rakiura Track

Rakiura National Park covers around 80% of the island and is home to the least crowded of Great Walks. I booked my camping tickets only 2 days before departure which would rather not be possible on other tracks in the middle of the season.

You will hike along sandy beaches and through the forest but the most interesting part is the chance to see the kiwi. It’s the best place in the whole of New Zealand to see its symbolic bird. Apparently it’s possible even in the daylight! I suggest waking up around midnight, taking headlight (best with the red light mode that doesn’t scare kiwi off) and walking quietly around the camp.

Read the full description of the track.

Introduction

Hiking 1 of 10 New Zealand’s Great walks will bring you close to the best thing this country has to offer. Its nature. But be warned! It’s addictive and most likely the first of your Great Walks won’t be the last. Many people get pulled in by the idea and complete them all. So did I.

It’s a perfect opportunity for beginners in multi-day hiking to test their limits. You will be away for 2-4 days having a glimpse on backcountry experience but you don’t need any hardcore survival skills. Breath-taking scenery will reward even the worst weather. And when you can be alone on a track for quite some, you will certainly meet great people on campsites and in huts.

Before you go, make sure you are well prepared and packed all the essentials!

The art of packing

Packing for long-distance hikes can be a pain, especially for beginners. In the end, we consider many items as essentials that may be useful on the way. But once it’s all packed, we quickly realize the backpack is way too heavy. Believe me, the weight of each extra item on your back will matter when you ascend another hill.

It’s hard to avoid first-timer mistakes and I did learn some lessons on my own skin as well. To be honest, with every next hike, I’m taking less and fewer things. Consider my packing list for New Zealand’s Great Walks but also observe and learn from your own experience.

The list describes the suggested equipment for Great Walks in the summer season. Needless to say, equipment is necessary for harsh winter conditions.

Routeburn Track, New Zealand
Routeburn Track

Food

There is nothing that you can buy on the track, therefore whatever you take you with, it needs to last for the entire duration of the hike. To be on the safe side, it’s even recommended to take a supply for an extra day, in case of an unexpected injury or difficult weather conditions.

After a long day of the walk, you want to set up your tent and eat something warm as soon as possible. Prepare high-energy value meal that you can easily heat up. Freeze-dried food is a good idea as it just requires boiling the water, but it’s expensive.

For the first hikes, I used the food produced by Backcountry Cousine. The selection is really big and the meals are tasty but to be honest, I had to buy the bigger pack with a portion for 2 people to be really full. A meal costs around 10-15 NZD.

Whatever you take, the rule is simple. Eat the heaviest stuff first and keep the lightweight meals for last days.

Abel Tasman Track, New Zealand

Breakfast:

  • Bread
    with jam, honey or peanut butter
  • Instant
    cereal with fruits or porridge
  • Biscuits
    with jam
  • Powdered
    milk
  • Banana
  • Tea
    or coffee

Lunch:

  • Bread
  • Cheese
  • Salami
  • Humous
  • Ready to eat sausages
  • Instant soup
  • Nuts and dried fruits
  • Tea or coffee

Dinner:

  • Instant rice or pasta
  • Tinned tuna or chicken
  • Instant soup
  • Freeze-dried meal
  • Tea or coffee

Snacks:

  • Chocolate
  • Muesli bars
  • Biscuits
  • Nuts
  • Frooze Balls

Equipment

Only if you camp:

For campsites and huts:

  • Backpack with a waterproof cover
    40-60L should be enough for a multiday hike.
  • Waterproof bag
    Used as extra protection inside your backpack to put electronics and spare clothes inside.
  • Sleeping bag
    It can get cold no matter what time of the year so 3-4 seasons sleeping bag would be perfect. In mid of February, the temperature on Kepler Track dropped to 2C in the night so I was happy my sleeping bag comfort rating was 0C. It’s much warmer if you sleep in a hut, though you still need a sleeping bag as there are only bunk beds with mattresses.
  • Drinking bottle 1-1.5 L
    Water is always available next to the huts and campsites. It’s rainwater, fine for drinking without treatment. If you have doubts, boil it first or use the Sawyer water filter.
  • Cooking pot
    I’m using MSR PocketRocket 2 Mini Stove Kit which proved to be great size and quality.
  • Gas stove
    Sometimes provided in huts, check in advance.
  • Fuel
    Sometimes provided in huts, check in advance.
  • Plastic cutlery
  • Cup
  • Sharp survival knife
  • Cleaning set
  • Matches / lighter
  • Light camera or phone with a camera
  • Power bank / spare camera battery
  • Bin bags
    Whatever you bring in to the national park, you have to bring it out and throw away when you reach civilization.
  • Hut/campsite tickets
    These have to be picked up at DOC visitor centre before you depart.
  • Map
    Can be found at DOC visitor centre as well.
  • Earplugs
    Useful especially in bunkrooms in huts.
Kepler Track, New Zealand
Kepler Track

Clothing

It rains quite often in New Zealand, therefore you need to be prepared for changing weather conditions. Not to mention the fact that in February I experienced snow on Kepler Track. Warms and waterproof clothes are essential to increase your comfort on the trail.

  • Boots that are comfortable and well broken in
    Shoes are the most important element of your clothing, especially when hiking in the mountains with a heavy backpack. Your comfort and safety depend on them. Make sure that they are top-class shoes that you trust. For all Great Walks, I used La Sportiva TX5. Even though it took quite a while to break them in, they are extremely light, comfortable and provide great stabilization for my feet.
  • Raincoat with hood
  • Trousers
  • Waterproof over trousers
  • Jumper or sweater
    For cold mornings and evening or even for sleeping in case your sleeping bag is not warm enough.
  • T-shirt (at least 2)
  • Long sleeve shirt
  • Pair of thermals
  • Shorts
  • Buff
    It’s light and can be worn on the head, neck or wrist.
  • Flip flops / lightweight shoes for a campsite
    You will want to let your feet rest from heavy boots and feel more comfortable while hanging around campsite or hut.
  • Hiking socks
    I recommend taking an extra pair. Nothing is worse than wet feet.
  • Underwear
  • Hat
  • Gloves
    Rather for mountain tracks only.
  • Swimwear
    May be useful especially on Abel Tasman Track or Rakiura Track.
  • Extra clothes for sleeping
  • Sunglasses

Toiletries

  • Toothpaste
  • Toothbrush
  • Wet tissues
  • Toilet paper
  • Hand sanitizer
  • Soap
    There are usually sinks with rainwater next to the huts so you can use them for basic needs.
  • Small quick-dry towel
    May be useful especially on Abel Tasman Track or Rakiura Track.

Safety

  • Flashlight (headlight is the best)
  • Spare batteries
  • First aid incl. antiseptic, pain killers, bandages, blisters kit, personal meds
  • Insect repellent
  • Sunscreen
  • Spare matches / lighter in a waterproof container
  • Spare set of warm clothes
  • Whistle
  • Personal documents (ID, passport) in a waterproof bag

I wouldn’t say that personal locator beacon is really needed on Great Walks. The trail is well marked and it would be difficult to get lost. Before you go, just tell someone about your plans and how long you plan to be on a trail.

Milford Track, New Zealand

Do you have your favourite items that you take with you on multiday hikes? Let me know in the comments!

Introduction

Due to limited time, most travellers focus only on visiting New Zealand’s North and South Islands, excluding the third biggest Stewart Island/Rakiura from their itineraries. At first, I didn’t plan to visit the island and hike Rakiura Track either. However, after my first Great Walk – Tongariro Northern Circuit, I totally fell in love with long-distance treks. I instantly thought I want to have them all in my collection of memories from New Zealand.

Rakiura Track is the shortest and certainly the easiest of all Great Walks. It’s a 32 km loop in the Eastern part of the island. Department of Conservation (DOC) suggests 3 days itinerary but the track can be done by an average hiker in 2 days without a problem. Some do it in 1 day, even though I don’t recommend that option as it will be extremely rushed.

The big benefit (especially when heading from Fiordland) is that Rakiura Track is the cheapest Great Walk to do and the easiest to organize. I booked the campsite just 1 day in advance which would be highly unlikely on any other Great Walk.

Stewart Island/Rakiura

Rakiura National Park

The park was established in 2002 and is made of over 80% of the island’s territory. On the track, you will encounter information boards about early Maori settlements especially around Maori Beach and Port William as well as relicts of sawmilling industry which lasted until 1931. Some parts cross the Maori land which has been shared for the public use by the courtesy of its owners.

How to get to Stewart Island?

There are 2 options to get to Stewart Island: ferry or plane.

Ferry service is operated by Stewart Island Experience. Depending on the season, it goes 2, 3 or 4 times a day. The crossing takes 1 hour and regular ticket costs 89 NZD one way or 159 NZD return. Always make a booking in advance. I didn’t and the ferry that I planned to take the next morning was fully booked. There is free parking just in front of the terminal in Bluff. The crossing can be quite bumpy, so better get your meal not before but after the arrival to Oban.

Flights are operated by Stewart Island Flights and leave Invercargill 3 times per day. It’s definitely faster (20 minutes) and more scenic way to arrive in Oban. As usually in New Zealand, it comes with the price and will hit the budget significantly with 130 NZD for a one-way ticket or 220 NZD return.

Overnight in Oban

If arriving in the afternoon, it’s worth to spend the night in Oban and start the track the next morning. Bunkers Backpackers Hostel is an excellent choice.

Clockwise or anticlockwise?

There is not much difference in which direction you start the hike. Deciding for 2 days itinerary, it’s up to you if longer and harder part should be done on the first or the second day of the hike.

If starting in the anticlockwise direction, make your way from Oban towards starting point at Lee Bay (5km). Otherwise, your starting point will be at the Fern Gully Road end (2km from Oban).

Weather

Due to its location, Stewart Island/Rakiura is exposed to even more changeable weather than the rest of New Zealand. It’s best to monitor the conditions on MetService. Strong winds and heavy rains are known on this track and can occur at any time of the year. After rains, be prepared to walk in deep mud. It’s worth dropping by to DOC office to reconfirm the weather conditions and ask for recommendations.

1,2 or 3 days?

Technically it is possible to do the track in one day, however, it would be a very long and very tough day. Start at sunrise is essential and you will finish around dusk, with not too much time for breaks along the way.

More popular versions are the ones over 2 or 3 days.

I did the track in 2 days and it was optimal time, giving the chance to have a break, take in all the sights and camp in the middle of the forest with the best chance in New Zealand to spot a kiwi in natural habitat.

3 days would be a bit too much for me, nevertheless, if you prefer to take your time, do sunbathing and picnicking on the way, then it’s a great opportunity.

Huts and campsites

The Great Walk season on Stewart Island/Rakiura begins usually at the beginning of October and lasts until the end of April. Bookings for huts and campsites are required year-round.

Booking can be done at the Department of Conservation website. Once on the island, don’t forget to drop by to DOC office in Oban to pick up the tickets and re-check weather conditions.

Both huts and campsites have pros and cos. Doing all of Great Walks, I used huts only on Milford Track and that’s because camping there is forbidden. I like to feel that I am totally independent and rely only on own supplies and equipment. Moreover, camping gives more flexibility to re-schedule the hike when the weather turns bad. Huts are rather booked out weeks in advance, especially on the most popular tracks. Camping on Rakiura Track gives you also better chance to spot the kiwi and hear all the sounds of the forest in the night.

Great Walks huts have bunk beds, mattresses, heating, toilets and cold water. Campings comes with water supply, cooking shelter, sinks and toilets.

List of huts and campsites

There are 2 huts and 3 campsites along the track. As for all Great Walks, overnight stays must be booked in advance and tickets should be picked up at DOC office in Oban before departure. As the track is the least popular of all Great Walks, there is usually no need of booking months in advance, however, do monitor the situation to avoid disappointment.

Maori Beach Campsite – besides being a grassy campsite close to the beach, it’s also the historic site where you can learn about remains of sawmill industry present on the island until 1931. It’s only a few kilometres from Oban so not many hikers stay here. There are 16 camping spots.

Port William Hut and Campsite – popular overnight stop located 8.1 kilometres from the trailhead at Lee Bay. If offers 24 bunk beds and 16 camping spots.

North Arm Hut and Campsite – from my point of view, the best place for the night on a track located only a stone’s throw away from Paterson Inlet. It offers 24 bunk beds and 16 camping spots.

Pricing

In the Great Walk season (1 October – 30 April) the prices are as follows:

Huts: 24 NZD per adult per night, 17 years old and under free (booking still required)

Campsites: 6 NZD per adult per night, 17 years old and under free (booking still required)

Outside of the season ( 1 May – 30 September), the price for a hut drops to 22 NZD. Price for campsite doesn’t change.

Track details and profile

Distance: 32 km (loop)

Time: 1-3 days

Rakiura Track elevation
www.doc.govt.nz

The track profile and other useful details can be found inside the Department of Conservation (DOC) brochure.

The following itinerary assumes 2 nights on a track which will give you plenty of time to relax, take a swim and enjoy nature. I did the track with only one overnight stay at North Arm Campsite (departing from Oban towards Lee Bay).

Stage 1 – From Lee Bay to Port William Hut and Campsite (3-4h, 8.1km)

The day at Oban started with perfect weather and I dropped by to DOC office to pick up the map and tickets for the campsite. Then I followed the road towards Lee Bay (5 kilometres). Alternatively, it’s possible to take a taxi and save the legs, but it’s a pleasant walk through the village. The chain-link sculpture at Lee Bay is the official beginning of the track and symbolizes one of the Maori legends. It’s the story of Maui, who used South Island as his canoe and Stewart Island/Rakiura as the anchor to fish the North Island.

Stewart Island/Rakiura

From here, the track continues along the coast to Maori Beach. It’s a perfect place for a snack and swim. The campsite is just right next to the beach and it’s much less crowded than the one at Port William, so if you like peace and silence, consider staying here overnight.

Stewart Island/Rakiura

For me, it wasn’t the time to rest yet and I continued further across the swing bridge and then to the turn off to Port William Hut and Campsite. Even though it wasn’t my overnight stopover, I dropped my backpack in the bushes, took my lunch and went there to eat and relax. It’s 40 minutes off the main track and as it was still early hour, not too many hikers were there. Two women were chilling on the grass in front of the hut and one of them happened to be half Polish so we had a nice chat in my native language.

Stewart Island/Rakiura

Stage 2 – From Port William Hut and Campsite to North Arm Hut and Campsite (4-6h, 13km)

The second stage became harder but not because of its steepness but rather constant need to jump over the mud. In parts, it’s necessary to get off the main track and take a detour through the bush. Honestly, it was quite a boring couple of kilometres. It’s just the path through the forest like any other in New Zealand, where the only highlights were passing by the old log hauler once used to drag trees to the gullies seeing… a stick insect.

Stewart Island/Rakiura

Upon arrival to North Arm Campsite, I was greeted by a Kiwi couple. We cooked our freeze-dried food made by Backcountry Cousine and had a nice chat. The guy was a real badass as in his late 50’s he finished Te Araroa Track which is 3.000 kilometres long hike from the very top of North Island to the very bottom of South Island. I really hope to follow his example when I am at his age.

I still had over an hour before the sunset and there is a nice place to relax behind the hut. Just follow the path down towards Paterson Inlet. Have a swim or just put your feet to the water and wait for the low tide to come.

Stage 3 – From North Arm Hut and Campsite to Oban (13 km)

In the morning of the next day, the weather changed significantly. It started to get windy and kiwi guy said that according to forecast, it’s gonna rain at 1 pm. I left the campsite at 7:30 am to be able to arrive in Oban before it gets wet. The easy path through the forest led me to the junction, where I took Ryan’s Creek Track for a more scenic detour to Fern Gully Carpark. It adds only around 1.5 hours to already quite an easy day.

Stewart Island/Rakiura

From Fern Gully Carpark, which is the end of the track, it’s another 2 kilometres to Oban. I checked in again to Bunkers Backpackers Hostel and enjoyed one of the most amazing sunsets in New Zealand.

Stewart Island/Rakiura

Don’t miss!

Dark Sky Sanctuary & Aurora Australis

Rakiura in the Maori language means ‘the land of glowing skies’. You will understand why. Stewart Island/Rakiura is one of the International Dark Night Sanctuaries and with clear skies, it’s a spectacle on the sky. Moreover, around winter you have good chances to see Southern Lights also known as Aurora Australis.

Kiwi spotting

There are less than 40 human inhabitants of Stewart Island/Rakiura. How about kiwis? Well, the estimated population is 20.000. It makes the island the best place to see kiwis in their natural environment. To be precise, the species is the southern brown kiwi. While in other parts of New Zealand kiwis are nocturnal, on Stewart Island/Rakiura they can be also spotted in daylight!

I got lucky as well. I set an alarm for midnight, took my flashlight and went for a short walk on a track, from where I came the previous day. I was walking very slowly, focusing on all the little noises in the bushes. Suddenly, I heard something and stopped moving for at least 15 minutes. I could clearly hear the movement closer and closer. The kiwi was walking perfectly towards me, probably curious about my flashlight. I had the one with white light but the best would be using the red light mode, so it doesn’t scare the kiwis off.

Kiwi on Stewart Island/Rakiura

It was quite a brave kiwi. At some point it was just at my feet, touching my shoelaces with his beak. Realizing that it’s not eatable, he continued his night journey through the forest. So did I, coming back to the tent to fell asleep completely satisfied with the night encounter.

Is it worth hiking Rakiura Track?

It’s definitely not that scenic as other Great Walks. However, there are things making up for it. Night walks in the forest in search for kiwis, spectacular sunrises and even more spectacular sunsets, dark skies and the chance to see Southern Lights. Due to the distance and advancement level, Rakiura Track is probably the best Great Walk for newbie hiker. And if you are experienced and want to go through muddy tracks even further, it’s possible to hike North West Circuit (125 km, 9-11 days) or Southern Circuit (71.5 km, 4-6 days).

Enjoy!

For questions, contact me on pinyourfootsteps@gmail.com

Introduction

Tongariro Northern Circuit was my first New Zealand’s Great Walk. It was also the first overnight hike in my life! I did camp before, but it was rather during road trips. Carrying food supplies, water, tent, sleeping bag, gas stove, cooking pot, water filter, clothes for change – all of it on my back for 2 days in volcanic landscape sounded like a challenge. What an exciting one!

Tongariro National Park

You will be hiking in one of the oldest National Parks in the world!

In 1894, Tongariro became the first National Park established in New Zealand and the fourth to become such worldwide. From 1993 it is on the World Heritage List for both Maori cultural significance and volcanic landscape. There is a wide choice of walks available in the area, suitable for all levels of fitness. Two of them are especially worth considering!

Tongariro Northern Circuit is the longer version of more popular 1-day Tongariro Alpine Crossing. It only depends on your personal preference which version you decide to hike. However, I do encourage you for longer exploration. Northern Circuit includes the most scenic part of Alpine Crossing and adds the chance to camp among active volcanoes in Taupo Volcanic Zone: Ngauruhoe, Tongariro and bit further on the horizon – Ruapehu. It gives you extra time to stop and enjoy the breathtaking scenery, an opportunity to test your limits on over 40 km track and make new friendships with all the fellow hikers that you get to meet on the way! Most likely you will also beat the crowds that start Alpine Crossing every morning from Mangatepopo Road End. And believe me, in high season is A LOT of people. You also won’t need to pay extra for the transport as it is in case of one-way Tongariro Alpine Crossing.

Do you feel encouraged?

Tongariro National Park, New Zealand

The legend has it…

Before going to Tongariro National Park, I visited the second highest volcano of New Zealand – Mount Taranaki. There is a legend that connects all the peaks in the central area of North Island. It says that both Taranaki and Tongariro were in love with Mount Pihanga and the fierce fight between them started. Tongariro won and Taranaki escaped to the west coast where he was trapped by Pouakai Ranges in the place he stands now. Taranaki is often covered in clouds, hiding the tears shed after his lost love.

Welcome to Mordor

Tongariro National Park acted as a filming location for Peter’s Jackson world-famous trilogy Lord of the Rings. Volcanic rocks and unique landscape were ideal for creating Mordor and Mount Ngauruhoe shape was digitally enhanced to make Mount Doom. Other locations include Emyn Muil (Iwikau Village at Whakapapa), Ithilien Camp (Mangawhero Falls) and scenes with Orc Army (Rangipo Desert). It’s quite cool add-on for all fans, even though sometimes you need to use your imagination to recognize the places.

Tongariro National Park, New Zealand

Clockwise or anticlockwise?

Tongariro Northern Circuit is a loop track and can be hiked in either direction. I started clockwise from Whakapapa Village towards Mangatepopo Hut and further to Oturere Campsite. In this way, I tackled more difficult part on the first day. It’s a good choice because of higher energy level at the beginning, however, you will be carrying a backpack loaded with most of your food supplies on the ascent to Red Crater. That’s also the more popular directions among hikers. I personally think that the track is so spectacular that it doesn’t matter which direction you choose.

Tongariro National Park, New Zealand

Bookings of huts and campsites

The season for Great Walks begins usually at the end of October and lasts until the end of April. In this period, bookings for huts and campsites are required. Outside of the season, they work on a first-come, first-served basis, however, please do remember that because of weather conditions the trail becomes much more difficult to tackle (avalanche risk) and experience is required.

Booking can be done at the Department of Conservation website. After a booking is done, don’t forget to drop by to DOC Office in the Whakapapa Village to pick up physical tickets and re-check weather conditions.

Both huts and campsites have pros and cos. Doing all Great Walks, I used huts only on Milford Track and that’s because camping there is forbidden. I like to feel that I am totally independent and rely only on own supplies and equipment. Moreover, camping gives more flexibility to re-schedule the hike when the weather turns bad. Huts are rather booked out weeks in advance, especially on the most popular tracks like Tongariro Norther Circuit, Milford Track, Kepler Track or Routeburn Track. The chance to postpone the adventure is small, meaning you either go in bad weather or don’t go at all.

Great Walks huts have bunk beds, mattresses, heating, toilets, basic gas cooking facilities, solar-powered lighting and cold water.

List of huts and campsites

Mangatepopo Hut and Campsite – it’s only 9.4 km from the trailhead at Whakapapa Village and unless you really want to take your time and enjoy the landscape, it’s simply not far enough to justify overnight stay.

Oturere Hut and Campsite – the most picturesque overnight stop and the only one I stayed on the track. It’s 21.4 km from the trailhead and I must say that for the last 2-3 km I was tired and couldn’t wait to reach the place. But it’s worth pushing. The clouds passing through the top of Ngauruhoe at dusk were unforgettable. It’s just next to the hut where you can use the facilities as well as have a chat with fellow hikers. It can get quite windy there and before I started to set up a tent, the ranger approached me. First, I thought that she wants to collect a ticket, but it wasn’t a case. Instead, she warned me that the day before, one of the hikers tried to set up a tent but the wind was so strong that the tent was blown away into the valley in a matter of seconds. The rather surprised hiker was forced to spend the night on the floor in a hut.

Tongariro National Park, New Zealand

Waihohonu Hut and Campsite – I had a booking there for the second night, but it took me only 2 hours to reach the place from Oturere. Therefore, I decided to spontaneously change the plans and push until the end of the trail. But again, if you want to take your time and not rush, then it’s a nice place to stay.

Pricing

Huts: 36 NZD per adult per night, 17 years old and under free (booking still required)

Campsites: 15 NZD per adult per night, 17 years old and under free (booking still required). Campers can use huts facilities (except for the beds obviously).

Tongariro National Park, New Zealand

Weather

It’s best to monitor the conditions on MetService. The weather can change quickly, and strong winds are known on this track due to exposed terrain. It’s also worth dropping by to DOC office and reconfirm weather conditions. I learned the importance of it on my own skin (more below)!

2, 3 or 4 days?

Many people keep asking how many days they should split the distance for. The track offers 3 huts and campsites on the way, however, if you decide to stay in all of them, you won’t hike for longer than 3-4 hours per day. That’s rather short for me. I initially planned to have a tough first day, spend the night at Otutere campsite and on the next day stop for the second night at Waihohonu campsite. After departing from Otutere early, I arrived Waihohonu only after 2 hours. It was 9 am, the weather was perfect, my level of energy high enough so I just decided to push till the end. I wasn’t the only person that changed the plans in this way.

Tongariro National Park, New Zealand

If you are reasonably fit and don’t mind walking over 20 km a day, do it in 2 days.

If you prefer to sleep longer, make picnics along the way and do side trips, do it in 3 days.

If you prefer to do all of the above plus read a book and take all the scenery really slow-paced, then 4 days is the answer.

Track details and profile

Distance: 43.1 km (loop)

Time: 2-4 days

Tongariro Elevation
www.doc.govt.nz

The track profile and other useful details can be found inside the Department of Conservation (DOC) brochure.

Stage 1 – From Whakapapa Village to Mangatepopo Hut and Campsite (2-3h, 9.4km)

The start of the hike took me… 3 days. I arrived at Whakapapa Village a day before and was welcomed by cold weather, fog and pouring rain. Not perfect conditions for the first overnight hike. I didn’t know what to do so I went to the Visitor Centre asking DOC staff for advice and they said that indeed it won’t be very enjoyable to walk out there. „If you have time, go to see Taupo and Rotorua first, and we will postpone your bookings by 3 days”. It was an excellent decision and I must say that the DOC staff is always very helpful and professional. In the end, it’s not only about covering the distance of 40+ km but actually seeing some landscape.

I came back 3 days later and that time the weather seemed to be more friendly. I left the car at the parking near the Visitor Centre and hit the track in the early morning. I was the only hiker walking the narrow path across huge wide spaces with the cone of Ngauruhoe appearing on my right side. After around 1 hour, I met the only hiker during that stage. The guy was walking with a backpack 3 times smaller than mine and he was actually doing Te Araroa Trail which is 3000 km route from the top of North Island to the bottom of South Island. What a badass.

Tongariro National Park, New Zealand

I don’t know if I was shocked after a short chat with another hiker or maybe my backpack was too heavy with all the unnecessary things I took (more likely), but I slipped on one of the big and wet stones, lost my balance and fell down on my face. Hiking poles didn’t help! Falling was quite straightforward, getting up with huge and heavy backpack not so much.

After around 2-2.5 hours I arrived at Mangatepopo Hut and here I realized that walking times provided by DOC are way overestimated (it is around 4h in track description). Refill your water bottle here if necessary, you will need for next, much more demanding stage.

Tongariro National Park, New Zealand

This stage is the least impressive, therefore if you doubt your fitness level, you can start the hike from Mangatepopo Road End and cut 9 km from your first day. You would need to arrange transport, as you will not complete the full loop.

Stage 2 – From Mangatepopo Hut to Oturere Hut (3.5 – 4h, 12km)

Here the most popular part of the hike known as Tongariro Alpine Crossing starts. Luckily, I was already on the way for over 2 hours so all the crowds doing the 1-day version of the hike were far ahead of me.

The track becomes wider and continues up the valley towards Mangatepopo Saddle. The wide valley is just impressive, and I seriously had the music theme from Lord of the Rings playing in my head.

Tongariro National Park, New Zealand

Climb to the Saddle is the most challenging part of the day and here backpack starts to be really heavy. It also becomes warmer and the sun starts to burn my skin. I knew I forgot something, and that something was sun cream. Luckily it didn’t take long until I saw a couple having a rest and being kind to save me from sunburns by sharing the cream. The climb continues up to the Red Crater where I took the long break to take in all the views. In clear weather, you can even see Mount Taranaki! Magnificent.

Tongariro National Park, New Zealand

Then the track goes down to Emerald Lakes. It’s a steep way down with plenty of small and slippery stones that proved to be challenging for a lot of tourists. My hiking poles proved to be very helpful to keep the balance. After descending, there is an option for 30min return side trip to Blue Lake which I took. It’s a sacred place for Maori and you must not touch the water. After that, I retrieved my steps and followed the track into Oturere Valley. Here I got the feeling like walking in the desert among lava forms. Ruapehu with its snowy peak is clearly visible on the horizon. After around 1 hour, I reached Oturere Hut and Campsite. If you desperately need a bath in ice-cold water, there is a waterfall close by (ask the ranger).

Tongariro Northern Circuit
Tongariro National Park, New Zealand

Stage 3 – From Oturere Hut and Campsite to Waihohonu Hut and Campsite (2-2.5h, 8.1 km)

The track continues for over 8 km through stream valleys and gravel fields. The morning fog made the atmosphere during the walk unique. On that day, there was a running event going on so I was passed by hundreds of runners. After around 2 hours I reached Waihohonu Hut, changed my initial plan of staying there overnight and continued until the track end.

Tongariro National Park, New Zealand

Stage 4 – From Waihohonu Hut and Campsite to Whakapapa Village (4-4.5h, 15.4 km)

The track follows Waihohonu Stream and climbs Tama Saddle. The area is known for strong winds. I experienced it on my skin, especially during a side trip to upper Tama Lake (1.5h return). Even though I left the backpack at the crossroad and continues just with a bottle of water, it was a steep incline and the wind made it very difficult to keep the balance. From the upper viewpoint, you get fine views over the lakes as well as Mount Ruapehu. After coming back to the crossroad and taking my backpack, it was another 2 hours to Whakapapa Village. I decided to add a bit more to the distance and check out Taranaki Falls as well. Don’t miss it!

Side trips

Blue Lake – Half an hour detour from the track junction nearby Emerald Lakes (along the Tongariro Alpine Crossing Track).

Tama Lakes – Two crates filled with water. It takes 15min return to Lower Tama and 1h return to Upper Lama. You can leave your backpack at the junction of the tracks and go light. Be careful of strong winds.

Tongariro National Park, New Zealand

Taranaki Falls Track – An alternative way to reach Whakapapa Village. Go down the steps to the base of the waterfall.

Mount Tongariro and Mount Ngauruhoe Summits – Technically, both summits can be climbed as a side trip. However, the route is not poled and the same as lakes, mountain’s summits are sacred for local Maori tribe and climbing is discouraged. I didn’t go to either of them and will not advertise this option.

Time to chill

It was wonderful 2 days in an out of this world landscape. When I reached parking, I was tired as hell. It’s a kind of physical exercise that consume your calories but build psychological strength and satisfaction. If I would need to select 3 places that I would like to visit again on North Island, Tongariro National Park would be one of them without a doubt!

Being a bit tired of big city life, I decided to spend another day in NZ closer to nature. Waking up early (probably jet-lag started to catch up on me) made it possible to board the first ferry of the day going to Rangitoto Island. 

Rangitoto is one of 50 volcanoes around Auckland, last time erupting around 600 years ago. It is still active and basically can erupt anytime. How fun for Aucklanders!

How to get to Rangitoto?

The connections between Auckland and surrounding islands are operated by Fullers and the return trip to Rangitoto lowered my budget by only 39 NZD. Not too bad for the whole day trip visiting two islands, isn’t it? The cruise takes just 25 minutes but what a scenic 25 minutes it is. You will pass by Auckland Port as well as fancy Davenport district with its Mount Victoria and historic reserve at Davenport.

Rangitoto

Hiking on Rangitoto Island

Once the boat arrived at the wharf, I and pretty much all the other passengers went on to climb the top of the Rangitoto volcano which stands 259m above the sea level. The climb is a too big word though, it’s rather a gentle walk up through lava fields that is 3.1 km long, with the only steep part at the very end (stairs). The effort was rewarded with the view of the crater rim and, once at to the higher viewpoint, your eyes open to the sublime panorama of Auckland and Hauraki Gulf.

Along the path to the top (or when going back down), you can make a small 15 minutes detour to explore lava caves. If you like dark, wet and insects’ friendly places – you just found one.

After taking a couple of panoramic pictures, I decided to take another way down towards crossroads with Summit Rd, then turn right and go to the beginning of Boulder Wreck Bay Track. Here I understood why everyone suggests wearing sturdy shoes on Rangitoto. I was walking on lava rocks. Big. Sharp. Getting hotter and hotter with every minute. My sports shoes tackled the summit without an issue, but here the discomfort and (shortly after) pain became significant. 

The track is about 45 minutes one way until you reach the bay that is now the graveyard of over 10 vessels that were parked here for disposal between 1887 and 1947. Some parts are well visible, especially during low tide.

After another 45 minutes back to the main road, it was time to change the scenery and cross the bridge to much grassier Motutapu Island.

Hiking on Motutapu Island

There are several tracks on the island (including 4.5 h loop track) passing by remains of island’s rich history from the times when there were Maori settlements, Victorian picnic parties or WWII military base. However, having covered a couple of kilometres on Rangitoto already and being short on time before the last ferry back to Auckland, I decided to walk to Emu Point and back. After all, missing the last ferry and being stranded on the island without food and water didn’t sound like a good idea.

What a change after rough rocks at Rangitoto! Here you are walking through grassland that is mainly a playground for bulls so the only thing you must take care of is not to step into their fresh poo. Views are particularly nice with Rangitoto Island on one side, the panorama of Auckland on another and plenty of yachts in between.

Motutapu Island

If you wish to extend your adventure, it’s possible to camp overnight at Home Bay. Home Bay is also a place where you can catch the ferry back to Auckland (less frequent than from Rangitoto, check the schedule first). In my case, I just retrieved my steps and came back all the way to the wharf on Rangitoto Island following very scenic and even very rocky Coastal Track (around 2 hours). Rocks were not the only bad news. Another one was that I was running low on drinking water so during the last hours I had to deal without it.

If you still have some time before the departure, you can check the small Bach Museum. Baches are a typical kiwi style summer houses built here. Quite cool to have a summer house on the active volcano and just drop by from time to time from Auckland! This is also probably the only place on the island where you can buy drinking water. A small bottle cost 2 NZD but I was seriously so thirsty that I would have probably paid 20 NZD if necessary. Such a relief!

Is it worth visiting Rangitoto and Motutapu Islands?

I can say it was an awesome second day in New Zealand. Both islands are full of incredible scenery and even though they are so close to Auckland, it feels to be miles away. The trip taught me important kiwi lessons, that stayed in my mind for next travels.

Firstly, if you are uncertain about how hiking track looks like, always prepare for the worst and take sturdy shoes

Secondly, don’t underestimate your water supplies. Taking too much and carrying it in your backpack is still better than walking in the heat without a single drop.

Finally, always use sun cream! This part I learned after being back at the hostel. Probably I looked like a typical tourist on the first days in New Zealand. Well, true story. New Zealand’s sun can be very deceptive. Even though it doesn’t look very sunny, you can still get badly burned.