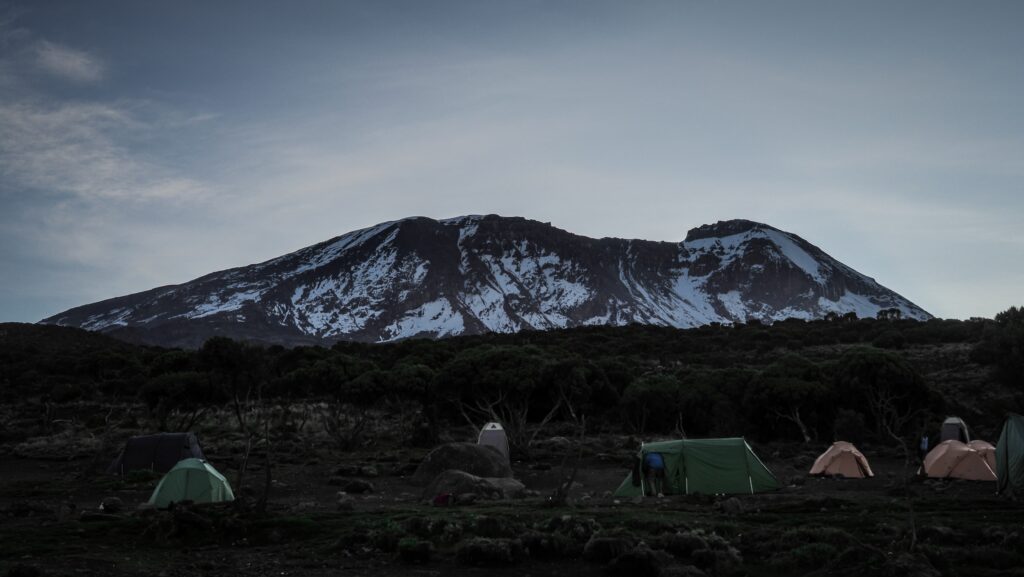
Rising proudly above the plains of Tanzania, Mount Kilimanjaro is the highest peak in Africa. This iconic mountain, crowned with snow despite its equatorial location, is a beacon for trekkers worldwide.
Kilimanjaro offers a journey through a kaleidoscope of landscapes: lush rainforests teeming with life, moorlands dotted with otherworldly plants, arid alpine deserts, and finally the icy summit at the Uhuru Peak. Unlike many high-altitude climbs, Kilimanjaro doesn’t require technical mountaineering skills, making it an accessible challenge for those with determination and a taste for adventure.
The history of Kilimanjaro
Mount Kilimanjaro was formed by powerful geological forces deep within the Earth, shaped over millions of years through volcanic activity. It sits in a region of East Africa known as the Great Rift Valley, where tectonic plates are slowly pulling apart. This shifting of the Earth’s crust created cracks and weaknesses, allowing magma to rise and build the towering mountain we see today.
Kilimanjaro is actually made up of three distinct volcanic cones: Kibo, Mawenzi, and Shira. Shira is the oldest and has mostly eroded, forming a plateau. Mawenzi, with its jagged peaks, is the second-highest and no longer active. Kibo, the central and tallest cone, is where Uhuru Peak is located. It’s the youngest of the three and still considered dormant, though it hasn’t erupted in thousands of years.
Over time, repeated eruptions built up layer upon layer of lava and ash, sculpting the massive stratovolcano. Glacial activity and erosion then helped carve the mountain’s current shape, leaving behind its iconic snow-capped summit and rugged terrain.
Long before it became a world-renowned trekking destination, it held deep cultural and spiritual significance for the indigenous Chagga people who live on its lower slopes. They regarded it with reverence, seeing it as a sacred place tied to myths, ancestral stories, and natural power.
The mountain remained largely a mystery to the outside world until the 19th century, when European explorers and missionaries began documenting its snow-capped peak, something that seemed impossible so close to the equator. One of the first widely noted accounts came from German missionary Johannes Rebmann in 1848, whose reports of snow were initially met with scepticism in Europe.
During the colonial era, Kilimanjaro fell under German control as part of German East Africa, and later came under British rule after World War I. In the early 20th century, it became a symbol of exploration and imperial ambition, with the first recorded successful summit made by Hans Meyer and Ludwig Purtscheller in 1889. Their expedition opened the door for future climbers and sparked interest in the mountain worldwide.
In 1961, just before Tanzania gained independence, Kilimanjaro took on a new symbolic role. A torch was carried to the summit and lit there as a gesture of freedom and unity, representing a new dawn for the nation. Today, the mountain is not only a national treasure but also a UNESCO World Heritage Site, drawing trekkers, scientists, and conservationists who continue to study and protect its unique ecosystems.
Routes
Mount Kilimanjaro offers several routes to the summit, each with its own character, scenery, and level of difficulty. Choosing the right one depends on your fitness, experience, and how much time you can commit.
Marangu Route (5–6 days)
Often called the “Coca-Cola” route, this is the only path with hut accommodations instead of tents. It’s the shortest and has a steady, direct trail, but that also means less time to adjust to the altitude, making it one of the routes with a lower success rate.
- Pros: Comfortable huts, easier logistics
- Cons: More crowded, limited scenery variety (same trail up and down)
Machame Route (6–7 days)
Known as the “Whiskey” route, it’s one of the most popular choices. The trail is more scenic and diverse than Marangu, passing through rainforest, moorland, and alpine desert. It allows better acclimatisation with its “climb high, sleep low” profile.
That route was the one that I chose, and I decided on a 6-day itinerary. If I had to do it again, I would definitely go for a 7-day version to give myself more time for acclimatisation and avoid potential problems on the summit day. However, the ability to acclimatise is always individual.
- Pros: Stunning views, good acclimatisation (I would choose the 7-day variant)
- Cons: Steeper and more physically demanding
Lemosho Route (7–8 days)
This is considered one of the best all-around routes, offering a scenic, less crowded approach with a higher success rate due to its longer acclimatisation period. It begins on the western side of the mountain and merges with the Machame Route later on.
- Pros: Excellent acclimatisation, remote and scenic start
- Cons: Slightly more expensive due to longer duration
Rongai Route (6–7 days)
Approaching from the north near the Kenyan border, this trail is drier and offers a quieter, less-travelled path. It’s great during the rainy season since it’s on the mountain’s more sheltered side.
- Pros: Less crowded, good for wet-season climbs
- Cons: Less dramatic scenery compared to western routes
Northern Circuit (8–9 days)
This is the longest route, circling the mountain’s northern slopes. Its extended duration offers the best chance for acclimatisation and solitude.
- Pros: Highest success rate, remote and uncrowded
- Cons: Longest and often most expensive
Umbwe Route (5–6 days)
A steep and direct route is best suited for experienced trekkers. It’s not recommended for most climbers due to the fast ascent and poor acclimatisation profile.
- Pros: Challenging and quiet
- Cons: Low success rate due to rapid altitude gain
Which agency to choose?
Climbing Mount Kilimanjaro requires you to go with a licensed tour operator, and you must be accompanied by a certified guide. This is a regulation enforced by the Tanzanian government to ensure climber safety and environmental protection. Solo, unguided treks are not allowed.
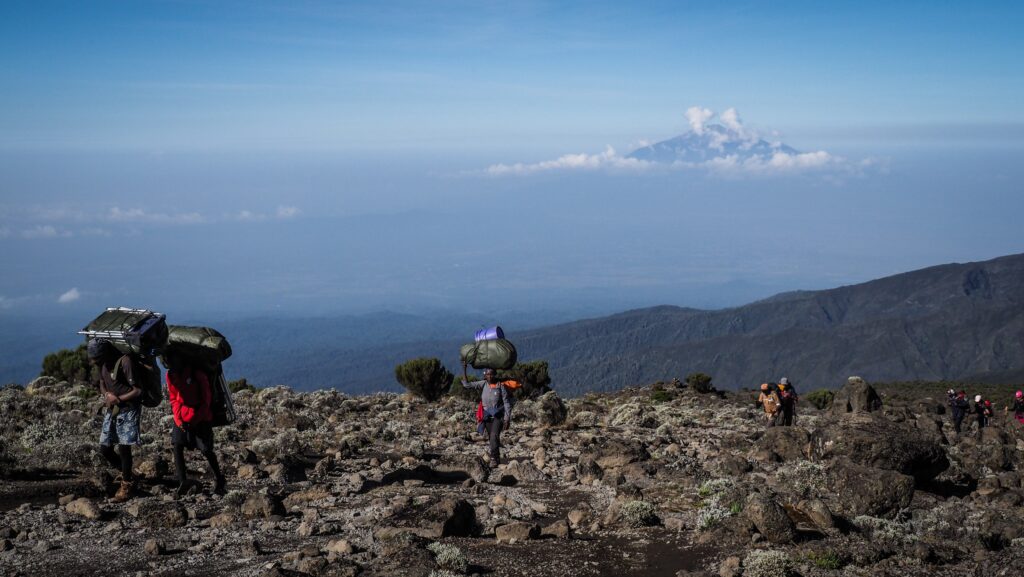
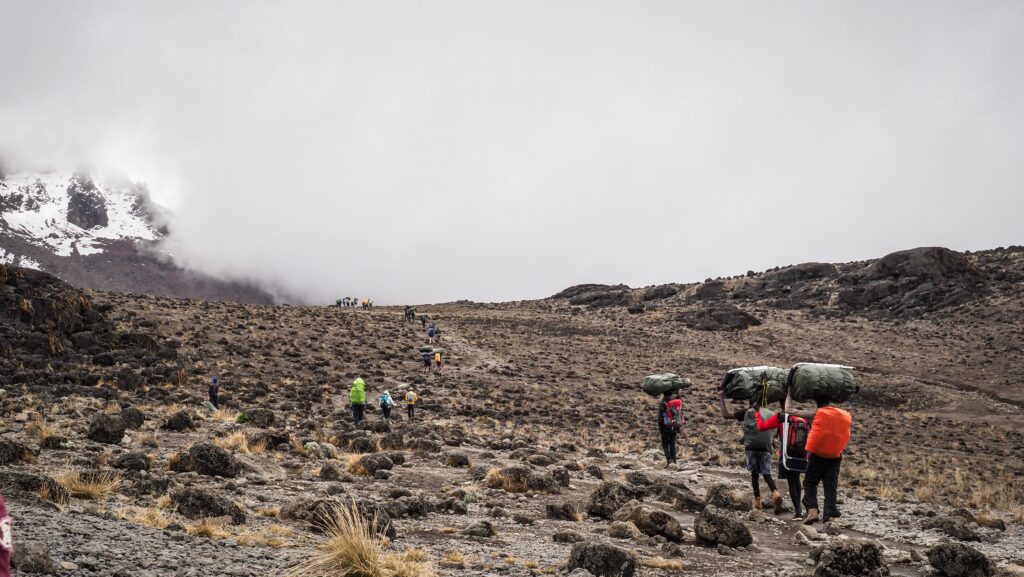
Guides are trained in recognising altitude sickness, emergency procedures, and route logistics. Along with guides, most treks include porters, who carry gear and supplies, and a cook, who prepares meals on the mountain. This team makes the climb more manageable and increases your chances of reaching the summit.
- Choose a company that is officially registered with the Kilimanjaro National Park authorities and follows local labour and safety laws. Check if the porter will carry a portable oxygen cylinder in case you get into trouble.
- Look for companies that employ certified guides with strong knowledge of first aid, altitude safety, and good reviews from past climbers.
- Support companies that are part of or recognised by organisations like KPAP (Kilimanjaro Porters Assistance Project), which ensures fair wages and treatment for porters.
- Beware of ultra-cheap tours as these often cut corners on safety, food, or porter welfare. A mid-range to premium tour might cost more, but it usually includes better equipment, safer practices, and better success rates.
- Read recent reviews, paying attention to how the company handles altitude sickness, emergencies, and client care. Look for companies with a high summit success rate and clear emergency protocols.
After quite a long research, I decided to climb Kilimanjaro as well as do a 6-day safari with Kilinge Adventures, which is based in Moshi. The contact with Thomas (the owner) on WhatsApp was very easy, and once I arrived in Moshi, he, together with the guide, came over to my accommodation for a briefing.
I paid 1400 USD for a 6-day variant of the Machame Route. Overall, the service provided was good, and I reached the summit, although on the summit day, I suffered due to altitude sickness, and I had the feeling that more could have been done to monitor my health. For example, the guide was not equipped with a device to check my pulse rate and level of oxygen, which I saw that other guides were doing with their clients.
Costs of climbing Kilimanjaro
Climbing Mount Kilimanjaro is a serious adventure, and it comes with a price tag to match. The total cost can vary widely, depending on the route, tour operator, number of days, and the level of service you choose.
Typical price range (per person):
- Budget climb: $1,500 – $2,000
- Mid-range climb: $2,000 – $3,500
- High-end climb: $3,500 – $6,000+
Here’s what you’re paying for:
- Park fees (a big chunk—$800+ per person for a 6–7 day trek)
- Guide, porter, and cook wages
- Camping equipment or hut accommodation
- Food, water, and logistics on the mountain
- Transport to and from the trailhead
Cheaper trips often mean fewer meals, overloaded porters, or less experienced guides, so it’s smart to strike a balance between affordability and reliability.
Tipping culture
Tipping is expected and considered a standard part of the climb. Your guide and support crew work hard, often in tough conditions, to help you reach the summit safely and comfortably. Tips are a major part of their income. The best is the ask your agency and make it clear what is expected, but also don’t let it discourage you from climbing.
To be honest, I didn’t give as high tip as was expected from me, but I clearly stated that this is the maximum that I can calculate into my budget, so it was either that or nothing.
Typical tipping breakdown (per group, per day):
- Lead guide: $20–30
- Assistant guide: $15–25
- Cook: $10–15
- Porter: $5–10 each
For a 7-day trek, a group of 2–4 people might tip anywhere from 300 to 500 USD per climber in total.
Tips are usually pooled and distributed on the last day, often during a ceremony. In my case, I handed over the amount to my lead guide and sent him the message on WhatsApp on how to distribute it between team members. It doesn’t matter if you give dollars or simply withdraw local currency from an ATM.
Additional costs
When budgeting for Kilimanjaro, don’t forget to factor in:
- Flights
- Travel insurance (must include high-altitude trekking)
- Gear rental or purchase
- Medications
- Visa fees and pre-/post-climb accommodations
The experience is a big investment, but for many, it’s a once-in-a-lifetime journey that’s well worth the cost. From the perspective of time, I can definitely say that I don’t regret it!
The best time to climb
The best time to climb Mount Kilimanjaro is during its two dry seasons, when the weather is generally more stable and visibility is at its best. These periods fall between January to mid-March and June to October.
The January to March window tends to be a bit quieter on the trails, with fewer climbers and cooler temperatures at the summit. It’s a great time for those seeking solitude and crisp, clear mornings, though occasional afternoon snow can fall at higher elevations.
The June to October season is the most popular due to its dry conditions and warmer days, especially during the mid-year holidays. Skies are usually clear, offering spectacular views, but this also means more people on the mountain.
Avoid the long rainy season (March to May) and the short rainy season (November) if possible, as trails can become slippery, clouds may block the views, and summit attempts are more challenging in wet conditions.

What to pack?
Packing smartly for a Kilimanjaro climb is key to staying comfortable, safe, and successful on your journey. Since you’ll be trekking through several climate zones, from humid rainforest to arctic-like summit conditions, you’ll need to be prepared for a wide range of weather.
All necessary equipment can be rented in Moshi, although I would recommend taking your own sleeping bag, which you trust, as there is nothing worse than being cold in the night. The weather is very changeable, and most likely you will get wet. Always keep another set of dry clothes in a waterproof place. If your things get wet, it may not be easy to dry them along the way.
I rented a few things from Gilmans Outdoor Store, and the quality was excellent.
Clothing
Base layers:
- Moisture-wicking thermal tops and bottoms (to keep sweat off your skin)
- Breathable underwear and hiking socks
Mid layers:
- Fleece or insulated jacket for warmth
- Long-sleeve shirts and trekking pants
Outer layers:
- Waterproof jacket and pants (Gore-Tex or similar)
- Down or synthetic puffy jacket for summit night
Accessories:
- Warm hat and sun hat
- Gloves: one lightweight pair and one insulated, waterproof pair
- Neck gaiter or buff for wind and dust
- Sunglasses with UV protection
Footwear
- Sturdy, broken-in hiking boots (waterproof)
- Comfortable camp shoes or sandals
Gear
- A durable backpack (30–40L) for your daily essentials
- A large duffel bag or backpack (porters will carry this)
- Sleeping bag (rated for cold temperatures, at least -10°C)
- Trekking poles (helpful for balance and reducing strain)
- Headlamp with extra batteries (essential for summit night)
- Water bottles and/or hydration bladder (minimum 3L capacity)
- Dry bags or plastic zip bags (to protect electronics and clothing from moisture)
Toiletries & Health
- Sunscreen and lip balm with SPF
- Wet wipes and hand sanitiser
- Toothbrush, toothpaste, and biodegradable soap
- Personal medications, altitude sickness meds (consult your doctor)
- First aid essentials: blister pads, band-aids, painkillers, etc.
- Fingertip pulse oximeter
Others
- Power bank for charging devices
- Snacks or energy bars for an extra boost
- Lightweight towel
- Travel journal or book for downtime
- Small binoculars or a camera
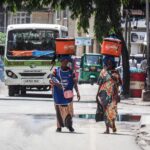
How to get to Moshi?
By Air
The nearest airport is Kilimanjaro International Airport (JRO), located about 40 km from Moshi. It serves international and domestic flights.
Taxi/Private Transfer from the airport to town takes 45 minutes and costs about $30-$50. Alternatively, some hotels and tour companies offer shared transfers (~$10-$20) or just take a local tuk-tuk and negotiate the price.
You can also fly into Julius Nyerere International Airport (DAR) in Dar es Salaam or Abeid Amani Karume Airport (ZNZ) in Zanzibar and take a domestic flight to JRO or Arusha.
By Road
From Arusha (80 km, 1.5-2 hours) – Buses, shared taxis, and private transfers run frequently.
From Dar es Salaam (500 km, 8-10 hours) – Luxury buses like Kilimanjaro Express or Dar Express offer comfortable rides for 15-20 USD.
From Nairobi, Kenya (350 km, 6-7 hours) – Shuttle services run daily, costing about 30 USD. Border crossing at Namanga is required.
By Train
Tanzania’s rail network is limited, but there is a train from Dar es Salaam to Moshi (though infrequent and slow). Buses are a better option.
Where to stay in Moshi?
I recommend Karibu Africa House and The Better Inn. Both places offer good quality at an affordable price, and they also offer day trips to Lake Chala or Marangu, but Karibu Africa House is significantly cheaper in that aspect.
My experience on the 6-day Machame Route
Day 0: Briefing in Moshi
Organisational day. First, I stopped at Gilmans Outdoor Store to rent some stuff for the hike: fleece, rain jacket, hiking poles, gloves and a day backpack. The quality of the items was really good, although the price wasn’t. If you don’t mind paying, you can get everything you need in Moshi, but in general, I would recommend taking your own equipment.
Then, I went to the supermarket to buy some snacks, chocolate and energy bars. Not too many, as it was clearly communicated that all meals are included in the price of the hike and there will be a cook preparing them daily.
When I came back to my accommodation, the landlady knocked on my door and informed me that my guide had arrived. It was Thomas (the owner of the Kilinge Adventures) and my mountain guide, Tayson. He came into my room to check the equipment and recommended renting one more warm jacket (which later on proved to be a good decision, even though at first I was sceptical about it).
I finished packing my backpack and was waiting in excitement for the next day!
Day 1: Machame Gate to Machame Camp (10,3 km, 1218 m up)
I had breakfast at my accommodation and was then picked up by the guide with only a small delay. Nice surprise considering that the services in Tanzania aren’t exactly punctual! We stopped at one more location to rent a rain poncho and two plastic bottles. The prices they have in Moshi are simply ridiculous. You can buy your own poncho and water bottles for the same price or even cheaper in Europe than renting them for a few days here. But well, they are taking all the advantage they can from having Kilimanjaro.
Then, we set off to Machame Gate. Once we arrived, it took forever to handle all the paperwork. I got my lunchbox even though I was not hungry at all, as it was too early. One of the monkeys stole my yoghurt, but maybe it was for the better… Better not to take any risks before such a long hike!
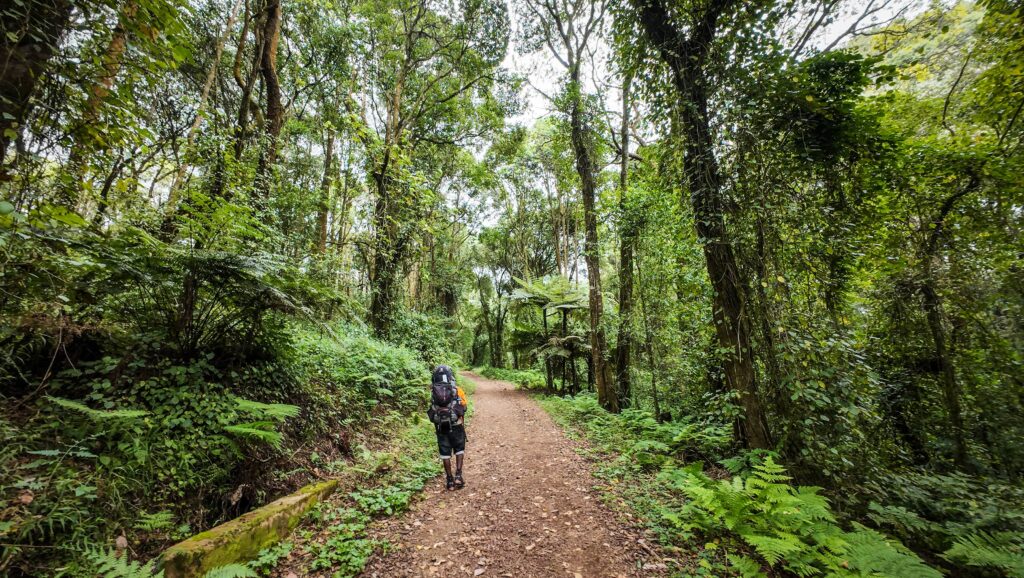
Finally, Tayson asked me to sign some papers, and it gave me the hope that we were about to start the real hike… but nope. I was slowly getting more and more annoyed, and probably after another 45 minutes of waiting, we went through the security gate and entered the forest. The security gate was a real deal, and they even asked me to open my backpack to see if I was carrying a drone or other prohibited items.
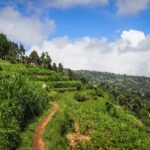
The first section to Machame camp was led through a scenic mossy forest, and it reminded me of the area at Mount Taranaki in New Zealand. Unfortunately, it started raining, and I had to wear my poncho for the first time.
When we arrived at the camp, it was foggy, wet and cold. Not exactly how I was imagining the first 2-3 days of the hike. I thought it would be rather warm and pleasant, especially at lower elevations! I had to wait a bit for my tent to be ready, but then I was quite impressed. There was one section for sleeping and another one with a table and a chair for eating meals and relaxing. Pretty cool!
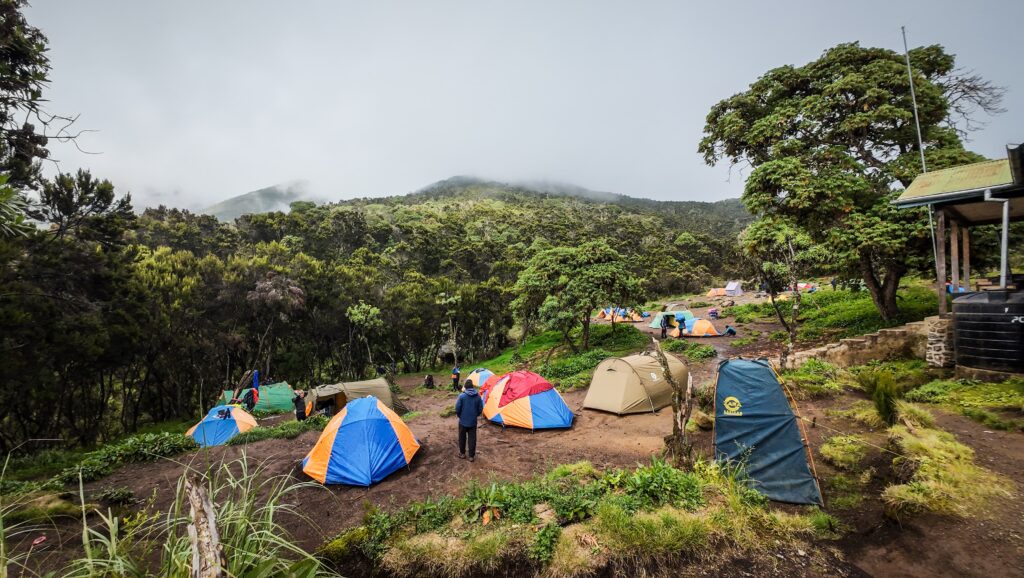
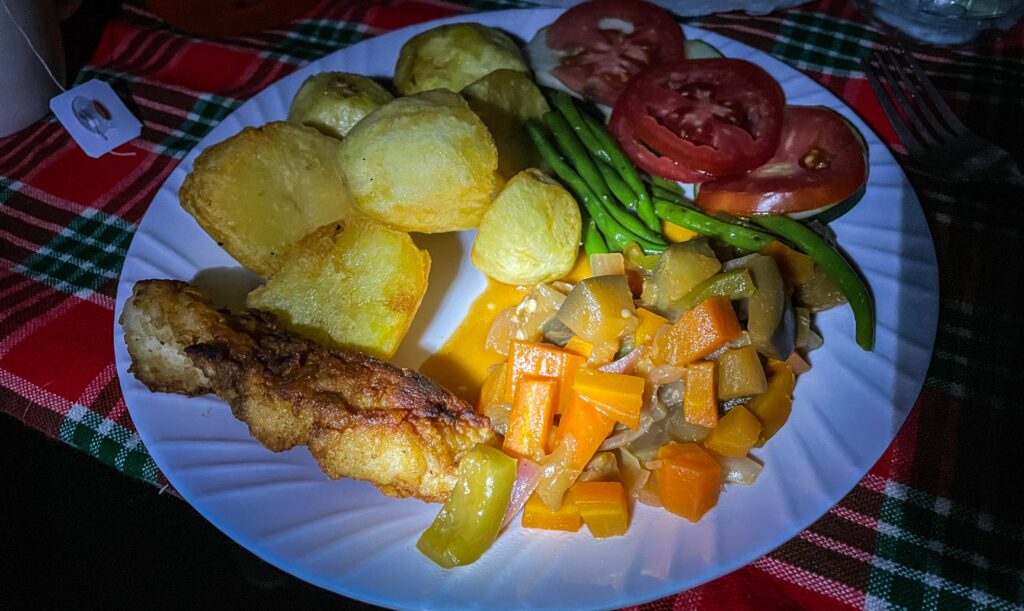
The first dinner was yummy, and our cook served fried potatoes with fried fish. I was also given a big bottle of hot water and could choose any drink I wanted: tea, cocoa, coffee, etc.
Apparently, I was added to the group of 10 other hikers, but it was only theoretical as I didn’t have any interaction with them for most of the time. I didn’t bother too much as I wanted to enjoy my experience in nature rather than forcing myself to socialise with much older folks who were probably from the UK or the US.
The first night was okayish, but I started taking preventive medication for altitude sickness, so I had to get out of the sleeping bag to pee quite frequently.
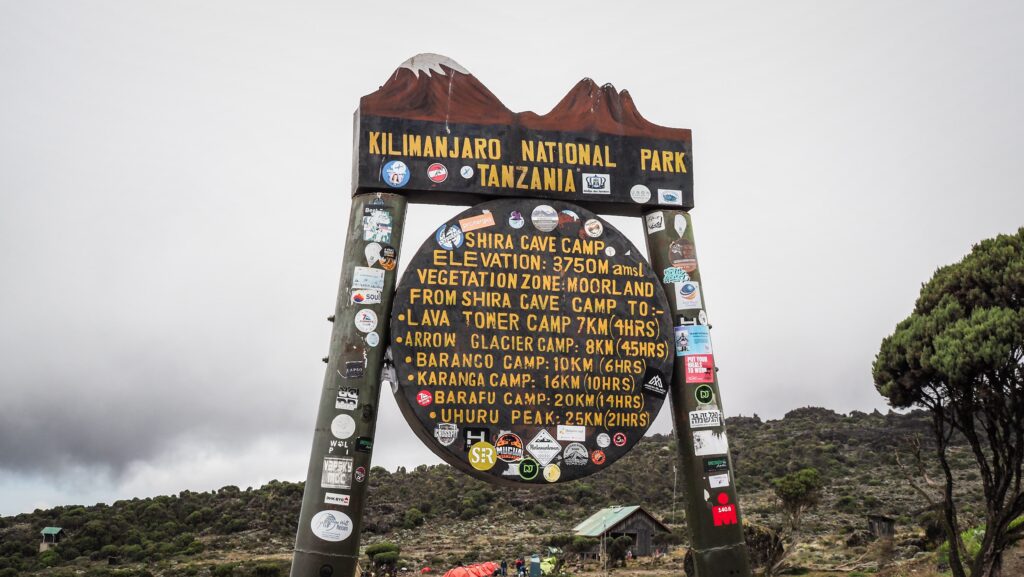
Day 2: Machame Camp to Shira Cave (4,8 km, 863 m up, 40 m down)
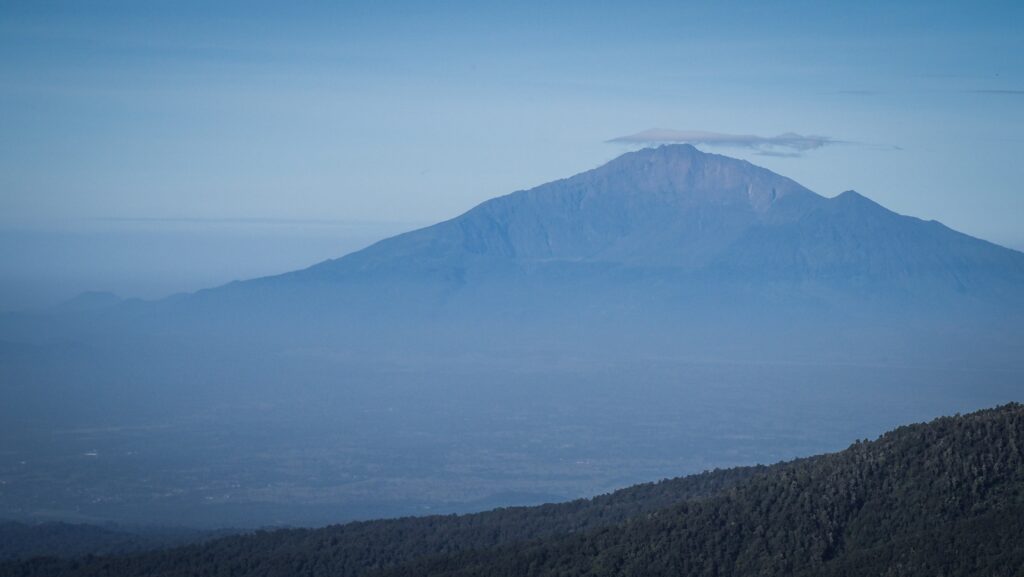
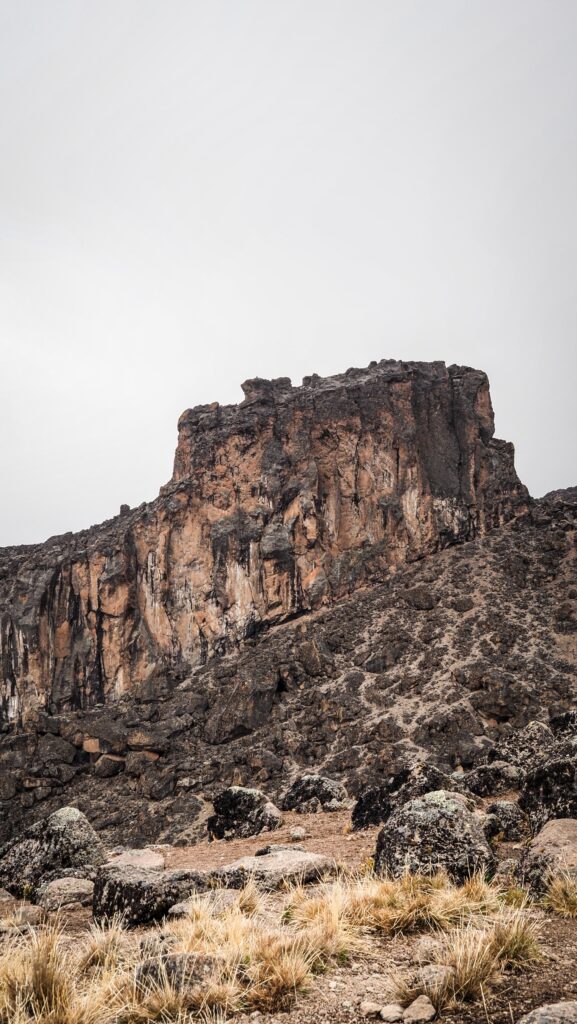
Easy day. The weather in the morning was good, and there were nice views of Mount Meru in the distance. The path was climbing up steadily, and it was not too challenging. The last section was more rocky, but still, nothing serious.
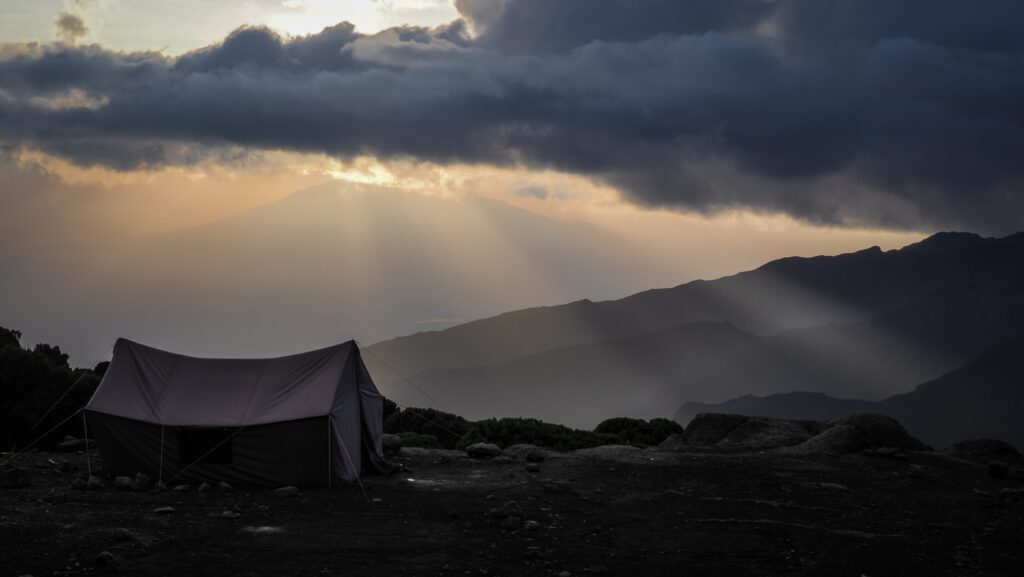
We arrived at the camp very early. I was walking around, but every now and then, the clouds were rolling in, so the conditions weren’t optimal for hanging out outside. At sunset, it improved a bit, and the clouds cleared. I could see the snowy summit of Kilimanjaro in the distance.
Today I realised that the portable toilets that were set near my tent were not for common use but for the rest of my group, as they paid extra for them. LOL. Good to know that I took a shit there twice the day before, and oh damn, it was a smelly one. What do people have in their minds that they pay extra for portable toilets, and they actually hire an extra porter to carry one? The public ones are just fine. I mean, it is just a stinky hole in the ground, but what would you expect on the mountain?

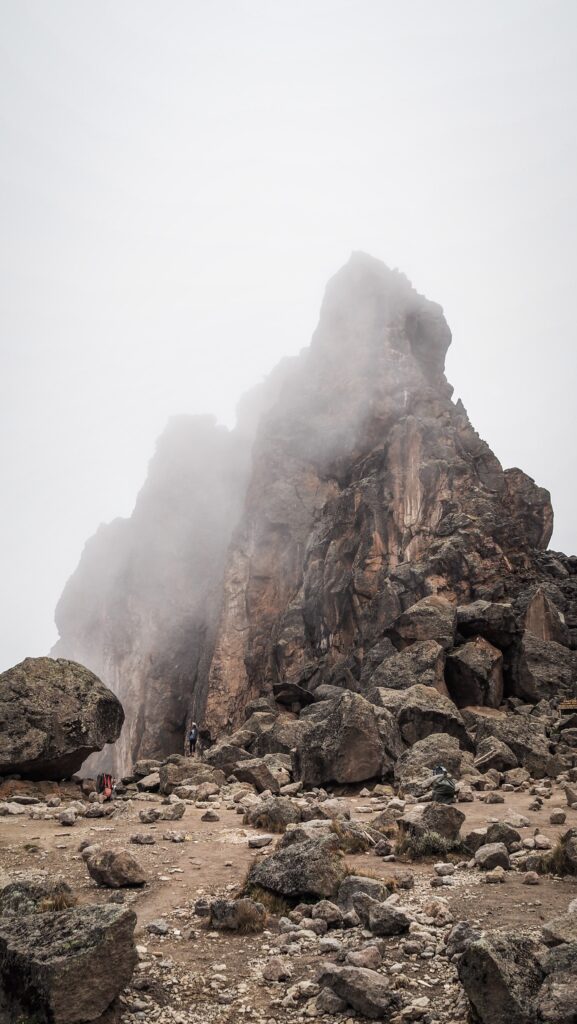
Day 3: Shira Cave to Barranco Camp (9,7 km, 806 m up, 667 m down)
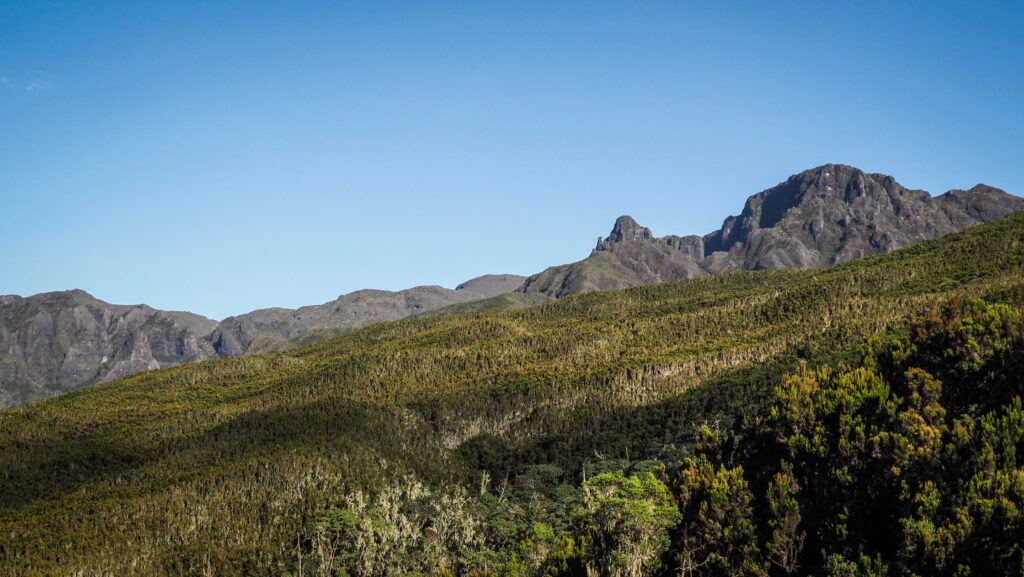
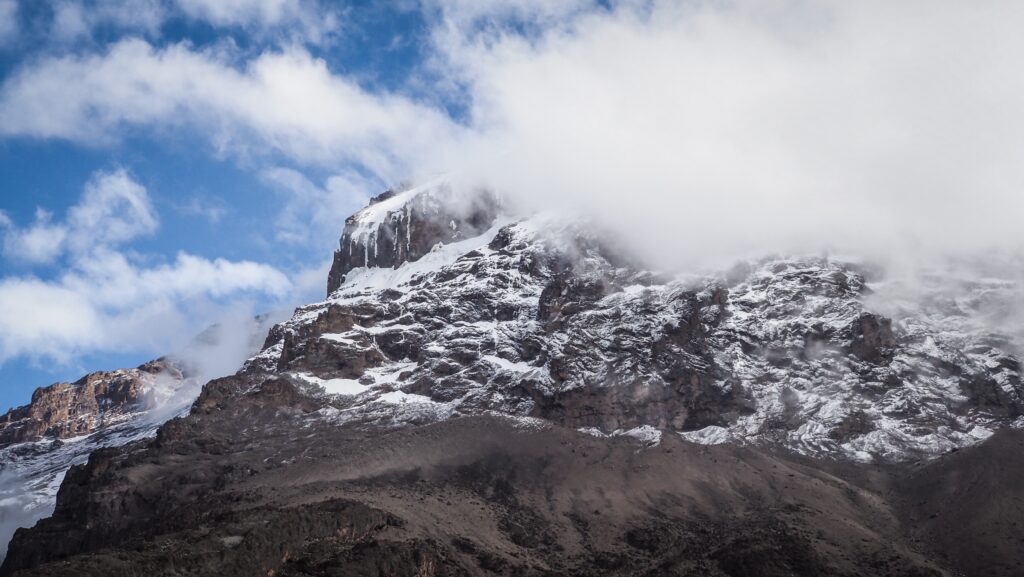
Beautiful hike, although again the weather was difficult. The first section of the Lava Tower had amazing views of the mountain at all times. Kilimanjaro looked pretty wide from that perspective, and there was a lot of snow near its top.
While we were approaching the Lava Tower, the weather was getting worse. It seems to be a standard on that mountain after noon. Luckily, instead of waiting for lunch, we just decided to make a short stop for snacks and then continued the way towards Barranco Camp.
I had some stomach problems that started the previous night, and I suspected that the vegetables served for dinner were to blame. It made me feel uncomfortable, and I had to make unwanted stops. I decided to start taking antibiotics, even though I knew that they could harm my body during the upcoming summit push.
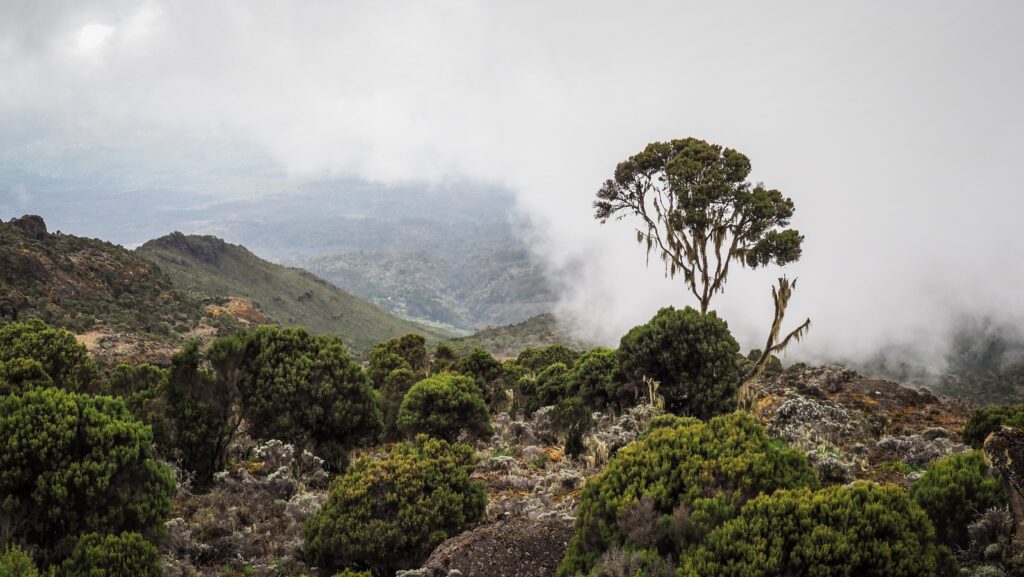
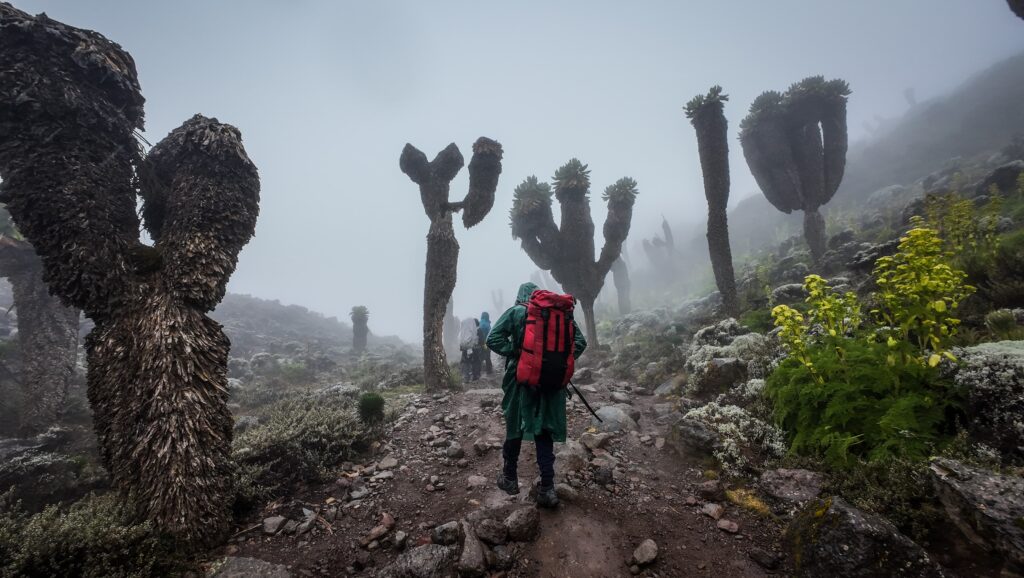
Then, it started raining, which was a pity as the way down to the camp was very scenic, full of unique trees that I could see so many times in the pictures and brochures about Kilimanjaro. Those are giant groundsel that are often mistaken for palm trees due to their unusual appearance. These plants, scientifically known as Dendrosenecio kilimanjari, have thick, weathered stems topped with large, succulent rosettes, resembling a cross between a Joshua tree and a pineapple.
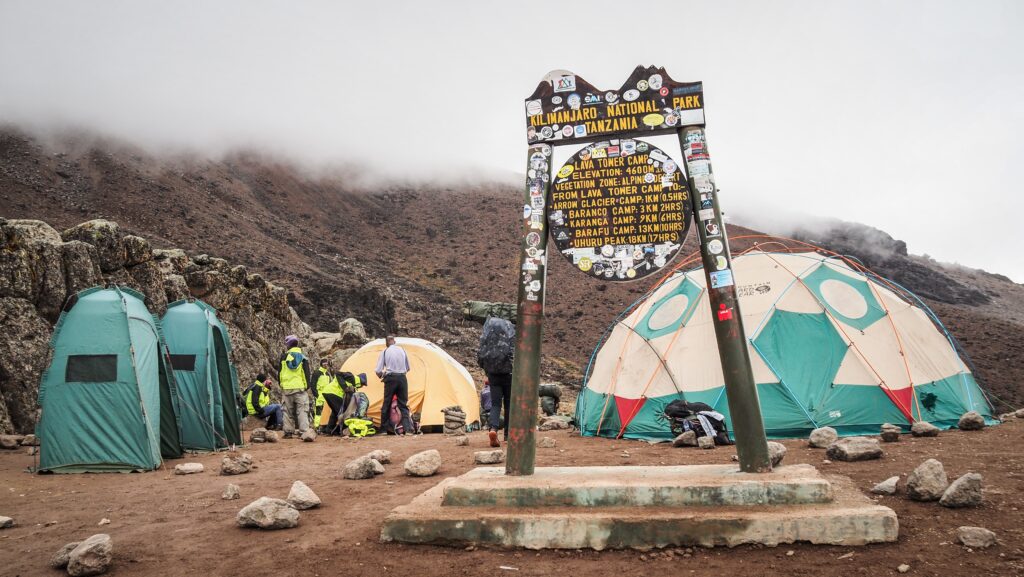
Once we arrived at the camp, I registered in the book and waited for a while for the tent to be set up. Then, I jumped inside and changed all my clothes to dry ones. The cook surprised me with freshly made popcorn, which I enjoyed sitting on the chair in front of the tent with an American girl of Vietnamese origin whom I had met the day before. This was also the place where we had our dinner. This time I decided not to touch the vegetables!
Day 4: Barranco Camp to Barafu Camp (7,8 km, 965 m up, 305 m down)
The day when the problems started.
The first part of the hike was relatively good. We arrived at Karanga Camp after climbing the steep Barranco Wall. In Karanga, it was foggy, and I started feeling so-so, but I made a stop for snacks. Then, we started climbing higher and higher, and I was feeling worse and worse. The altitude sickness symptoms kicked in, and once I finally made it to Barafu Camp, I was completely exhausted.
I went inside the tent and waited there throughout the very bad weather, while it was even snowing! Then, the cook served me dinner, but I didn’t have any appetite, and I was forcing myself to eat anything. Even going out of the tent to pee seemed to be too tiring for me. I knew what was going on as I experienced altitude problems in Nepal a year ago. I reported the situation to Tyson, and he said that I had to try to sleep and we would evaluate the situation before leaving the camp for the summit push, so around 1 AM. Unfortunately, I wasn’t able to sleep at all.
If it had been my choice, instead of going to the summit, I would have gone back to Barranco Camp for one more acclimatisation day and only then pushed further to the summit. But if you climb Kilimanjaro, you have to decide how many days you want to do it; therefore, any flexibility is gone. You can either climb it in the given window or give up. No space for plan adjustments.
Day 5: Barafu Camp to Uhuru Peak to Mweka Camp (16,1 km, 1251 m up, 2802 m down)
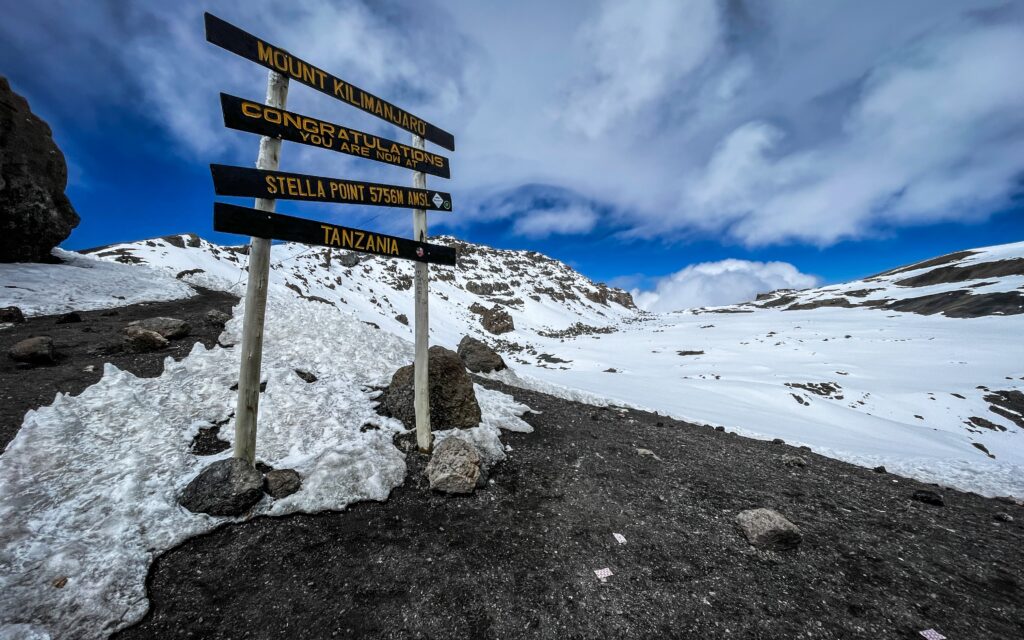
Besides drinking something warm in the morning, I didn’t eat anything more than some biscuits. We set off at 1 AM, and I was going slowly. I had to stop many times to catch my breath. It was pitch black, so I could only see the lights of people who were some meters ahead of me. Unfortunately, I also saw some people going back as they also couldn’t continue due to similar problems to mine. But I was fighting, even though I knew I was taking a risk. If it had been a solo trip, I would have certainly walked down a bit to acclimate better. Such an option isn’t really an option on a guided hike like that one, though. At sunrise, instead of being at the summit as it was planned, I was not even at Stella Point, which is a major milestone at 5,756 meters. The point was named after Estella Latham, the first woman to ever reach this mark in 1925.
Tyson was checking on me very often, and at some point, he suggested that it’s time to turn back. The mountain would still be there, and pushing myself to the limits was too risky. I knew he was right, but I am stubborn by nature and didn’t want to give up just yet. The oxygen level was very low, and we made a break at Stella Point to have snacks and drink glucose.
My guide was very strict, and he told me that I had to descend. But there we were, 20 minutes walk from the summit. I could see it. I had so many thoughts in my mind, and I really didn’t know what to do, but I told Tyson that I was taking all responsibility for my actions and I would continue walking to the summit. He wasn’t happy at all!
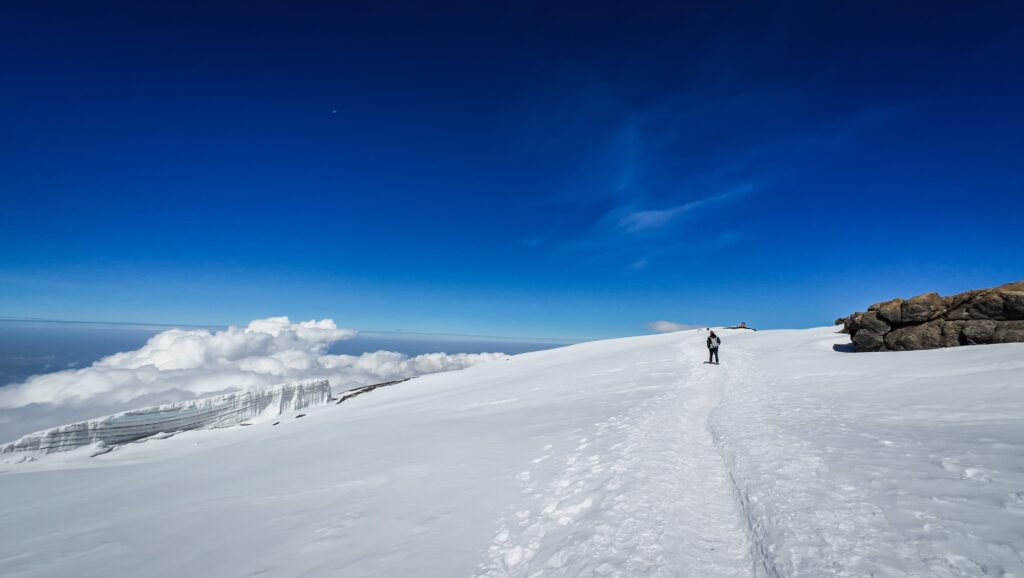
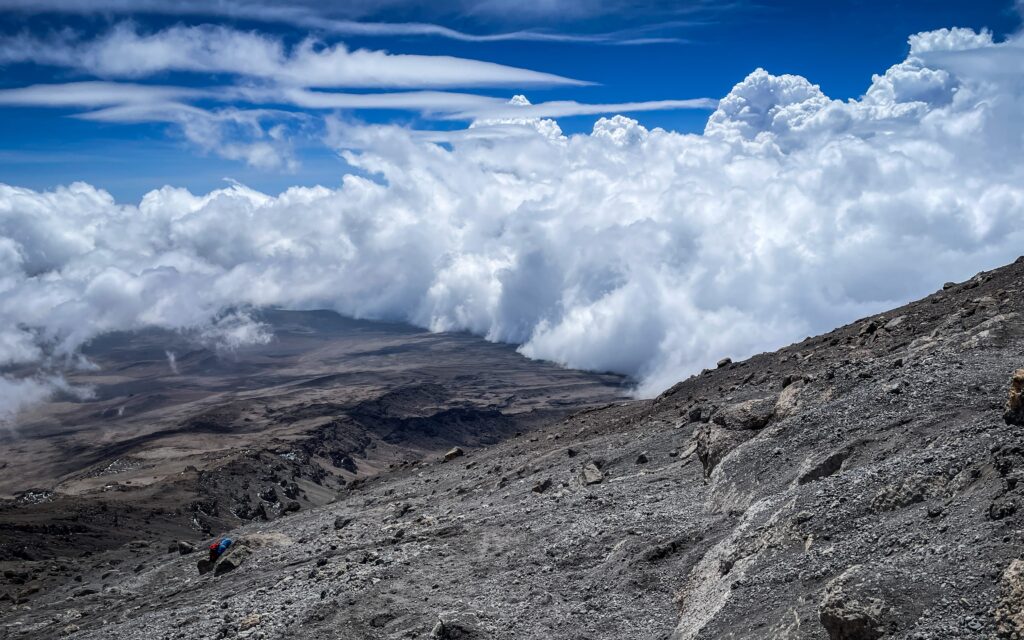
I was walking slowly, even though the elevation gain was very little compared to what we did the night before. The views all around were truly breathtaking, and I could see the crater on the right and the leftovers of the glacier on the left.
Finally, I reached the summit. I didn’t even have the energy to celebrate. After taking a few pictures, I started something that I should have done a long time ago – descent to Barafu Camp.

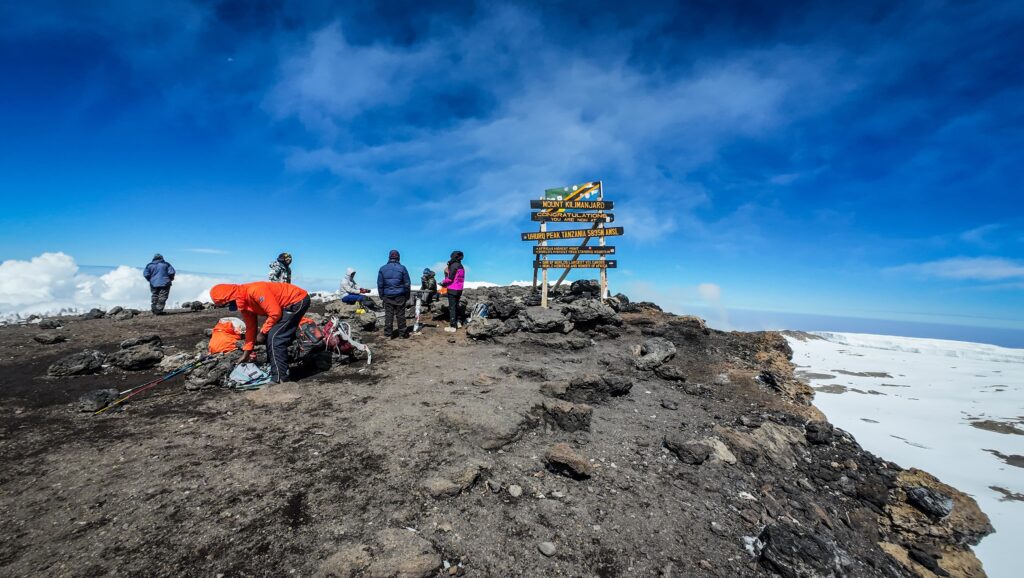
My legs were incredibly weak, and I almost fell down a few times. Due to a low level of oxygen in my body, I felt like I had been drinking a few beers, and I was dizzy. We passed Stella Point and then took a shortcut down, which was incredibly difficult as it was steep and full of loose stones. I fell down once or twice, and I was incredibly sleepy. During breaks, I had the feeling that I had to give up, and I would not be able to make more steps without some rest and sleep. Tayson kept motivating me, and luckily, it worked.
We made it to the camp, and I immediately jumped into my tent, lay down and fell asleep. The cook brought me food, but I wasn’t able to eat anything. Apparently, I asked Tyson if I could get a moto-taxi down to another camp. LOL. It only proved how destroyed and delusional I was because I had no idea how I could ask this kind of stupid question. There was no common sense in my way of thinking. I had the feeling that I had a fever, but it was probably just a sunburn on my face, as in all that mess, I had forgotten to apply sun cream.
I found leftovers of strength, or maybe I just didn’t have another option, and left the tent for over 2 hours of walking down to Mweka Camp. Luckily, I was feeling a bit better and the whole way the trail was descending. We arrived when it was already dark, and I only ate a little bit of dinner before I dropped off to sleep.
Damn, what a day it was.
Day 6: Mweka Camp to Mweka (9,5 km, 1549 m down)
From Mweka Camp, it was about 2-3 hours to the gate, and I made it quite quickly. I took a last picture with a goodbye sign, and I finally met with Ni, the American / Vietnamese girl whom I had hung out with in previous camps. She knew everything about my situation from other guides, as it seems the news spread fast on the Kilimanjaro slopes 🙂 She was fast and made it to the summit when it was still dark, without any problems.
She invited me to join her for the trip to the hot springs the next day, and I probably would have gone, but Thomas signed me up for the safari starting the next day, and it was not possible to delay it, as I was joining a group.
We stopped at Gilmans to return the rental equipment, and then I went to the hotel. I gave Tyson a tip with a detailed split of the amount per other members of our group, including porters and the cook.
Then I did my laundry as I had to quickly repack for the safari trip, and ate a delicious pizza in Blossoms Cafe. In the evening, I met up for dinner with Ni, and we exchanged our experiences from the roof of Africa over Thai curries 🙂
Summary
Overall, it was a great hike, but also the most challenging one for me so far. I think there were several reasons why I suffered, and if I had had to do it again, I would have played it differently.
Firstly, I wasn’t in the best shape. Before coming to Moshi, I spent a few days in the Usambara Mountains, where I got some serious infections. On top of stomach problems and fever, I also had a cough which I could not get rid of, and I was struggling with it for the whole time on Kilimanjaro. I started the hike straight after taking medicine for a few days, including antibiotics. The symptoms of stomach issues came back on day 3, and I had to resume taking antibiotics as a precaution. My organism was surely not at 100%.
Secondly, I was taking Acetazolamide as a prevention for mountain sickness, but still got plenty of symptoms of it. Who knows what would have happened if I hadn’t taken that medicine? Quite likely, I would have been taken off the mountain by a helicopter. Hopefully not in a plastic bag. Acute altitude sickness should not be ignored; however, when people pay so much money, they want to make it to the summit no matter what. Flexibility is crucial here. If hiking solo, I would have done one more acclimatisation day before the summit push. So maybe it’s a smart idea to discuss this with the travel agency if such an option exists, in case you notice that you need it. If not, it’s worth considering taking longer Lemosho or Northern Circuit routes.
Regardless of all problems, I came back from Kilimanjaro with priceless memories and new experiences in high-altitude hiking. Many people say that it is once in a lifetime experience, but in fact, I would like to set foot on the roof of Africa once more in the future!