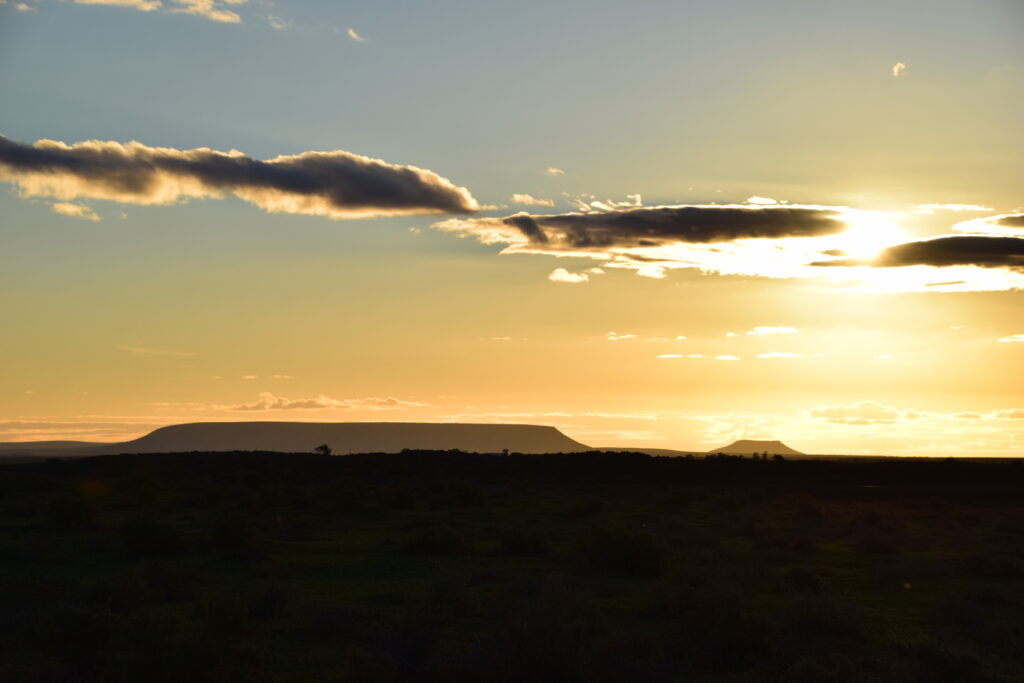
Tag

mountains

Browsing

Introduction

The park is named after Mount Kosciuszko, which at 2,228 metres is Australia’s highest mountain. The best way to discover the area is to go for a walk. Nature enthusiasts will be rewarded with alpine views, crystal clear streams, glacial lakes and historic huts.

At the northern end of the national park are the Yarrangobilly Caves. The limestone dates back 440 million years. An impressive place to discover with an extra opportunity to relax in a naturally heated thermal pool. Don’t forget your swimmers!

During winter, it’s one of the best places in the country for skiing. All New South Wales alpine resorts are within Kosciuszko National Park: Perisher Blue, Charlotte Pass, Thredbo and Mt Selwyn.

Yarrangobilly Caves and Thermal Pool

I made my first stop at Yarrangobilly Caves Visitor Centre to purchase 24 hours pass to the National Park. It costs $17 per vehicle per day (24hrs) and includes free entrance to some of the self-guided caves in the area. I was advised to visit South Glory Cave first and that was exactly what I did.

Yarrangobilly’s karst landscapes were created from a belt of limestone laid down about 440 million years ago. Karst environments preserve evidence of climate change, floods, droughts, fires, animal and human activity. All of that makes it an incredible place to discover.

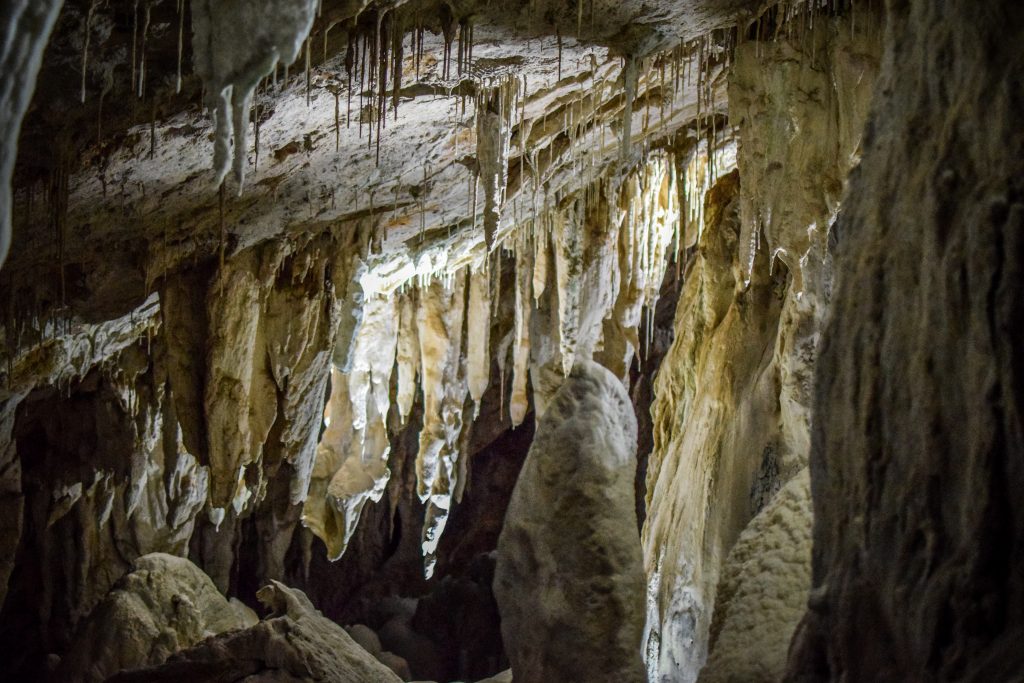
South Glory Cave is the largest one in the Yarrangobilly area of Kosciuszko National Park. I drove past the visitor centre following the signs to the parking. All that area can be easily accessed with a 2WD vehicle. From there, the cave is accessed along a 500m gravel track, leading to Glory Arch. Yarrangobilly river flows just down the escarpment.

The fact that the tour is self-guided makes it much more interesting than just following a group. I was inside completely alone and it took me around half an hour to go through and read information signs. Even though there are sensor lights that switch on as you approach, having your own flashlight is essential. Moreover, the average temperature in this cave is around 10 C so bring a hoodie or a jacket.

After visiting South Glory Cave, it’s a good idea to hike the Castle Cave Walk with the views to limestone cliffs and Mill Creek Gorge. and on to Castle Cave. The track is 3.2 km return and shouldn’t take you more than an hour. Detailed map of the track can be found on the website of NSW National Parks.

If one short track is not enough, head back towards the parking and join Yarrangobilly River Walk. It’s an easy 3 km loop beside the river with an interesting stop on the way – Thermal Pool. Water temperature is on a constant level of 27C so bring your swimsuit and towel! It was nice to jump in and refresh my body, especially after a visit in a cold and damp cave. Detailed map of the track can be found on the website of NSW National Parks.

Glory Farm Walk is a short extension to the thermal pool walk. It’s 2.8 km long (return hike) and follows Yarrangobilly River to the site of Henry Harris’s Glory Hole Farm which provided meat and vegetables for the Kiandra miners in the late 1800s.

There are more caves in the area: Jillabenan Cave, Jersey Cave and North Glory Cave. The first one can be visited on a guided tour. It’s the smallest of the Yarrangobilly Caves with the path through it being 73m long. I didn’t join the tour as visiting South Glory Cave fulfilled all my expectations towards stalagmites and stalactites 🙂 Jersey Cave and North Glory Cave are closed until further notice.

After longer than expected visit in Yarrangobilly Caves, it was time to move on toward Thredbo, which was over 2 hours away.

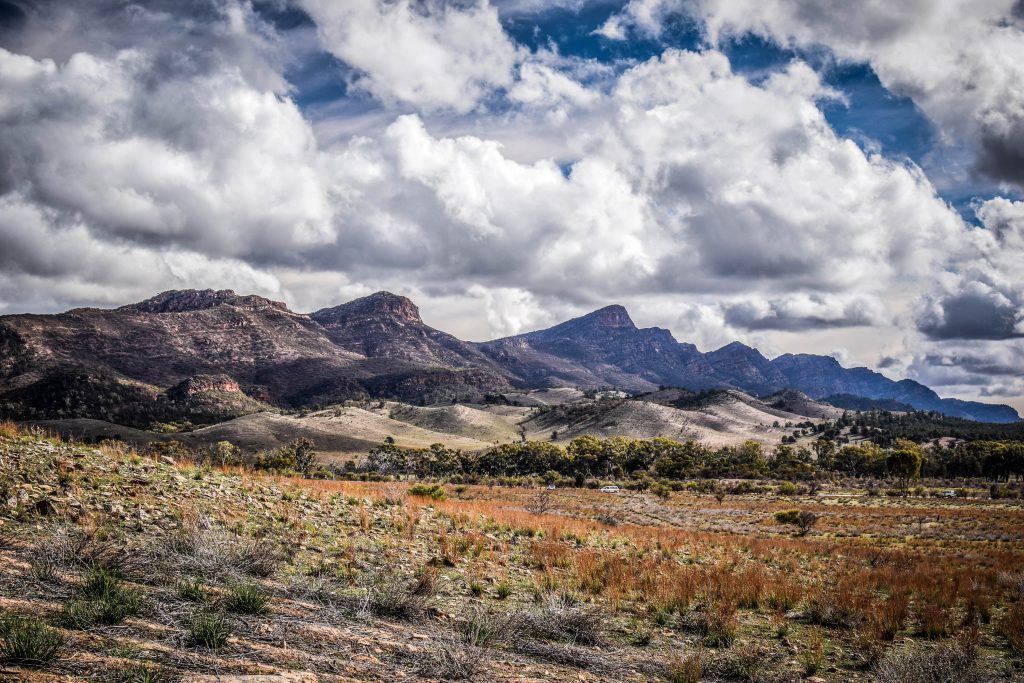
Mount Kosciuszko Summit (Main Range Walk)

There is not much to do in Thredbo outside of ski season. I had a short walk but then simply made my way to Ngarigo campground which is located along Alpine Way. The place isn’t big but there was only one more campervan parked. I have no idea what the temperature in the night was, but it was damn cold! Definitely the coldest night in Australia during my trip. I used everything I could: blankets, sleeping bag and hoodie.

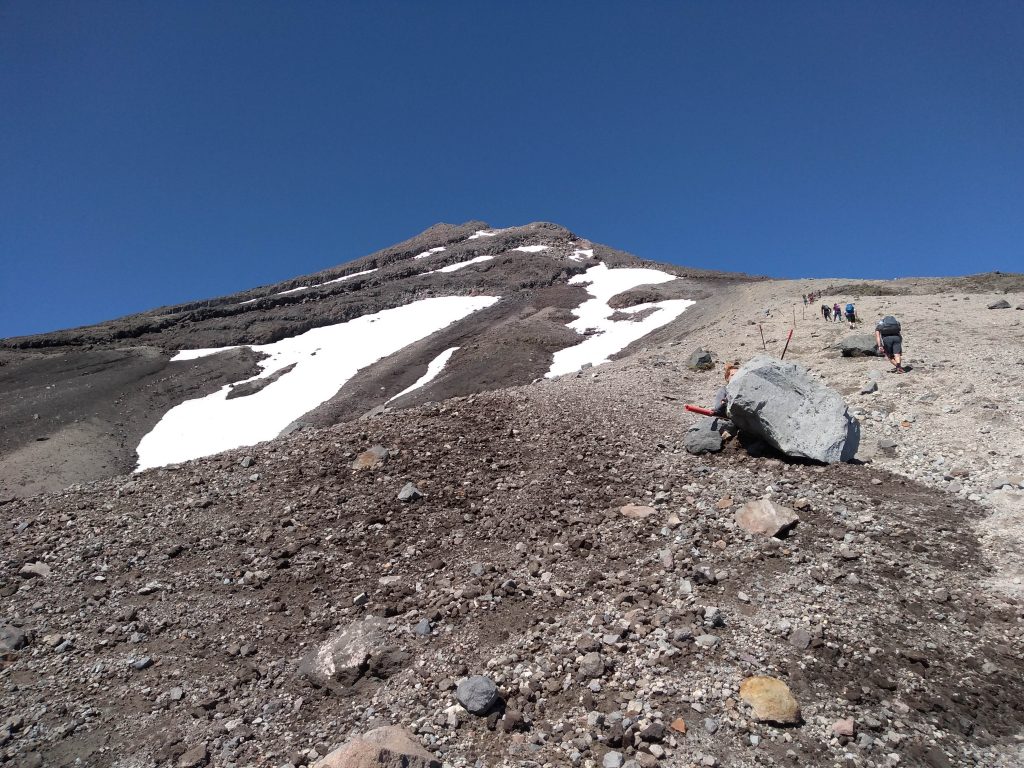
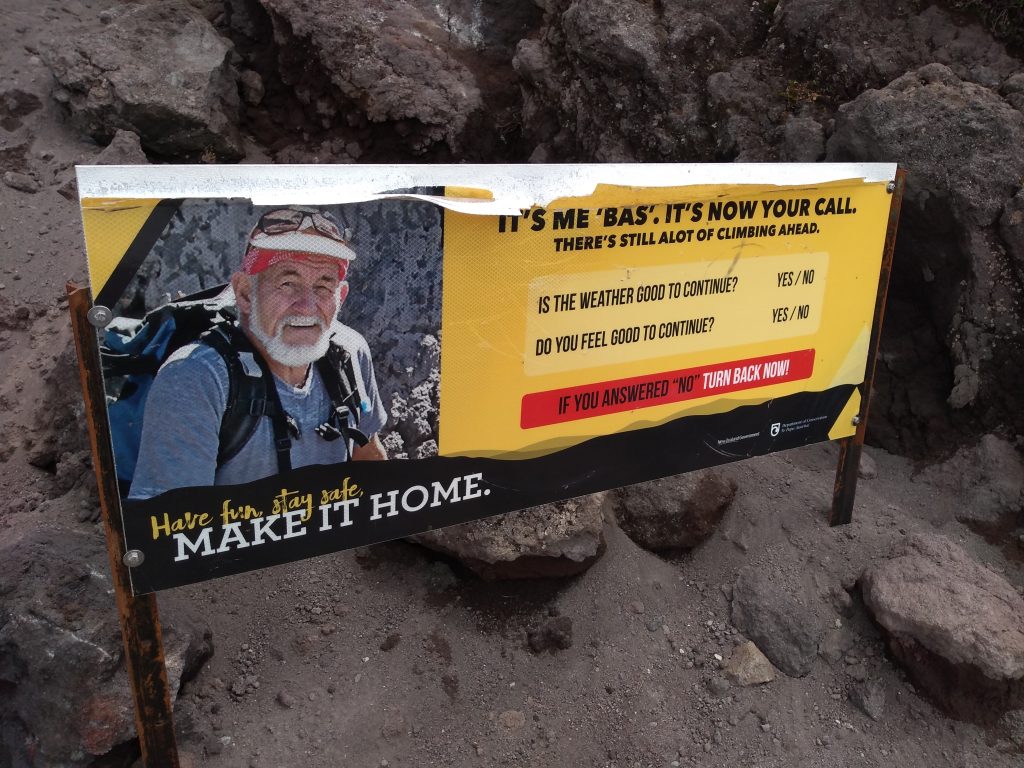
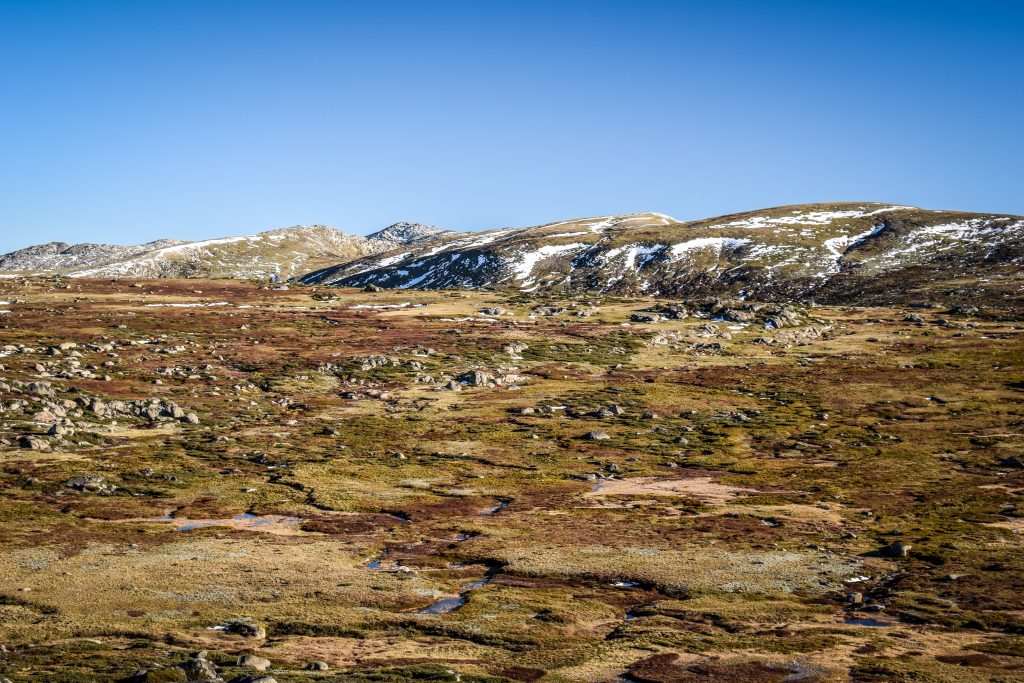
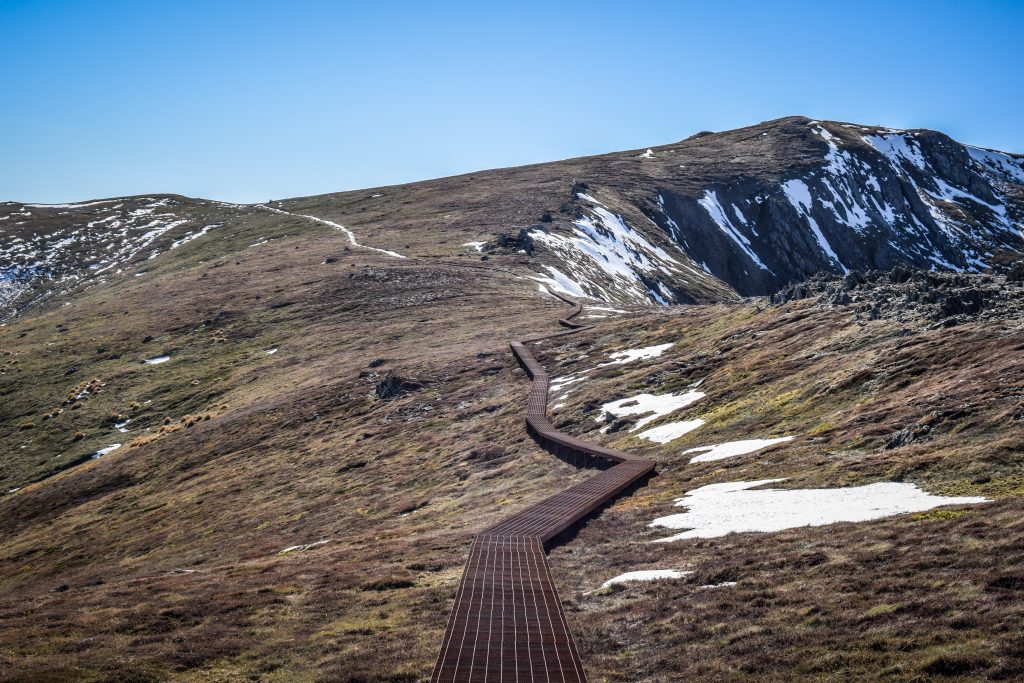
I woke up at dawn I set off without breakfast. It was the first time that I had to turn on the heating as the front windshield got icy! The way to the parking at the end of Kosciuszko Road took me about 1 hour. After breakfast, I packed my backpack and followed the Summit Track. The distance to the summit is 9.3 km (about 2 hours) but I had the plan to take another path on the way back, completing the loop called the Main Range Walk. It’s a 22 km loop that in theory should take between 7-9 hours but in my case, it was rather closer to 5-6 hours.

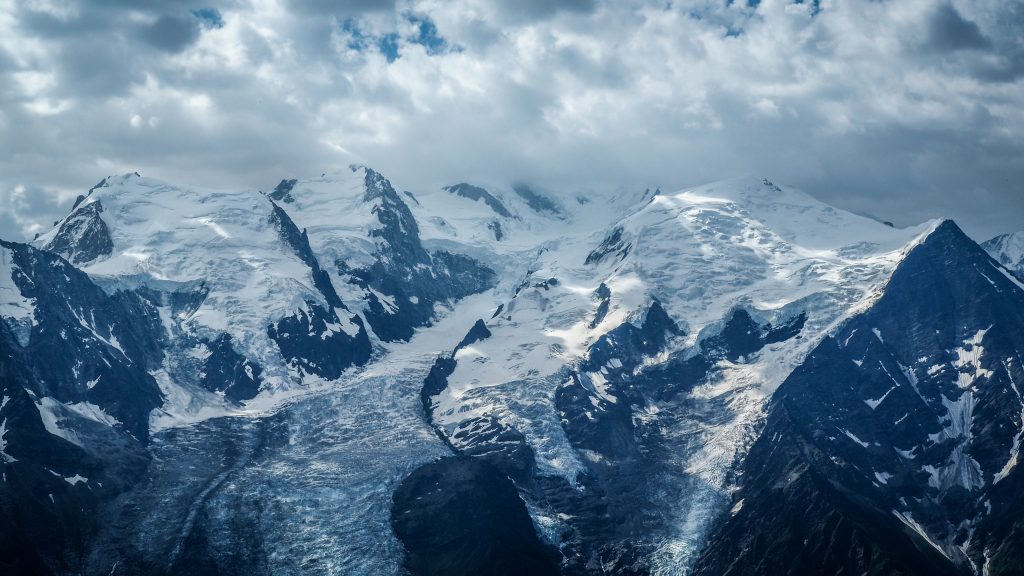
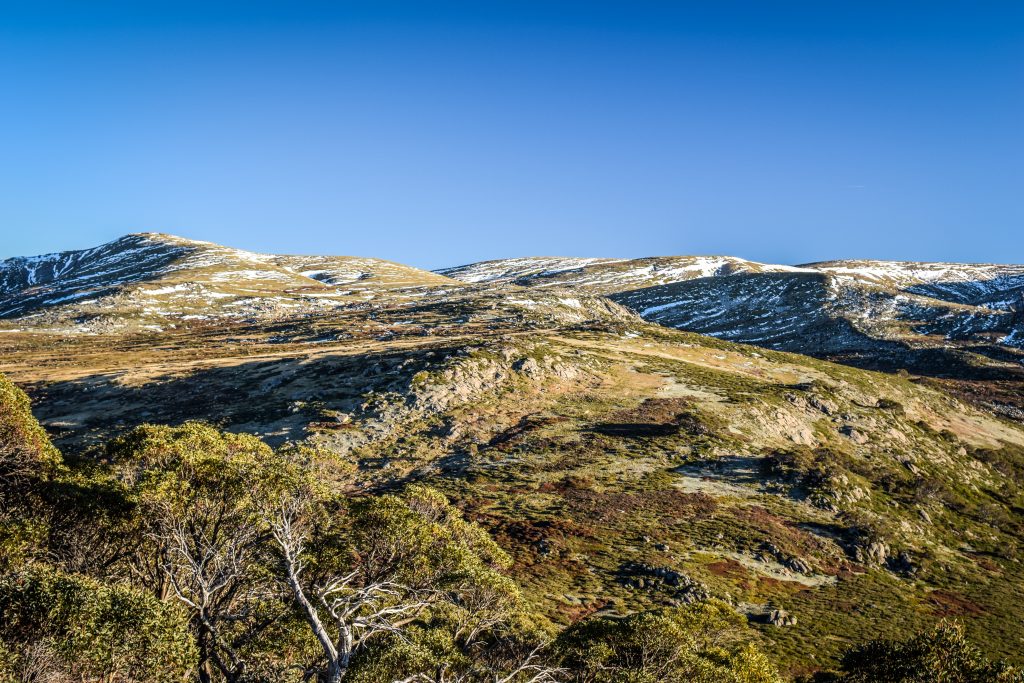
The morning was very cold but the sun was rising higher and higher warming up the air. Small streams along the track got frozen and there was snow clearly visible in the upper parts of the mountains. I definitely didn’t expect to see it in Australia!

Glacier-carved landscape in Kosciuszko National Park
Kosciuszko National Park
Mornings in late May can be quite cold!
Frozen water along the track
Kosciuszko National Park
Alpine meadows

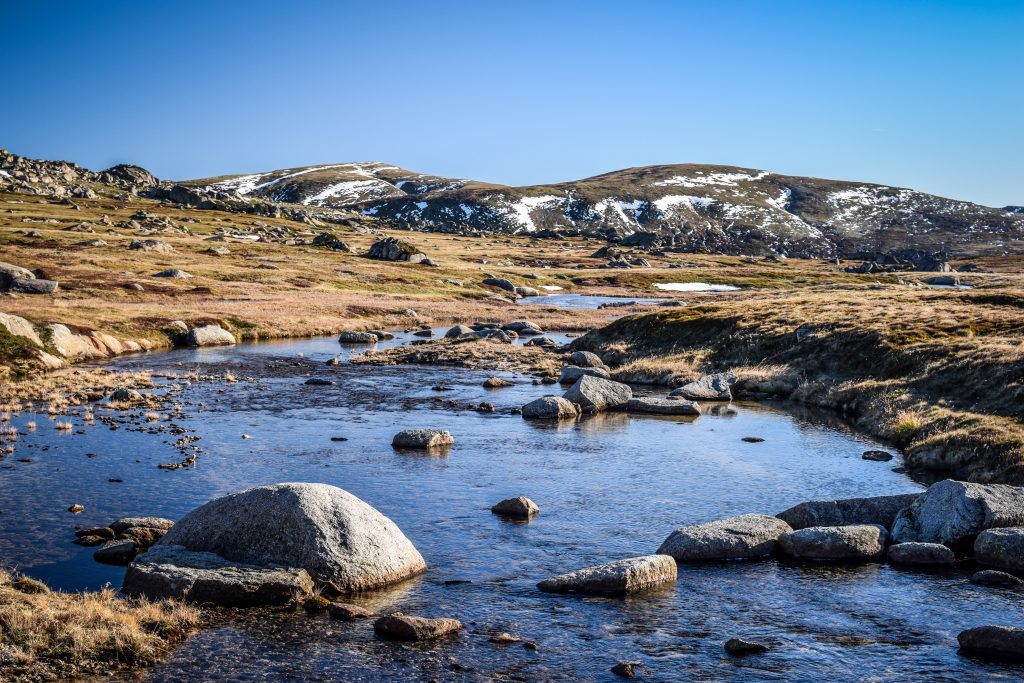
I crossed Snowy River and then, 6 km from the beginning of the track, I passed Seaman’s Hut which is a small safe haven if the weather turns. Rawson Pass is another 1.7 km away. Here it was the time to turn right and make the final ascent to the summit of Mount Kosciuszko.

You may wonder, where the name comes from?

It was given by Polish explorer Count Pawel Edmund Strzelecki who was the first to summit the peak in 1840. It refers to Polish hero General Tadeusz Kosciuszko, a prominent figure in the American revolution. Apparently, the highest Australian mountain looks similar to the sight in which General Kosciuszko was buried.

Kosciuszko National Park
Approaching the summit
Kosciuszko National Park
Views from the top of Mount Kosciuszko

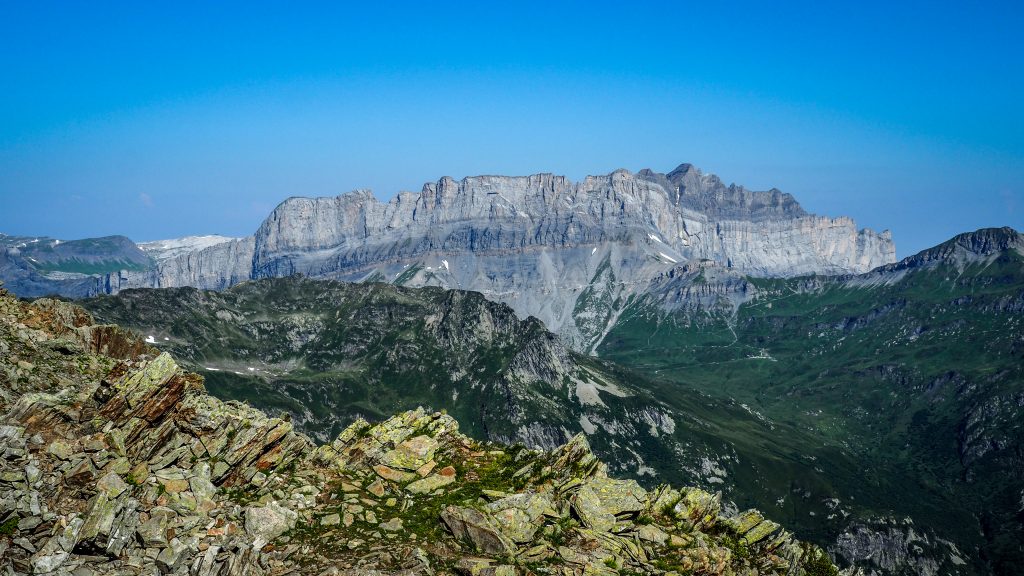
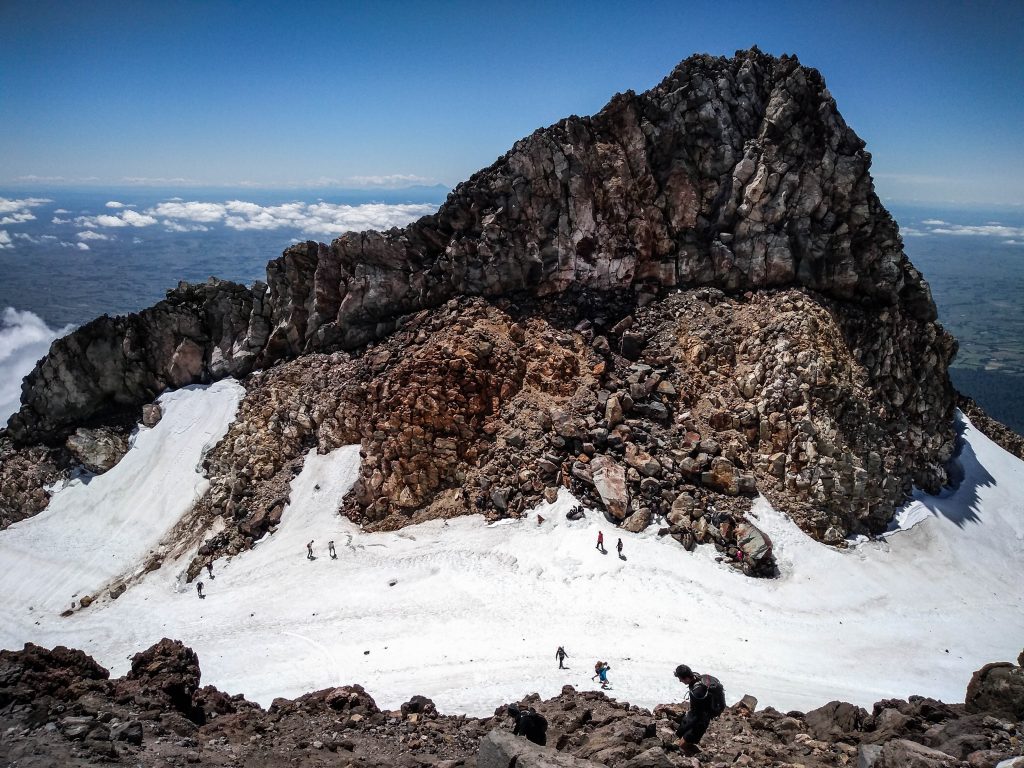
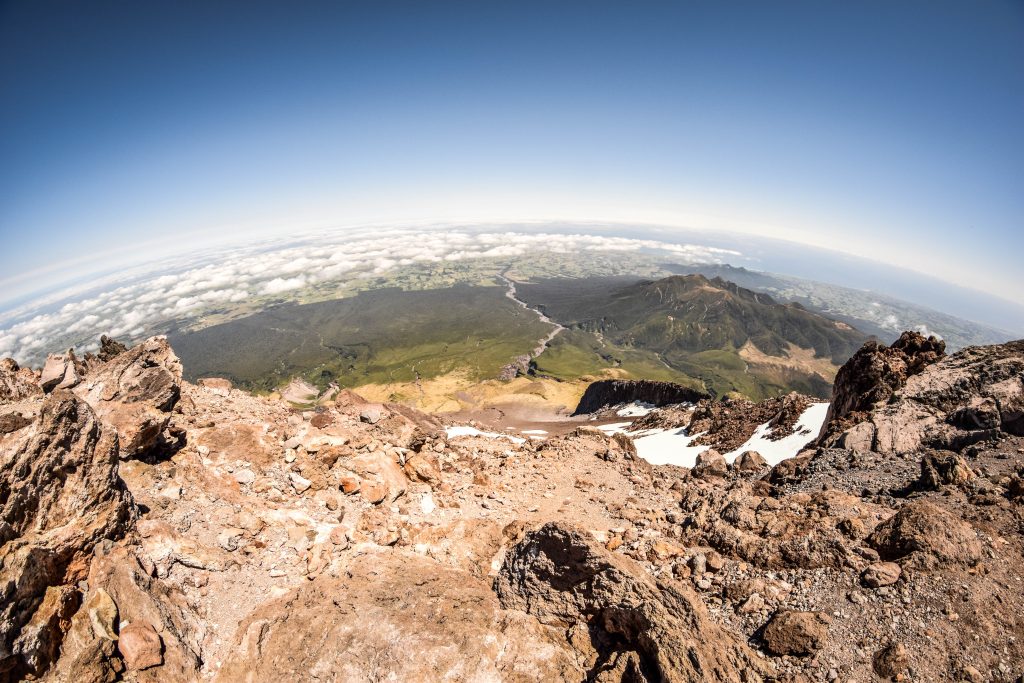
From the distance, the mountain doesn’t look impressive at all. But in sunny weather, the views from 2228 m a.s.l. are decent enough to justify the effort 🙂 Honestly, the landscape here doesn’t feel like Australia at all. Or maybe I just got used to the desert on one side and the ocean on the other?

Continuing the hike along the Main Range Track
Walking on the snow? Why not!
Moon just hanging over the mountain
Kosciuszko National Park
Part of the track leads on metal platforms
The Main Range Walk is very scenic!
Fantastic alpine views
Kosciuszko National Park
Track covered by snow
Views along the Main Range Track
Kosciuszko National Park
Unique Australian landscape in Kosciuszko National Park

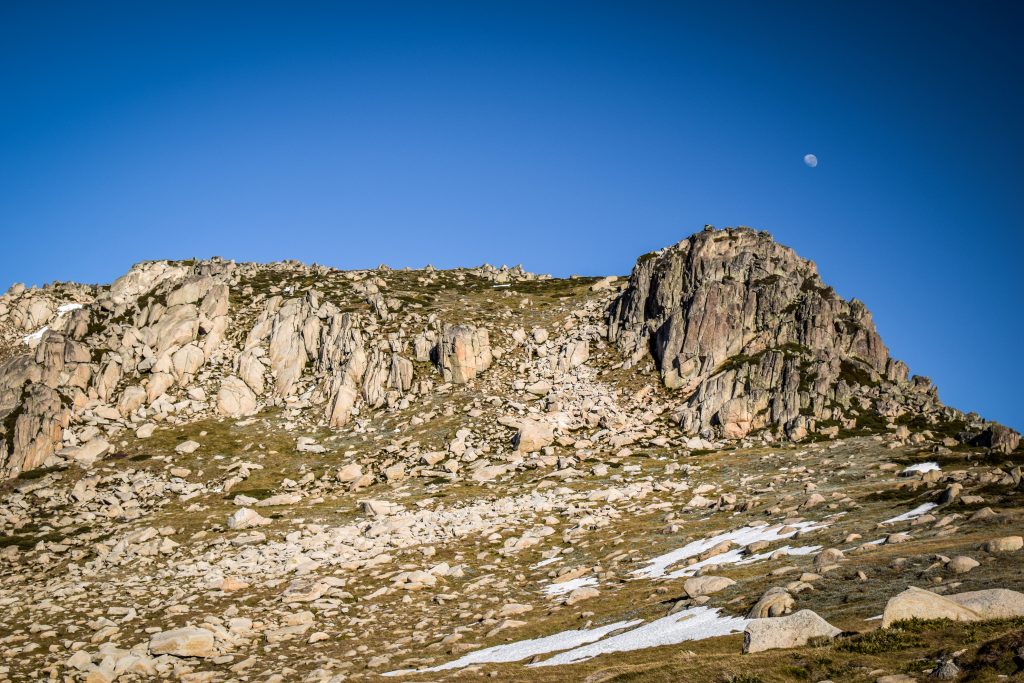
I started the descent following the same way as before but shortly after I turned left on the track leading towards Muellers Pass. Then, it continues to Northcote Pass which is just next to Albina Lake. There is an opportunity of a short detour to Blue Lake which is definitely worth doing.

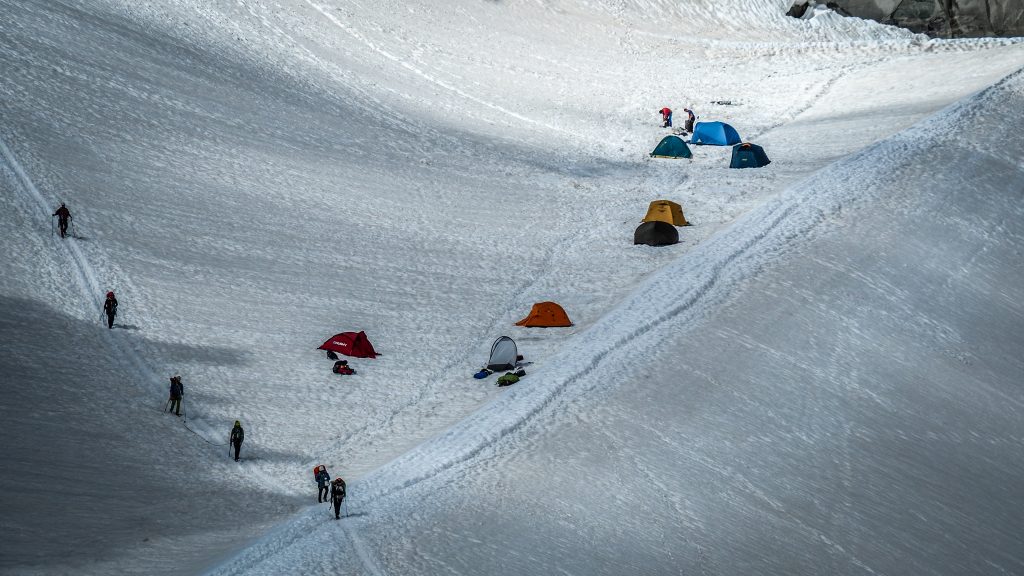
I’m not sure what are the rules of freedom camping in Kosciuszko National Park but I saw two tents pitched on the meadows. Certainly, the nights are cold, but what a great location! If you are a camping enthusiast, consider doing the same.

After crossing the Carruthers Creek, the track goes to the meeting point of Club Lake Creek and Snowy River. From here, the last uphill section leads back to the parking lot.

Introduction

The main attraction bringing tourists to Chamonix-Mont-Blanc, commonly known as Chamonix, is Mont Blanc. The summit of the highest mountain in Western Europe is at 4810m a.s.l. and the first successful ascent by Jacques Balmat and Michael Paccard took place on August 8th 1786, causing a significant boom in mountaineering.

Winter sports were always popular in the region and it resulted in the first Winter Olympics organized here in 1924.

Mont Blanc MultiPass

Following below itinerary, you will save a lot of money by purchasing a 1-day version of Mont Blanc MultiPass. It costs 68 EUR, while return ticket for the cable car to Aiguille du Midi costs already 65 EUR. Totally worth it!

Aiguille du Midi

It’s impossible to miss a huge cable car station in the centre of Chamonix. Looking up, you can see the destination and the upper station at a height of 3,777m a.s.l. with o the summit terrace at 3,842m a.s.l. One can’t get closer to the summit of Mont-Blanc without hiking or climbing. It only takes around 20 minutes to get there, starting at the altitude of 1035 m a.s.l. It’s like a journey to a different world. Alpine world.

There is usually a lot of people but also a lot of space on the terraces to observe the panorama of the French, Swiss and Italian Alps, of course including the king – Month Blanc.

View to Aiguille du Midi from Chamonix centre
Upper station of Aiguille du Midi cable car


At this altitude, it is usually much colder and windier than down in the valley, so take an extra layer but also sunglasses and suncream.

You may want to check out extra attractions such as small exhibition, cinema or something called Step Into the Void. It’s a 2.50 m glass cage out over a 1000 m precipice. Waiting lines are usually long here so I didn’t want to lose time just to take one picture.

Gondola ride to Aiguille du Midi is included in Mont Blanc MultiPass, otherwise, return trip costs 65 EUR.

Panoramic Mont Blanc Gondola (optional)

The Panoramic Mont-Blanc gondola is not included in Mont Blanc MultiPass but for me, it’s the most awesome ride in Chamonix region. For an extra 32 EUR, it takes you from Aiguille du Midi over the Glacier du Geant seracs and crevasses to the Pointe Helbronner in Italy. One way ride takes around 30 minutes.

There are a lot of hikers who challenged themselves to tackle the highest mountain in the Alps and their camps are like colourful pins on a white sea. I feel the strong atmosphere of this place. Will I ever be able to stand at the top of Mont Blanc? I have no experience in mountaineering whatsoever, but it’s never too late to learn.

Mer de Glace

From Plan de l’Aiguille du Midi, which is the mid-station of Aiguille du Midi gondola, take a scenic track known as Grand Balcon Nord towards Mer de Glace. It takes 2 – 2.5 hours and it’s a wonderful alpine walk.

In English, Mer de Glace means the Sea of Ice.  It’s the largest glacier in France, 7km long and 200m deep. Being heavily covered in debris, it doesn’t look like it at all. But take your time, use your zoom lens or binoculars and you will understand how impressive it is.

Chamonix Mer de Glace
Panorama of glacier

Obviously, it was even more impressive some years ago. After reaching Montevers train station, check out small exhibition located dedicated to the history of glaciers in Glaciorium. Then, take a small cable car down to the ice cave. From the cable car lower station, there is still a long descent on metal platforms and steps. Every year new platforms are added and the way down is getting longer. Why? There are a lot of information boards along the track indicating the level of the glacier in the last years. It is really scary to see how fast it’s receding.  

Ice cave itself was not very impressive but maybe it’s because I saw similar attractions in Switzerland before. When I was there, it was way too crowded to really enjoy the experience.

Chamonix Mer de Glace
Inside the ice cave

The Montevers train, even though looking cute, was even more crowded with tourists and hikers with big backpacks and equipment. The ride is included in Mont Blanc MultiPass, otherwise, one-way ticket costs 28.50 EUR.

Le Brevent

Another popular gondola lift takes you from Chamonix to Plan Praz (2000 m a.s.l.), from where you continue by cable car to the top of Le Brevent (2525 m a.s.l.). Views to the south slope of Mont Blanc are terrific and there are nice walks in the area as well, such as Grand Balcon Sud or Lake Cornu.

The ride is included in Mont Blanc MultiPass, otherwise return ticket costs 34 EUR.

If you are about to hike Tour du Mont Blanc, you will conquer Le Brevent anyway by foot, so going there by cable car won’t make sense.

Chamonix Brevent
View from Le Brevent

Chamonix

In such a case, spend the afternoon visiting the Alpine Museum in Chamonix. It’s quite cheap compared to other attractions in the area and for 6 EUR you can easily spend an hour here learning about the increasing popularity of mountain hikes, followed by the construction of cable cars and gondolas to meet the demand. All of that resulted in the development of the popular French mountain resort – Chamonix.

The town is extremely charming, despite the crowds of tourists. Spend your evening strolling on the streets. Don’t miss the statue of Balmat and Saussure. In 1760 Horace Bénédict de Saussure challenge climbers offering a financial prize to the first people setting foot on the top of Mont Blanc.

The statue of Balmat and Saussure in Chamonix

After several unsuccessful attempts, on August 8th 1786 two local Chamonix men finally made it happen. They were Jacques Balmat and Dr Michel Gabriel Paccard. As always, it’s all about money and a great story which in that case promoted Balmat, making him a local superstar. The role of his companion was consistently ignored and downgraded.

The second bronze statue to commemorate Dr Paccard was erected only in 1986. It stands only a few meters away and somehow nicely corresponds to the original story. Paccard calmly looks at the mountain when Balmat and Saussure stand in the spotlight, pointing at the summit in clearly visible excitement.

Introduction

Mt Taranaki or Mt Egmont, is a volcano in the center of one of the most popular wilderness areas in New Zealand – Egmont National Park. Standing 2.518m above the sea level gives it a status of the second-highest volcano in the country, just after Mt Ruapehu (2.797m).

Taranaki is a Maori name consisting of two parts: tara means “mountain peak”, and naki (coming from ngaki) means “shining”. The shiny mountain peak clearly relates to the snow covering its upper sloper all year long.

The second name was given by James Cook on 11 January 1770. Yes, this guy is really all over New Zealand and this time the name was given in the honor of John Perceval, 2nd Earl of Egmont, who was one of the supporters of search expeditions for the new continent – Terra Australis Incognita.

Track details

The way to the summit is challenging 12.6 km hike (there and back) with 1.6 km of vertical climb. However, it doesn’t discourage adventure seekers.

Distance: 12.6 km return

Time: 7-10 hr

Best time to go & safety

The best chance for good weather and higher temperatures is from December to April. In other months, the mountain will most likely be covered in snow and ice. Therefore, tourists without experience and proper equipment should not try their luck there.

The last major eruption occurred around 1655, meaning there is an extremely low risk of any volcanic activity going on in the area. However, it doesn’t mean that you should underestimate the mountain. More than 80 people have died since 1891 when records began. Weather can change quickly at any time of the year and even though it’s not a very high or difficult mountain, pay attention and make smart decisions on the way.

Check weather conditions on MetService prior to your summit climb.

How to get there?

North Egmont National Park Visitor Centre is only about 30 min (29 km) drive from New Plymouth. Take a turn off at Egmont Village and continue straight until you reach the parking. When driving from the south, it takes about 2 hours (160 km) from Whanganui.

Where to stay overnight?

Climbing Taranaki Summit is a full day hike so if you stay overnight in New Plymouth, I recommend departing early in the morning.

If you have a self-contained vehicle, there is awesome parking just in front of the visitor centre. In the high season, it gets full pretty quickly so try to arrive in the early afternoon. By doing so, you will secure your place, have time for a nice dinner in the shadow of the mountain and even the chance to tackle some easy and short hikes around the area as a warm-up.

Other than that, there are couple of camping sites or lodges along the way from New Plymouth.

What I did was to stay a night prior to the hike in a self-contained vehicle just next to the visitor center and after the hike, I drove to Ariki Hostel in New Plymouth to take advantage of a hot shower. After a tough hike, it always brings me back to life 🙂 Such a plan was really optimal for me, as I had the chance to enjoy the evening and morning right at the foot of the mountain and then relax in a warm and cozy place.

Interesting facts

The legend has it…

There is a legend that connects all the volcanic summits in the central area of North Island, which adds an extra flavor to the experience. Apparently both Mount Taranaki and Mount Tongariro were in love with Mount Pihanga and the fierce fight between them started. Tongariro won and Taranaki escaped to the west coast where he was trapped by Pouakai Ranges in the place he stands now. It’s often covered in clouds, hiding the tears shed after his lost love. Therefore, be gentle and show compassion when walking on Taranaki’s slopes 🙂

Mt Taranaki, New Zealand
Mt Taranaki covered in clouds

Filming location

Did you know that Mount Taranaki is an actor too? Due to its similarity to Mount Fuji in Japan, it played in the movie The Last Samurai. Reason? Much more space for filming crew than around actual location in the Land of the Rising Sun.

Itinierary

Day 1 – Dawson Falls and Kapuni Loop Track, North Egmont Visitor Centre

As I was approaching Egmont National Park driving along West Coast, the second-highest volcano of New Zealand’s North Island was hidden in thick clouds and I just trusted my map that it’s really there. The road was gaining altitude and after a while, I was in the clouds as well. It was still early afternoon so I took a detour to visit Dawson Falls and make a warm-up on a short Kapuni Loop Track (45-60 min round trip).

The path leads through the so-called ‘goblin forest’, which indeed looked like a separate fairy tale world, especially in misty weather conditions. I didn’t spot any actual goblins, but twisted trees that grow over the remains of the previous forest destroyed by the volcanic eruption made create the atmosphere of mystery.

Mt Taranaki, New Zealand
Goblin Forest, Egmont National Park
Dawson Falls, New Zealand
Dawson Falls

Turn off from the main track takes you down to 18 m high Dawson Falls. Like many places in New Zealand, they were named after the first European explorer that reached them in 1885 – Thomas Dawson.

Moving to the other side of the mountain brought significant weather improvement. Strong winds chased the clouds away and once I parked my van next to North Egmont Visitor Centre, the first rays of the sun timidly broke through. Or was it Taranaki itself that stopped hiding his bad mood and decided to present its beauty? I used the remaining time of the afternoon to explore short walks around the place and admire the sunset with a perfectly blue sky. It filled me with confidence that tomorrow I will be lucky enough to go up the summit and enjoy spectacular cloud-free views over North Island.

Day 2 – Taranaki Summit Track, New Plymouth

I departed 8 am sharp and the track was rather empty. Though, it didn’t take longer than 1 hour when I stopped for the first time and saw lots of people down there following my steps. The weather was horrible last days and it seems that everyone was waiting for this perfect sunny window which happened on that day. The way up is definitely a challenging one. It has nothing to do with the zig-zag style that gains altitude in a moderate way. Instead, it’s a straightforward climb first along the wide gravel road and then up the steep slope of the mountain. Tahurangi Lodge was a perfect spot to boost my energy and get rid of the second breakfast. As I pushed forward to the summit, there was more and more snow lying around, the wind blew stronger in my face and the temperature dropped down.

Taranaki Summit Track
The first stage of Taranaki Summit Track
Mt Taranaki, New Zealand
Stairs on the way up to Taranaki Summit
Mt Taranaki, New Zealand
More and more snow on both sides of the track
Mt Taranaki, New Zealand
Loose stones on the way up to Taranaki Summit

Orange poles, the same as on many other tracks in New Zealand, guided me towards the destination. It was extremely helpful to support myself with hiking poles, especially on the snow around the crater and when going down the mountain. I recommend taking at least one with you to keep the balance. Otherwise, you have a high chance to slip and land on your ass. Not a big deal, but could be painful on some bigger stones 🙂

Mt Taranaki, New Zealand
Mt Taranaki crater
Mt Taranaki, New Zealand
Hikers sliding down in Taranaki crater
Taranaki Summit
Hiking poles were extremely useful when walking on the snow and loose rocks

Finally, I put my feet in the crater. There are ice and snow all year round which makes tourists very happy when they play around and slide down on their shoes or ass down the path. But the crater is not the end. From there, it’s another final short climb up to the summit rock. 

Mt Taranaki, New Zealand
Final push to the summit rock

I got two things as a reward for reaching the summit. The first one was the chance to admire 360 degrees panorama across the south-west area of North Island. With good visibility, it was possible to see as far as volcanic summits in Tongariro National Park one side and the Tasman Sea on the other.

The second one was the ultimate satisfaction that I conquered the second highest volcano in New Zealand. Believe me, that was a great feeling. Moreover, Taranaki is one of these places that I’m already dying to visit again as soon as I’m back to the kiwi country.

Taranaki Summit
Panorama from the summit

The way down was significantly easier than the way up. It took me only 2.5-3h to reach the parking lot, comparing to 4-5h that I spent pushing to the summit. Why is it like that? I was basically sliding down on loose stones, very often simply running all the way down as it was the easiest way to keep the balance. I saw many hikers struggling and falling down. I landed on my ass twice, even though I had my hiking poles for support. It was a really fun experience though 🙂 In the afternoon, more and more clouds started to cover the mountain and when I was halfway down and turned around, I couldn’t see the summit anymore. Taranaki started crying after his lost love once again.

Final thoughts

Climbing Mt Taranaki was certainly one of the most memorable hikes on North Island. Be patient and attempt it when the conditions are good. In the end, it’s not only about reaching the summit, but also about enjoying panoramic views. And if the conditions change or you don’t feel well, just listen to Bas and make it back home. The mountain will be always there. Have fun and stay safe!

Taranaki Summit Track

Other tracks in the area

If the weather is not on your side or you just think that tackling Taranaki Summit Track is too much, don’t let it discourage you! There are several other options in Egmont National Park ranging from the very short and pleasant ones to more challenging multiple days hikes such as Around the Mountain Track. Check the website of the Department of Conservation and select the one that fits you best.

Introduction

Flinders Ranges National Park was my first stop on the way from Adelaide to Darwin. Well, not exactly on the way as I had to make nearly 200 km detour from Port Augusta. However, the first stop on the way through the iconic scenery of outback Australia. I expected it to be marvellous and pristine. Driving from Melbourne to Adelaide was fun. Great Ocean Road, detour to Kangaroo Island and multicultural city of Adelaide. But now it was a time to get inland. To see the Red Centre. To feel the heartbeat of Australia.

I knew that there are long days of driving ahead of me but all emotions were covered by pure excitement. I love desert landscapes. Silence, remoteness, huge open spaces with me standing in the middle like a small pawn on a giant board. I feel I am self-dependent. Far away from the mess of daily life. Free.

I hit the road in the morning and left Adelaide before traffic jams. The day was beautiful with a blue sky and a pleasant temperature of 20-25C. The plan was to get to Port Augusta with a stop in Mount Remarkable National Park. After a short hike there, I still had enough time to visit Australia Arid Lands Botanic Gardens. I didn’t expect more than boring walk among plants just to kill some time but instead, I got one of the biggest positive surprises in South Australia. Learning about the flora doesn’t come with the thrill of joy in my heart, but the walk through the garden was very relaxing and the landscape around it at sunset time was simply stunning. Look at the pictures below and tell me I’m wrong!

Landscape around Australia Arid Lands Botanic Garden in Port Augusta
Flinders Ranges, South Australia
Landscape around Australia Arid Lands Botanic Garden in Port Augusta
Sunset around Australia Arid Lands Botanic Garden in Port Augusta
Flinders Ranges, South Australia
Sturt’s Desert Pea

After the night at the gas station, I hit the road well before sunrise. It took me around 2 hours to reach the turn into Brachina Gorge Road. From here, dust road led me as far as I could see, pulling towards mountain ranges growing on the horizon with every second.

Flinders Ranges, South Australia
Brachina Gorge Road leading towards Flinders Ranges

Flinders Ranges National Park was named for Matthew Flinders, the English navigator who sighted and explored the peaks in 1802.

There is a lot to see here. The largest mountains range in South Australia with stunning gorges rich in wildlife as well as historical sites. Ikara/Wilpena Pound is an ancient meeting or initiation place for Aboriginal people and several ruined buildings around Wilpena, Arkaba and Aroona remind about first settlements of Europeans in this region. Contacts between traditional owners (Adnyamathanha people) and newcomers were not always peaceful, especially when it comes to water and land rights.

Best time to visit

The most comfortable time for exploring the area is between April and October. In summer, the temperatures can rise well over 40ºC, which can already be dangerous for your health and safety.

I would suggest staying at least 2 days to do plenty of bushwalks and admire night sky at the campsite.

How to get there

The easiest way is to start from Adelaide and drive around 450 kilometers to the north in the direction of Hawker and Wilpena. You don’t need 4WD at any point.

Alternatively, you can approach Flinders Ranges from the north, following Birdsville Track or from Broken Hill, turning right at Yunta but in both cases don’t think about it without 4WD.

For getting around the park, a 2WD car with high clearance is enough. Roads are unsealed and sometimes rough, especially in Brachina Gorge, but just take it slowly and it’s gonna be fine. I had no problems driving my Toyota Tarago.

Flinders Ranges, South Australia
Views around Wilpena Pound Resort

Camping

There are 10 campgrounds in the national park. Most of them have basic facilities, such as toilets and fire pits (can be used outside of the fire danger season). As there is no mobile signal at campgrounds, therefore book your spot and vehicle entry fee online or at the Wilpena Pound Visitor Centre. I really recommend staying for the night in Ikara-Flinders Ranges National Park. There is no light source here, so take your own and don’t forget to just turn it off for a while. Then, enjoy the magical spectacle full of stars.

Worth to know

  • Take Georama virtual tour – a great chance to have the first look at the national park scenery before heading there in person. Views include Wilpena Pound, Pine Hut, Parachilna Gorge and more.
  • Download mobile apps: Discover the Flinders Ranges (iOS / Android) and Flinders Ranges Walks (iOSAndroid). The first one includes driving and walking tours as well as information about geology, wildlife and plants. On the other hand, the second one covers 16 walking tracks in the national park.
  • Maps can be downloaded from the website National Parks and Wildlife Service South Australia.
  • Park Pass is required to access the Flinders Ranges National Park and costs 11 AUD per vehicle. It can be purchased at the Wilpena Pound Visitor’s Centre.

Top sights in Ikara-Flinders Ranges National Park

Wilpena Pound – 80 sq km amphitheatre of mountains that is also known by its Adnyamathanha name of Ikara, meaning “meeting place”. According to Dreaming stories, the surrounding mountains are the bodies of two giant snakes that laid around during the initiation ceremony. After feasting on the people, they couldn’t move and died, creating the most iconic landmark of the national park.

If you have some cash to spare, take a scenic flight and admire this miracle of nature from the sky. Scenic flights can be booked through the Wilpena Pound Visitor Centre and such a pleasure costs between 100-200 AUD.

Pound Gap Track and Wangarra Lookouts – there are several walking tracks starting at the Wilpena Visitor centre, including the Pound Gap Track (8 km return). It follows Wilpena Creek through tall river red gums and pines. After some time, you will reach Hill Homestead which is worth a stop to read information about historic inhabitants of the cottage and difficult conditions they struggled with. Refill your body with water and calories and continue to lower and then to the upper Wangarra Lookouts to fully enjoy spectacular Wilpena Pound from the inside.

If you are lazy, there is an option to take a shuttle bus that stops around 1 km from Hill Homestead. It runs 3 or 4 times a day but check the schedule at Wilpena Pound Resort.

Flinders Ranges, South Australia
View from upper Wangarra Lookout

Solar Panel Station – nice short walk on the road towards Wilpena Pound Resort. Nice not because of solar panels but the gang of kangaroos hopping around.

Flinders Ranges, South Australia
Solar Panel Station

Brachina Gorge – 20 km drive with informative signs along the way telling about the age and formations of the rock and cliffs. Some of the oldest fossils on earth have been found here! If that doesn’t excite you, then just sit back and enjoy the ride with the bumps adding a bit of adventure feel. Amazing experience! If you are lucky, there is a chance to spot a yellow-footed rock wallaby, especially active in the afternoons.

Flinders Ranges, South Australia
Road through Brachina Gorge

Bunyeroo Gorge – a great opportunity for a walk surrounded by rocks and gum trees. The 7.5 km return hike will take about 3-3.5 hours to complete.

Flinders Ranges, South Australia
Hiking trail in Bunyeroo Gorge

Razorback Lookout – only a short drive away from the parking at Bunyeroo Gorge following scenic Bunyeroo Valley road lays this iconic viewpoint. Breathtaking panorama of Ikara-Flinders Ranges National Park.

Old Wilpena Station – the oldest pastoral site in South Australia, working until 1985. Remainings of old buildings and cemetery remind about harsh conditions that first European settlers faced after arrival to the region. Two options for a walk here: 1km loop or 3.2km loop.

Arkaroo Rock – Short bushwalk taking you to ochre and charcoal rock paintings from the land’s traditional owners. Parking is easily accessible from Ikara/Wilpena Pound (around 17 km). From there, it’s uphill but gentle loop track which shouldn’t take longer than 1-1.5 hours to complete. Other spots to admire aboriginal art are at Perawurtina and Sacred Canyon, however, the last one can be visited only on an organized tour with an Aboriginal guide from Wilpena Pound Resort.

Flinders Ranges, South Australia
Aboriginal art inside Arkaroo Rock
Flinders Ranges, South Australia
Landscape around Arkaroo Rock

St Mary Peak – The highest point of the Flinders Ranges (1171m above sea level) and significant place for aboriginal people of Adnyamathanha. Due to this fact, it’s recommended to respect the summit and not to go beyond Tanderra Saddle. There are two options: the direct route, which is 14.6 km long and takes about 6 hours or the loop route, which is 21.5 km and takes about 8-9 hours. I didn’t do the hike but I heard it’s pretty difficult so take enough supplies and tell someone about your plans.

Aroona Ruins – Above the spring are the remains of sheep station from the early nineteenth century. The area is strongly connected with Hans Heysen, the German watercolour artist.

Flinders Ranges, South Australia
Parking and campsite around Aroona Ruins

Appealinna Ruins – In the 1850s, Joseph Wills was a local pastoralist who built the homestead and stockyards on the southern side of the creek, while the ruins on the north side were once a busy mining settlement.

Walks and hikes – There are enough tracks to satisfy even the most demanding wanderers and spend several days with nature. Check the full list on the website of the national park and get a map from Wilpena Visitor Centre. Never forget your water and keep in mind safety rules!